1999 NISSAN SENTRA clock
[x] Cancel search: clockPage 57 of 223
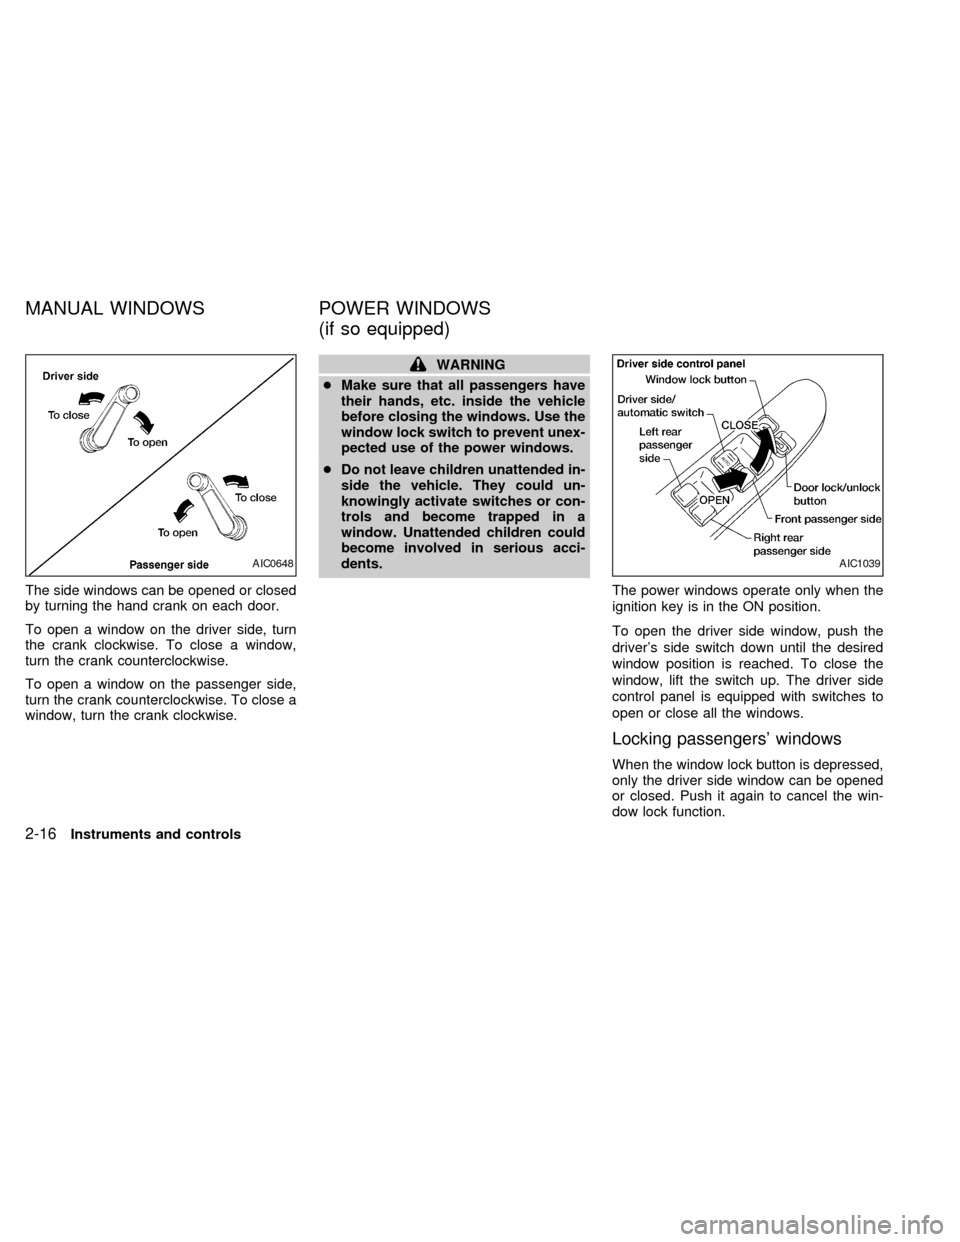
The side windows can be opened or closed
by turning the hand crank on each door.
To open a window on the driver side, turn
the crank clockwise. To close a window,
turn the crank counterclockwise.
To open a window on the passenger side,
turn the crank counterclockwise. To close a
window, turn the crank clockwise.
WARNING
cMake sure that all passengers have
their hands, etc. inside the vehicle
before closing the windows. Use the
window lock switch to prevent unex-
pected use of the power windows.
cDo not leave children unattended in-
side the vehicle. They could un-
knowingly activate switches or con-
trols and become trapped in a
window. Unattended children could
become involved in serious acci-
dents.
The power windows operate only when the
ignition key is in the ON position.
To open the driver side window, push the
driver's side switch down until the desired
window position is reached. To close the
window, lift the switch up. The driver side
control panel is equipped with switches to
open or close all the windows.
Locking passengers' windows
When the window lock button is depressed,
only the driver side window can be opened
or closed. Push it again to cancel the win-
dow lock function.
AIC0648AIC1039
MANUAL WINDOWS POWER WINDOWS
(if so equipped)
2-16Instruments and controls
ZX
Page 72 of 223
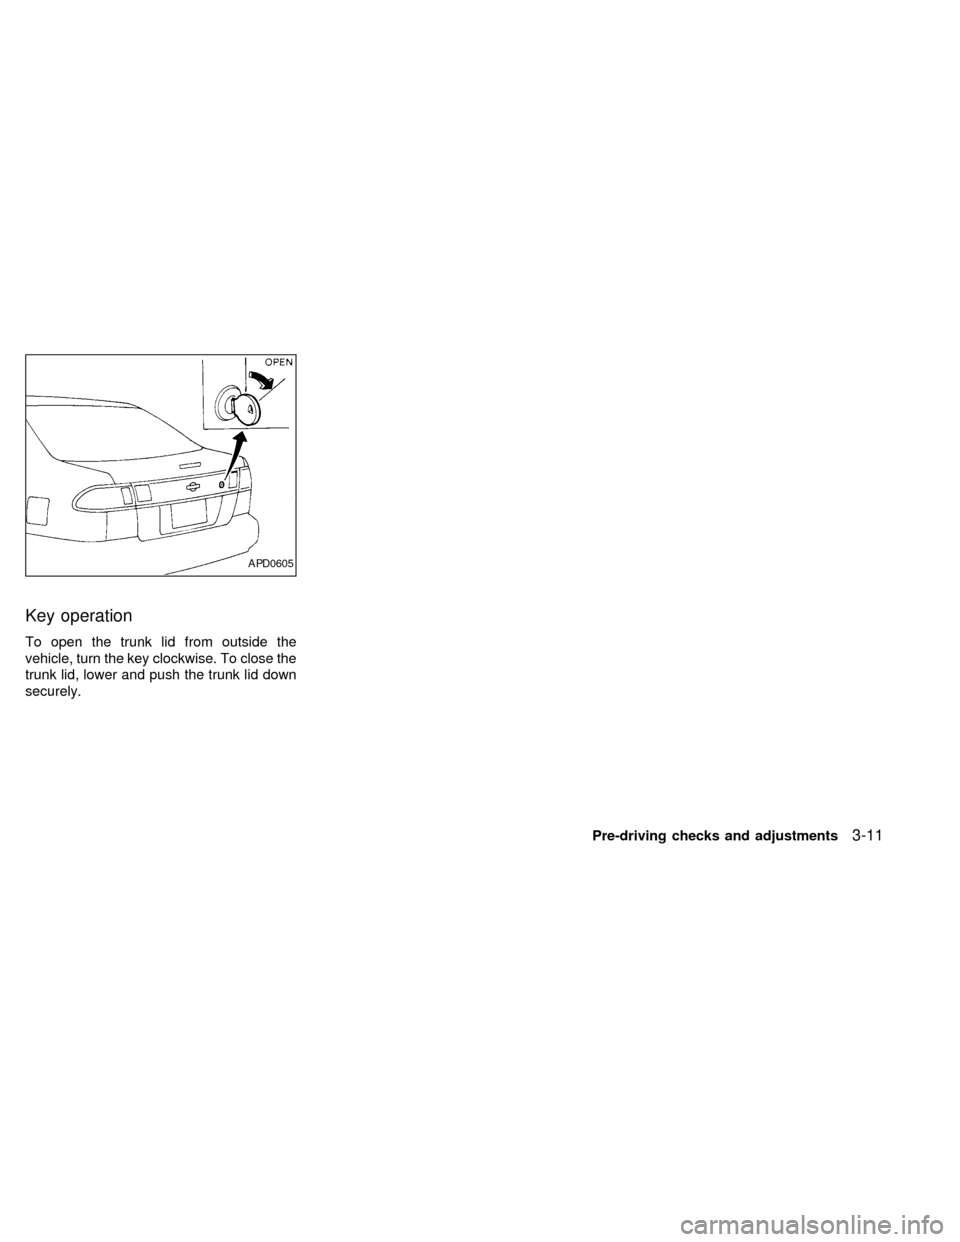
Key operation
To open the trunk lid from outside the
vehicle, turn the key clockwise. To close the
trunk lid, lower and push the trunk lid down
securely.
APD0605
Pre-driving checks and adjustments3-11
ZX
Page 73 of 223
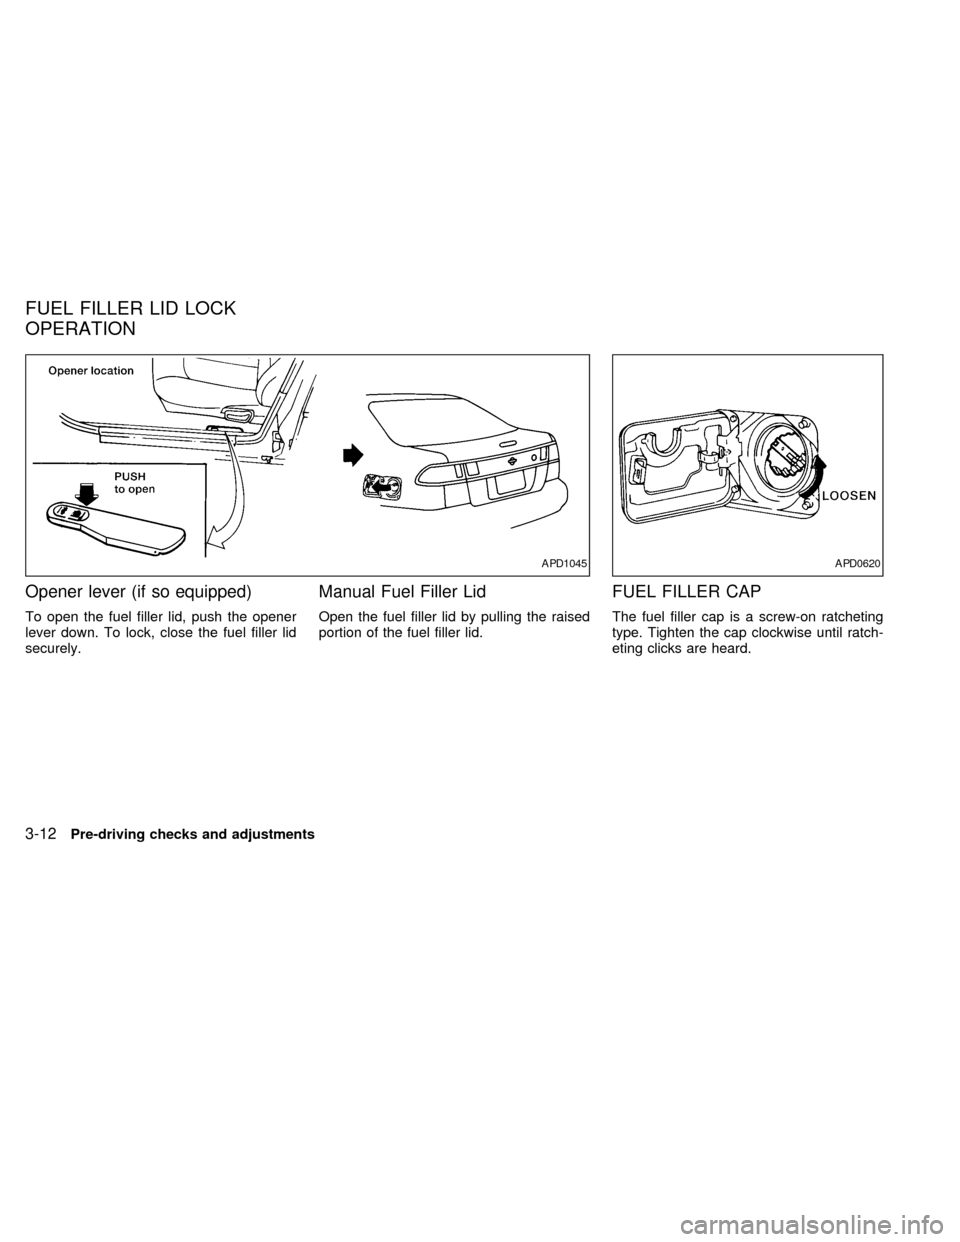
Opener lever (if so equipped)
To open the fuel filler lid, push the opener
lever down. To lock, close the fuel filler lid
securely.
Manual Fuel Filler Lid
Open the fuel filler lid by pulling the raised
portion of the fuel filler lid.
FUEL FILLER CAP
The fuel filler cap is a screw-on ratcheting
type. Tighten the cap clockwise until ratch-
eting clicks are heard.
APD1045APD0620
FUEL FILLER LID LOCK
OPERATION
3-12Pre-driving checks and adjustments
ZX
Page 88 of 223
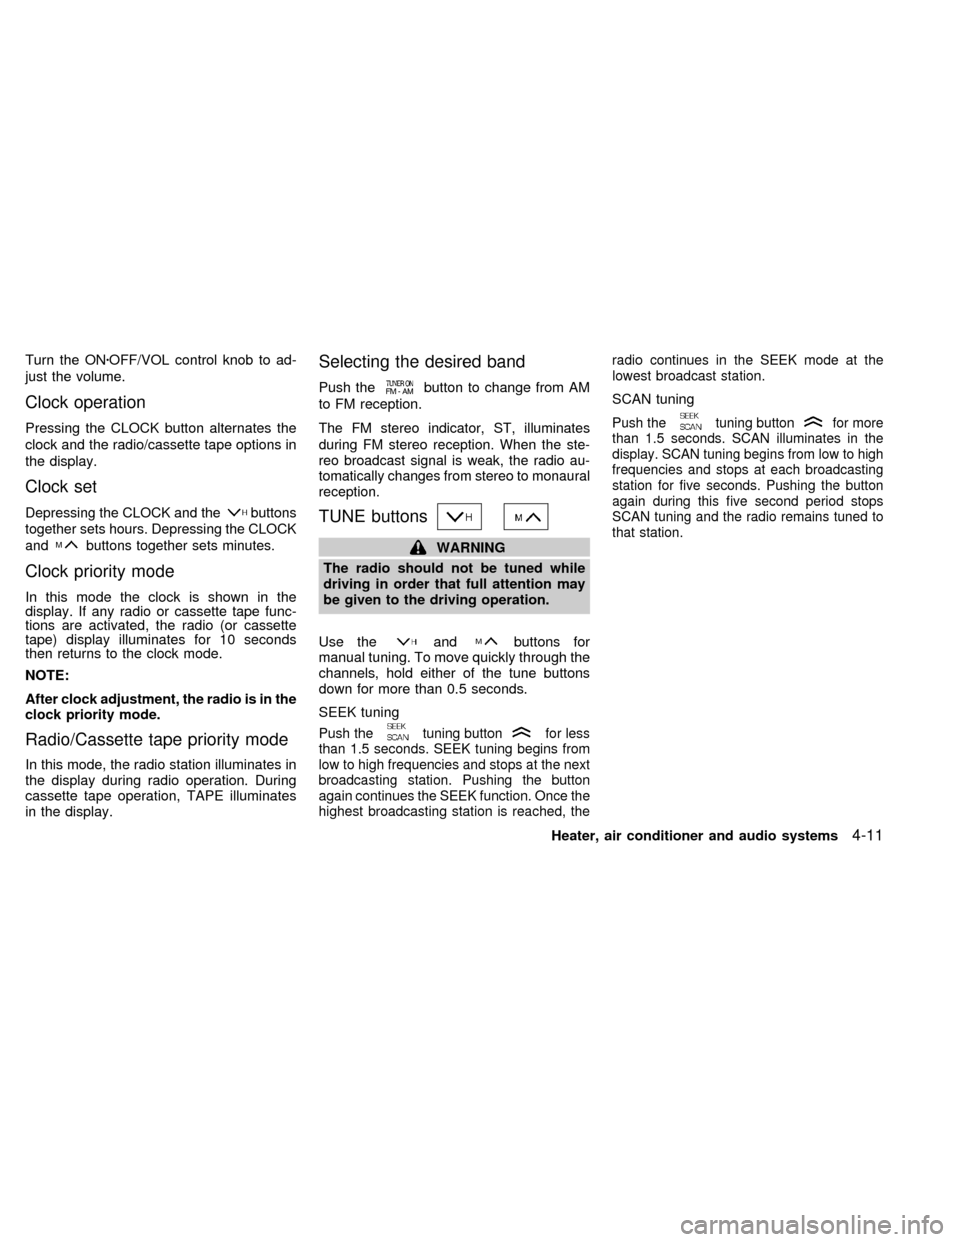
Turn the ONzOFF/VOL control knob to ad-
just the volume.
Clock operation
Pressing the CLOCK button alternates the
clock and the radio/cassette tape options in
the display.
Clock set
Depressing the CLOCK and thebuttons
together sets hours. Depressing the CLOCK
and
buttons together sets minutes.
Clock priority mode
In this mode the clock is shown in the
display. If any radio or cassette tape func-
tions are activated, the radio (or cassette
tape) display illuminates for 10 seconds
then returns to the clock mode.
NOTE:
After clock adjustment, the radio is in the
clock priority mode.
Radio/Cassette tape priority mode
In this mode, the radio station illuminates in
the display during radio operation. During
cassette tape operation, TAPE illuminates
in the display.
Selecting the desired band
Push thebutton to change from AM
to FM reception.
The FM stereo indicator, ST, illuminates
during FM stereo reception. When the ste-
reo broadcast signal is weak, the radio au-
tomatically changes from stereo to monaural
reception.
TUNE buttons
WARNING
The radio should not be tuned while
driving in order that full attention may
be given to the driving operation.
Use the
andbuttons for
manual tuning. To move quickly through the
channels, hold either of the tune buttons
down for more than 0.5 seconds.
SEEK tuning
Push thetuning buttonfor less
than 1.5 seconds. SEEK tuning begins from
low to high frequencies and stops at the next
broadcasting station. Pushing the button
again continues the SEEK function. Once the
highest broadcasting station is reached, theradio continues in the SEEK mode at the
lowest broadcast station.
SCAN tuning
Push thetuning buttonfor more
than 1.5 seconds. SCAN illuminates in the
display. SCAN tuning begins from low to high
frequencies and stops at each broadcasting
station for five seconds. Pushing the button
again during this five second period stops
SCAN tuning and the radio remains tuned to
that station.
Heater, air conditioner and audio systems4-11
ZX
Page 91 of 223

This system searches for the blank intervals
between selections. If there is a blank inter-
val within one selection or there is no inter-
val between selections, the system may not
stop in the desired or expected location.
Changing the direction of tape play
Push the(program) select button.
The moving digital squares illuminate on
either the right or left side of the display
window to indicate the side of program play.
Playing and stopping the cassette
tape
Push thebutton while the cassette
tape is playing to stop the tape. Push the
button again to play the tape.
Dolby NR (noise reduction)
Push thebutton for Dolby NR en-
coded tapes to reduce high frequency tape
noise. The
symbol illuminates in the
display.
If the display is in the clock priority mode
when the
button is pressed,and TAPE illuminate in the display
window for about 10 seconds. The clock
mode then returns to the display window.Dolby NR is manufactured under license
from Dolby Laboratories Licensing Corpora-
tion. DOLBY NR and the double-D symbol
are trademarks of Dolby Laboratories Li-
censing Corporation.
Metal or chrome tape usage
The cassette player is automatically set to
high performance play when playing a metal
or chrome cassette tape.
Ejecting the cassette tape
Push thebutton. The cassette tape
automatically comes out.
4-14Heater, air conditioner and audio systems
ZX
Page 93 of 223
Turn the ONzOFF/VOL control knob to ad-
just the volume.
Clock operation
Pressing the clock button alternates the
clock and the radio/CD player options in the
display.
Clock set
Depressing the clock andbuttons to-
gether sets hours. Depressing the clock and
buttons together sets minutes.
Clock priority mode
In this mode the clock is shown in the
display. If any radio or CD functions are
activated, the radio or CD display illumi-
nates for 10 seconds then returns to the
clock mode.
NOTE:
After clock adjustment, the radio is in the
clock priority mode.
FM/AM band select button
Push thebutton to change from AM
to FM reception.
The FM stereo indicator, ST, illuminatesduring FM stereo reception. When the ste-
reo broadcast signal is weak, the radio
automatically changes from stereo to mon-
aural reception.
TUNE buttons
WARNING
The radio should not be tuned while
driving in order that full attention may
be given to the driving operation.
Use the
andbuttons for manual
tuning. To move quickly through the chan-
nels, hold either of the tune buttons down
for more than 0.5 seconds.
SEEK/SCAN buttons
SEEK tuning
Push the SEEK/SCAN tuning button
orfor less than 1.5 seconds. SEEK tuning
begins from high to low frequencies or low
to high frequencies, depending on which
button is pressed, and stops at the next
broadcasting station. Once the highest
broadcasting station is reached, the radio
continues in the SEEK mode at the lowest
broadcasting station. If using the
button, once the lowest broadcastingstation is reached, the radio continues in the
SEEK mode at the highest broadcasting
station.
SCAN tuning
Push the SEEK/SCAN tuning button
orfor more than 1.5 seconds. SCAN illu-
minates in the display. SCAN tuning begins
from high to low frequencies or low to high
frequencies, depending on which button is
pressed. SCAN tuning stops at each broad-
casting station for five seconds. Pushing the
button again during this five second period
stops SCAN tuning and the radio remains
tuned to that station.
4-16Heater, air conditioner and audio systems
ZX
Page 98 of 223
ONzOFF/VOL control knob
Turn the ignition key to ACC or ON, then
push the ONzOFF/VOL control knob button.
The mode (radio, tape or CD) which was
playing immediately before the system was
turned off resumes playing. When no CD or
tape is loaded, the radio comes on. Pushing
the ONzOFF/VOL control knob button again
turns the system off.
Turn the ONzOFF/VOL control knob to ad-
just the volume.
Clock operation
Pressing the clock button alternates the
clock and the radio/cassette/CD player op-
tions in the display.
Clock set
Depressing the clock andbuttons to-
gether sets hours. Depressing the clock and
buttons together sets minutes.
Clock priority mode
In this mode, the clock is shown in the
display. If any radio, cassette or CD func-
tions are activated, the radio, cassette or
CD display illuminates for 10 seconds then
returns to the clock mode.NOTE:
After clock adjustment, the radio is in the
clock priority mode.
FM-AM band select button
Pushing thebutton changes the band.
The FM stereo indicator, ST, illuminates
during FM stereo reception. When the ste-
reo broadcast signal is weak, the radio
automatically changes from stereo to mon-
aural reception.
TUNE/DISC buttons
WARNING
The radio should not be tuned while
driving in order that full attention may
be given to the driving operation.
Use the
andbuttons for manual
tuning. To move quickly through the chan-
nels, hold either of the tuning buttons down.
SEEK/SCAN buttons
SEEK tuning
Push the SEEK/SCAN tuning button
orfor less than 0.5 seconds. SEEK tuning
begins from low to high frequencies or highto low frequencies, depending on which
button is pressed, and stops at the next
broadcasting station. Once the highest
broadcasting station is reached, the radio
continues in the SEEK mode at the lowest
broadcasting station. If using the
button, once the lowest broadcasting
station is reached, the radio continues in the
SEEK mode at the highest broadcasting
station.
SCAN tuning
Push the SEEK/SCAN tuning button
orfor more than 0.5 seconds. SCAN illu-
minates in the display, and the radio station
blinks. SCAN tuning begins from low to high
frequencies or high to low frequencies, de-
pending on which button is pressed. SCAN
tuning stops at each broadcasting station
for five seconds. Pushing the button again
during this five second period stops SCAN
tuning and the radio remains tuned to that
station.
Heater, air conditioner and audio systems
4-21
ZX
Page 103 of 223
times to skip several selections. Each time
the button is pushed, the CD advances one
additional selection. The number appears in
the display window. (When the last selec-
tion on the compact disc is skipped, the first
selection is played.)
When the
button is pushed, the selec-
tion being played returns to the beginning.
Push the
button several times to skip
back several selections. Each time the but-
ton is pushed, the CD moves back one
selection.
PROG (program) button
When thebutton is pushed while the
compact disc is playing, the play pattern
changes as follows.
1.The current selection is repeated.
RANDOM:Selections are played at ran-
dom, not following the sequence on the
compact disc. The same program may be
repeated twice.
Blank(no symbol): All selections are played
repeatedly in sequence.
When a new compact disc is inserted,
the play pattern automatically changes
to Blank.
CD EJECT button
When thebutton is pushed with a com-
pact disc loaded, the compact disc ejects.
When the
button is pushed while the
compact disc is playing, the compact disc
ejects and the system turns off.
If the compact disc ejects and is not
removed within 10 seconds, it is pulled
back into the slot.
CD IN (DISC) indicator light
CD IN appears in the display when a com-
pact disc is loaded into the player.
CAUTION
cDuring cold weather or rainy days,
the player may malfunction due to
the humidity. If this occurs, remove
the CD and dehumidify or ventilate
the player completely.
cThe player may skip while driving on
rough roads.cThe CD player sometimes cannot
function when the compartment tem-
perature is extremely high. Decrease
the temperature before use.
cDo not expose the CD to direct sun-
light.
ANTENNA
Manual antenna
The manual antenna cannot be shortened,
but can be removed. When you need to
remove the antenna, turn the antenna rod
clockwise.
To install the antenna rod, turn the antenna
clockwise. Tighten the antenna rod to speci-
fication using a suitable tool such as a
open-end wrench. The antenna rod tighten-
ing specification is 3.4 - 3.6 Nzm(30-32
in-lb). Do not use pliers to tighten the an-
tenna as they can leave marks on the
antenna surface. The antenna rod can not
be hand tightened to the proper specifica-
tion.
4-26Heater, air conditioner and audio systems
ZX