Page 220 of 286

Drain plug tightening torque:
22 to 29 ft-lb
(29 to 39 Nzm)
Do not use excessive force.
7. Refill the engine with a recommended oil
through the oil filler opening then install
the oil filler cap securely.
See the ``Technical and consumer infor-
mation'' section for drain and refill capac-
ity.
The drain and refill capacity depends on
the oil temperature and drain time. Use
these specifications for reference only.
Always use the dipstick to determine
when the proper amount of oil is in the
engine.
8. Start the engine. Check for leakage
around the drain plug. Correct as re-
quired.
9. Turn the engine off and wait several
minutes. Check the oil level with the
dipstick. Add engine oil if necessary.
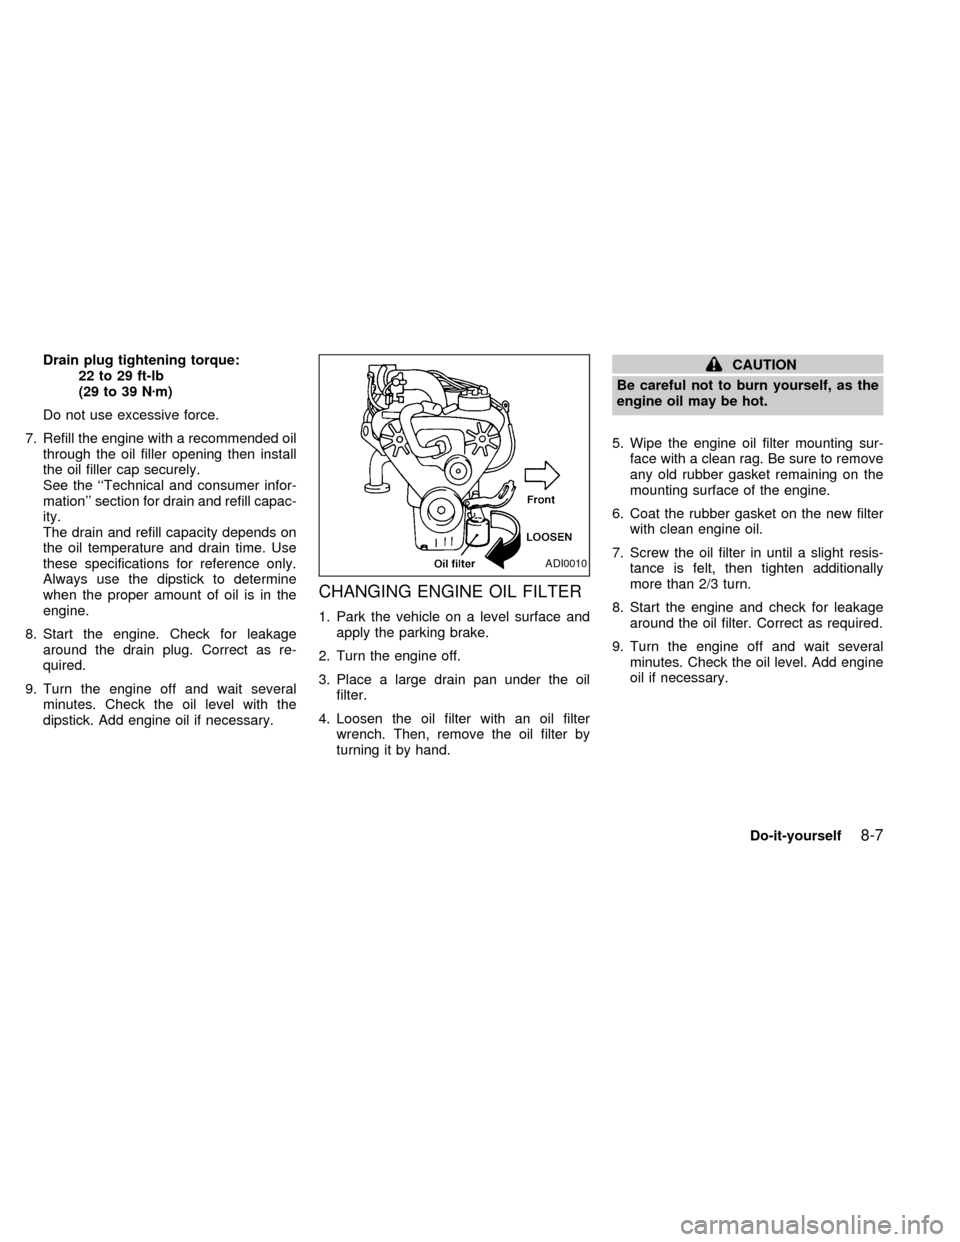
CHANGING ENGINE OIL FILTER
1. Park the vehicle on a level surface and
apply the parking brake.
2. Turn the engine off.
3. Place a large drain pan under the oil
filter.
4. Loosen the oil filter with an oil filter
wrench. Then, remove the oil filter by
turning it by hand.
CAUTION
Be careful not to burn yourself, as the
engine oil may be hot.
5. Wipe the engine oil filter mounting sur-
face with a clean rag. Be sure to remove
any old rubber gasket remaining on the
mounting surface of the engine.
6. Coat the rubber gasket on the new filter
with clean engine oil.
7. Screw the oil filter in until a slight resis-
tance is felt, then tighten additionally
more than 2/3 turn.
8. Start the engine and check for leakage
around the oil filter. Correct as required.
9. Turn the engine off and wait several
minutes. Check the oil level. Add engine
oil if necessary.
ADI0010
Do-it-yourself8-7
ZX
Page 266 of 286

When planning to travel in another coun-
try,you should first find out if the fuel
available is suitable for your vehicle's en-
gine.
Using fuel with an octane/cetane rating that
is too low may cause engine damage. All
gasoline vehicles must be operated with
unleaded gasoline. Therefore, avoid taking
your vehicle to areas where appropriate fuel
is not available.
When transferring the registration of
your vehicle to another country, state,
province or district,it may be necessary to
modify the vehicle to meet local laws and
regulations.
The laws and regulations for motor vehicle
emission control and safety standards vary
according to the country, state, province or
district. Therefore, vehicle specifications
may differ.
When any vehicle is to be taken into
another country, state, province or dis-
trict and registered, its modifications,
transportation, and registration are the
responsibility of the user. NISSAN is not
responsible for any inconvenience that
may result.
VEHICLE IDENTIFICATION
NUMBER (VIN) PLATE
The vehicle identification number plate is
attached to the upper portion of the dash-
board on the driver's side. This number is
the identification for your vehicle and is
used in the vehicle registration.
VEHICLE IDENTIFICATION
NUMBER (chassis number)
ATI0563ATI1021
REGISTERING YOUR VEHICLE
IN ANOTHER COUNTRYVEHICLE IDENTIFICATION
Technical and consumer information10-9
ZX
Page 272 of 286

cTo reduce the possibility of addi-
tional damage if your vehicle is
struck from the rear, where practical
remove the hitch when not in use.
Remove the receiver when not in
use. After the hitch is removed, seal
the bolt holes to prevent exhaust
fumes, water or dust from entering
the passenger compartment.
cRegularly check that all hitch mount-
ing bolts are securely mounted.
Tire pressures
cWhen towing a trailer, inflate the vehicle
tires to the recommended cold tire pres-
sure indicated on the tire placard (located
on the inside of the glove box lid).
cTrailer tire condition, size, load rating and
proper inflation pressure should be in
accordance with the trailer and tire
manufacturer's specifications.
Safety chain
Always use suitable safety chains between
your vehicle and the trailer. Safety chains
should be crossed and should be attached
to the hitch, not to the vehicle bumper oraxle. Be sure to leave enough slack in the
chains to permit turning corners.
Trailer lights
Trailer lights should comply with Federal
and/or local regulations. When wiring the
vehicle for towing, connect the stop and tail
light pickup into the vehicle electrical circuit.
Class I Trailer Tow electrical wiring provides
two circuits (right and left hand) to operate
trailer stop/turn tail lamps. Each individual
stop/turn circuit will operate only one com-
bination stop/turn light bulb (#1157, 3157,
2357, or 3357) on the trailer. Never add
more than one trailer light bulb to one
circuit.
Technical and consumer information
10-15
ZX