1999 NISSAN QUEST parking brake
[x] Cancel search: parking brakePage 91 of 286
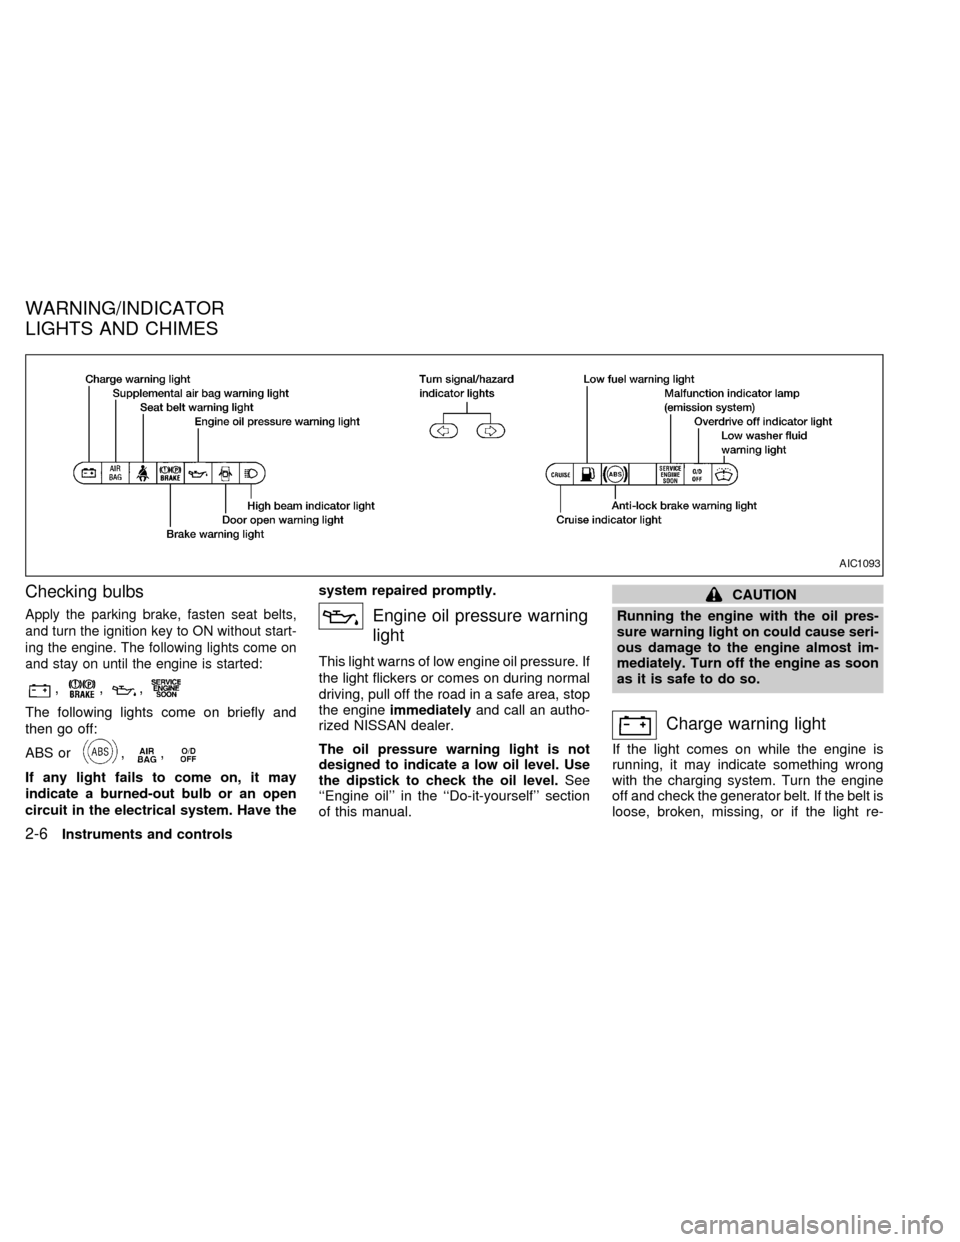
Checking bulbs
Apply the parking brake, fasten seat belts,
and turn the ignition key to ON without start-
ing the engine. The following lights come on
and stay on until the engine is started:
,,,
The following lights come on briefly and
then go off:
ABS or
,,
If any light fails to come on, it may
indicate a burned-out bulb or an open
circuit in the electrical system. Have thesystem repaired promptly.
Engine oil pressure warning
light
This light warns of low engine oil pressure. If
the light flickers or comes on during normal
driving, pull off the road in a safe area, stop
the engineimmediatelyand call an autho-
rized NISSAN dealer.
The oil pressure warning light is not
designed to indicate a low oil level. Use
the dipstick to check the oil level.See
``Engine oil'' in the ``Do-it-yourself'' section
of this manual.
CAUTION
Running the engine with the oil pres-
sure warning light on could cause seri-
ous damage to the engine almost im-
mediately. Turn off the engine as soon
as it is safe to do so.
Charge warning light
If the light comes on while the engine is
running, it may indicate something wrong
with the charging system. Turn the engine
off and check the generator belt. If the belt is
loose, broken, missing, or if the light re-
AIC1093
WARNING/INDICATOR
LIGHTS AND CHIMES
2-6Instruments and controls
ZX
Page 92 of 286
mains on, see an authorized NISSAN
dealer immediately.
CAUTION
Do not continue driving if the belt is
loose, broken or missing.
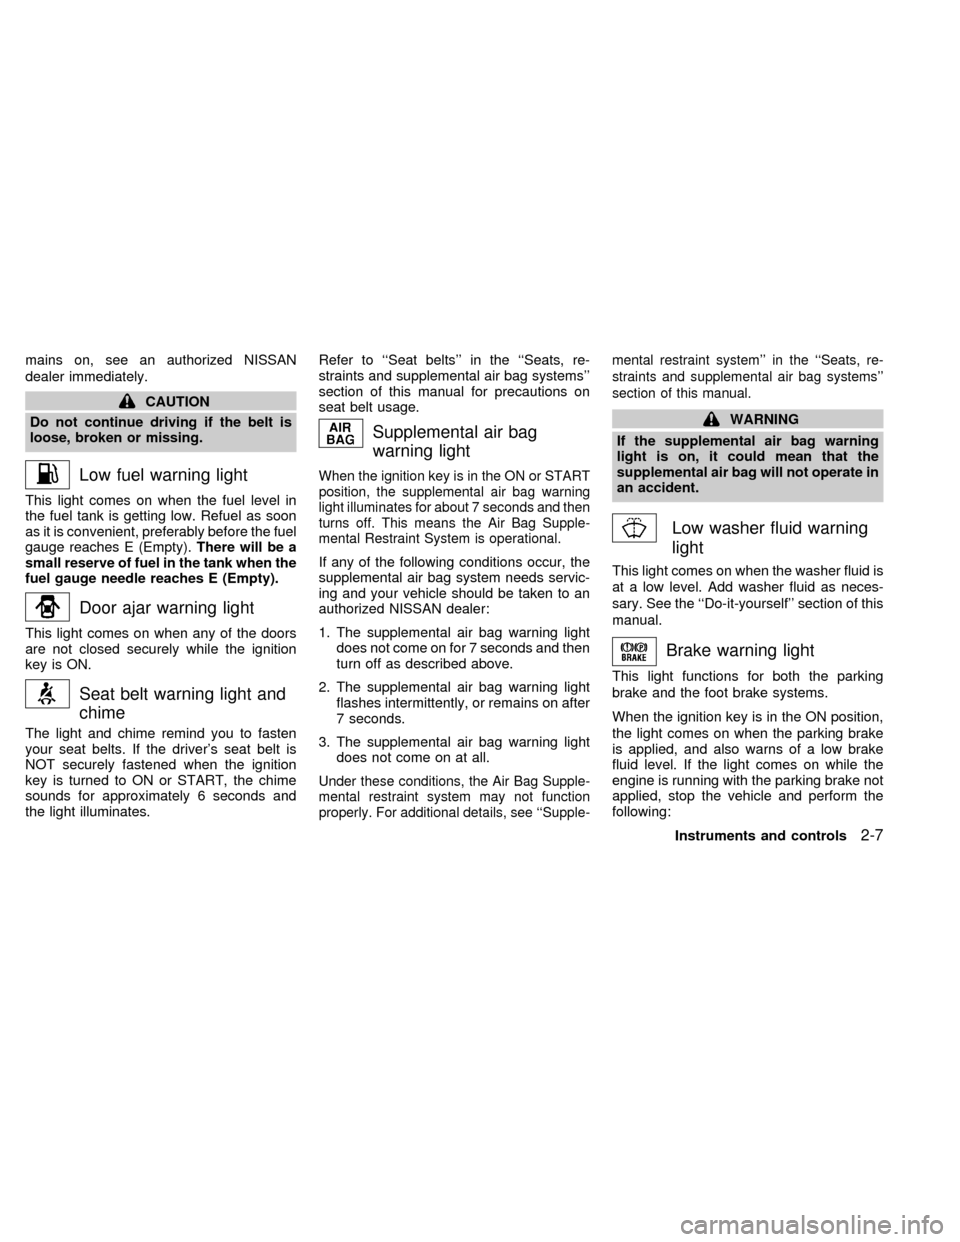
Low fuel warning light
This light comes on when the fuel level in
the fuel tank is getting low. Refuel as soon
as it is convenient, preferably before the fuel
gauge reaches E (Empty).There will be a
small reserve of fuel in the tank when the
fuel gauge needle reaches E (Empty).
Door ajar warning light
This light comes on when any of the doors
are not closed securely while the ignition
key is ON.
Seat belt warning light and
chime
The light and chime remind you to fasten
your seat belts. If the driver's seat belt is
NOT securely fastened when the ignition
key is turned to ON or START, the chime
sounds for approximately 6 seconds and
the light illuminates.Refer to ``Seat belts'' in the ``Seats, re-
straints and supplemental air bag systems''
section of this manual for precautions on
seat belt usage.
Supplemental air bag
warning light
When the ignition key is in the ON or START
position, the supplemental air bag warning
light illuminates for about 7 seconds and then
turns off. This means the Air Bag Supple-
mental Restraint System is operational.
If any of the following conditions occur, the
supplemental air bag system needs servic-
ing and your vehicle should be taken to an
authorized NISSAN dealer:
1. The supplemental air bag warning light
does not come on for 7 seconds and then
turn off as described above.
2. The supplemental air bag warning light
flashes intermittently, or remains on after
7 seconds.
3. The supplemental air bag warning light
does not come on at all.
Under these conditions, the Air Bag Supple-
mental restraint system may not function
properly. For additional details, see ``Supple-mental restraint system'' in the ``Seats, re-
straints and supplemental air bag systems''
section of this manual.
WARNING
If the supplemental air bag warning
light is on, it could mean that the
supplemental air bag will not operate in
an accident.
Low washer fluid warning
light
This light comes on when the washer fluid is
at a low level. Add washer fluid as neces-
sary. See the ``Do-it-yourself'' section of this
manual.
Brake warning light
This light functions for both the parking
brake and the foot brake systems.
When the ignition key is in the ON position,
the light comes on when the parking brake
is applied, and also warns of a low brake
fluid level. If the light comes on while the
engine is running with the parking brake not
applied, stop the vehicle and perform the
following:
Instruments and controls
2-7
ZX
Page 99 of 286

Push the headlight switch again to turn the
interior lights off.
DAYTIME RUNNING LIGHT
SYSTEM (Canada only)
The headlights automatically illuminate at a
reduced intensity when the engine is started
with the parking brake released. The day-
time running lights operate with the head-
light switch in the OFF position or in the
position. Turn the headlight switch to
theposition for full illumination when
driving at night.
If the parking brake is applied before the
engine is started, the daytime running lights
do not illuminate. The daytime running lights
illuminate once the parking brake is released.
The daytime running lights will remain on until
the ignition switch is turned OFF.
WARNING
When the daytime running light system
is active, tail lights on your vehicle will
not be on. It is necessary at dusk to
turn on your headlights. Failure to do
so could cause an accident injuring
yourself and others.The autolamp system allows the headlights
to be set so they turn on and off automati-
cally. The autolamp system can turn on the
headlights automatically when it is dark,
turn off the headlights when it is light, and
keep the headlights on for up to three
minutes after you turn the key to OFF.
To set the autolamp system:
1. Make sure the headlight switch is in the
AUTO1 or AUTO2 position.
2. Turn the ignition key to ON.
3. The autolamp system automatically turns
the headlights on and off.
Shut-off delay
The length of time the headlights stay on
after the ignition is turned to OFF depends
on whether the switch is in the AUTO1 or
AUTO2 position. If the switch is in the
AUTO1 position, then the headlights stay on
for less than 1 minute after the ignition is
turned OFF. If the switch is in the AUTO2
position, the headlights stay on approxi-
mately 3 minutes after the ignition is turned
OFF.
To turn the autolamp system off, turn the
switch to the OFF,
,orposition.AIC1058
AUTOLAMP SWITCH
(if so equipped)
2-14Instruments and controls
ZX
Page 176 of 286

5 Starting and driving
Precautions when starting and driving ...................5-2
Exhaust gas (carbon monoxide) ............................5-2
Three way catalyst .................................................5-2
Avoiding collision and rollover................................5-3
Drinking alcohol/drugs and driving .........................5-3
Ignition switch .........................................................5-4
Before starting the engine ......................................5-5
Driving with an automatic transmission .................5-5
Overdrive switch .....................................................5-7
Starting the engine .................................................5-8Parking brake operation .........................................5-9
Cruise control (if so equipped) ...............................5-9
Break-in schedule ................................................5-11
Increasing fuel economy ......................................5-12
Parking/parking on hills ........................................5-13
Power steering system .........................................5-14
Brake system........................................................5-14
Anti-lock brake system (ABS) (if so equipped) ....5-15
Cold weather driving ............................................5-16
ZX
Page 179 of 286
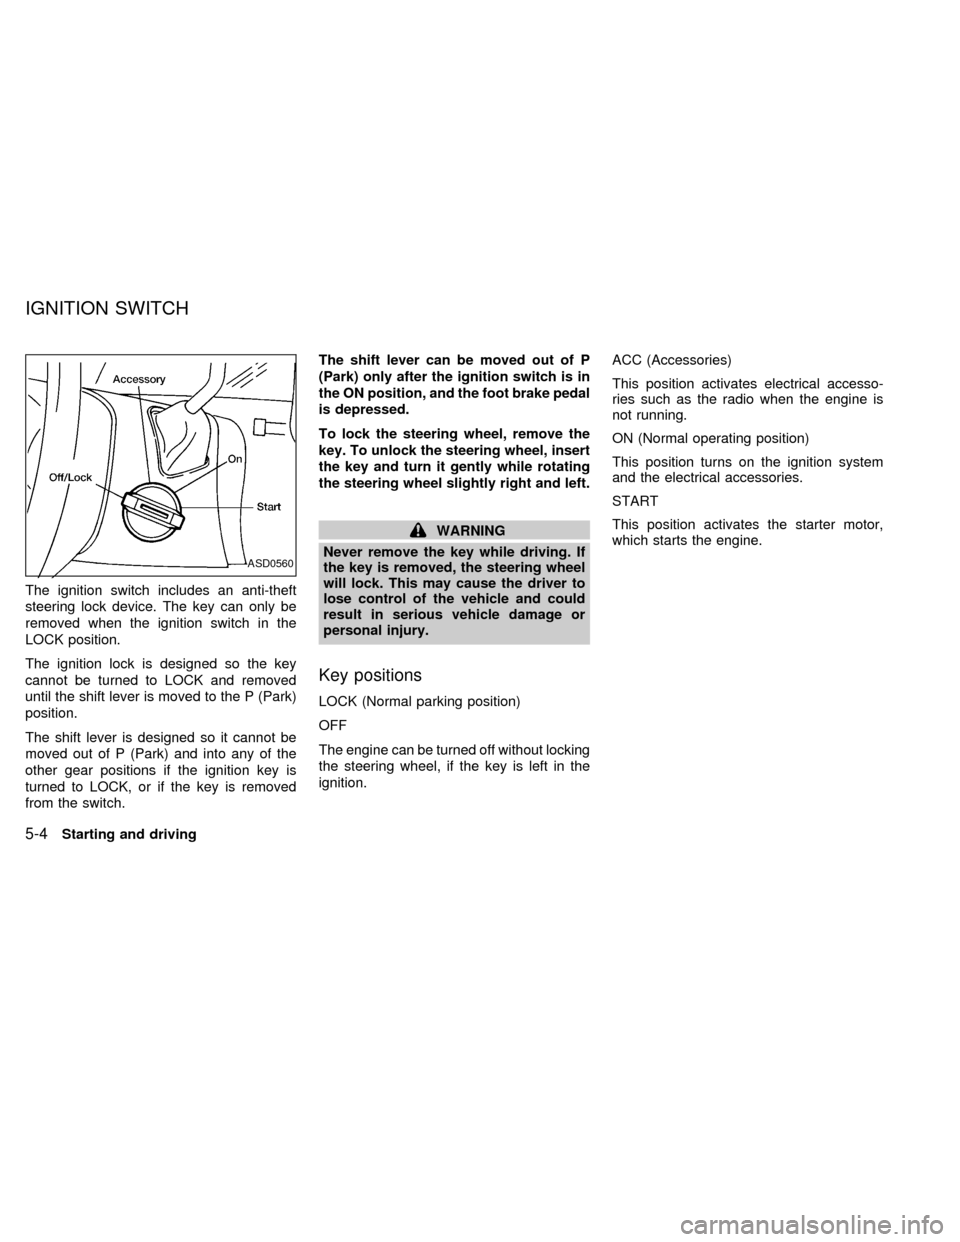
The ignition switch includes an anti-theft
steering lock device. The key can only be
removed when the ignition switch in the
LOCK position.
The ignition lock is designed so the key
cannot be turned to LOCK and removed
until the shift lever is moved to the P (Park)
position.
The shift lever is designed so it cannot be
moved out of P (Park) and into any of the
other gear positions if the ignition key is
turned to LOCK, or if the key is removed
from the switch.The shift lever can be moved out of P
(Park) only after the ignition switch is in
the ON position, and the foot brake pedal
is depressed.
To lock the steering wheel, remove the
key. To unlock the steering wheel, insert
the key and turn it gently while rotating
the steering wheel slightly right and left.
WARNING
Never remove the key while driving. If
the key is removed, the steering wheel
will lock. This may cause the driver to
lose control of the vehicle and could
result in serious vehicle damage or
personal injury.
Key positions
LOCK (Normal parking position)
OFF
The engine can be turned off without locking
the steering wheel, if the key is left in the
ignition.ACC (Accessories)
This position activates electrical accesso-
ries such as the radio when the engine is
not running.
ON (Normal operating position)
This position turns on the ignition system
and the electrical accessories.
START
This position activates the starter motor,
which starts the engine.
ASD0560
IGNITION SWITCH
5-4Starting and driving
ZX
Page 181 of 286

The shift lever can be moved if the igni-
tion switch is in the ACC position. This
allows the vehicle to be moved if the
battery is discharged.
1. Keep the foot brake pedal depressed and
shift into a driving gear.
2. Release the parking brake and foot
brake, then gradually start the vehicle in
motion.
Shifting with automatic transmission
P (Park):
Use this selector position when the vehicle
is parked or when starting the engine. Al-
ways be sure the vehicle is at a complete
stop. For maximum safety, depress the
brake pedal, pull the lever toward you, and
move the lever to the P (Park) position.
Apply the parking brake. When parking on a
hill, apply the parking brake first, then shift
the lever into the P (Park) position.
Shifting from P (Park)
If the ignition switch is in the ON position
and the foot brake pedal is depressed, but
the shift lever still cannot be moved out of P
(Park), follow these instructions:
1. Shut the engine off and remove the key.
2. Apply the parking brake.
3. Reinsert the ignition key and turn it clock-
wise to the first position (ACC).
4. Depress the brake pedal, move the gear-
shift lever to N (Neutral).
5. Start the engine.
R (Reverse):
Use this position to back up. Always be sure
the vehicle is completely stopped. Depress
the brake pedal, then pull the shift lever
toward you and move it to the R (Reverse)
position.
ASD0552
5-6Starting and driving
ZX
Page 183 of 286
once. The O/D OFF indicator light
illuminates at this time. When cruis-
ing at a low speed or climbing a
gentle slope, you may feel uncom-
fortable shift shocks as the transmis-
sion shifts between 3rd gear and
overdrive repeatedly. In this case,
press the overdrive switch.
When driving conditions change, press the
overdrive switch to turn the overdrive on.
The O/D OFF indicator light goes out.
Remember not to drive at high speeds for
extended periods of time with the O/D OFF
light illuminated. This reduces the fuel
economy.1. Apply the parking brake.
2. Move the selector lever to P (Park) or N
(Neutral) (P is recommended).
The shift selector lever cannot be
moved out of P and into any of the
other gear positions under the follow-
ing conditions:
cThe ignition key is turned to the
OFF position.
cThe ignition key is turned to the ON
position without depressing the
foot brake pedal.
The starter will not operate if the shift
selector lever is in one of the driving
positions.
3. Crank the enginewith your foot off the
accelerator pedalby turning the ignition
key to START. Release the key when the
engine starts. If the engine starts, but
fails to run, repeat the above procedure.
Ð If the engine is very hard to start in
extremely cold or hot weather, de-
press the accelerator pedal to the
floor and hold it to help start the
engine.Ð In the summer, when restarting the
engine within 30 minutes after it has
been stopped, keep the accelerator
pedal slightly depressed while start-
ing.
CAUTION
Do not operate the starter for more than
15 seconds at a time. If the engine does
not start, turn the key off and wait 10
seconds before cranking again, other-
wise the starter could be damaged.
4. Warm-up
Allow the engine to idle for at least 30
seconds after starting. Drive at moderate
speeds for a short distance first, espe-
cially in cold weather.
STARTING THE ENGINE
5-8Starting and driving
ZX
Page 184 of 286
WARNING
cBe sure the parking brake is fully
released before driving. Failure to do
so can cause brake failure and lead
to an accident.
cDo not release the parking brake
from outside the vehicle.
cDo not use the gearshift in place of
the parking brake. When parking, be
sure the parking brake is fully en-
gaged.
c
Do not leave children unattended in a
vehicle. They could release the park-
ing brake and cause an accident.
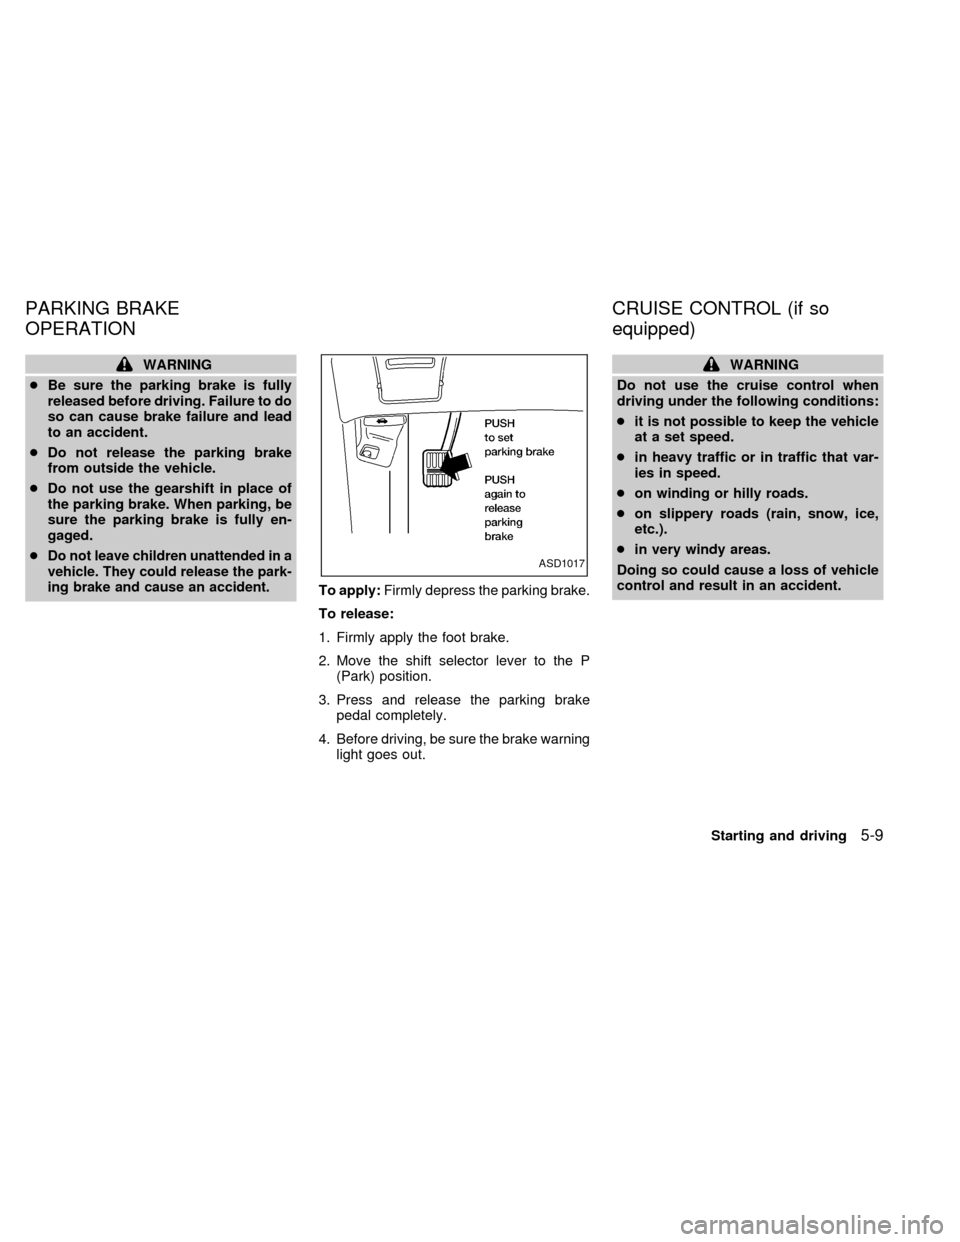
To apply:Firmly depress the parking brake.
To release:
1. Firmly apply the foot brake.
2. Move the shift selector lever to the P
(Park) position.
3. Press and release the parking brake
pedal completely.
4. Before driving, be sure the brake warning
light goes out.
WARNING
Do not use the cruise control when
driving under the following conditions:
cit is not possible to keep the vehicle
at a set speed.
cin heavy traffic or in traffic that var-
ies in speed.
con winding or hilly roads.
con slippery roads (rain, snow, ice,
etc.).
cin very windy areas.
Doing so could cause a loss of vehicle
control and result in an accident.
ASD1017
PARKING BRAKE
OPERATIONCRUISE CONTROL (if so
equipped)
Starting and driving5-9
ZX