1999 NISSAN FRONTIER clock
[x] Cancel search: clockPage 101 of 247
When no CD or tape is loaded, the radio
comes on. Pushing the ON×OFF/VOL con-
trol knob button again turns the system off.
Turn the ON×OFF/VOL control knob to ad-
just the volume.
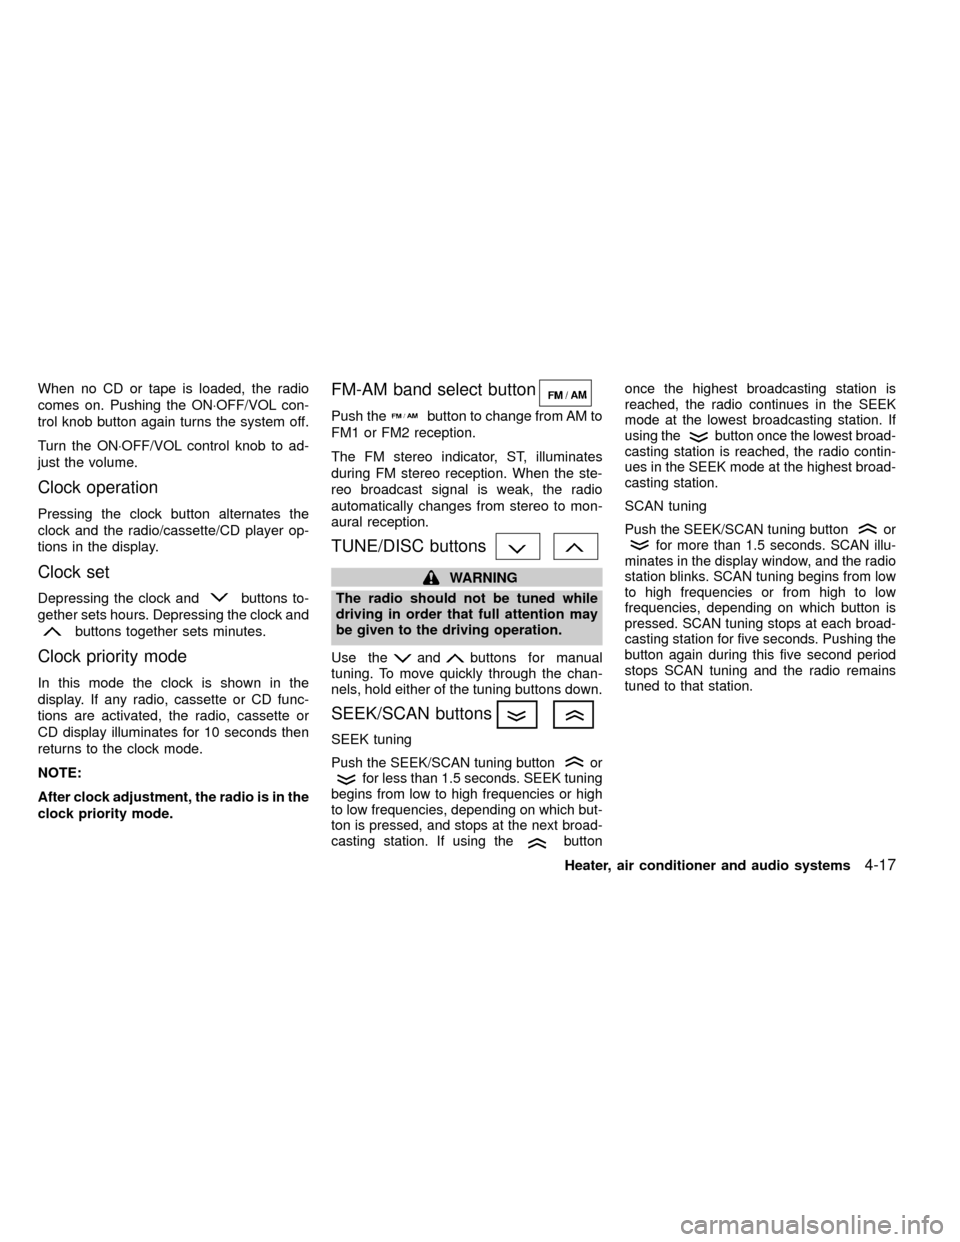
Clock operation
Pressing the clock button alternates the
clock and the radio/cassette/CD player op-
tions in the display.
Clock set
Depressing the clock andbuttons to-
gether sets hours. Depressing the clock and
buttons together sets minutes.
Clock priority mode
In this mode the clock is shown in the
display. If any radio, cassette or CD func-
tions are activated, the radio, cassette or
CD display illuminates for 10 seconds then
returns to the clock mode.
NOTE:
After clock adjustment, the radio is in the
clock priority mode.
FM-AM band select button
Push thebutton to change from AM to
FM1 or FM2 reception.
The FM stereo indicator, ST, illuminates
during FM stereo reception. When the ste-
reo broadcast signal is weak, the radio
automatically changes from stereo to mon-
aural reception.
TUNE/DISC buttons
WARNING
The radio should not be tuned while
driving in order that full attention may
be given to the driving operation.
Use the
andbuttons for manual
tuning. To move quickly through the chan-
nels, hold either of the tuning buttons down.
SEEK/SCAN buttons
SEEK tuning
Push the SEEK/SCAN tuning buttonorfor less than 1.5 seconds. SEEK tuning
begins from low to high frequencies or high
to low frequencies, depending on which but-
ton is pressed, and stops at the next broad-
casting station. If using the
buttononce the highest broadcasting station is
reached, the radio continues in the SEEK
mode at the lowest broadcasting station. If
using the
button once the lowest broad-
casting station is reached, the radio contin-
ues in the SEEK mode at the highest broad-
casting station.
SCAN tuning
Push the SEEK/SCAN tuning buttonorfor more than 1.5 seconds. SCAN illu-
minates in the display window, and the radio
station blinks. SCAN tuning begins from low
to high frequencies or from high to low
frequencies, depending on which button is
pressed. SCAN tuning stops at each broad-
casting station for five seconds. Pushing the
button again during this five second period
stops SCAN tuning and the radio remains
tuned to that station.
Heater, air conditioner and audio systems4-17
ZX
Page 107 of 247
The antenna cannot be shortened, but it can
be removed. When you need to remove the
antenna, turn the antenna rod counterclock-
wise.
To install the antenna rod, turn the antenna
clockwise. Tighten the antenna rod to speci-
fication using a suitable tool such as a
open-end wrench. The antenna rod tighten-
ing specification is 3.4 - 3.6 N×m(30-32
in-lb). Do not use pliers to tighten the an-
tenna as they can leave marks on the
antenna surface. The antenna rod can not
be hand tightened to the proper specifica-
tion.
CAUTION
Always properly tighten the antenna
rod during installation or the antenna
rod may break during vehicle opera-
tion.
Microphone installed model
If equipped with a genuine NISSAN cellular
phone, your NISSAN features a non-
directional
microphone in the steering column cover, so
it is not necessary to look at or speak
directly into the microphone when calling. To
do so could detract from the driving opera-
tion and cause an accident. See the manual
for car phone operation.
Pre-wired and antenna for phone
installed model
Some models are pre-wired to accept the
genuine NISSAN cellular phone. In addition,
the same model has the phone antenna
built into the rear glass window.
When installing a CB, ham radio or car
phone in your NISSAN, be sure to observe
the following cautions, otherwise the new
equipment may adversely affect the MFI
(Multiport Fuel Injection) system and other
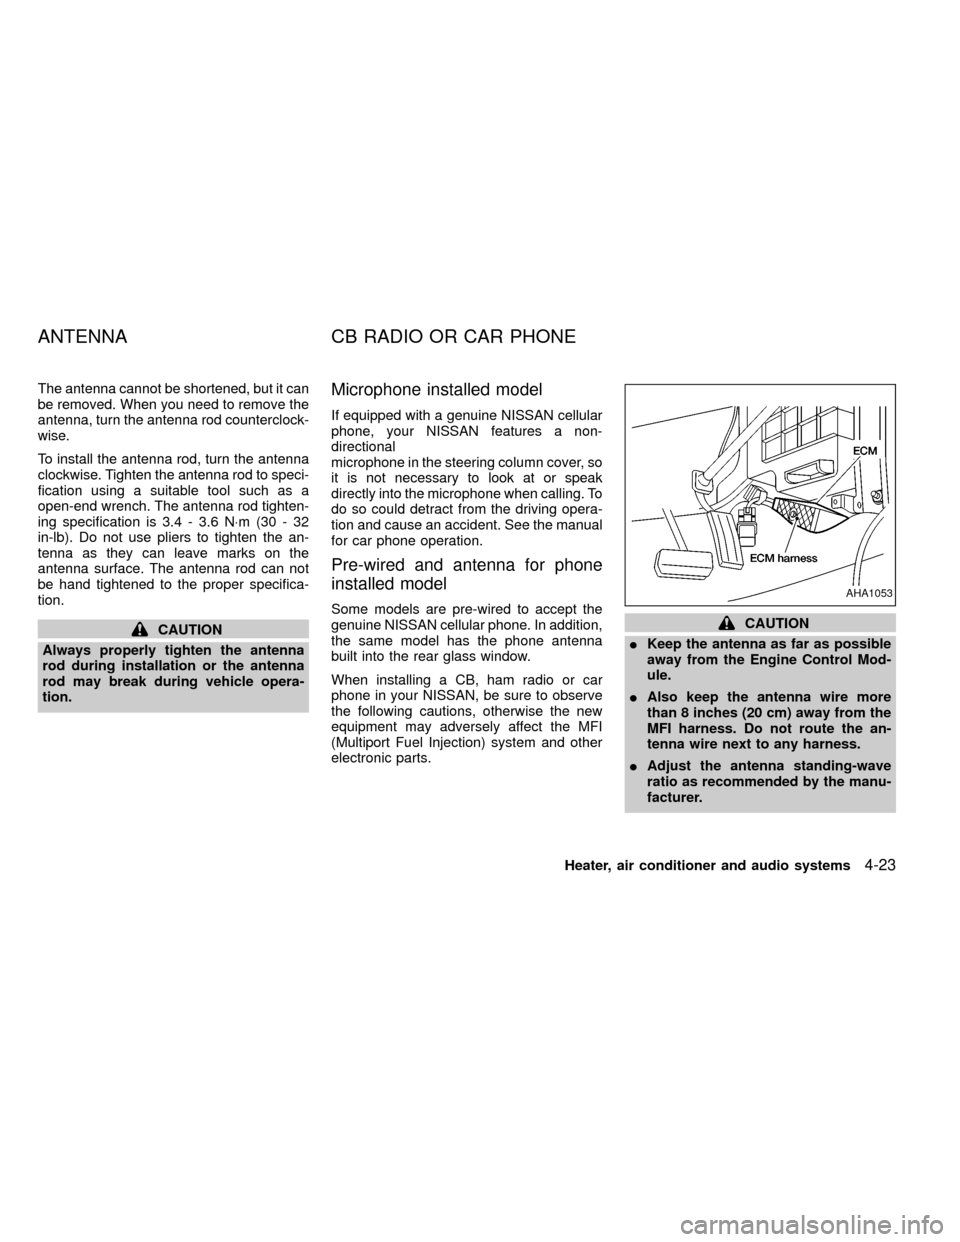
electronic parts.CAUTION
IKeep the antenna as far as possible
away from the Engine Control Mod-
ule.
IAlso keep the antenna wire more
than 8 inches (20 cm) away from the
MFI harness. Do not route the an-
tenna wire next to any harness.
IAdjust the antenna standing-wave
ratio as recommended by the manu-
facturer.
AHA1053
ANTENNA CB RADIO OR CAR PHONE
Heater, air conditioner and audio systems4-23
ZX
Page 112 of 247
WARNING
Never drive under the influence of alco-
hol or drugs. Alcohol in the blood
stream reduces coordination, delays
reaction time and impairs judgement.
Driving after drinking alcohol increases
the likelihood of being involved in an
accident, injuring yourself and others.
Additionally, if you are injured in the
accident, alcohol can increase the se-
verity of injury.
NISSAN is committed to safe driving. How-
ever, you must choose not to drive under
the influence of alcohol. Every year thou-
sands of people are injured or killed in
alcohol related accidents. Although the local
laws vary on what is considered to be
legally intoxicated, the fact is that alcohol
affects all people differently and most
people underestimate the effects of alcohol.
Remember, drinking and driving don't mix!
And that's true for drugs, too (over the
counter, prescription, and illegal drugs).
Don't drive if your ability to operate your
vehicle is impaired by alcohol, drugs, or
some other physical condition.
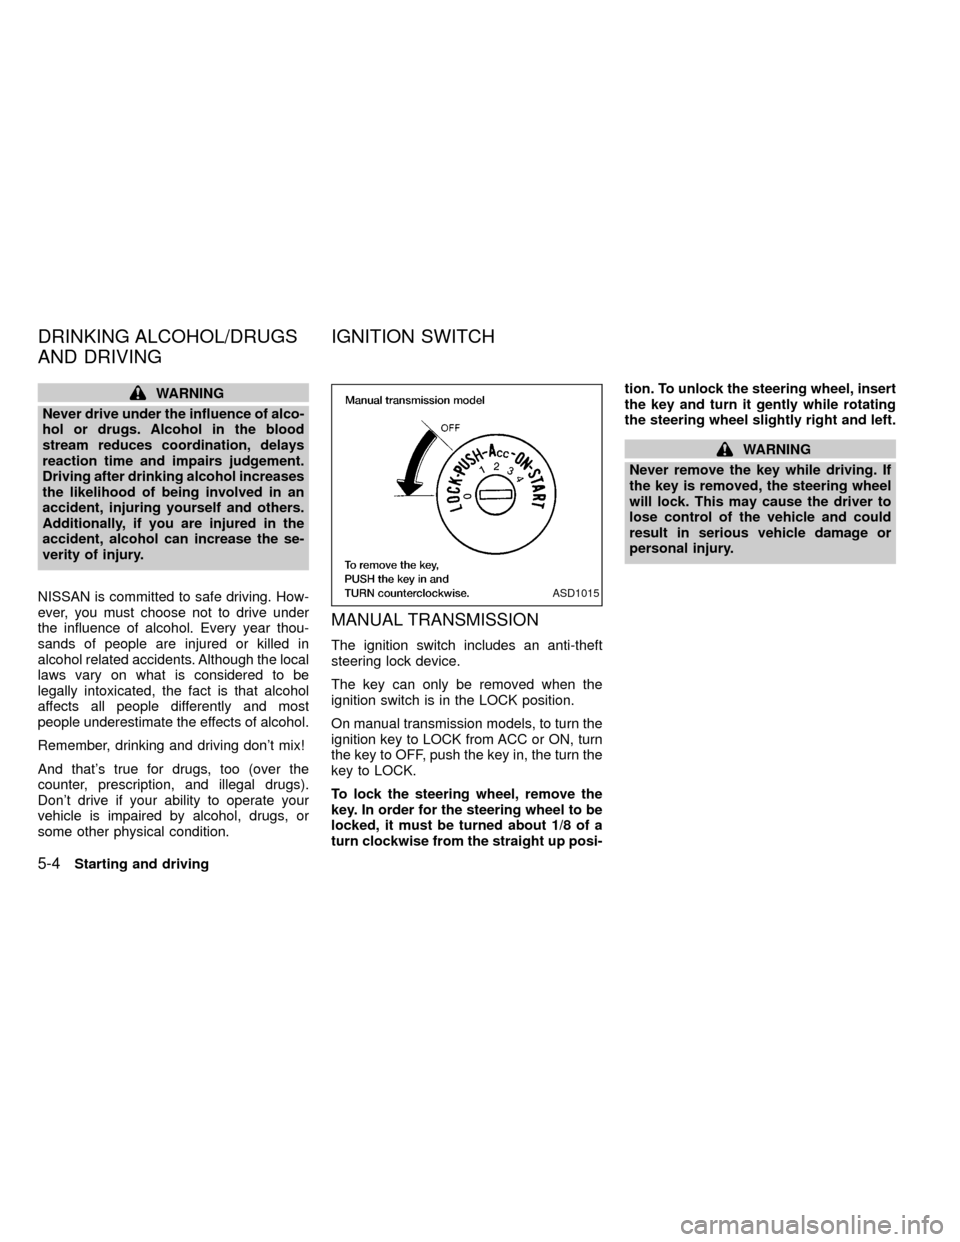
MANUAL TRANSMISSION
The ignition switch includes an anti-theft
steering lock device.
The key can only be removed when the
ignition switch is in the LOCK position.
On manual transmission models, to turn the
ignition key to LOCK from ACC or ON, turn
the key to OFF, push the key in, the turn the
key to LOCK.
To lock the steering wheel, remove the
key. In order for the steering wheel to be
locked, it must be turned about 1/8 of a
turn clockwise from the straight up posi-tion. To unlock the steering wheel, insert
the key and turn it gently while rotating
the steering wheel slightly right and left.
WARNING
Never remove the key while driving. If
the key is removed, the steering wheel
will lock. This may cause the driver to
lose control of the vehicle and could
result in serious vehicle damage or
personal injury.
ASD1015
DRINKING ALCOHOL/DRUGS
AND DRIVINGIGNITION SWITCH
5-4Starting and driving
ZX
Page 113 of 247
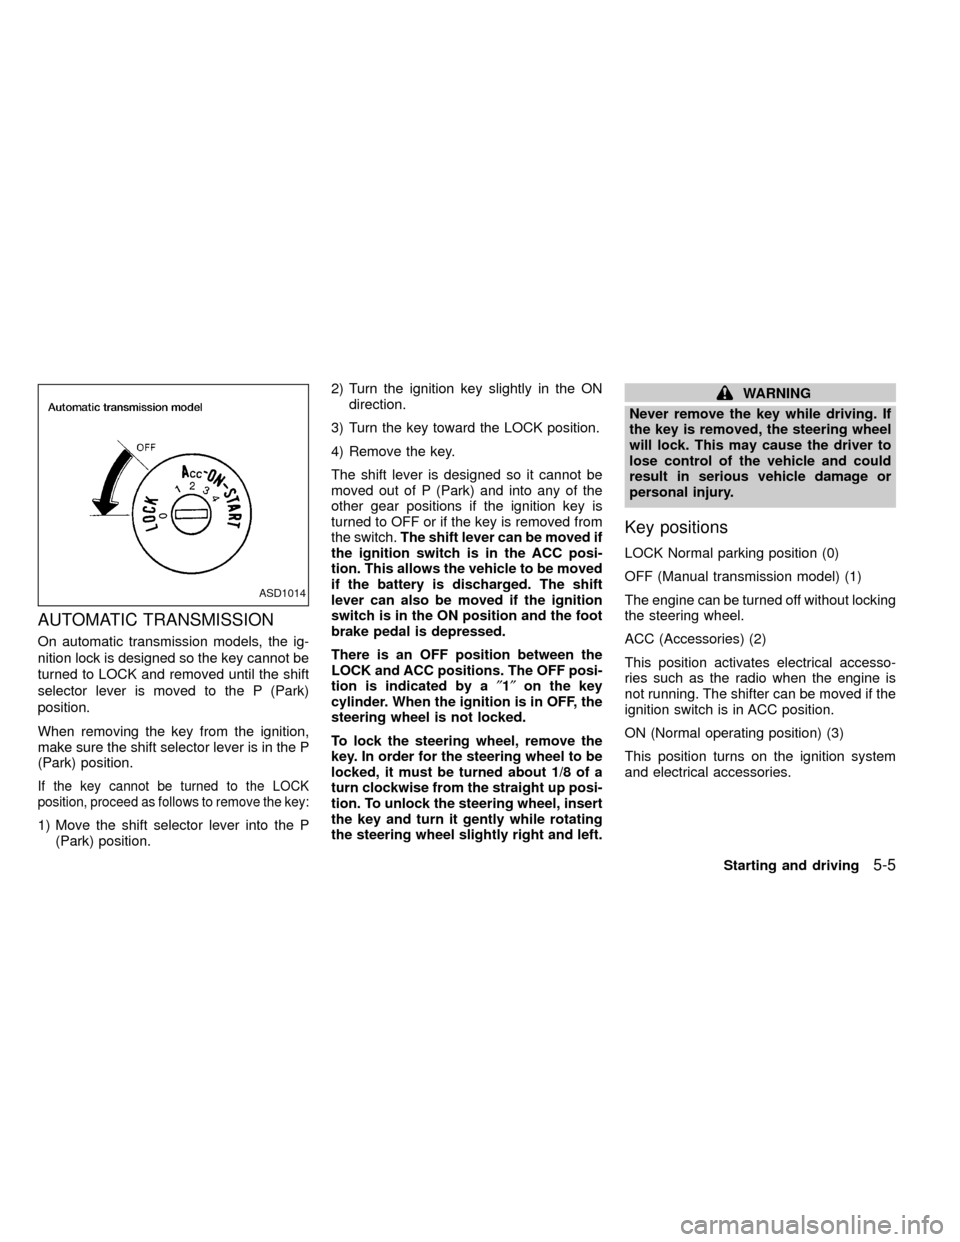
AUTOMATIC TRANSMISSION
On automatic transmission models, the ig-
nition lock is designed so the key cannot be
turned to LOCK and removed until the shift
selector lever is moved to the P (Park)
position.
When removing the key from the ignition,
make sure the shift selector lever is in the P
(Park) position.
If the key cannot be turned to the LOCK
position, proceed as follows to remove the key:
1) Move the shift selector lever into the P
(Park) position.2) Turn the ignition key slightly in the ON
direction.
3) Turn the key toward the LOCK position.
4) Remove the key.
The shift lever is designed so it cannot be
moved out of P (Park) and into any of the
other gear positions if the ignition key is
turned to OFF or if the key is removed from
the switch.The shift lever can be moved if
the ignition switch is in the ACC posi-
tion. This allows the vehicle to be moved
if the battery is discharged. The shift
lever can also be moved if the ignition
switch is in the ON position and the foot
brake pedal is depressed.
There is an OFF position between the
LOCK and ACC positions. The OFF posi-
tion is indicated by a²1²on the key
cylinder. When the ignition is in OFF, the
steering wheel is not locked.
To lock the steering wheel, remove the
key. In order for the steering wheel to be
locked, it must be turned about 1/8 of a
turn clockwise from the straight up posi-
tion. To unlock the steering wheel, insert
the key and turn it gently while rotating
the steering wheel slightly right and left.
WARNING
Never remove the key while driving. If
the key is removed, the steering wheel
will lock. This may cause the driver to
lose control of the vehicle and could
result in serious vehicle damage or
personal injury.
Key positions
LOCK Normal parking position (0)
OFF (Manual transmission model) (1)
The engine can be turned off without locking
the steering wheel.
ACC (Accessories) (2)
This position activates electrical accesso-
ries such as the radio when the engine is
not running. The shifter can be moved if the
ignition switch is in ACC position.
ON (Normal operating position) (3)
This position turns on the ignition system
and electrical accessories.
ASD1014
Starting and driving5-5
ZX
Page 116 of 247

selector lever into the P (Park) position.
Shifting from P (Park)
If the ignition switch is in the ON position
and the foot brake pedal is depressed, but
the shift lever still cannot be moved out of P
(Park), use the following procedure:
1. Shut the engine off and remove the key.
2. Apply the parking brake.
3. Reinsert the key and turn it clockwise to
the ACC position.
4. Depress the brake pedal, move the shift
selector lever to N (Neutral).
5. Start the engine.
These instructions for starting the vehicle in
N (Neutral) should only be used until service
can be obtained at an authorized NISSAN
dealership.
R (Reverse):
Use this position to back up. Shift into this
position only after the vehicle has com-
pletely stopped.N (Neutral):
Neither forward or reverse gear is engaged.
The engine can be started in this position.
You may shift to N (Neutral) and restart a
stalled engine while the vehicle is moving.
D (Drive):
Use this position for normal forward driving.
2 (Second gear):
Use for moderate uphill grades engine brak-
ing on downhill grades or starting on slip-
pery surfaces.
Do not downshift into the 2 position at speeds
above 62 MPH (100 km/h), and do not exceed
62 MPH (100 km/h) in the 2 position.
1 (Low gear):
Use this position for steep uphill grades,
driving slowly through deep snow, sand or
mud, or for maximum engine braking on
steep downhill grades.
Do not downshift into the 1 position at
speeds above 30 MPH (48 km/h), and do
not exceed 30 MPH (48 km/h) in the 1
position.
5-8Starting and driving
ZX
Page 143 of 247
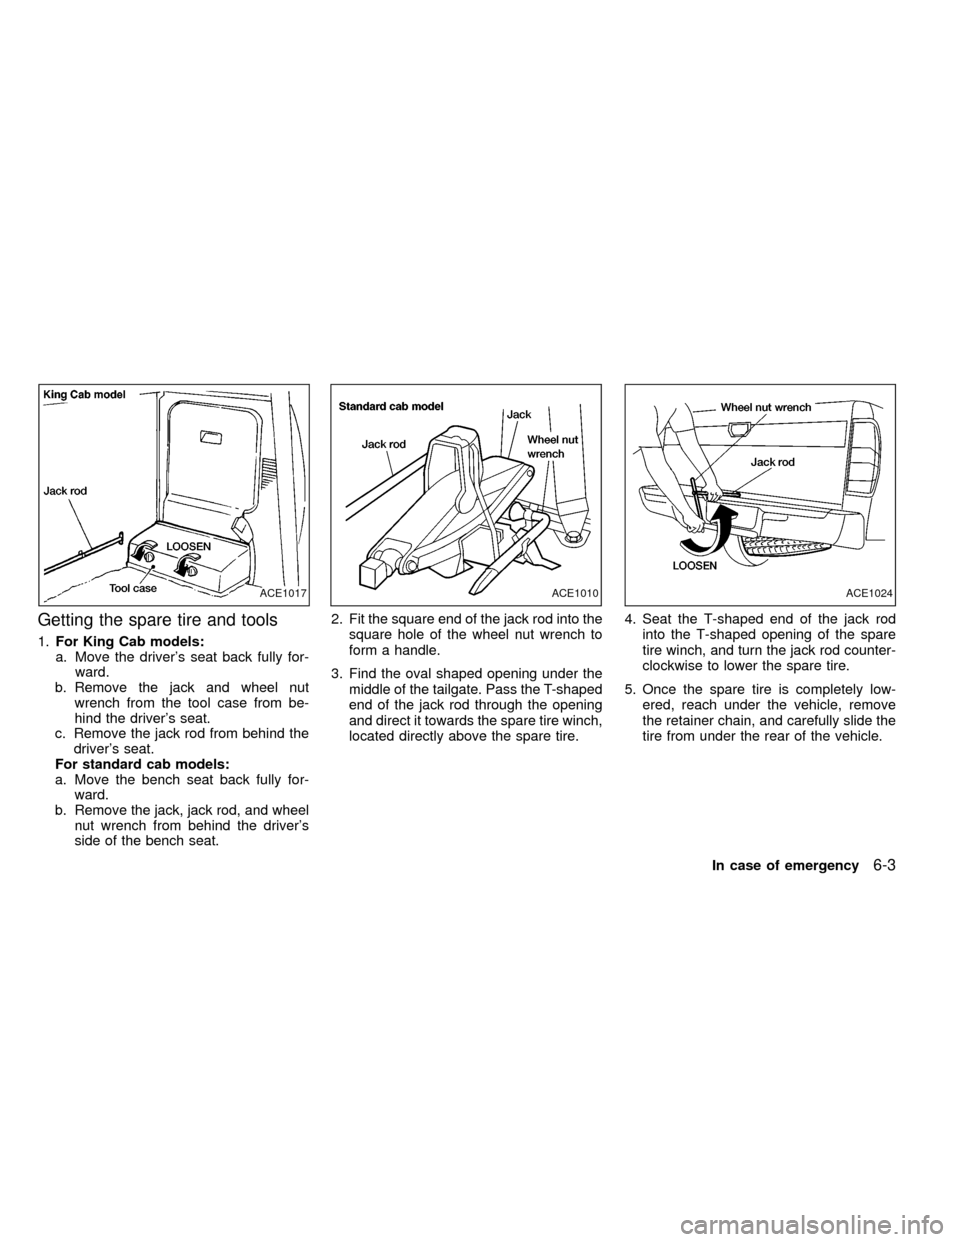
Getting the spare tire and tools
1.For King Cab models:
a. Move the driver's seat back fully for-
ward.
b. Remove the jack and wheel nut
wrench from the tool case from be-
hind the driver's seat.
c. Remove the jack rod from behind the
driver's seat.
For standard cab models:
a. Move the bench seat back fully for-
ward.
b. Remove the jack, jack rod, and wheel
nut wrench from behind the driver's
side of the bench seat.2. Fit the square end of the jack rod into the
square hole of the wheel nut wrench to
form a handle.
3. Find the oval shaped opening under the
middle of the tailgate. Pass the T-shaped
end of the jack rod through the opening
and direct it towards the spare tire winch,
located directly above the spare tire.4. Seat the T-shaped end of the jack rod
into the T-shaped opening of the spare
tire winch, and turn the jack rod counter-
clockwise to lower the spare tire.
5. Once the spare tire is completely low-
ered, reach under the vehicle, remove
the retainer chain, and carefully slide the
tire from under the rear of the vehicle.
ACE1017ACE1010ACE1024
In case of emergency6-3
ZX