1999 NISSAN ALTIMA start stop button
[x] Cancel search: start stop buttonPage 85 of 220

Ð Air flows from center and side
ventilators and foot outlets.
Ð Air flows mainly from foot outlets.
Ð Air flows from defroster outlets
and foot outlets.
Ð Air flows mainly from defroster
outlets.
Temperature control lever
This lever allows you to adjust the tempera-
ture of the outlet air.
Air recirculation button
Off position (Indicator light off):
Outside air is drawn into the passenger
compartment and distributed through the
selected outlet.
Use the off position for normal heater or air
conditioner operation.
On position (Indicator light on):
Interior air is recirculated inside the vehicle.
Push the
button to the on position
when:
cdriving on a dusty road.cto avoid traffic fumes.
cfor maximum cooling when using the air
conditioner
Air conditioner button
(if so equipped)
This button is provided only on vehicles
equipped with an air conditioner.
Start the engine, move the fan control dial to
the desired (1 to 4) position and push the
A/C button to turn on the air conditioner.
The indicator light comes on when the air
conditioner is operating. To stop the air
conditioner, push the switch again.
The air conditioner cooling function op-
erates only when the engine is running.
HEATER OPERATION
Heating
This mode is used to direct heated air to the
foot outlets. Some air also flows from the
defroster outlets.
1. Push the
button to the off position
for normal heating.
2. Push the
button in.3. Move the fan control dial to the desired
position.
4. Move the temperature control lever to the
desired position between the middle and
the HOT position.
Ventilation
This mode directs outside air to the side and
center ventilators.
1. Push the
button to the off position.
2. Push the
button in.
3. Move the fan control dial to the desired
position.
4. Move the temperature control lever to the
desired position.
Defrosting or defogging
This mode is used to defrost/defog the
windows.
1. Push the
button in.
2. Move the fan control dial to the desired
position.
3. Move the temperature control lever to the
desired position between the middle and
the HOT position.
4-4Heater, air conditioner and audio systems
ZX
Page 99 of 220

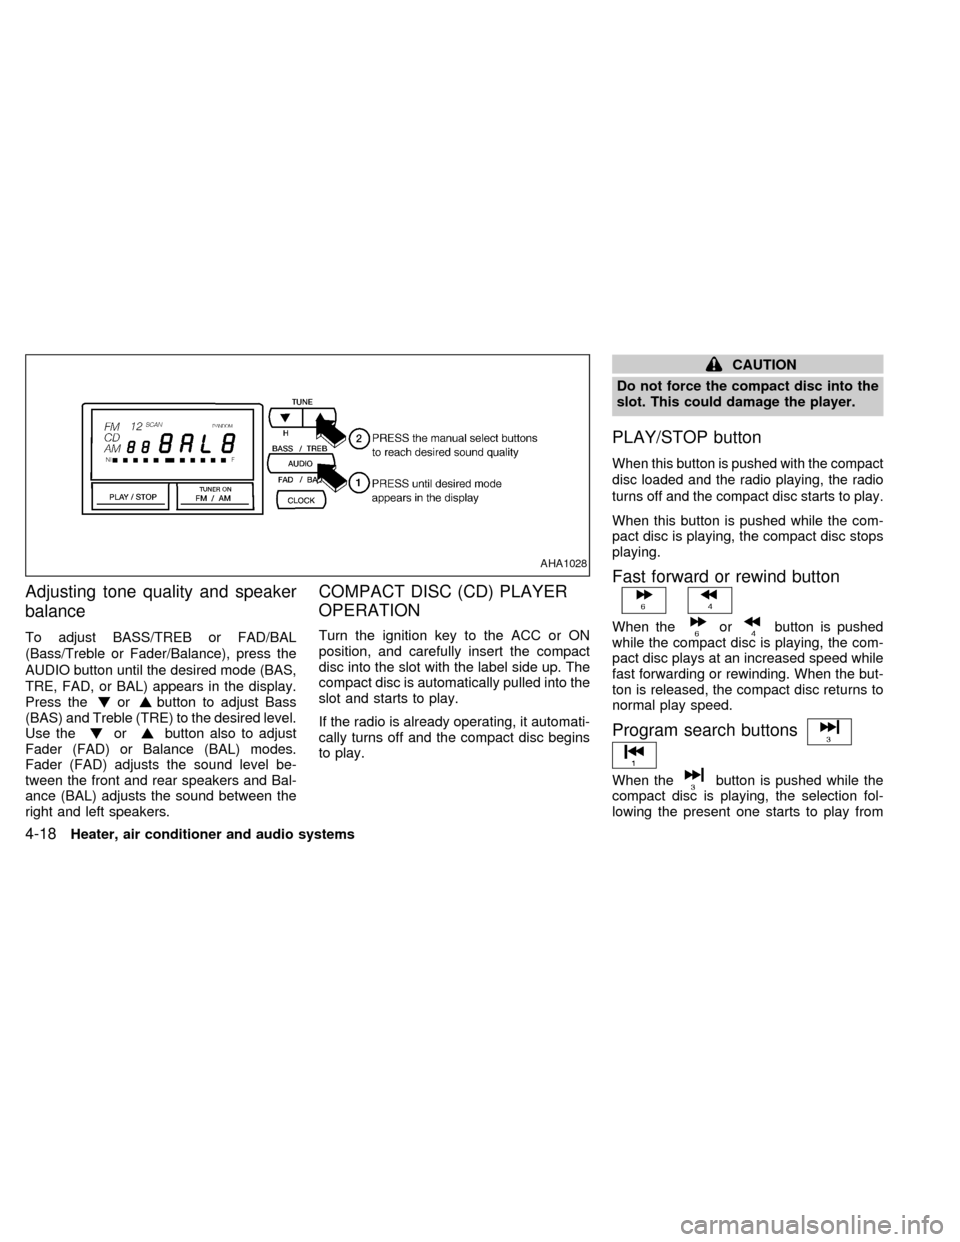
Adjusting tone quality and speaker
balance
To adjust BASS/TREB or FAD/BAL
(Bass/Treble or Fader/Balance), press the
AUDIO button until the desired mode (BAS,
TRE, FAD, or BAL) appears in the display.
Press the
orbutton to adjust Bass
(BAS) and Treble (TRE) to the desired level.
Use the
orbutton also to adjust
Fader (FAD) or Balance (BAL) modes.
Fader (FAD) adjusts the sound level be-
tween the front and rear speakers and Bal-
ance (BAL) adjusts the sound between the
right and left speakers.
COMPACT DISC (CD) PLAYER
OPERATION
Turn the ignition key to the ACC or ON
position, and carefully insert the compact
disc into the slot with the label side up. The
compact disc is automatically pulled into the
slot and starts to play.
If the radio is already operating, it automati-
cally turns off and the compact disc begins
to play.
CAUTION
Do not force the compact disc into the
slot. This could damage the player.
PLAY/STOP button
When this button is pushed with the compact
disc loaded and the radio playing, the radio
turns off and the compact disc starts to play.
When this button is pushed while the com-
pact disc is playing, the compact disc stops
playing.
Fast forward or rewind button
When theorbutton is pushed
while the compact disc is playing, the com-
pact disc plays at an increased speed while
fast forwarding or rewinding. When the but-
ton is released, the compact disc returns to
normal play speed.
Program search buttons
When thebutton is pushed while the
compact disc is playing, the selection fol-
lowing the present one starts to play from
AHA1028
4-18Heater, air conditioner and audio systems
ZX
Page 105 of 220

When thebutton is pushed with either
the radio or compact disc turned on and a
tape loaded, the compact disc or the radio
turns off and the tape plays.
FF (fast forward) and REW (rewind)
buttons
Push thebutton to fast forward the
tape. Push the
button to rewind the
tape. Either REW or FF illuminates in the
display. To stop the FF or REW function,
press the
,,orbuttons.
Automatic Program Search (APS)
FF and REW buttons
When thebutton is pushed while the
tape is being played, the tape runs quickly,
stops, then plays the next selection from the
beginning. Push the
button several
times to skip several selections. Each time
the button is pushed, the tape fast forwards
one additional selection. This number ap-
pears in the display window. The tape can
be fast forwarded through up to nine selec-
tions. (for example: 7 in the display indi-
cates that the
button has been pushedseven times to skip forward through seven
selections).
When thebutton is pushed, the selec-
tion being played starts again from the be-
ginning. Push the
button several times
to rewind several selections. Each time the
button is pushed, the tape rewinds
back one additional selection. The number
of selections skipped appears in the display
window as a negative number (for example:
27 in the display indicates that the
but-
ton has been pushed seven times to rewind
back through seven selections).
Either the FF or REW blinks in the display
when the
orbutton is pushed.
The system searches for the blank intervals
between selections. If there is a blank inter-
val within one selection or there is no inter-
val between selections, the system may not
stop in the desired or expected location.
PROG (Program) button
Push thebutton to change the tape
side while the tape is being played.
The cassette tape automatically changes
directions to play the other side when the
first side is complete.
Dolby NR (noise reduction)
Push thebutton for Dolby NR encoded
tapes to reduce high frequency tape noise.
The
indicator illuminates in the display.
Dolby NR is manufactured under license
from Dolby Laboratories Licensing Corpora-
tion. DOLBY NR and the double-D symbol
are trademarks of Dolby Laboratories Li-
censing Corporation.
Metal or chrome tape usage
The cassette player is automatically set to
high performance play when playing a metal
or chrome cassette tape.
TAPE EJECT button
Push thebutton to eject the cassette
tape.
Precautions on cassette player op-
eration
cTo maintain good quality sound,
NISSAN recommends using cassette
tapes of 60 minutes or shorter in
length.
4-24Heater, air conditioner and audio systems
ZX
Page 116 of 220

The selector lever cannot be moved out
of P (Park) and into any of the other gear
positions if the ignition key is turned to
LOCK or if the key is removed.
The shift selector lever can be moved if
the ignition switch is in the ACC posi-
tion. This allows the vehicle to be moved
if the battery is discharged.
Shifting with automatic transmission
Push the button to shift into P (Park), R
(Reverse) or from D (Drive) to 2. All other
positions can be selected without pushing
the button.
P (Park):
Use this position when the vehicle is parked
or when starting the engine. Always be sure
the vehicle is at a complete stop. For maxi-
mum safety, depress the brake pedal, then
push in the selector lever button and move
the shift selector lever to the P (Park) posi-
tion. Apply the parking brake. When parkingon a hill, apply the parking brake first, then
move the shift selector lever into the P
(Park) position.
Shifting from P (Park)
If the ignition switch is in the ON position
and the foot brake pedal is depressed, but
the shift selector lever still cannot be moved
out of P (Park), follow these instructions.
1. Turn the ignition key to the lock position
and remove the key.
2. Apply the parking brake.
ASD0510
Starting and driving5-7
ZX
Page 117 of 220

3. Remove the key and turn it to the ACC
position.
4. Depress the foot brake pedal, and move
the selector lever to N (Neutral).
5. Start the engine.
These instructions for starting the vehicle in
N (Neutral) should only be used until service
can be obtained at an authorized NISSAN
dealership. Never drive the vehicle if the
stop lights are not operating properly.
R (Reverse):
Use this position to back up. Always be sure
the vehicle is at a complete stop before
moving the shift selector lever to the R
(Reverse) position. Check to ensure the
area behind the vehicle is clear. With the
brake pedal depressed, push in the selector
lever button and move the shift selector
lever to the R (Reverse) position.
N (Neutral):
Neither forward nor reverse gear is en-
gaged. The engine can be started in this
position. You may shift to N (Neutral) and
restart a stalled engine while the vehicle is
moving.D (Drive):
Use this position for all normal forward
driving.
2 (Second gear):
Use this position for hill climbing or engine
braking on downhill grades.
Do not shift into the 2 position at speeds
above 74 MPH (118 Km/h). Do not exceed
74 MPH (118 Km/h) in the 2 position.
1 (Low gear):
Use this position when climbing steep hills
slowly or slow driving through deep snow,
sand or mud, or for maximum engine brak-
ing on steep downhill grades.
Do not shift into the 1 position at speeds
above 41 MPH (66 km/h). Do not exceed 41
MPH (66 km/h) in the 1 position.
ASD1018
5-8Starting and driving
ZX
Page 121 of 220

to help start the engine.
Ð In the summer, when restarting the
engine within 30 minutes after it has
been stopped, keep the accelerator
pedal fully depressed while starting.
CAUTION
Do not operate the starter for more than
15 seconds at a time. If the engine does
not
start, turn the key off and wait 10
seconds before cranking again, other-
wise the starter could be damaged.
4.Warm-up
Allow the engine to idle for at least 30
seconds after starting. Drive at moderate
speed for a short distance first, especially
in cold weather.
WARNING
cBe sure the parking brake is fully
released before driving. Failure to do
so can cause brake failure and lead
to an accident.
cDo not release the parking brake
from outside the vehicle.
cDo not use the gear shift in place of
the parking brake. When parking, be
sure the parking brake is fully en-
gaged.
c
Do not leave children unattended in a
vehicle. They could release the park-
ing brake and cause an accident.
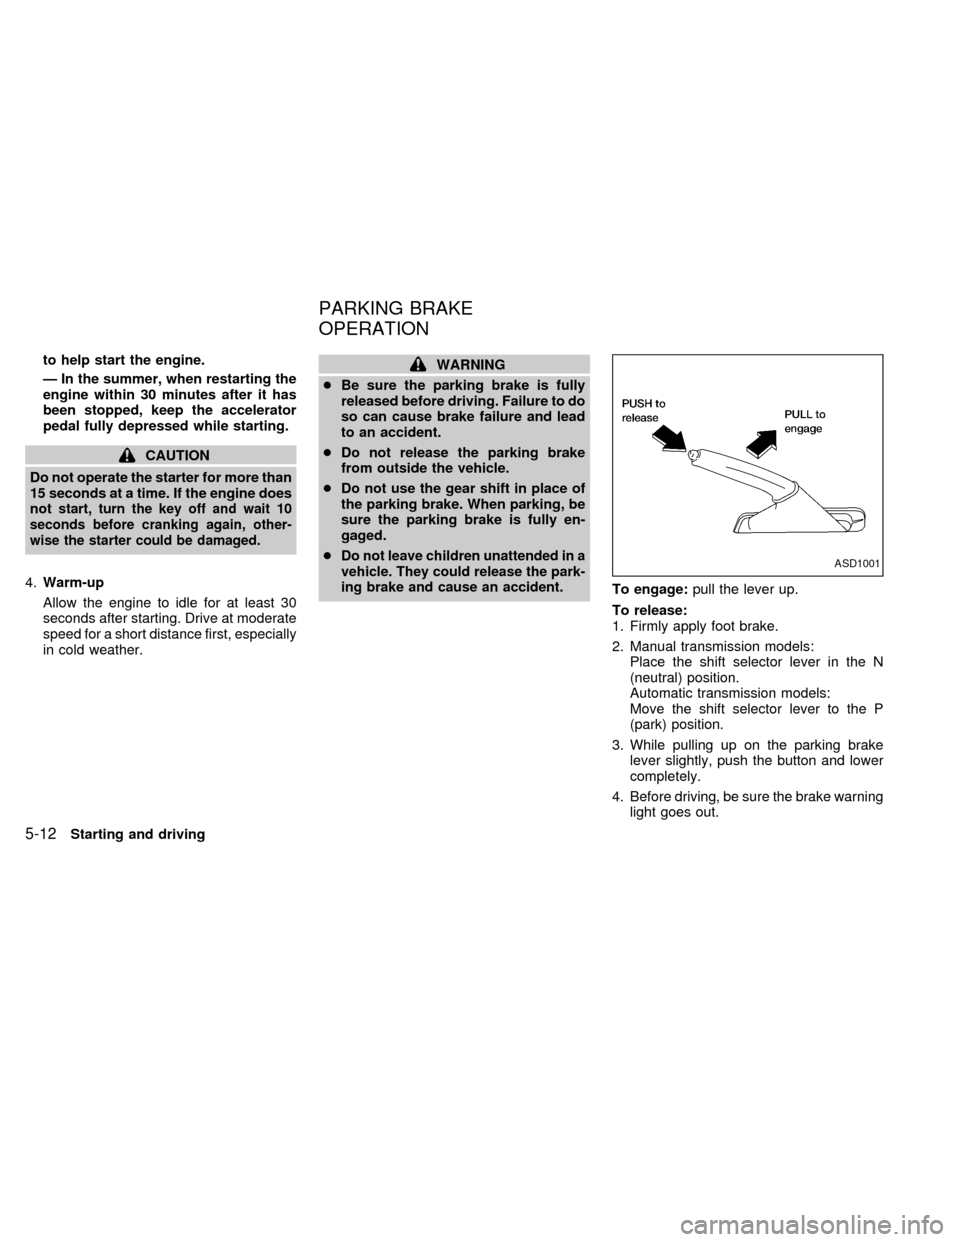
To engage:pull the lever up.
To release:
1. Firmly apply foot brake.
2. Manual transmission models:
Place the shift selector lever in the N
(neutral) position.
Automatic transmission models:
Move the shift selector lever to the P
(park) position.
3. While pulling up on the parking brake
lever slightly, push the button and lower
completely.
4. Before driving, be sure the brake warning
light goes out.
ASD1001
PARKING BRAKE
OPERATION
5-12Starting and driving
ZX