Page 39 of 220
3. Pull on the shoulder belt until all of the
belt is fully extended. At this time, the belt
retractor is in the automatic locking mode
(child restraint mode). It reverts back to
emergency locking mode when the belt is
fully retracted.4. Allow the belt to retract. Pull up on the
belt to remove any slack in the belt.5. Before placing the child in the child re-
straint, use force to tilt the child restraint
from side to side, and tug it forward to
make sure it is securely held in place.
6.
Check that the retractor is in the automatic
locking mode by trying to pull more belt
out of the retractor. If you cannot pull any
more belt webbing out of the retractor, the
belt is in the automatic locking mode.
7.Check to make sure the child restraint is
properly secured prior to each use. If the
belt is not locked, repeat steps 3 through 6.
After the child restraint is removed and the
ARS1033ARS1071ARS1072
1-32Seats, restraints and supplemental air bag systems
ZX
Page 40 of 220

seat belt is fully retracted, the automatic
locking mode (child restraint mode) is can-
celed.
TOP STRAP CHILD RESTRAINT
If your child restraint has a top strap, it must
be secured to the provided anchor point.
Anchor bracket hardware must be installed.
The top strap anchor bracket hardware is
available through an authorized NISSAN
dealer.
U.S. Part #88894-89900
Canadian Part #88894-89902
Secure the child restraint with the center lap
belt or the lap portion of an outboard Three-
point belt and latch the top strap hook onto
the appropriate anchor bracket. To installthe anchor bracket, a metric bolt of the
dimensions listed below must be used:
Bolt diameter: 8.0 mm
Bolt length: at least 1.18 in (30 mm)
Thread pitch: 1.25 mm
Secure the top strap to the attaching bolt
which provides the straightest installation of
the top strap.
WARNING
Child restraint anchor points are de-
signed to withstand only those loads
imposed by correctly fitted child re-
straints. Under no circumstances are
they to be used for adult seat belts or
harnesses.
ARS1015
Seats, restraints and supplemental air bag systems1-33
ZX
Page 41 of 220
Anchor point locations
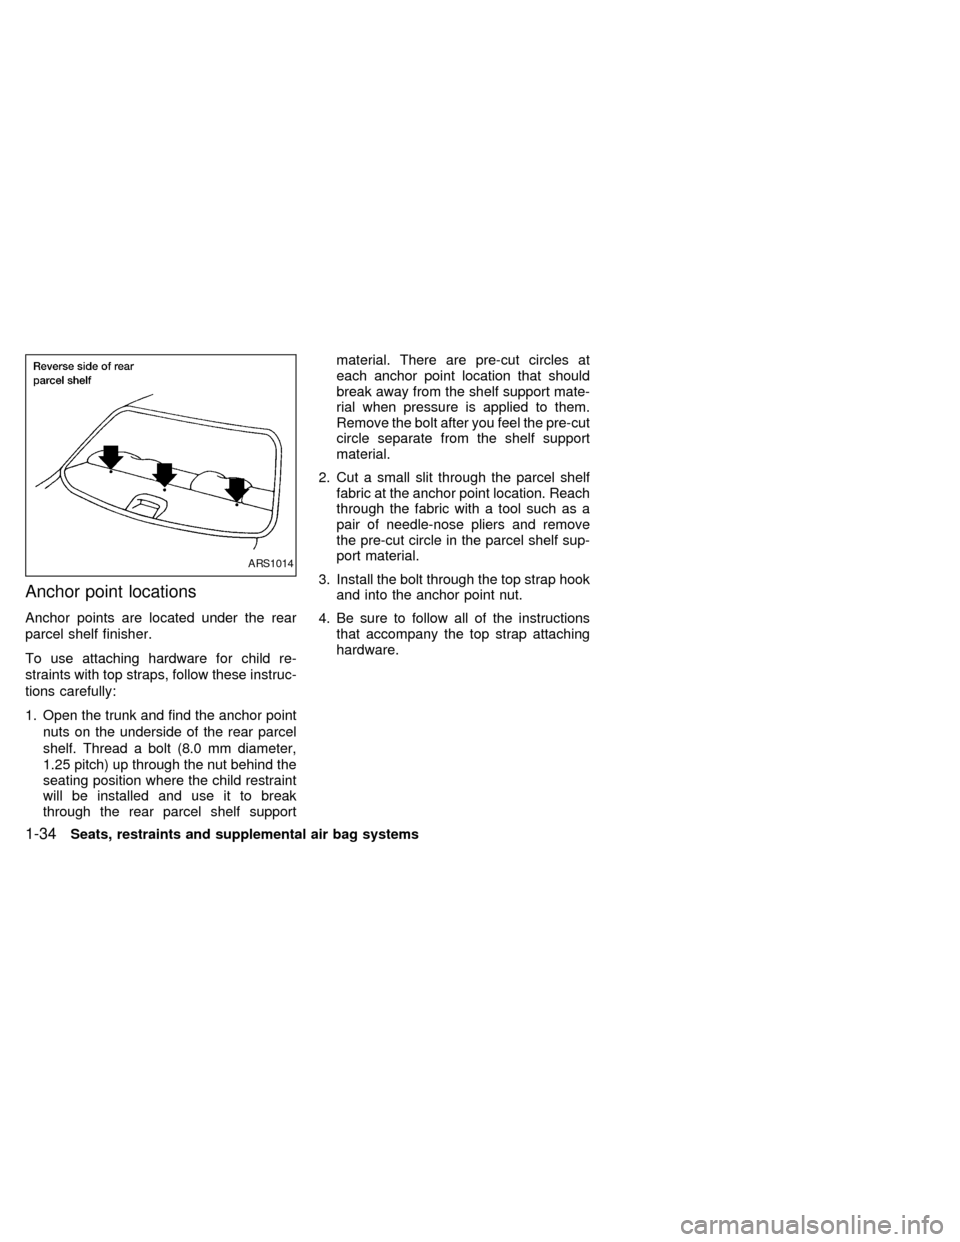
Anchor points are located under the rear
parcel shelf finisher.
To use attaching hardware for child re-
straints with top straps, follow these instruc-
tions carefully:
1. Open the trunk and find the anchor point
nuts on the underside of the rear parcel
shelf. Thread a bolt (8.0 mm diameter,
1.25 pitch) up through the nut behind the
seating position where the child restraint
will be installed and use it to break
through the rear parcel shelf supportmaterial. There are pre-cut circles at
each anchor point location that should
break away from the shelf support mate-
rial when pressure is applied to them.
Remove the bolt after you feel the pre-cut
circle separate from the shelf support
material.
2. Cut a small slit through the parcel shelf
fabric at the anchor point location. Reach
through the fabric with a tool such as a
pair of needle-nose pliers and remove
the pre-cut circle in the parcel shelf sup-
port material.
3. Install the bolt through the top strap hook
and into the anchor point nut.
4. Be sure to follow all of the instructions
that accompany the top strap attaching
hardware.
ARS1014
1-34Seats, restraints and supplemental air bag systems
ZX
Page 42 of 220
Installation on front passenger seat
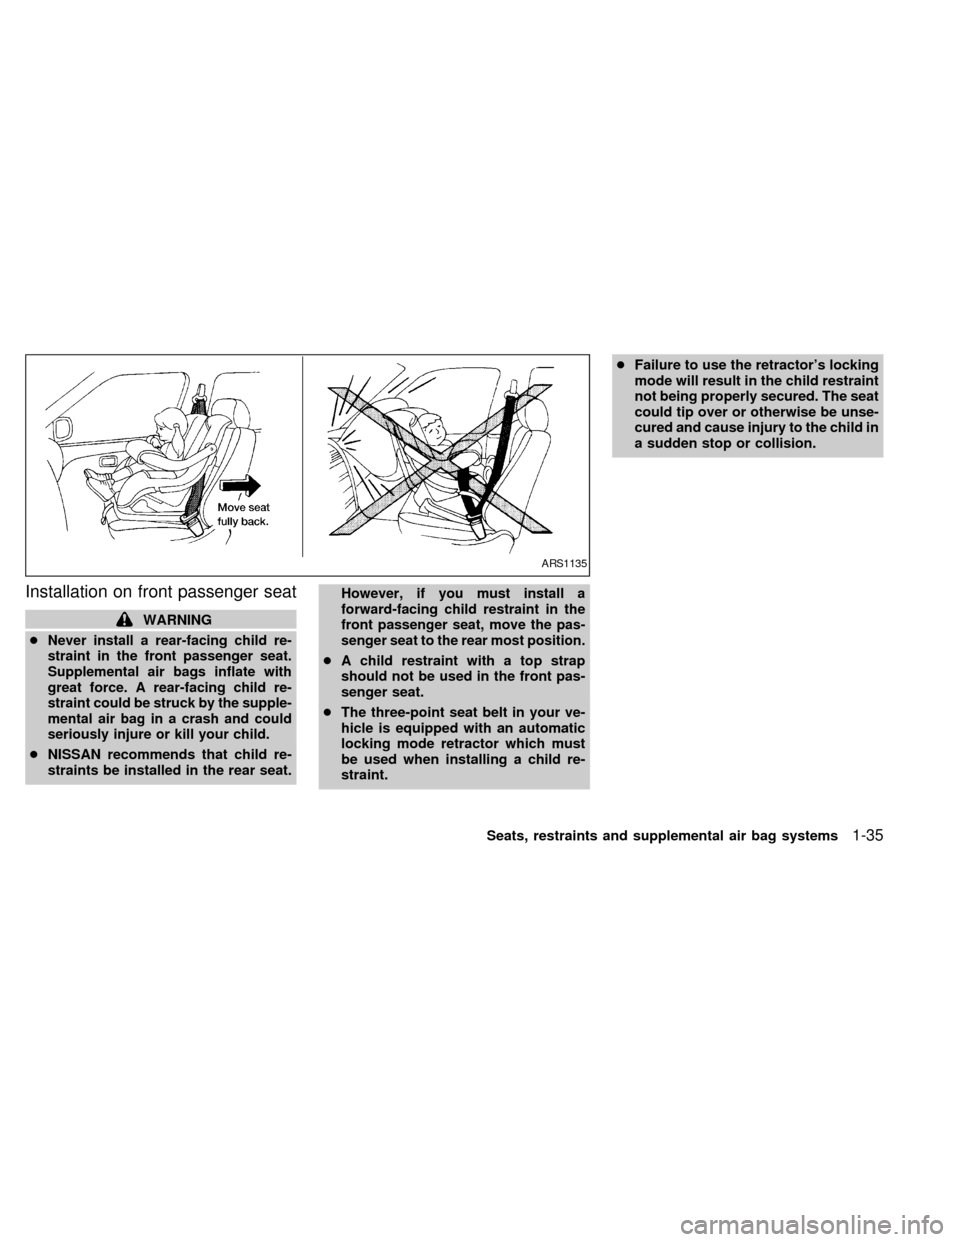
WARNING
c
Never install a rear-facing child re-
straint in the front passenger seat.
Supplemental air bags inflate with
great force. A rear-facing child re-
straint could be struck by the supple-
mental air bag in a crash and could
seriously injure or kill your child.
cNISSAN recommends that child re-
straints be installed in the rear seat.
However, if you must install a
forward-facing child restraint in the
front passenger seat, move the pas-
senger seat to the rear most position.
cA child restraint with a top strap
should not be used in the front pas-
senger seat.
cThe three-point seat belt in your ve-
hicle is equipped with an automatic
locking mode retractor which must
be used when installing a child re-
straint.cFailure to use the retractor's locking
mode will result in the child restraint
not being properly secured. The seat
could tip over or otherwise be unse-
cured and cause injury to the child in
a sudden stop or collision.
ARS1135
Seats, restraints and supplemental air bag systems1-35
ZX
Page 43 of 220
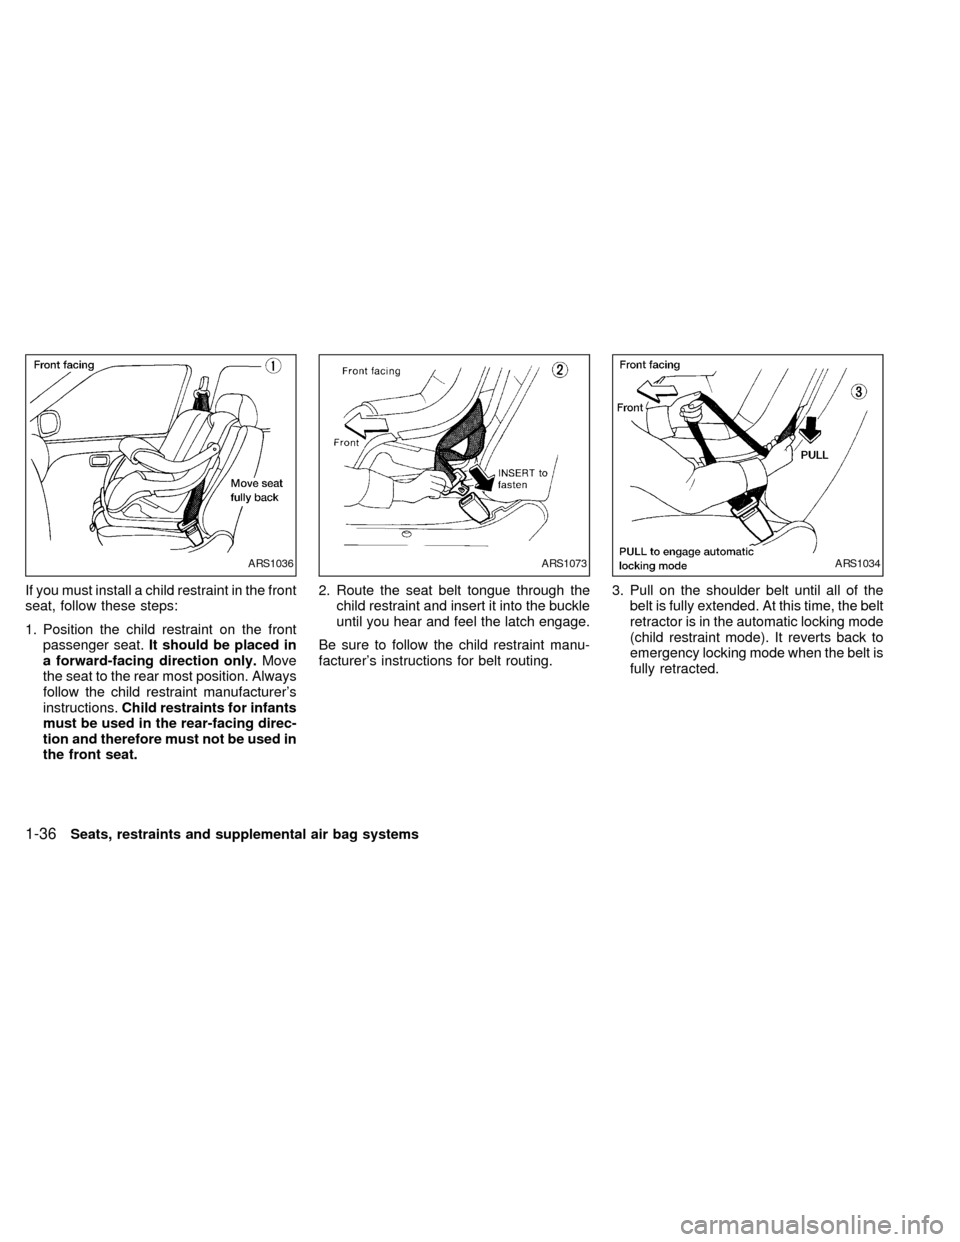
If you must install a child restraint in the front
seat, follow these steps:
1. Position the child restraint on the front
passenger seat.It should be placed in
a forward-facing direction only.Move
the seat to the rear most position. Always
follow the child restraint manufacturer's
instructions.Child restraints for infants
must be used in the rear-facing direc-
tion and therefore must not be used in
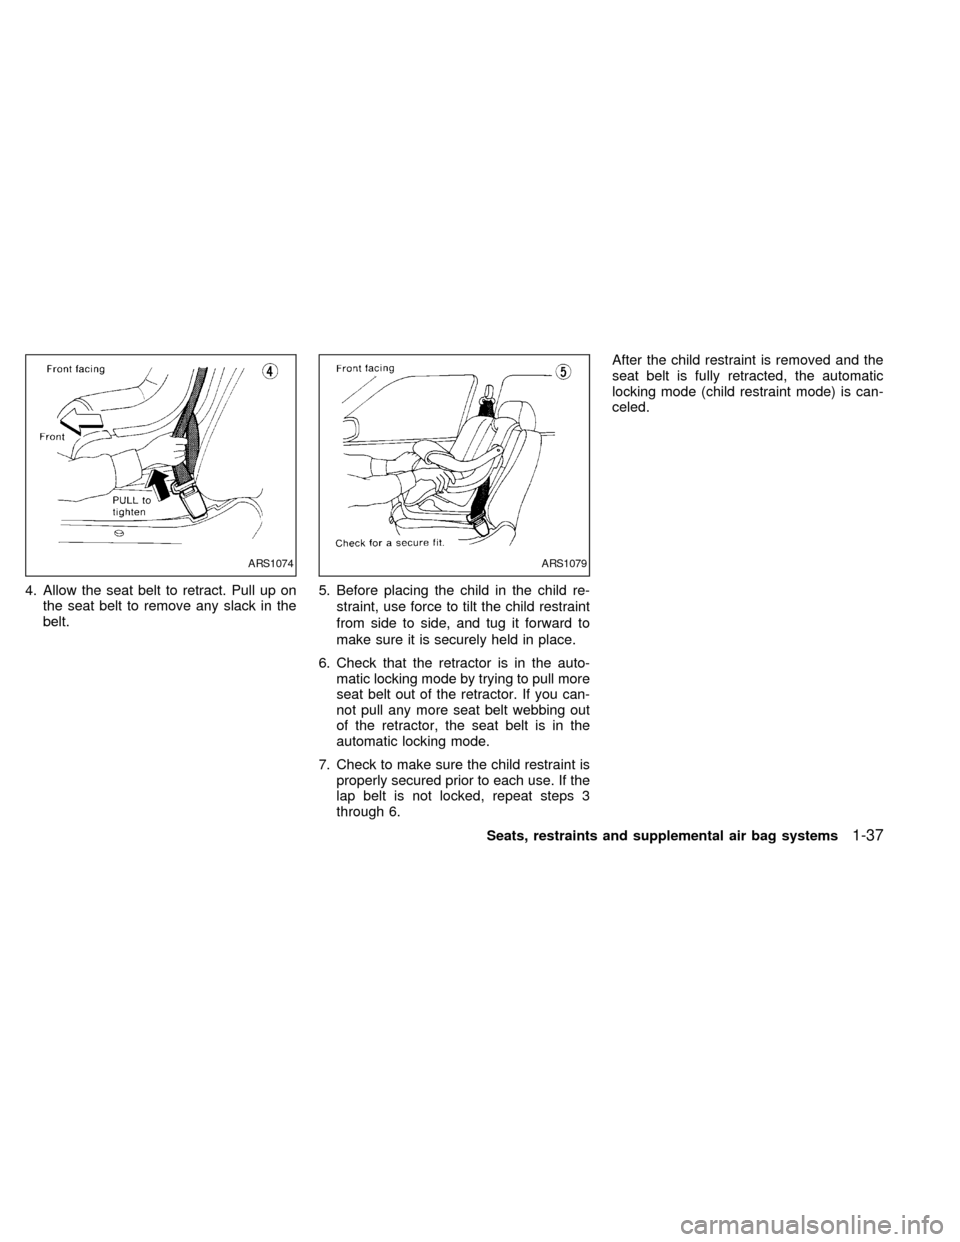
the front seat.2. Route the seat belt tongue through the
child restraint and insert it into the buckle
until you hear and feel the latch engage.
Be sure to follow the child restraint manu-
facturer's instructions for belt routing.3. Pull on the shoulder belt until all of the
belt is fully extended. At this time, the belt
retractor is in the automatic locking mode
(child restraint mode). It reverts back to
emergency locking mode when the belt is
fully retracted.
ARS1036ARS1073ARS1034
1-36Seats, restraints and supplemental air bag systems
ZX
Page 44 of 220
4. Allow the seat belt to retract. Pull up on
the seat belt to remove any slack in the
belt.5. Before placing the child in the child re-
straint, use force to tilt the child restraint
from side to side, and tug it forward to
make sure it is securely held in place.
6. Check that the retractor is in the auto-
matic locking mode by trying to pull more
seat belt out of the retractor. If you can-
not pull any more seat belt webbing out
of the retractor, the seat belt is in the
automatic locking mode.
7. Check to make sure the child restraint is
properly secured prior to each use. If the
lap belt is not locked, repeat steps 3
through 6.After the child restraint is removed and the
seat belt is fully retracted, the automatic
locking mode (child restraint mode) is can-
celed.
ARS1074ARS1079
Seats, restraints and supplemental air bag systems1-37
ZX
Page 63 of 220
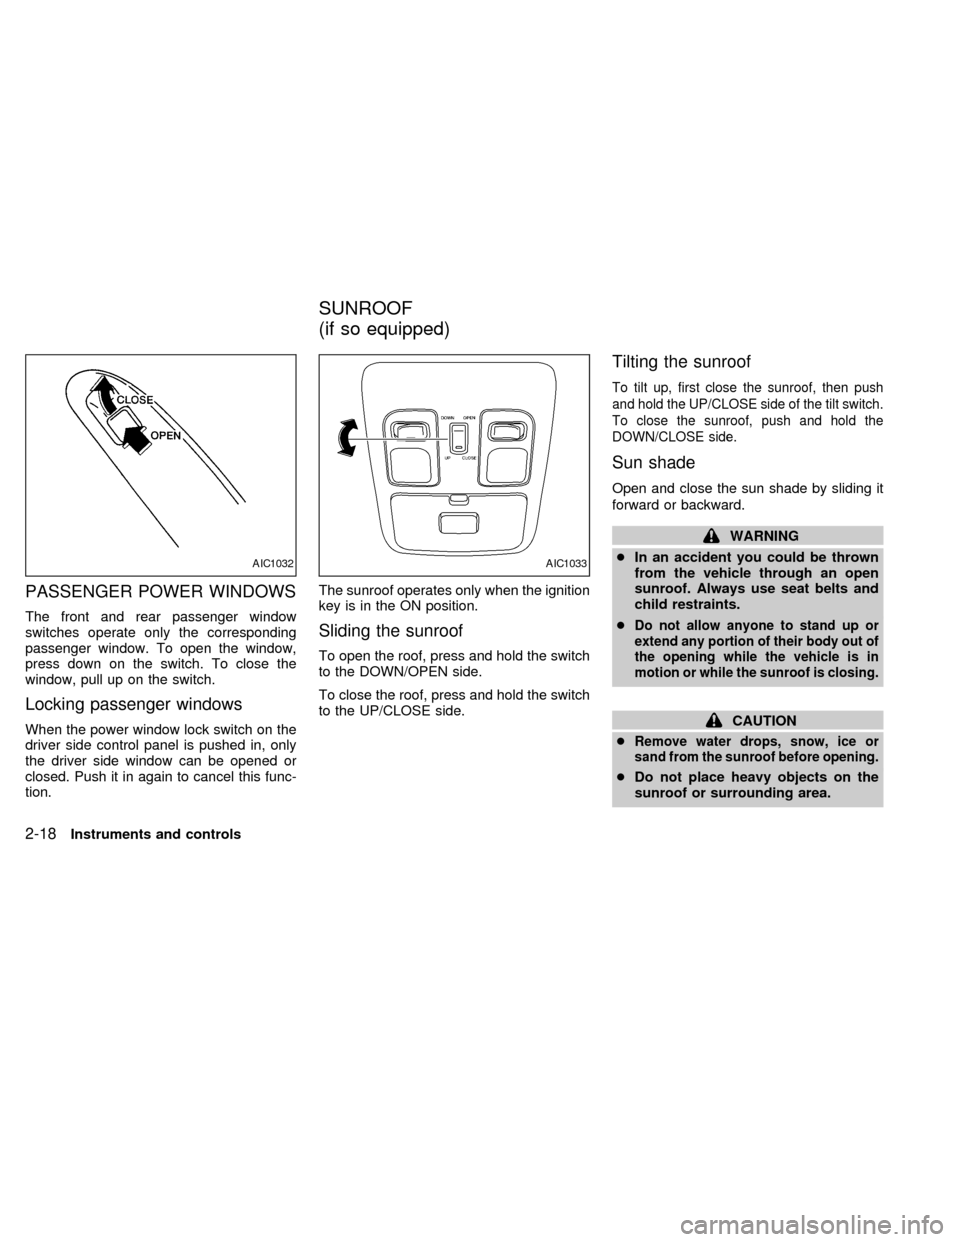
PASSENGER POWER WINDOWS
The front and rear passenger window
switches operate only the corresponding
passenger window. To open the window,
press down on the switch. To close the
window, pull up on the switch.
Locking passenger windows
When the power window lock switch on the
driver side control panel is pushed in, only
the driver side window can be opened or
closed. Push it in again to cancel this func-
tion.The sunroof operates only when the ignition
key is in the ON position.
Sliding the sunroof
To open the roof, press and hold the switch
to the DOWN/OPEN side.
To close the roof, press and hold the switch
to the UP/CLOSE side.
Tilting the sunroof
To tilt up, first close the sunroof, then push
and hold the UP/CLOSE side of the tilt switch.
To close the sunroof, push and hold the
DOWN/CLOSE side.
Sun shade
Open and close the sun shade by sliding it
forward or backward.
WARNING
cIn an accident you could be thrown
from the vehicle through an open
sunroof. Always use seat belts and
child restraints.
c
Do not allow anyone to stand up or
extend any portion of their body out of
the opening while the vehicle is in
motion or while the sunroof is closing.
CAUTION
c
Remove water drops, snow, ice or
sand from the sunroof before opening.
cDo not place heavy objects on the
sunroof or surrounding area.
AIC1032AIC1033
SUNROOF
(if so equipped)
2-18Instruments and controls
ZX
Page 69 of 220
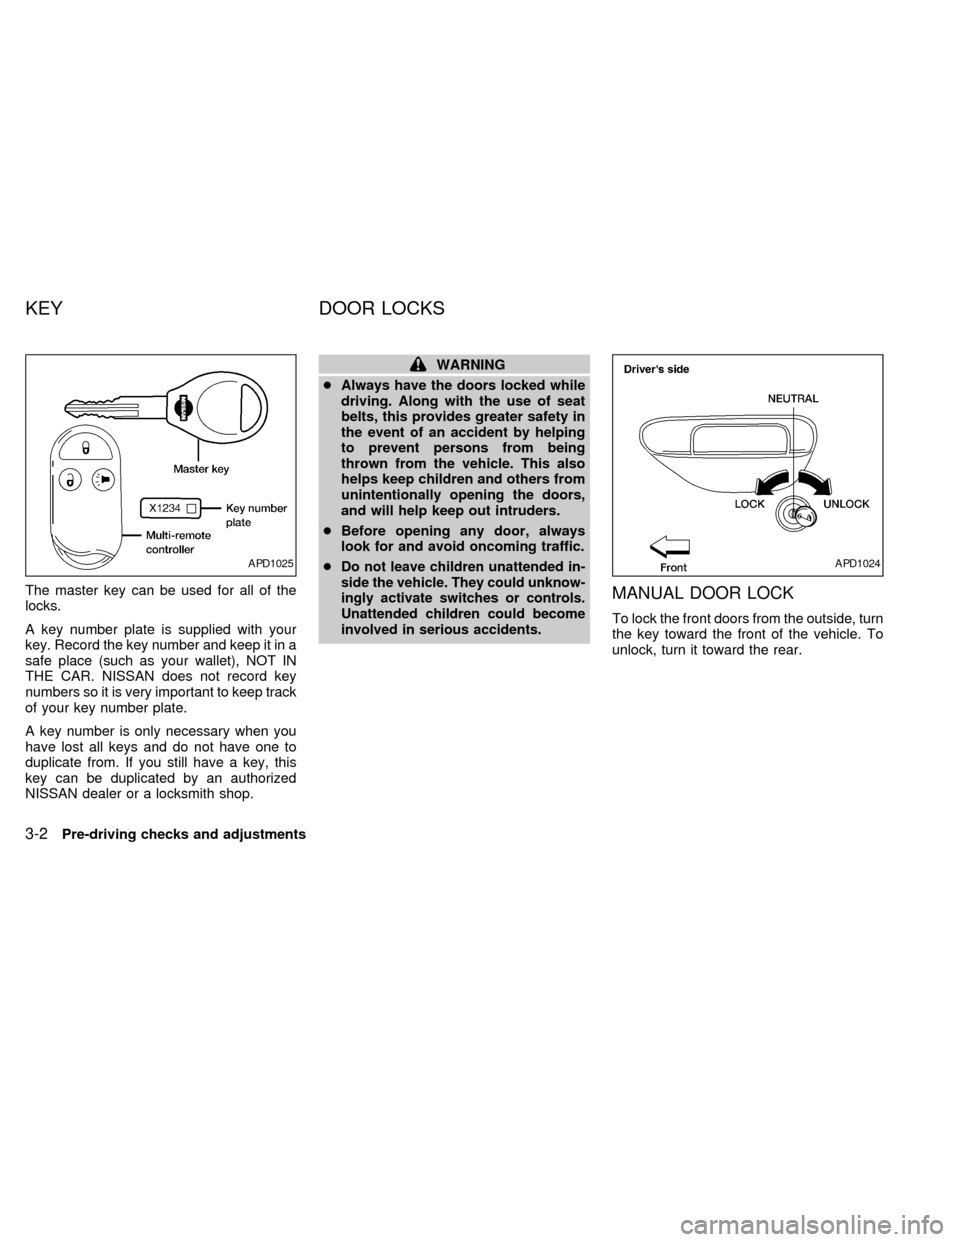
The master key can be used for all of the
locks.
A key number plate is supplied with your
key. Record the key number and keep it in a
safe place (such as your wallet), NOT IN
THE CAR. NISSAN does not record key
numbers so it is very important to keep track
of your key number plate.
A key number is only necessary when you
have lost all keys and do not have one to
duplicate from. If you still have a key, this
key can be duplicated by an authorized
NISSAN dealer or a locksmith shop.
WARNING
cAlways have the doors locked while
driving. Along with the use of seat
belts, this provides greater safety in
the event of an accident by helping
to prevent persons from being
thrown from the vehicle. This also
helps keep children and others from
unintentionally opening the doors,
and will help keep out intruders.
cBefore opening any door, always
look for and avoid oncoming traffic.
c
Do not leave children unattended in-
side the vehicle. They could unknow-
ingly activate switches or controls.
Unattended children could become
involved in serious accidents.
MANUAL DOOR LOCK
To lock the front doors from the outside, turn
the key toward the front of the vehicle. To
unlock, turn it toward the rear.
APD1025APD1024
KEY DOOR LOCKS
3-2Pre-driving checks and adjustments
ZX