1999 NISSAN ALTIMA flat tire
[x] Cancel search: flat tirePage 172 of 220

a. Keep all of the tires inflated to the correct
pressure.
b. Place the vehicle on level ground.
c. See that the vehicle is unloaded (except
for full levels of coolant, engine oil and
fuel, and spare tire, jack, and tools).
Have the driver or an equivalent weight
placed in the driver's seat.
Low beam
1. Open the hood.
2. Adjust the vertical aim by turning the
adjusting screw with a Phillips screw-
driver.
3. Adjust the horizontal aim by turning the
adjusting screw with a Phillips screw-
driver.
ADJUSTMENT AFTER
HEADLIGHT ASSEMBLY
REPLACEMENT
If the vehicle front body has been repaired
and/or the headlight assembly has been
replaced, check aiming. Use the aiming
chart shown in the illustration.
cUpper edge and left edge of high in-
tensity zone should be within the
range shown at left. Adjust headlights
accordingly.
cDotted lines in the illustration show
center of headlights.
``H'' : Horizontial center line of headlights
``W
L'': Distance between each headlight
center
ADI1039
Do-it-yourself8-23
ZX
Page 177 of 220
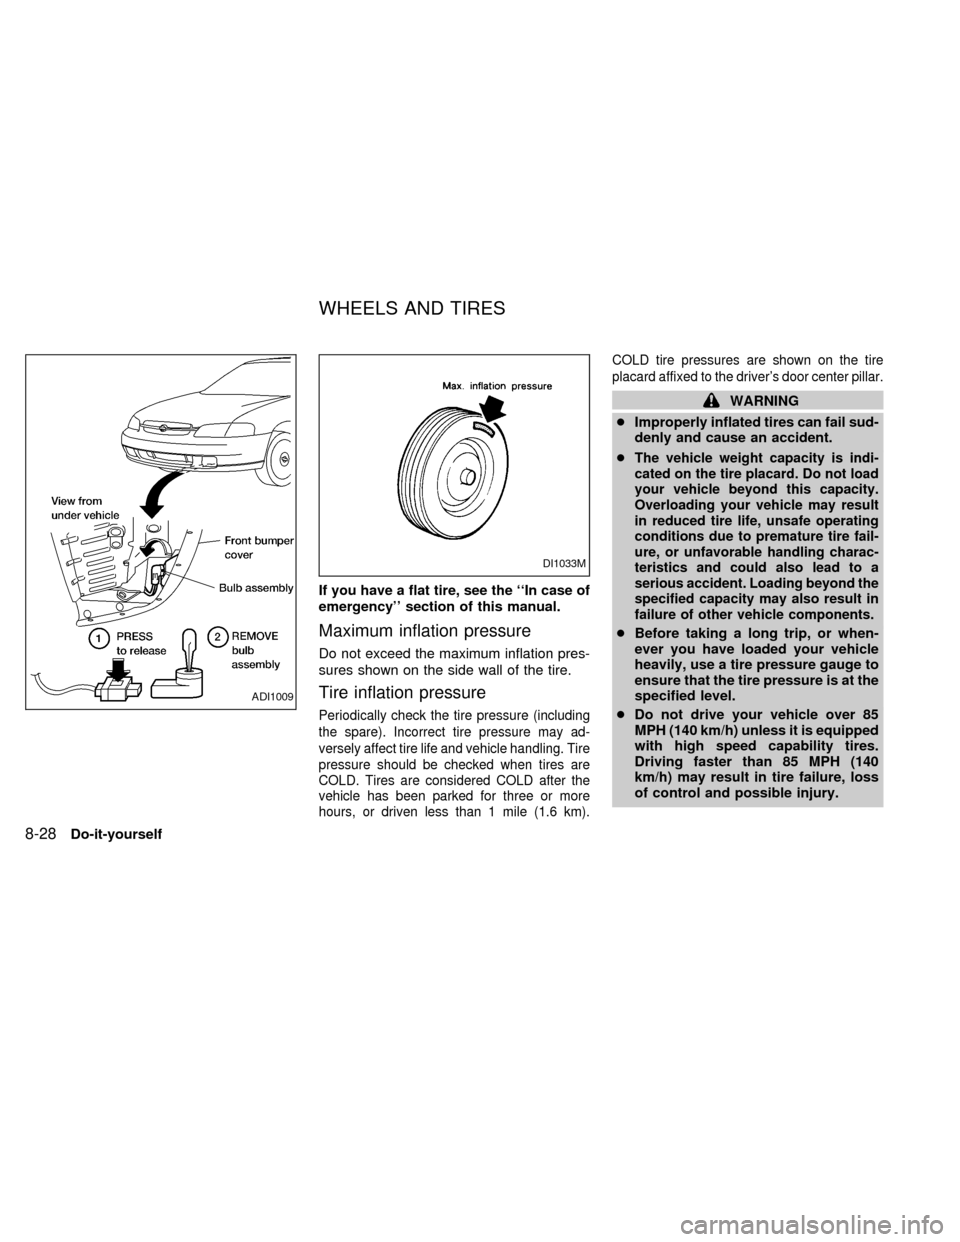
If you have a flat tire, see the ``In case of
emergency'' section of this manual.
Maximum inflation pressure
Do not exceed the maximum inflation pres-
sures shown on the side wall of the tire.
Tire inflation pressure
Periodically check the tire pressure (including
the spare). Incorrect tire pressure may ad-
versely affect tire life and vehicle handling. Tire
pressure should be checked when tires are
COLD. Tires are considered COLD after the
vehicle has been parked for three or more
hours, or driven less than 1 mile (1.6 km).COLD tire pressures are shown on the tire
placard affixed to the driver's door center pillar.
WARNING
cImproperly inflated tires can fail sud-
denly and cause an accident.
c
The vehicle weight capacity is indi-
cated on the tire placard. Do not load
your vehicle beyond this capacity.
Overloading your vehicle may result
in reduced tire life, unsafe operating
conditions due to premature tire fail-
ure, or unfavorable handling charac-
teristics and could also lead to a
serious accident. Loading beyond the
specified capacity may also result in
failure of other vehicle components.
cBefore taking a long trip, or when-
ever you have loaded your vehicle
heavily, use a tire pressure gauge to
ensure that the tire pressure is at the
specified level.
cDo not drive your vehicle over 85
MPH (140 km/h) unless it is equipped
with high speed capability tires.
Driving faster than 85 MPH (140
km/h) may result in tire failure, loss
of control and possible injury.
ADI1009
DI1033M
WHEELS AND TIRES
8-28Do-it-yourself
ZX
Page 179 of 220
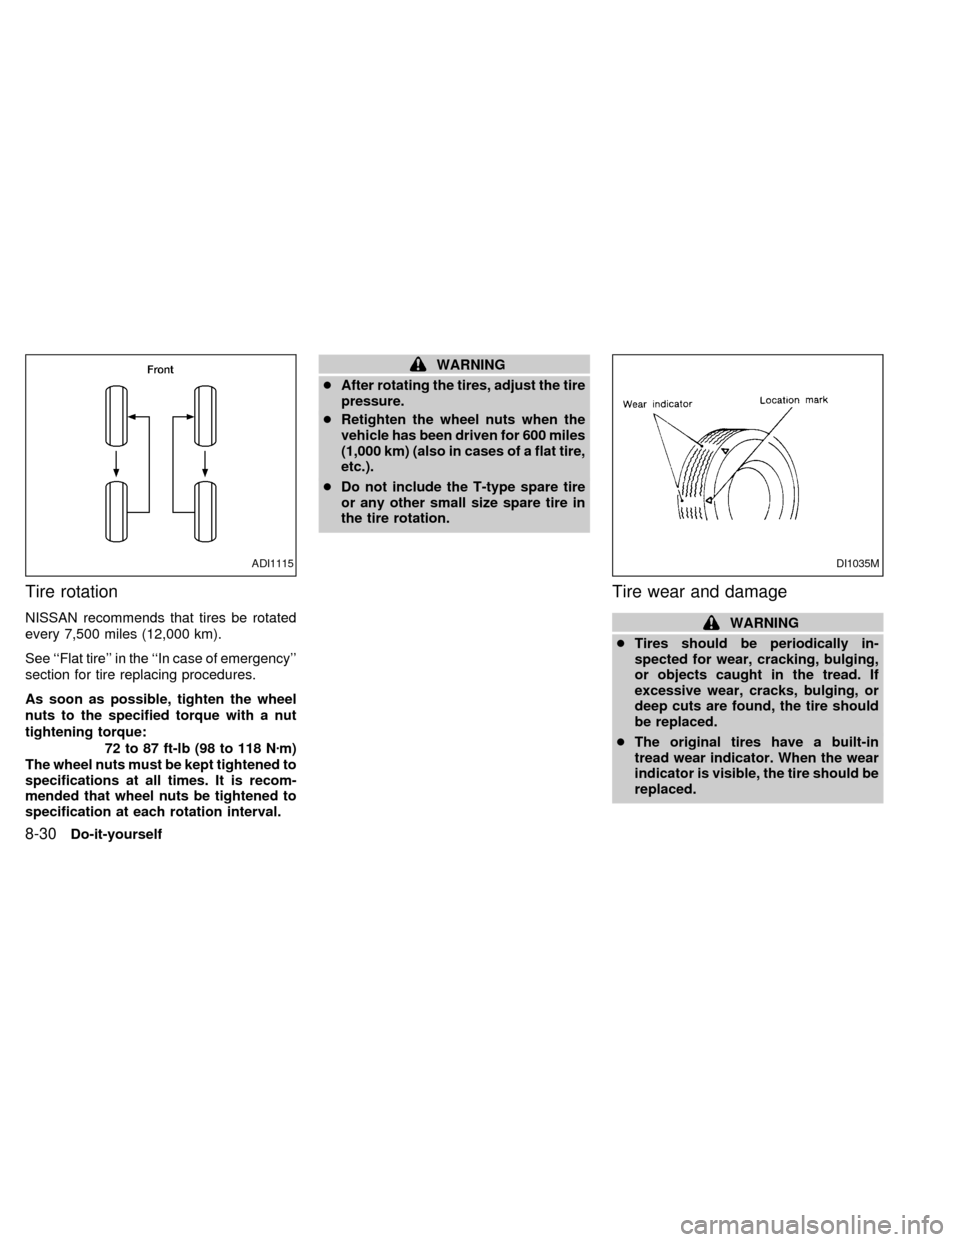
Tire rotation
NISSAN recommends that tires be rotated
every 7,500 miles (12,000 km).
See ``Flat tire'' in the ``In case of emergency''
section for tire replacing procedures.
As soon as possible, tighten the wheel
nuts to the specified torque with a nut
tightening torque:
72 to 87 ft-lb (98 to 118 Nzm)
The wheel nuts must be kept tightened to
specifications at all times. It is recom-
mended that wheel nuts be tightened to
specification at each rotation interval.
WARNING
cAfter rotating the tires, adjust the tire
pressure.
cRetighten the wheel nuts when the
vehicle has been driven for 600 miles
(1,000 km) (also in cases of a flat tire,
etc.).
cDo not include the T-type spare tire
or any other small size spare tire in
the tire rotation.
Tire wear and damage
WARNING
cTires should be periodically in-
spected for wear, cracking, bulging,
or objects caught in the tread. If
excessive wear, cracks, bulging, or
deep cuts are found, the tire should
be replaced.
cThe original tires have a built-in
tread wear indicator. When the wear
indicator is visible, the tire should be
replaced.
ADI1115DI1035M
8-30Do-it-yourself
ZX
Page 181 of 220
the vehicle is washed.
cDo not use abrasive cleaners when
washing the wheels.
cInspect wheel rims regularly for dents or
corrosion. Such damage may cause loss
of pressure or poor seal at the tire bead.
cNISSAN recommends waxing the road
wheels to protect against road salt in
areas where it is used during winter.
Spare tire (T-type spare tire)
Observe the following precautions if the
T-type spare tire must be used, otherwise
your vehicle could be damaged or involved
in an accident:
CAUTION
cThe T-type spare tire should be used
only for an emergency. It should be
replaced by the standard tire at the
first opportunity.
cDrive carefully while the T-type
spare tire is installed. Avoid sharp
turns and abrupt braking while driv-
ing.cPeriodically check tire inflation pres-
sure, and always keep it at 60 psi
(420 kPa, 4.2 bar).
cDo not drive your vehicle at speeds
faster than 50 MPH (80 km/h).
cDo not use tire chains on a T-type
spare tire. Tire chains will not fit
properly on the T-type spare tire and
may cause damage to the vehicle.
cWhen driving on roads covered with
snow or ice, the T-type spare tire
should be used on the rear wheel
and the original tire used on the front
wheels (drive wheels). Use tire
chains only on the front two original
tires.
cTire tread of the T-type spare tire will
wear at a faster rate than the original
tire. Replace the T-type spare tire as
soon as the tread wear indicators
appear.cBecause the T-type spare tire is
smaller than the original tire, ground
clearance is reduced. To avoid dam-
age to the vehicle do not drive over
obstacles. Also do not drive the ve-
hicle through an automatic car wash
since it may get caught.
cDo not use the T-type spare tire on
other vehicles.
cDo not use more than one T-type
spare tire at the same time.
cDo not tow a trailer while the T-type
spare tire is installed.
8-32Do-it-yourself
ZX
Page 207 of 220
cDo not modify the vehicle exhaust
system, brake system, etc. when the
hitch is installed.
cTo reduce the possibility of addi-
tional damage if your vehicle is
struck from the rear, where practical
remove the hitch when not in use.
Remove receiver when not in use.
cAfter the hitch is removed, seal the
bolt holes to prevent exhaust fumes,
water or dust from entering the pas-
senger compartment.
cRegularly check that all hitch mount-
ing bolts are securely mounted.
Tire pressures
cWhen towing a trailer, inflate the vehicle
tires to the recommended cold tire pres-
sure indicated on the tire placard (affixed
to the driver's door, center pillar).
cTrailer tire condition, size, load rating and
proper inflation pressure should be in
accordance with the trailer and tire
manufacturer's specifications.
Safety chains
Always use suitable chains between your
vehicle and the trailer. Safety chains should
be crossed and should be attached to the
hitch, not to the vehicle bumper or axle. Be
sure to leave enough slack in the chains to
permit turning corners.
Trailer lights
Trailer lights should comply with federal
and/ or local regulations. When wiring the
vehicle for towing, connect the stop and tail
light pickup into the vehicle electrical circuit.
Trailer brakes
If your trailer is equipped with a braking
system, make sure it conforms to Federal
and/or local regulations and that it is prop-
erly installed.
WARNING
Never connect a trailer brake system
directly to the vehicle brake system.
Pre-towing tips
cBe certain your vehicle maintains a level
position when a loaded and/or unloaded
trailer is hitched. Do not drive the vehicle ifit has an abnormal nose-up or nose- down
condition; check for improper tongue load,
overload, worn suspension or other pos-
sible causes of either condition.
cAlways secure items in the trailer to
prevent load shift while driving.
cBe certain your rear view mirrors conform
to all federal, state or local regulations. If
not, install any mirrors required for towing
before driving the vehicle.
Trailer towing tips
In order to gain skill and an understanding
of the vehicle's behavior, you should prac-
tice turning, stopping and backing up in an
area which is free from traffic. Steering
stability and braking performance will be
somewhat different than under normal driv-
ing conditions.
cAlways secure items in the trailer to
prevent load shift while driving.
cAvoid abrupt starts, acceleration or
stops.
cAvoid sharp turns or lane changes.
cAlways drive your vehicle at a moderate
speed.
10-16Technical and consumer information
ZX
Page 209 of 220
DOT (Department of Transportation) Qual-
ity Grades: All passenger car tires must
conform to federal safety requirements in
addition to these grades.
Treadwear
Treadwear grade is a comparative rating
based on tire wear rate when tested under
controlled conditions on specified govern-
ment test courses. For example, a tire
graded 150 would wear one and a half
(1-1/2) times as well on the government
course as a tire graded 100. However,
relative tire performance depends on actual
driving conditions, and may vary signifi-
cantly due to variations in driving habits,
service practices and differences in road
characteristics and climate.
Traction AA, A, B and C
The traction grades, from highest to lowest,
are AA, A, B, and C. Those grades repre-
sent the tire's ability to stop on wet pave-
ment as measured under controlled condi-
tions on specified government test surfaces
of asphalt and concrete. A tire marked C
may have poor traction performance.
WARNING
The traction grade assigned to your ve-
hicle's tires is based on straight-ahead
braking traction tests and does not in-
clude acceleration, cornering, hydro-
planing, or peak traction characteristics.
Temperature A, B and C
Temperature grades are A (the highest), B,
and C. They represent a tire's resistance to
heat build-up, and its ability to dissipate
heat when tested under controlled condi-
tions on a specified indoor laboratory test
wheel. Sustained high temperature can
cause tire material to degenerate, reducing
tire life. Excessive temperatures can lead to
sudden tire failure. Grade C corresponds to
a performance level which all passenger car
tires must meet under the Federal Motor
Vehicle Safety Standard No. 109. Grades A
and B represent higher levels of perfor-
mance on laboratory test wheels than the
minimum required by law.
WARNING
The temperature grade for this tire is
established for a tire that is properlyinflated and not overloaded. Excessive
speed, underinflation, or excessive
loading, either separately or in combi-
nation, can cause heat buildup and
possible tire failure.
UNIFORM TIRE QUALITY
GRADING
10-18Technical and consumer information
ZX
Page 215 of 220

Controls
Heater and air conditioner controls ........ 4-3
Coolant
Capacities and recommended fuel/
lubricants .............................................. 10-2
Changing engine coolant........................ 8-5
Checking engine coolant level ............... 8-4
Engine coolant temperature gauge ........ 2-4
Corrosion protection .................................... 7-5
Cruise control............................................. 5-13
Cup holder ................................................. 2-16
D
Daytime running light system
(Canada only) ............................................ 2-13
Defogger switch
Rear window defogger switch .............. 2-11
Dimensions and weights............................ 10-9
Door ajar warning light ................................ 2-6
Door locks .................................................... 3-2
Drive belts .................................................. 8-14
Driving
Cold weather driving............................. 5-19
Driving with automatic transmission ...... 5-5,
5-6
Driving with manual
transmission .................................. 5-10, 5-4
Precautions when starting and driving ... 5-2E
Economy - fuel........................................... 5-15
Emission control information label........... 10-12
Emission control system warranty ........... 10-19
Engine
Before starting the engine ...................... 5-6
Capacities and recommended fuel/
lubricants .............................................. 10-2
Changing engine coolant........................ 8-5
Changing engine oil................................ 8-8
Changing engine oil filter........................ 8-9
Checking engine coolant level ............... 8-4
Checking engine oil level ....................... 8-7
Engine compartment check locations .... 8-3
Engine coolant temperature gauge ........ 2-4
Engine cooling system ........................... 8-4
Engine oil ................................................ 8-7
Engine oil and oil filter
recommendation ................................... 10-5
Engine oil pressure warning light ........... 2-5
Engine oil viscosity ............................... 10-5
Engine serial number ......................... 10-11
Engine specifications ............................ 10-8
Starting the engine ............................... 5-11
Exhaust gas (Carbon monoxide) ................. 5-2
F
Flashers (See hazard warning flasher
switch) ........................................................ 2-14Flat tire ......................................................... 6-2
Floor mat positioning aid ............................. 7-5
Fluid
Automatic transmission fluid (ATF) ........ 8-9
Brake fluid............................................. 8-11
Capacities and recommended fuel/
lubricants .............................................. 10-2
Clutch fluid ............................................ 8-12
Engine oil ................................................ 8-7
Power steering fluid .............................. 8-11
Window washer fluid ............................ 8-12
F.M.V.S.S. certification label ................... 10-11
Front fog light switch ................................. 2-14
Front seats ................................................... 1-2
Fuel
Capacities and recommended fuel/
lubricants .............................................. 10-2
Fuel economy ....................................... 5-15
Fuel filler cap ........................................ 3-11
Fuel filler lid lock opener lever ............. 3-11
Fuel gauge.............................................. 2-4
Fuel octane rating................................. 10-3
Fuel recommendation ........................... 10-3
Fuses ......................................................... 8-20
Fusible links ............................................... 8-20
G
Garage door transmitter storage
compartment .............................................. 2-20
Gauge
Engine coolant temperature gauge ........ 2-4
11-2
ZX
Page 218 of 220

Servicing air conditioner .............................. 4-9
Shift lock release ......................................... 5-9
Shifting
Automatic transmission .......................... 5-7
Manual transmission............................. 5-10
Shoulder belt height adjustment ................ 1-21
Spark plug replacement............................. 8-14
Speedometer ............................................... 2-3
Spotlights (See map light) ......................... 2-22
SRS warning label ..................................... 1-14
Starting
Before starting the engine ...................... 5-6
Jump starting................................. 6-7, 8-14
Precautions when starting and driving ... 5-2
Push starting........................................... 6-9
Starting the engine ............................... 5-11
Steering
Power steering fluid .............................. 8-11
Power steering system ......................... 5-17
Tilting steering wheel............................ 3-13
Stop light .................................................... 8-27
Sunroof ...................................................... 2-18
Supplemental restraint system
Information and warning labels ............ 1-14
Supplemental restraint system
(Supplemental air bag system).................... 1-9
Switch
Automatic power window switch .......... 2-17
Front fog light switch ............................ 2-14
Hazard warning flasher switch ............. 2-14
Headlight and turn signal switch .......... 2-12
Ignition switch ......................................... 5-4Overdrive switch ..................................... 5-9
Rear window defogger switch .............. 2-11
Windshield wiper and washer switch ... 2-11
T
Tachometer .................................................. 2-3
Theft warning ............................................... 2-9
Three way catalyst....................................... 5-3
Tilting steering wheel ................................. 3-13
Tire
Flat tire.................................................... 6-2
Spare tire....................................... 6-6, 8-32
Tire chains ............................................ 8-29
Tire placard......................................... 10-12
Tire pressure ............................. 10-16, 8-28
Tire rotation .......................................... 8-30
Types of tires ........................................ 8-29
Uniform tire quality grading ................ 10-18
Wheels and tires................................... 8-28
Wheel/tire size ...................................... 10-9
Tool kit ......................................................... 6-2
Towing
Tow truck towing .................................. 6-10
Towing load/specification chart .......... 10-15
Trailer towing ...................................... 10-14
Transmission
Automatic transmission fluid (ATF) ........ 8-9
Driving with automatic
transmission .................................... 5-5, 5-6
Driving with manual
transmission .................................. 5-10, 5-4Selector lever lock release ..................... 5-9
Transmission selector lever lock release .... 5-9
Travel (See registering your vehicle in
another country)....................................... 10-10
Trip odometer .............................................. 2-3
Trunk access through the rear seat ............ 1-7
Trunk lid lock opener lever .......................... 3-9
Trunk light .................................................. 2-22
Tuning ........................................................ 4-11
Turn signal switch (See headlight and turn
signal switch) ............................................. 2-12
U
Uniform tire quality grading ..................... 10-18
V
Vanity mirror .............................................. 3-14
Vehicle dimensions and weights ............... 10-9
Vehicle identification ................................ 10-10
Vehicle identification number (VIN)
(chassis number) ..................................... 10-10
Vehicle identification number (VIN)
plate ......................................................... 10-10
Vehicle loading information ..................... 10-13
Vehicle recovery ........................................ 6-12
Ventilators .................................................... 4-2
11-5
ZX