Page 103 of 472

INTERIOR EQUIPMENT
83
The
HomeLink
� has 3 buttons and can be
programmed to operate 3 separate devices.
Prepare the HomeLink
� for programming by
erasing all codes or the memorized data
programmed by the former owner. Follow the
procedure in º(c) Erasing the garage door opener
memoryº.
1. Decide which one of the 3 buttons you want to
program. Push and hold down the button for about 20
seconds until the indicator light begins to flash. While
holding this button, follow steps º2º and º3º. 2. Bring the hand held garage door opener within about
25 mm (1 in.) of the button being programmed and push
the button on the hand held garage door opener. The
signal from the hand held garage door opener is sent to
the vehicle's opener.
3. When the frequency and code is registered, the
indicator light flashes rapidly. At this point, you can
release both buttons.
4. To program the remaining buttons, repeat steps º1º
through º3º.
If you want to replace an existing program with a new
program, select the button you want to
program. Follow
the procedure from step 1.
If the transmitter has a ºrolling code featureº, it is
necessary to program the in±garage receiver after
programming HomeLink
�.
1. Locate the ºtrainingº or ºlearningº button on the
in±garage receiver and push and release this
button. Location of the button may vary by the
garage door opener manufacturer.
2. Firmly push and release the trained HomeLink
�
button 2 times (some garage door manufacturer
may require you to push the HomeLink� button up
to 3 times) to complete the process.
The garage door should now operate when the
HomeLink
� button is pushed.
Page 186 of 472

COMFORT ADJUSTMENT
166When not using the child restraint system, keep it
secured with the seat belt or place it in the trunk or
somewhere other than in the passenger compartment.
This will prevent it from injuring passengers in the event
of a sudden stop or accident.
Your vehicle has anchors for securing the top strap of a
child restraint system. The anchor nuts are welded
beneath the sheet metal to permit installation of an
anchor bracket for a child restraint system.
To install an anchor bracket, use an 8 mm X 30 mm X
1.25 mm coarse thread metric bolt and a 15 mm (0.6 in.)
spacer. Note that the bolts accompanying many child
restraint systems are not metric. You can damage the
anchor nuts on your vehicle if you force bolts with
different thread into the anchor nuts.
For instructions about how to install the anchor bracket,
see ºTop strap anchors and locationsº.
If your child restraint system does not provide any of the
necessary parts, you can purchase the following items
from your Lexus dealer.
�
CRS installation kit (Part No. 04731±22012)
± contains 1 bolt, 3 types of spacer and 1 locking clip.
� Bolt (Part No. 91511±60830)
Page 206 of 472
COMFORT ADJUSTMENT
186
16E117b
2. To remove the child restraint system, press the
buckle±release button and allow the belt to retract.Top strap anchors and locations
16E032
If your child restraint system requires the use of a
top strap, latch the hook onto the anchor bracket
and tighten the top strap.
See the following instructions to install the anchor
bracket.
Page 208 of 472
COMFORT ADJUSTMENT
188
16E034±1
� 1Bolt 2Anchor bracket 3Spacer
3. Insert a 15 mm (0.6 in.) spacer, and tighten down the
anchor bracket for your child restraint system with a bolt.
Torque the bolt to 16.5 ± 24.7 N´m (1.68 ±2.52 kgf´m,
12.2 ± 18.2 ft´lbf.).
To comply with Canadian Motor Vehicle Safety
Standards, this model sold in Canada is provided with a
bracket set in the glovebox, designed for use with any of
the 3 anchor locations shown in the illustration.
DRIVING POSITION MEMORY SYSTEM
The micro computer can memorize the position of the
driver's seat. Two different driving position profiles can
be entered into the computer's memory.
Recording a driving position in the computer's memory
can only be done when the ignition key is in the ºONº
position and the selector lever is in the ºPº position.
Setting a driving position
16E047
Page 344 of 472
IN CASE OF AN EMERGENCY
324
40E002a
� 1Spare tire 2Jack 3Wrench 4Jack
handle
1. Get the jack, wrench and spare tire.
To prepare yourself for an emergency, you should
familiarize yourself with the use of the jack and each tool,
and their storage locations. The jack handle and wrench
are attached at the reverse side of the cover.
2. Remove the cover.
Page 356 of 472
IN CASE OF AN EMERGENCY
33610. After changing the wheel, check the air pressure
of the replaced tire. Stow all the tools, jack and flat
tire securely.
If the pressure of the replaced tire is low, drive slowly to
the nearest service station and fill to the correct
pressure.
Do not forget to reinstall the tire valve cap as dirt and
moisture could get into the valve core and possible
cause air leakage. If the cap is missing, put a new one
on as soon as possible.
This is the same procedure for changing or rotating your
tires.
CAUTION
Before driving, make sure all the tools, jack and flat tire
are securely in place in their storage location to reduce
the possibility of personal injury during a collision or
sudden braking.
Page 361 of 472
IN CASE OF AN EMERGENCY
341
40E014
40E015
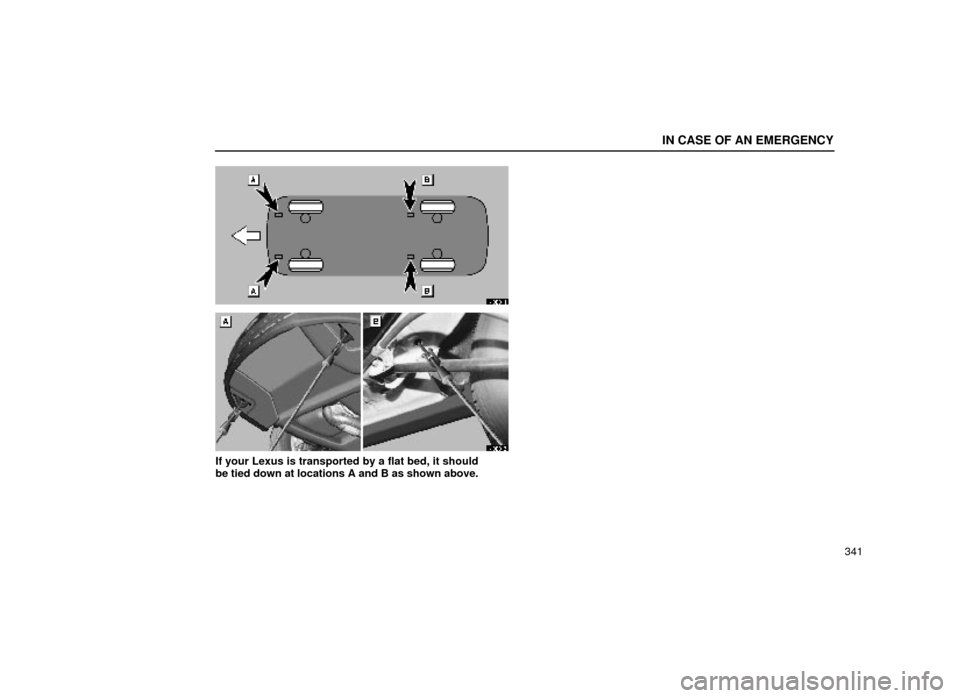
If your Lexus is transported by a flat bed, it should
be tied down at locations A and B as shown above.
Page 420 of 472
CHASSIS
400
63E006
� 1New tread 2Tread wear indicator 3Worn
tread
Replace the tires when the tread wear indicators
show. The location of the tread wear indicators is
shown by the marks such as ºTWIº or º
Dº marks
molded on the sidewall of each tire.
The tires on your Lexus have built±in tread wear
indicators to help you know when the tires need
replacement. When the tread depth wears to 1.6 mm
(0.06 in.) or less, the indicators will appear. If you can
see the indicators in two or more adjacent grooves, the
tire should be replaced.
The effectiveness of snow tires is lost if the tread
wears down below 4 mm (0.16 in.).