Page 950 of 1529
EXTERIOR FITTINGS
REPAIRS 76-2-3
6.Remove bolt securing front wing lower support
bracket to the body.
7.Remove nut securing sill finisher to the front
wing lower support bracket.
8.Remove 3 bolts securing front wing rear edge
to the body and collect the bracket.9.Remove bonnet sealing rubber from the front
wing flange.
10.Remove bolt securing front wing to the front
support bracket.
11.Remove 5 bolts securing front wing to the body
and remove the front wing.
NOTE: Do not carry out further dismantling if
component is removed for access only.
12.Remove nut securing lower support bracket to
the front wing and remove the bracket.
13.Remove the front wing wheel arch finisher.
Page 951 of 1529

EXTERIOR FITTINGS
76-2-4 REPAIRS
Refit
1.Clean front wing body mounting brackets.
2.Fit and secure the front wheel arch finisher to
the front wing.
3.Position lower support bracket to the front wing,
fit nut and tighten to 8 Nm (6 lbf.ft).
4.Position front wing to body, fit bracket and bolts
but do not tighten at this stage.
5.Check and adjust alignment of the front wing to
the bonnet and door.
6.Tighten the front wing retaining bolts to 8 Nm (6
lbf.ft).
7.Fit bonnet sealing rubber to the front wing
flange.
8.Fit bolt securing lower support bracket to the
body and tighten to 8 Nm (6 lbf.ft).
9.Fit nut securing sill finisher to the front wing
lower support bracket and tighten to 8 Nm (6
lbf.ft).
10.Fit bolt securing front wing to the front support
bracket and tighten to 8 Nm (6 lbf.ft).
11.Fit side repeater lamp to the front wing and
connect the multiplug.
12.Fit front wheel arch liner extension panel to the
front bumper and secure with screws.
13.Fit and tighten screw securing front wheel arch
liner extension panel to the inner wing.
14.Fit the front wheel arch liner.
+ EXTERIOR FITTINGS, REPAIRS,
Liner - wheel arch - front.
15.Fit the headlamp assembly.
+ LIGHTING, REPAIRS, Headlamp -
from 03MY.
Rear folding step
$% 76.10.41
Remove
1.Remove 2 bolts securing step and damper
assembly to chassis.
2.Remove step and damper assembly.
3.Remove 2 patch lock nuts securing damper to
step and discard nuts.
4.Remove damper from step.
Refit
1.Fit damper to step and secure with new patch
lock nuts. Tighten nuts to 17 Nm (13 lbf.ft).
2.Position step and damper assembly to chassis
and secure with bolts. Tighten bolts to 45 Nm
(33 lbf.ft).
Page 1108 of 1529

PANEL REPAIRS
REPAIRS 77-2-41
Refit
1.Fit side drip rail finisher.
2.Fit wiring to 'B/C' post and sill areas.
3.Fit front and rear door door aperture seal.
4.Position carpet and secure with fixings.
5.Fit tread plates to front and rear door apertures.
6.Fit head lining.
+ INTERIOR TRIM COMPONENTS,
REPAIRS, Headlining.
7.Fit rear seat.
+ SEATS, REPAIRS, Seat - rear.
8.Fit front seat belt.
+ RESTRAINT SYSTEMS, REPAIRS,
Seat belt - front.
9. LH side: Fit CD autochanger.
+ IN CAR ENTERTAINMENT,
REPAIRS, CD autochanger.
10. RH side: Fit power amplifier.
+ IN CAR ENTERTAINMENT,
REPAIRS, Amplifier - power.
11.Fit RH or LH front seat.
+ SEATS, REPAIRS, Seat - front.
12.Fit sill finisher.
13.Fit front door striker to B/C post, fit Torx bolts
and tighten to 26 Nm (19 lbf.ft).
14.Fit rear door.
+ DOORS, REPAIRS, Door - rear.
15.Connect leads/multiplug to alternator.
16.Connect battery leads, negative lead last.
Panel body side assembly
Remove
1.Disconnect both battery leads, negative lead
first.
2.Disconnect leads/multiplug from alternator.
3.Remove loadspace side trim casing.
+ INTERIOR TRIM COMPONENTS,
REPAIRS, Trim casing - side - loadspace.
4.Remove head lining rear trim finisher.
5.Remove rear head rests, if fitted.
6.Remove body side rear glass.
+ SCREENS, REPAIRS, Glass - body
side - rear.
7.Remove rear bumper assembly.
+ EXTERIOR FITTINGS, REPAIRS,
Bumper assembly - rear - up to 03MY.
8.Remove rear bumper finisher.
9.Remove rear wheel arch liner.
+ EXTERIOR FITTINGS, REPAIRS,
Liner - wheel arch - rear.
10.Remove mud flap.
11.Remove tread plate from rear door aperture.
12.Remove rear door aperture seal.
13.Remove rear door striker from 'D' post.
14.Remove 'D' post outer trim finisher.
15.Remove wheel arch trim finisher.
16.Remove side drip rail finisher.
17. RH side: Remove tail door.
18. LH side: Remove tail door striker and setting
block from 'E' post.
19.Remove tail door tread plate.
20.Remove loadspace carpet retainer.
21.Remove tail door aperture seal.
22.Remove tail lamp.
+ LIGHTING, REPAIRS, Lamp - tail.
23. RH side: Remove fuel filler flap.
24. RH side: Remove fuel filler tube.
+ FUEL DELIVERY SYSTEM - V8,
REPAIRS, Filler tube - fuel.
25.Remove aerial amplifier.
26.Remove relevant wiring from body side area.
Page 1109 of 1529

PANEL REPAIRS
77-2-42 REPAIRS
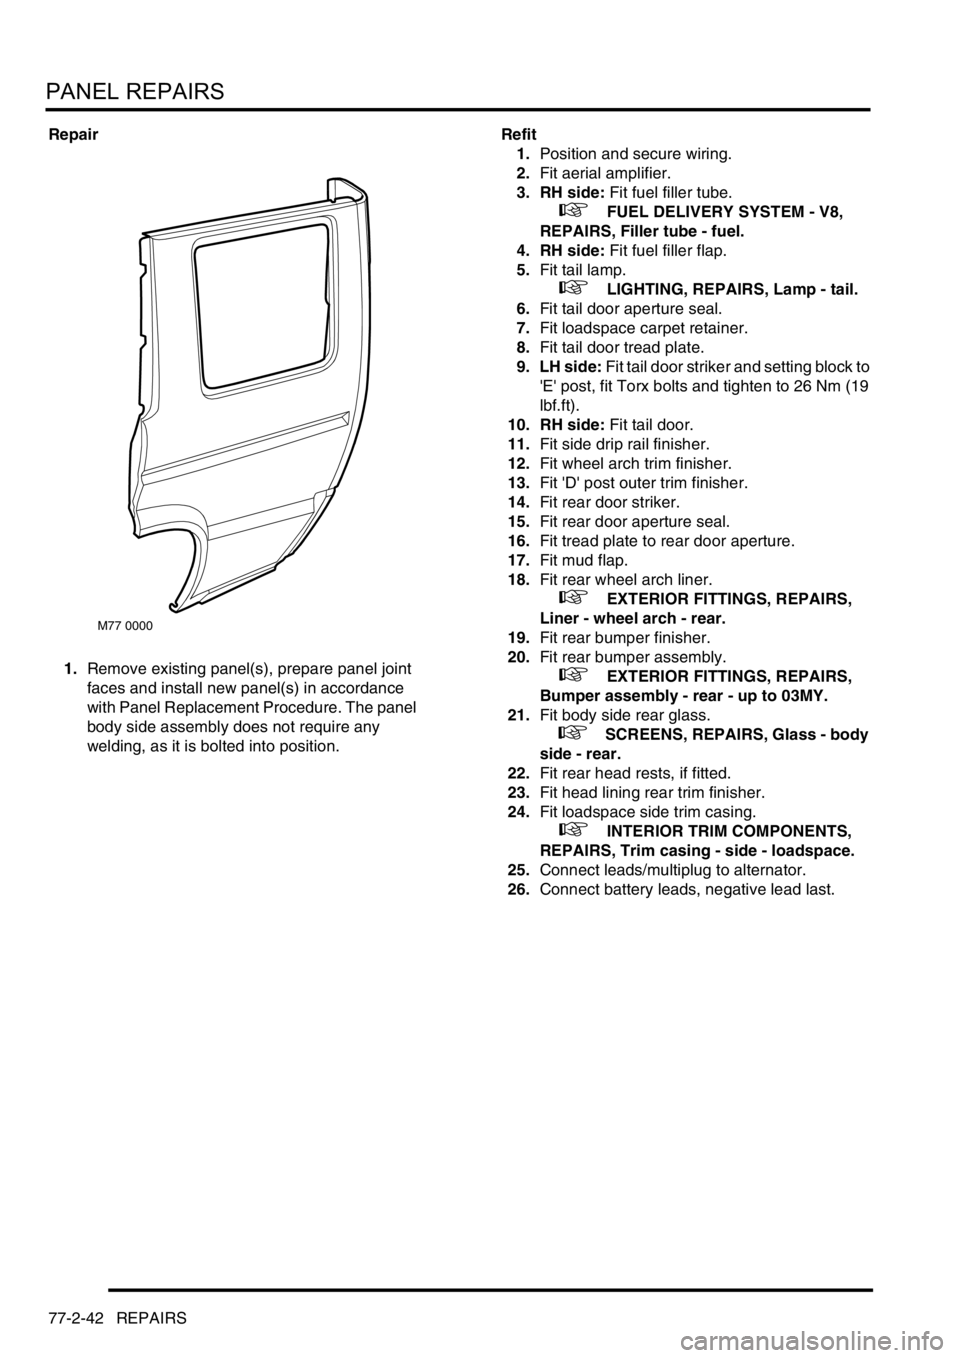
Repair
1.Remove existing panel(s), prepare panel joint
faces and install new panel(s) in accordance
with Panel Replacement Procedure. The panel
body side assembly does not require any
welding, as it is bolted into position.Refit
1.Position and secure wiring.
2.Fit aerial amplifier.
3. RH side: Fit fuel filler tube.
+ FUEL DELIVERY SYSTEM - V8,
REPAIRS, Filler tube - fuel.
4. RH side: Fit fuel filler flap.
5.Fit tail lamp.
+ LIGHTING, REPAIRS, Lamp - tail.
6.Fit tail door aperture seal.
7.Fit loadspace carpet retainer.
8.Fit tail door tread plate.
9. LH side: Fit tail door striker and setting block to
'E' post, fit Torx bolts and tighten to 26 Nm (19
lbf.ft).
10. RH side: Fit tail door.
11.Fit side drip rail finisher.
12.Fit wheel arch trim finisher.
13.Fit 'D' post outer trim finisher.
14.Fit rear door striker.
15.Fit rear door aperture seal.
16.Fit tread plate to rear door aperture.
17.Fit mud flap.
18.Fit rear wheel arch liner.
+ EXTERIOR FITTINGS, REPAIRS,
Liner - wheel arch - rear.
19.Fit rear bumper finisher.
20.Fit rear bumper assembly.
+ EXTERIOR FITTINGS, REPAIRS,
Bumper assembly - rear - up to 03MY.
21.Fit body side rear glass.
+ SCREENS, REPAIRS, Glass - body
side - rear.
22.Fit rear head rests, if fitted.
23.Fit head lining rear trim finisher.
24.Fit loadspace side trim casing.
+ INTERIOR TRIM COMPONENTS,
REPAIRS, Trim casing - side - loadspace.
25.Connect leads/multiplug to alternator.
26.Connect battery leads, negative lead last.
M77 0000
Page 1264 of 1529
WIPERS AND WASHERS
REPAIRS 84-29
Motor - wiper - rear screen
$% 84.35.12
Remove
1.Remove spare wheel from taildoor.
2.Remove tail door trim casing.
+ DOORS, REPAIRS, Trim casing - tail
door.
3.Remove tail door water shedder.
4.Disconnect washer tube
5.Raise nut cover, remove nut and release wiper
arm.
6.Remove spindle nut and flat washer and
discard rubber seal.
7.Disconnect taildoor harness multiplug from
wiper motor.
8.Remove 2 bolts securing wiper motor to tail
door.
9.Remove wiper motor. Refit
1.Position wiper motor to door and secure with
bolts.
2.Connect tail door harness multiplug to wiper
motor.
3.Fit rubber seal, flat washer and spindle nut.
Tighten spindle nut to 3 Nm (2.2 lbf.ft).
4.Position wiper arm to tail door and connect
washer tube.
5.Tighten wiper arm nut to 20 Nm (15 lbf.ft) and
fit nut cover.
6.Fit tail door water shedder.
7.Fit tail door trim casing.
+ DOORS, REPAIRS, Trim casing - tail
door.
8.Fit spare wheel to tail door.