Page 1221 of 1529
AIR CONDITIONING
82-32REPAIRS
8.Remove 3 remaining bolts securing cooling fan
support rails to condenser.
9.Remove condenser.
10.Remove bolt securing adaptor block to receiver
drier.
11.Remove adaptor block from receiver drier and
discard 'O' ring.
CAUTION: Always fit plugs to open
connections to prevent contamination.12.Remove bolt securing condenser pipe to
receiver drier.
13.Remove clamp bolt receiver drier to bracket
and remove drier from bracket.
14.Remove and discard 'O' ring from condenser
pipe.
CAUTION: Always fit plugs to open
connections to prevent contamination.
15.Remove 2 remaining bolts securing receiver
drier brackets and condenser LH mounting
bracket to condenser.
16.Remove mounting bracket assembly.
17.Remove remaining bolt securing condenser RH
mounting and remove mounting.
18.Remove sealing strip from outer upper seam of
condenser.
19.Remove captive nut plates from condenser.
Page 1222 of 1529

AIR CONDITIONING
REPAIRS 82-33
Refit
1.Fit captive nut plates to new condenser.
2.Fit seal to condenser.
3.Fit RH mounting bracket to condenser and
secure with bolt.
4.Fit receiver drier bracket assembly and secure
with bolts.
5.Ensure condenser pipe and new receiver drier
connections are clean.
6.Lubricate new 'O' ring with refrigerant oil and fit
to condenser pipe.
7.Fit receiver drier to bracket and condenser
pipe. Tighten bolt securing condenser pipe to 5
Nm (3.7 lbf.ft). Fit clamping bolt securing
receiver drier to bracket and tighten to 5 Nm
(3.7 lbf.ft).
8.Ensure adaptor block and receiver drier
connections are clean.
9.Lubricate new 'O' ring with refrigerant oil and fit
to adaptor block.
10.Fit adaptor block to receiver drier and tighten
bolt to 5 Nm. (3.7 lbf.ft).
11.Fit condenser assembly.
12.Fit cooling fan to condenser and fit bolts to
secure support rails to condenser brackets.
13.Ensure connections of condenser, receiver
drier and evaporator pipes are clean.
14.Lubricate new 'O' ring seals with refrigerant oil
and fit one seal to each evaporator pipe.
15.Connect evaporator pipes and tighten bolts to 5
Nm (3.7 lbf.ft).
16.Connect multiplug to dual pressure switch.
17.Fit radiator.
l
+ COOLING SYSTEM - Td5,
REPAIRS, Radiator.
l
+ COOLING SYSTEM - V8,
REPAIRS, Radiator.
18.Recharge A/C system.
+ AIR CONDITIONING, REFRIGERANT
RECOVERY, RECYCLING AND
RECHARGING, Refrigerant recovery,
recycling and recharging.
Receiver drier and dual pressure switch
$% 82.17.03
Remove
1.Recover refrigerant from air conditioning
system.
+ AIR CONDITIONING, REFRIGERANT
RECOVERY, RECYCLING AND
RECHARGING, Refrigerant recovery,
recycling and recharging.
2.Remove front grille.
+ EXTERIOR FITTINGS, REPAIRS,
Grille - front - up to 03MY.
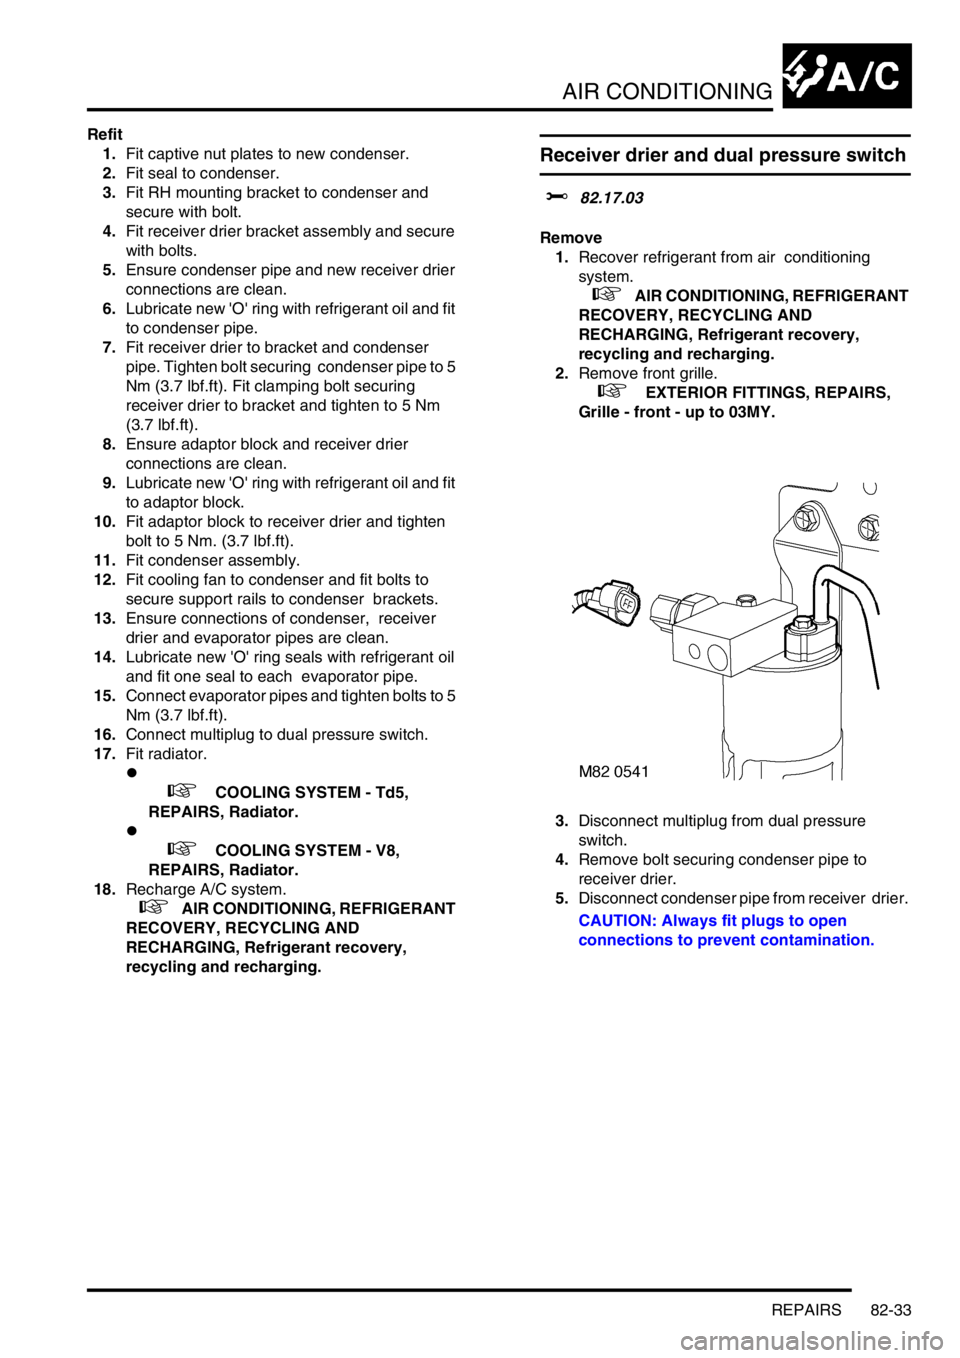
3.Disconnect multiplug from dual pressure
switch.
4.Remove bolt securing condenser pipe to
receiver drier.
5.Disconnect condenser pipe from receiver drier.
CAUTION: Always fit plugs to open
connections to prevent contamination.
Page 1266 of 1529
CHARGING AND STARTING
REPAIRS 86-1-1
CHARGING AND STARTING REPAIRS
Alternator - diesel
$% 86.10.02
Remove
1.Remove auxiliary drive belt.
+ CHARGING AND STARTING,
REPAIRS, Belt - auxiliary drive.
2.Release cover and remove nut securing lead
to alternator.
3.Disconnect alternator multiplug.
4.Remove bolt (LH thread) and remove auxiliary
drive belt tensioner. 5.Remove bolt securing support stay to
alternator.
6.Release clip and disconnect oil drain hose from
vacuum pump.
7.Disconnect vacuum pump oil supply pipe from
cylinder head and discard 'O' ring.
8.Remove bolt securing alternator and release
from mounting bracket.
9.Disconnect vacuum hose from vacuum pump.
10.Remove alternator. Take care not to damage
radiator cooling fins.
11.Remove 4 bolts, and remove vacuum pump
from alternator.
CAUTION: Always fit plugs to open
connections to prevent contamination.
Page 1269 of 1529

CHARGING AND STARTING
86-1-4 REPAIRS
Belt - auxiliary drive
$% 86.10.03
Remove
1.Remove viscous fan:
l
+ COOLING SYSTEM - V8,
REPAIRS, Fan - viscous.
l
+ COOLING SYSTEM - Td5,
REPAIRS, Fan - viscous.
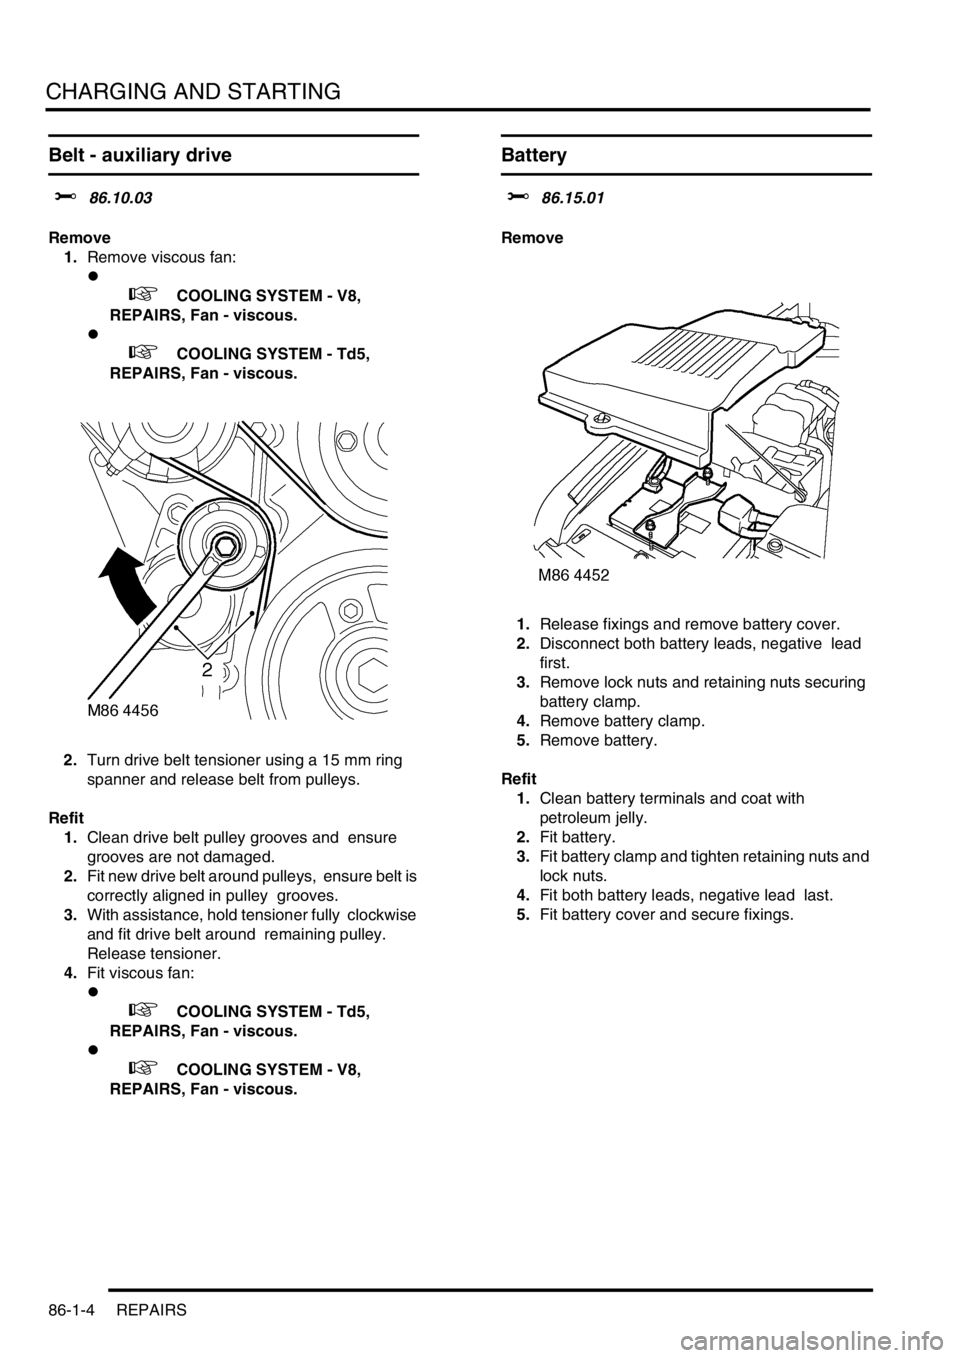
2.Turn drive belt tensioner using a 15 mm ring
spanner and release belt from pulleys.
Refit
1.Clean drive belt pulley grooves and ensure
grooves are not damaged.
2.Fit new drive belt around pulleys, ensure belt is
correctly aligned in pulley grooves.
3.With assistance, hold tensioner fully clockwise
and fit drive belt around remaining pulley.
Release tensioner.
4.Fit viscous fan:
l
+ COOLING SYSTEM - Td5,
REPAIRS, Fan - viscous.
l
+ COOLING SYSTEM - V8,
REPAIRS, Fan - viscous.
Battery
$% 86.15.01
Remove
1.Release fixings and remove battery cover.
2.Disconnect both battery leads, negative lead
first.
3.Remove lock nuts and retaining nuts securing
battery clamp.
4.Remove battery clamp.
5.Remove battery.
Refit
1.Clean battery terminals and coat with
petroleum jelly.
2.Fit battery.
3.Fit battery clamp and tighten retaining nuts and
lock nuts.
4.Fit both battery leads, negative lead last.
5.Fit battery cover and secure fixings.
Page 1421 of 1529
HARNESSES
86-7-16 REPAIRS
7.Disconnect multiplugs from receiver drier and
air temperature sensor.
8.Release 3 cable tie clips securing harness to
lower support rail. 9.Disconnect multiplugs from cooling fan and
horn.
10.Release 3 cable tie clips from front RH panel.
11.Remove RH indicator lamp.
+ LIGHTING, REPAIRS, Lamp - front
repeater - up to 03MY.
Page 1433 of 1529

HARNESSES
86-7-28 REPAIRS
50.Feed harness through to front panel.
51.Secure fog lamp multiplug.
52.Connect headlamp level motor, headlamp and
side lamp multiplugs.
53.Fit indicator lamp.
+ LIGHTING, REPAIRS, Lamp - front
repeater - up to 03MY.
54.Secure harness to RH front panel.
55.Connect cooling fan and horn multiplug.
56.Secure harness to lower support rail.
57.Connect receiver drier and air temperature
sensor multiplugs.
58.Fit front bumper.
+ EXTERIOR FITTINGS, REPAIRS,
Bumper assembly - front.
59.Fit battery tray.
60.Fit air filter assembly.
+ ENGINE MANAGEMENT SYSTEM -
V8, REPAIRS, Air cleaner assembly.
61.Position both lower 'A' post trims and secure
with studs.
62.Fit heater assembly.
+ HEATING AND VENTILATION,
REPAIRS, Heater assembly - models with
air conditioning.
+ HEATING AND VENTILATION,
REPAIRS, Heater assembly - models
without air conditioning.
Harness - main - DVD unit
$% 86.70.25
Remove
1.Remove battery cover and disconnect the
battery earth lead.
2.Remove CD switch box.
+ IN CAR ENTERTAINMENT,
REPAIRS, Switch box - CD/DVD player.
3.Remove DVD player unit.
+ IN CAR ENTERTAINMENT,
REPAIRS, DVD screen/player unit.
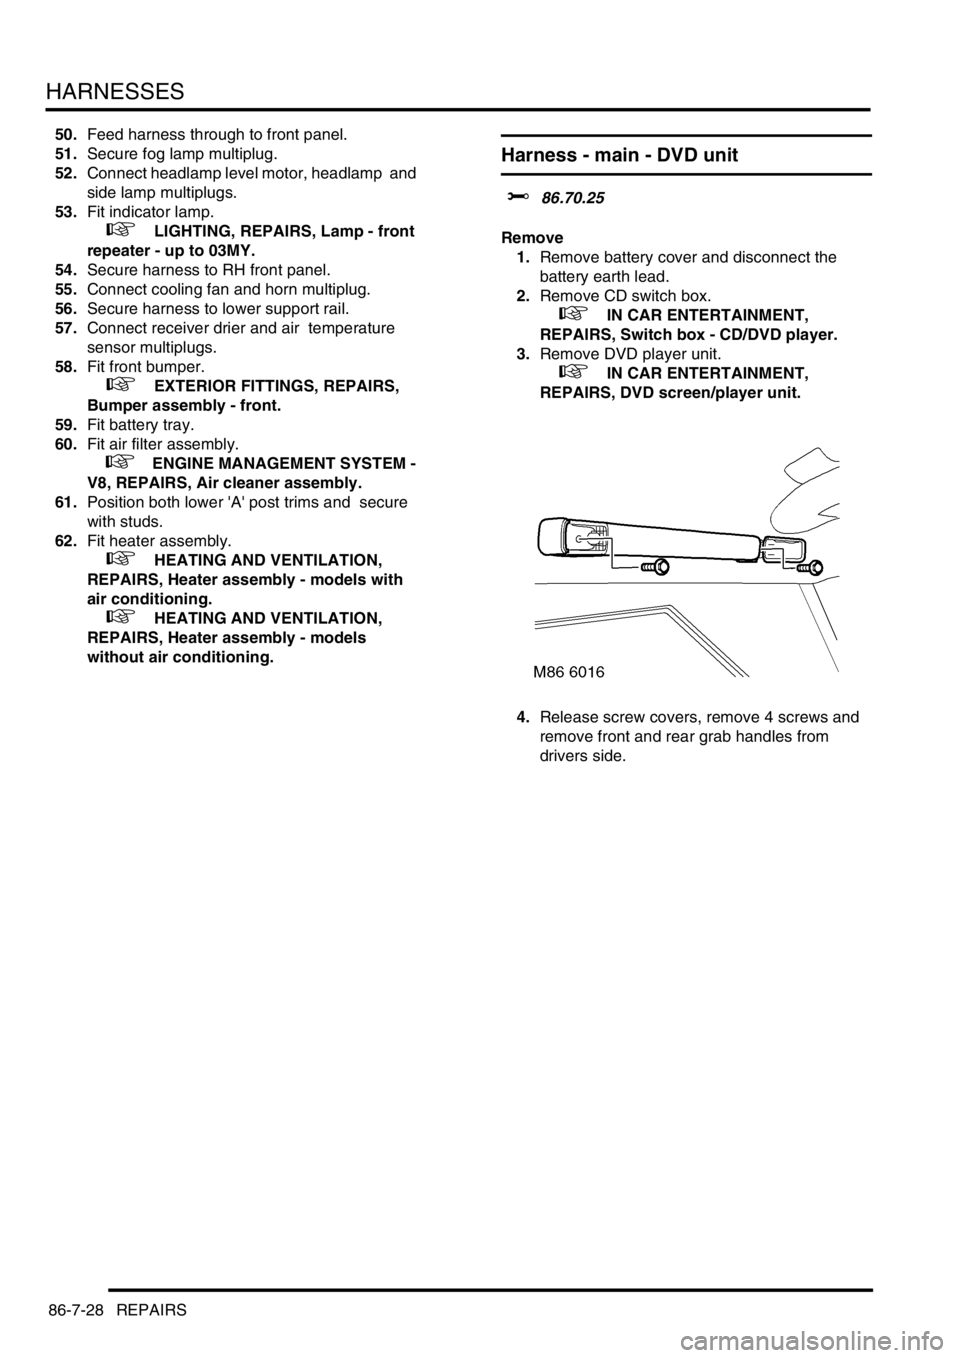
4.Release screw covers, remove 4 screws and
remove front and rear grab handles from
drivers side.