Page 108 of 269

Audio System
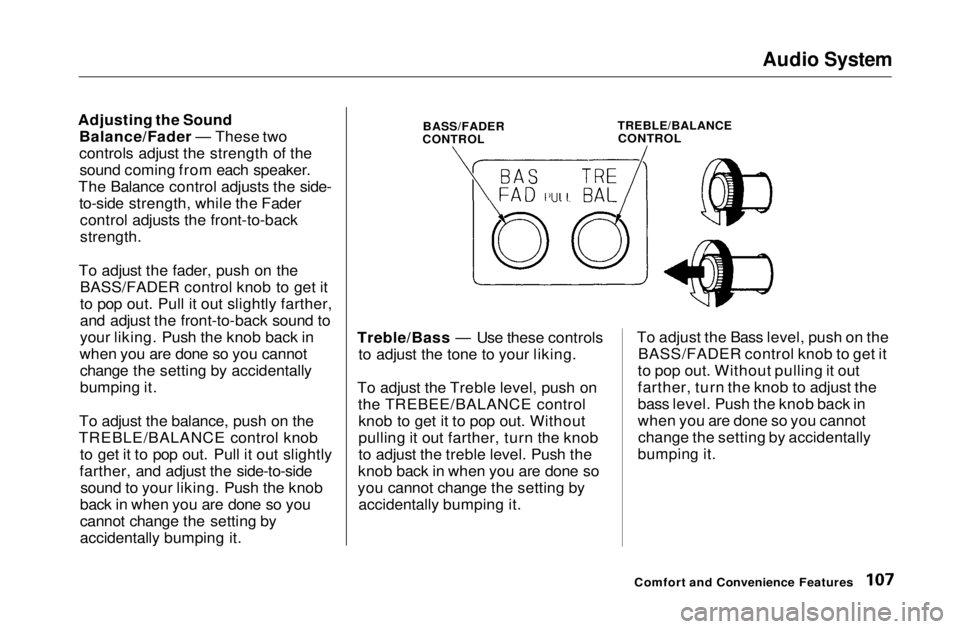
Adjusting the Sound Balance/Fader — These two
controls adjust the strength of thesound coming from each speaker.
The Balance control adjusts the side- to-side strength, while the Fadercontrol adjusts the front-to-back
strength.
To adjust the fader, push on the BASS/FADER control knob to get it
to pop out. Pull it out slightly farther,
and adjust the front-to-back sound to
your liking. Push the knob back in
when you are done so you cannot change the setting by accidentally
bumping it.
To adjust the balance, push on the
TREBLE/BALANCE control knob to get it to pop out. Pull it out slightly
farther, and adjust the side-to-side sound to your liking. Push the knob
back in when you are done so you
cannot change the setting by
accidentally bumping it. Treble/Bass — Use these controls
to adjust the tone to your liking.
To adjust the Treble level, push on the TREBEE/BALANCE controlknob to get it to pop out. Without
pulling it out farther, turn the knob
to adjust the treble level. Push the
knob back in when you are done so
you cannot change the setting by accidentally bumping it. To adjust the Bass level, push on the
BASS/FADER control knob to get it
to pop out. Without pulling it out
farther, turn the knob to adjust the
bass level. Push the knob back in
when you are done so you cannot change the setting by accidentally
bumping it.
Comfort and Convenience Features
BASS/FADER
CONTROL
TREBLE/BALANCE
CONTROLMain Menu Table of Contents s t
Page 109 of 269

Audio System
Audio System Lighting
You can use the instrument panelbrightness control dial to adjust the il-
lumination of the audio system (see
page 62). The audio system
illuminates when the parking lightsare on, even if the radio is turned off.
Digital Clock
The display of your audio system usually shows the time when the
ignition switch is in ACCESSORY (I)or ON (II). It shows operation mode
of radio, CD player, or optional CD
changer/cassette player when you
operate them, and goes back to the
time display after five seconds.
The display also goes back to the time display two seconds after you
turn the volume knob to adjust the
volume.
If an error occurs while operating
the CD player or optional CD changer, the display will show the
error code and will not switch to the time display until the error is
corrected (see page 133 and 134).
To set the time, press the CLOCK (AM/FM) button for more than two
seconds until you hear a beep. The
time display will begin blinking. To set the hour, press and hold the H (Preset 4) button until the hour
advances to the desired time.
To set the minutes, press and hold the M (Preset 5) button until the
numbers advance to the desired time.
When you are finished, presss the
CLOCK button again. The time
display will stop blinking and the
time is now set.
To exit the clock set function, push
the AM/FM button.
Comfort and Convenience Features
AM/FM BUTTONMain Menu Table of Contents s t
Page 110 of 269
Audio System
Operating the CD Player
You operate the CD player with the same controls used for the radio.
With the ignition switch in
ACCESSORY (I) or ON (II), insert the disc into the CD slot. Push thedisc in halfway, the drive will pull it
in the rest of the way and begin to
play. The number of the track that is
playing is shown in the display.
You can also play 3-inch (8-cm) discs
without using an adapter ring. Play only standard round discs. Odd-
shaped CDs may jam in drive or
cause other problems.
When the system reaches the end of the disc, it will return to the begin-ning and play that disc again.
You can switch to the radio while a CD is playing by pressing the AM/
FM button. Press the CD button to
return to playing the CD. The CD
will begin playing where it left off.
CONTINUED
Comfort and Convenience Features
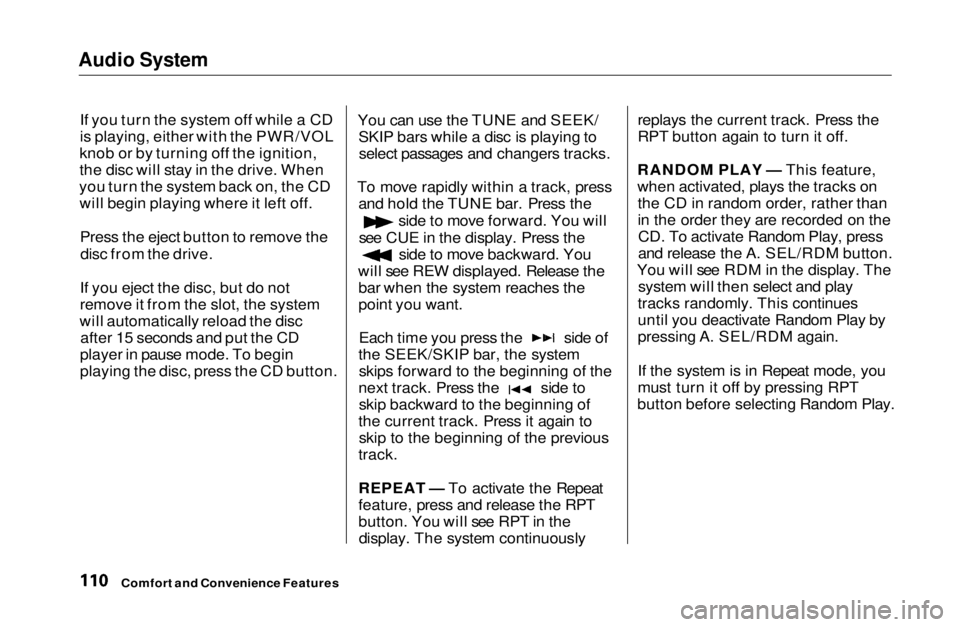
CD SLOT
AM/FM BUTTON
TUNE BAR
EJECT BUTTON
SEEK/SKIP
BAR
RPT BUTTON A. SEL/RDM BUTTONMain Menu Table of Contents s t
Page 111 of 269

Audio System
If you turn the system off while a CD
is playing, either with the PWR/VOL
knob or by turning off the ignition,
the disc will stay in the drive. When
you turn the system back on, the CD will begin playing where it left off.
Press the eject button to remove thedisc from the drive.
If you eject the disc, but do not
remove it from the slot, the system
will automatically reload the disc after 15 seconds and put the CD
player in pause mode. To begin
playing the disc, press the CD button. You can use the TUNE and SEEK/
SKIP bars while a disc is playing toselect passages and changers tracks.
To move rapidly within a track, press and hold the TUNE bar. Press the side to move forward. You will
see CUE in the display. Press the side to move backward. You
will see REW displayed. Release the bar when the system reaches the
point you want. Each time you press the side of
the SEEK/SKIP bar, the system skips forward to the beginning of the next track. Press the side to
skip backward to the beginning of
the current track. Press it again to skip to the beginning of the previous
track.
REPEAT — To activate the Repeat
feature, press and release the RPT
button. You will see RPT in the display. The system continuously replays the current track. Press the
RPT button again to turn it off.
RANDOM PLAY — This feature,
when activated, plays the tracks on the CD in random order, rather than
in the order they are recorded on theCD. To activate Random Play, press
and release the A. SEL/RDM button.
You will see RDM in the display. The system will then select and play
tracks randomly. This continues
until you deactivate Random Play by
pressing A. SEL/RDM again.
If the system is in Repeat mode, you
must turn it off by pressing RPT
button before selecting Random Play.
Comfort and Convenience FeaturesMain Menu Table of Contents s t
Page 112 of 269

Audio System
Operating the CD Changer
(Optional)
A Compact Disc changer is available for your vehicle. It holds up to six discs, providing several hours of
continuous entertainment. You
operate this CD changer with the
same controls used for the in-dash
CD player.
Load the desired CD's in the
magazine and load the magazine in
the changer according to the instructions that came with the unit.
Play only standard round discs. Odd-shaped CDs may jam in the drive or
cause other problems.
To select the CD changer, press the CD button. The disc and track
numbers will be displayed. To select a different disc, press the
appropriate preset button (1 — 6). If
you select an empty slot in the magazine, the changer will, after
finding that slot empty, try to load
the CD in the next slot. Thiscontinues until it finds a CD to load
and play.
If you load a CD in the in-dash player
while the changer is playing a CD, the system will stop the changer and
begin playing the in-dash CD. To select the changer again, press the
CD button. Play will begin where it
left off. Use the CD button to switch
between the player and the changer.
If you eject the in-dash CD while it is
playing, the system will automatically switch to the CD changer and begin
play where it left off. If there are no CDs in the changer, the display will
flash. You will have to select another mode (AM or FM) with the button. When you switch back to CD mode,
the system selects the same unit (in-dash or changer) that was playing
when you switched out of CD mode.
To use the SKIP, REPEAT, and RANDOM functions, refer to the in-
dash player operating instructions.
Comfort and Convenience FeaturesMain Menu Table of Contents s t
Page 113 of 269
Audio System
Protecting Compact Discs
Handle a CD by its edges; never
touch either surface. Contamination
from fingerprints, liquids, felt-tip
pens, and labels can cause the CD to
not play properly, or possibly jam in
the drive.
When a CD is not being played, store
it in its case to protect it from dustand other contamination. To prevent
warpage, keep CDs out of direct sunlight and extreme heat.
To clean a disc, use a clean soft cloth. Wipe across the disc from the centerto the outside edge. A new CD may be rough on the
inner and outer edges. The small
plastic pieces causing this roughness
can flake off and fall on the re-
cording surface of the disc, causing skipping or other problems. Remove
these pieces by rubbing the inner and outer edges with the side of a
pencil or pen.
Never try to insert foreign objects in
the CD player or the magazine.
Comfort and Convenience FeaturesMain Menu Table of Contents s t
Page 114 of 269
Audio System
CD Player Error Indications
If you see an error indication in the display while operating the CD
player, find the cause in the chart to
the right. If you cannot clear the error indication, take the car to your
Honda dealer.
Comfort and Convenience FeaturesMain Menu Table of Contents s t
Page 115 of 269
Audio System
CD Changer Error Indications
If you see an error indication in the
display while operating the CD
changer, find the cause in the chart
to the right. If you cannot clear the error indication, take the car to your
Honda dealer.
Comfort and Convenience FeaturesMain Menu Table of Contents s t