Page 66 of 269
Controls Near the Steering Wheel
Steering Wheel Adjustment
See page 18 for important safety
information about how to properly
position the steering wheel.
Make any steering wheel adjustment
before you start driving.
To adjust the steering wheel upward or downward: 1. Push the lever under the steering
column all the way down.
2. Move the steering wheel to the desired position, making sure the
wheel points toward your chest, not toward your face. Make sure
you can see the instrument panel gauges and the indicator lights. 3. Push the lever up to lock the
steering wheel in that position.
4. Make sure you have securely locked the steering wheel in place
by trying to move it up and down.
Instruments and Controls
Adjusting the steering wheel
position while driving may
cause you to lose control of the
car and be seriously injured in a crash.
Adjust the steering wheel only
when the car is stopped.Main Menu Table of Contents s t
Page 80 of 269
Folding Rear Seat, Power Windows
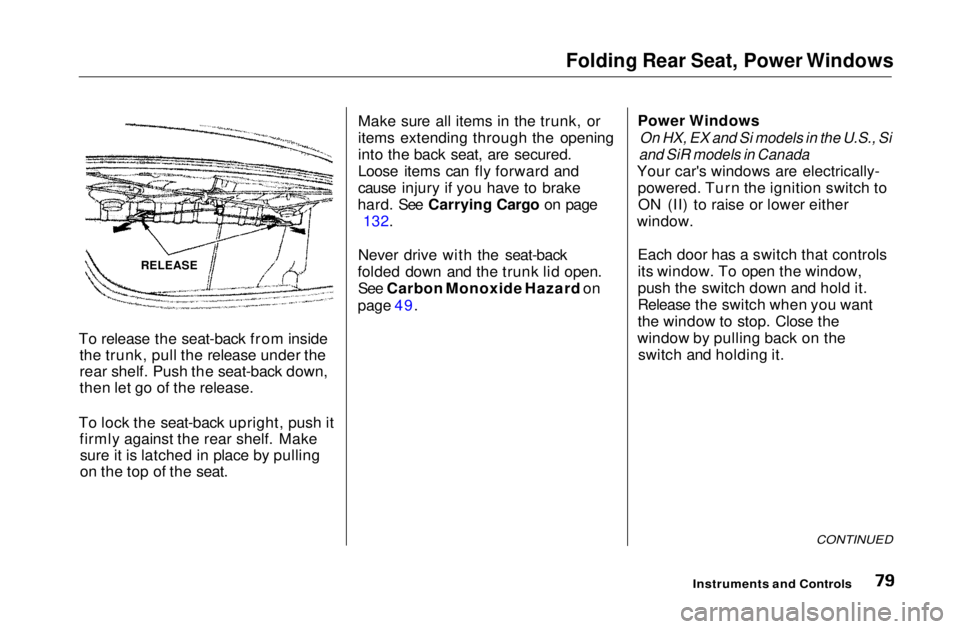
To release the seat-back from inside the trunk, pull the release under the
rear shelf. Push the seat-back down,
then let go of the release.
To lock the seat-back upright, push it firmly against the rear shelf. Makesure it is latched in place by pulling
on the top of the seat. Make sure all items in the trunk, or
items extending through the opening
into the back seat, are secured.
Loose items can fly forward and
cause injury if you have to brake
hard. See Carrying Cargo on page 132.
Never drive with the seat-back
folded down and the trunk lid open. See Carbon Monoxide Hazard on
page 49. Power Windows
On HX, EX and Si models in the U.S., Si
and SiR models in Canada
Your car's windows are electrically- powered. Turn the ignition switch toON (II) to raise or lower either
window.
Each door has a switch that controls
its window. To open the window,
push the switch down and hold it.
Release the switch when you want
the window to stop. Close the
window by pulling back on the switch and holding it.
CONTINUED
Instruments and Controls
RELEASEMain Menu Table of Contents s t
Page 127 of 269
Service Station Procedures
3. Pull the support rod out of its clip and insert the end into the hole on
the left side of the hood.
To close the hood, lower it to about a foot (30 cm) above the fender, thenpress down firmly with your hands.
After closing the hood, make sure it is securely latched.
After closing the hood, make sure it is securely latched. Check the engine oil level every time
you fill the car with fuel. Wait a few minutes after turning the engine off
before you check the oil.
1. Remove the dipstick (orange handle). 2. Wipe the dipstick with a clean
cloth or paper towel.
CONTINUED
Before Driving
SUPPORT ROD
CLIP
Oil Check
DIPSTICKMain Menu Table of Contents s t
Page 133 of 269
Carrying Cargo
Load Limit
The maximum load for your car is
850
lbs
(395 kg).
This figure includes the total weight
of all occupants, cargo, and
accessories.
To figure out how much cargo you
can carry:
Add up the weight of all occupants.
Subtract the total from 850 Ibs
(395 kg).
The final number is the total weight
of cargo you can carry.
Carrying Items in the Passenger
Compartment Store or secure all items that could
be thrown around and hurt
someone during a crash. Do not put any items on top of the
rear shelf. They can block your
view and be thrown around the car during a crash. Be sure items placed on the floor
behind the front seats cannot roll under the seats and interfere with
the driver's ability to operate the
pedals, or with the properoperation of the seats. Keep the glove box closed while
driving. If the lid is open, a
passenger could injure their knees during a crash or sudden stop.
Before Driving
Overloading or improper
loading can affect handling and
stability and cause a crash in
which you can be hurt or killed.
Follow all load limits and other
loading guidelines in this
manual.Main Menu Table of Contents s t
Page 136 of 269
Preparing to Drive
You should do the following checks and adjustments every day before
you drive your car.
1. Make sure all windows, mirrors, and outside lights are clean and
unobstructed. Remove frost, snow,or ice.
2. Check that the hood and trunk are fully closed.
3. Visually check the tires. If a tire looks low, use a gauge to check its
pressure. 4. Check that any items you may be
carrying with you inside are stored
properly or fastened downsecurely.
5. Check the adjustment of the seat (see page 76).
6. Check the adjustment of the inside and outside mirrors (see
page 81).
7. Check the adjustment of the steering wheel (see page 65).
8. Make sure the doors are securely closed and locked. 9. Fasten your seat belt. Check that
your passengers have fastenedtheir seat belts (see page 8).
10.Turn the ignition switch ON (II). Check the indicator lights in the
instrument panel.
11.Start the engine (see page 137).
12. Check the gauges and indicator lights in the instrument panel (see
page 53).
DrivingMain Menu Table of Contents s t
Page 170 of 269
Engine Oil
Adding Oil
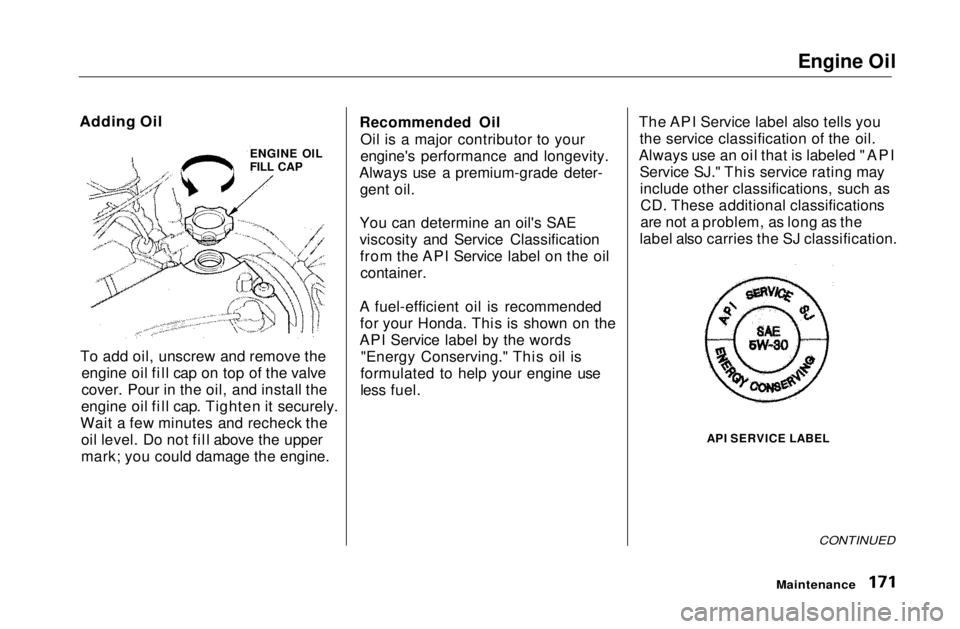
To add oil, unscrew and remove the engine oil fill cap on top of the valve
cover. Pour in the oil, and install the
engine oil fill cap. Tighten it securely.
Wait a few minutes and recheck the oil level. Do not fill above the upper
mark; you could damage the engine. Recommended Oil
Oil is a major contributor to your
engine's performance and longevity.
Always use a premium-grade deter- gent oil.
You can determine an oil's SAE
viscosity and Service Classification from the API Service label on the oilcontainer.
A fuel-efficient oil is recommended for your Honda. This is shown on the
API Service label by the words "Energy Conserving." This oil is
formulated to help your engine use
less fuel. The API Service label also tells you
the service classification of the oil.
Always use an oil that is labeled "API Service SJ." This service rating mayinclude other classifications, such asCD. These additional classifications
are not a problem, as long as the
label also carries the SJ classification.
API SERVICE LABEL
CONTINUED
Maintenance
ENGINE OIL
FILL CAPMain Menu Table of Contents s t
Page 177 of 269
Cooling System
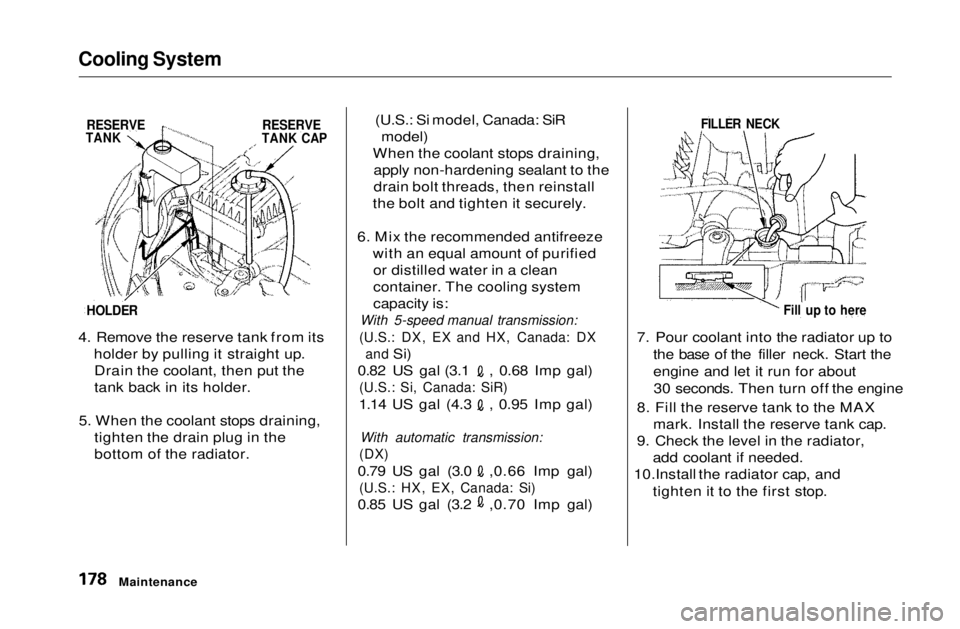
4. Remove the reserve tank from its
holder by pulling it straight up.Drain the coolant, then put the
tank back in its holder.
5. When the coolant stops draining, tighten the drain plug in the
bottom of the radiator. (U.S.: Si model, Canada: SiR
model)
When the coolant stops draining, apply non-hardening sealant to the
drain bolt threads, then reinstall
the bolt and tighten it securely.
6. Mix the recommended antifreeze with an equal amount of purifiedor distilled water in a clean
container. The cooling system
capacity is:
With 5-speed manual transmission:
(U.S.: DX, EX and HX, Canada: DX and
Si) 0.82 US gal (3.1 , 0.68 Imp gal)
(U.S.: Si, Canada: SiR)
1.14 US gal (4.3 , 0.95 Imp gal)
With automatic transmission:
(DX)
0.79 US gal (3.0 ,0.66 Imp gal)
(U.S.: HX, EX, Canada: Si)
0.85 US gal (3.2 ,0.70 Imp gal)7. Pour coolant into the radiator up to
the base of the filler neck. Start the
engine and let it run for about30 seconds. Then turn off the engine
8. Fill the reserve tank to the MAX mark. Install the reserve tank cap.
9. Check the level in the radiator, add coolant if needed.
10.Install the radiator cap, and
tighten it to the first stop.
Maintenance
RESERVE
TANK
RESERVE
TANK CAP
HOLDER
FILLER NECK
Fill up to hereMain Menu Table of Contents s t
Page 180 of 269
Transmission Fluid
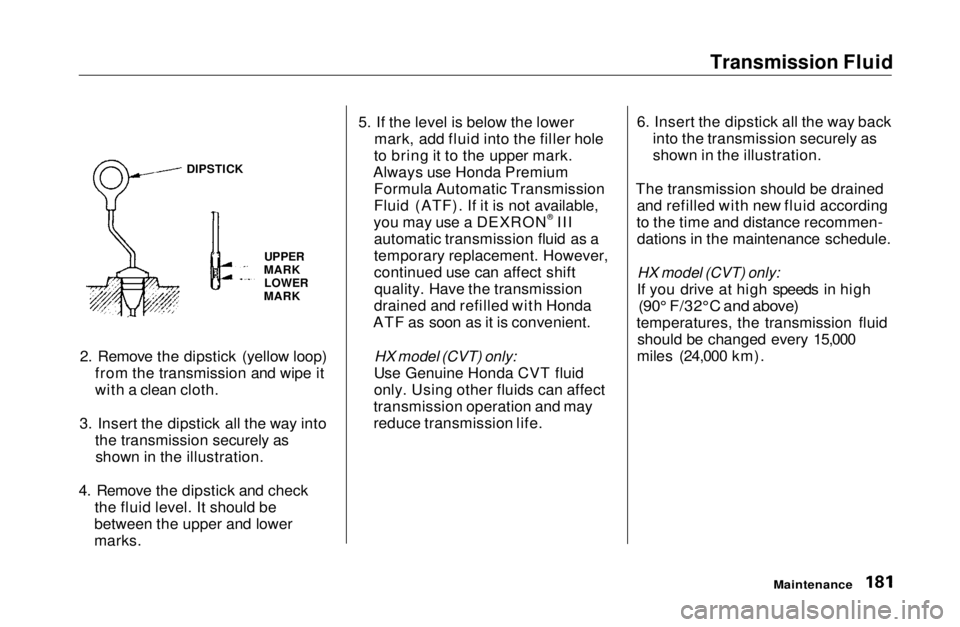
2. Remove the dipstick (yellow loop) from the transmission and wipe it
with a clean cloth.
3. Insert the dipstick all the way into the transmission securely asshown in the illustration.
4. Remove the dipstick and check the fluid level. It should be
between the upper and lower
marks. 5. If the level is below the lower
mark, add fluid into the filler hole
to bring it to the upper mark.
Always use Honda Premium Formula Automatic Transmission
Fluid (ATF). If it is not available,
you may use a DEXRON® III automatic transmission fluid as a
temporary replacement. However,
continued use can affect shiftquality. Have the transmission
drained and refilled with Honda
ATF as soon as it is convenient.
HX model (CVT) only:
Use Genuine Honda CVT fluid
only. Using other fluids can affect
transmission operation and may
reduce transmission life. 6. Insert the dipstick all the way back
into the transmission securely as
shown in the illustration.
The transmission should be drained and refilled with new fluid according
to the time and distance recommen- dations in the maintenance schedule.
HX model (CVT) only:
If you drive at high speeds in high
(90° F/32°C and above)
temperatures, the transmission fluid should be changed every 15,000
miles (24,000 km).
Maintenance
DIPSTICK
UPPER
MARK LOWER
MARKMain Menu Table of Contents s t