Page 147 of 269

Automatic Transmission (CVT)
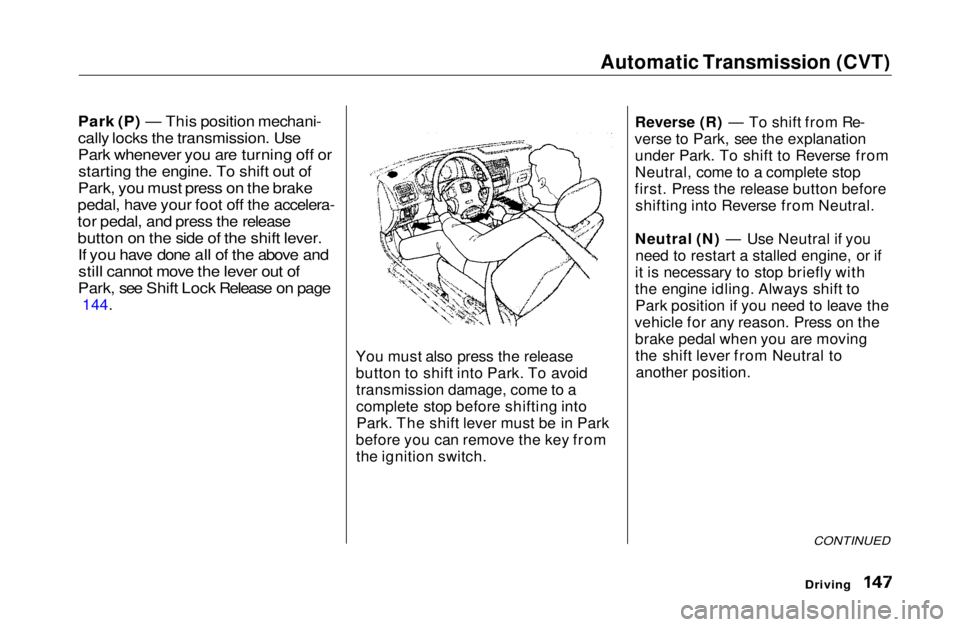
Park (P) — This position mechani-
cally locks the transmission. Use
Park whenever you are turning off or
starting the engine. To shift out of
Park, you must press on the brake
pedal, have your foot off the accelera-
tor pedal, and press the release
button on the side of the shift lever.
If you have done all of the above andstill cannot move the lever out of
Park, see Shift Lock Release on page
144.
You must also press the release
button to shift into Park. To avoidtransmission damage, come to a
complete stop before shifting intoPark. The shift lever must be in Park
before you can remove the key from the ignition switch. Reverse (R) — To shift from Re-
verse to Park, see the explanation under Park. To shift to Reverse from
Neutral, come to a complete stop
first. Press the release button before shifting into Reverse from Neutral.
Neutral (N) — Use Neutral if you need to restart a stalled engine, or if
it is necessary to stop briefly with
the engine idling. Always shift to Park position if you need to leave the
vehicle for any reason. Press on the brake pedal when you are movingthe shift lever from Neutral toanother position.
CONTINUED
DrivingMain Menu Table of Contents s t
Page 153 of 269
The Braking System
*U.S. indicator shown
The ABS is self-checking. It also checks itself whenever you use the
brakes.
If anything goes wrong, the ABS
indicator on the instrument panelcomes on (see page 55). This means
the anti-lock function of the braking system has shut down. The brakes
still work like a conventional system
without anti-lock, providing normal stopping ability. You should have the dealer inspect your car as soon as
possible if this light stays on after
you start the engine, or comes on
while driving.
Driving
ABS Indicator
ABS INDICATOR'Main Menu Table of Contents s t
Page 177 of 269

Cooling System
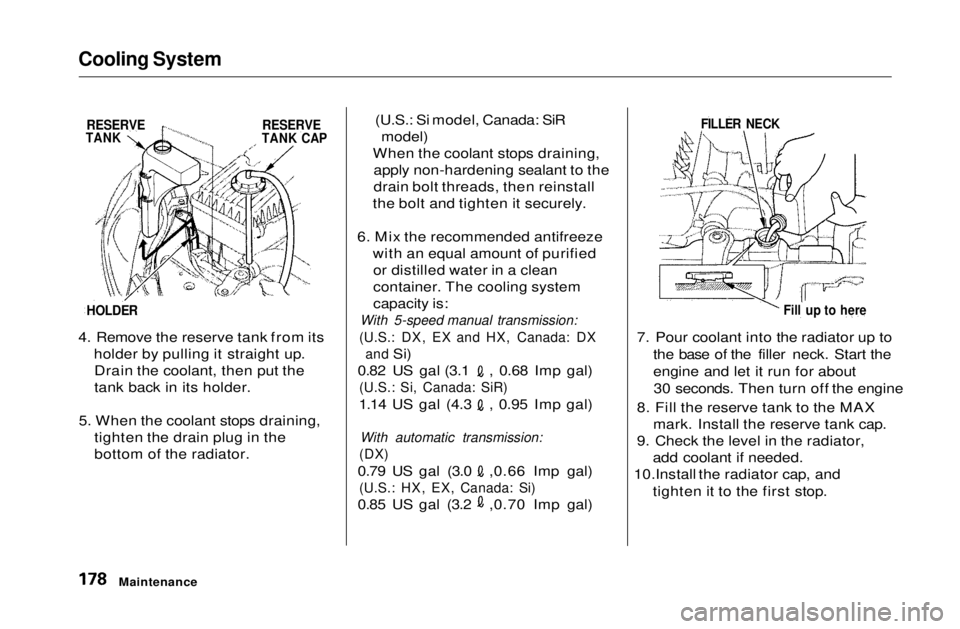
4. Remove the reserve tank from its
holder by pulling it straight up.Drain the coolant, then put the
tank back in its holder.
5. When the coolant stops draining, tighten the drain plug in the
bottom of the radiator. (U.S.: Si model, Canada: SiR
model)
When the coolant stops draining, apply non-hardening sealant to the
drain bolt threads, then reinstall
the bolt and tighten it securely.
6. Mix the recommended antifreeze with an equal amount of purifiedor distilled water in a clean
container. The cooling system
capacity is:
With 5-speed manual transmission:
(U.S.: DX, EX and HX, Canada: DX and
Si) 0.82 US gal (3.1 , 0.68 Imp gal)
(U.S.: Si, Canada: SiR)
1.14 US gal (4.3 , 0.95 Imp gal)
With automatic transmission:
(DX)
0.79 US gal (3.0 ,0.66 Imp gal)
(U.S.: HX, EX, Canada: Si)
0.85 US gal (3.2 ,0.70 Imp gal)7. Pour coolant into the radiator up to
the base of the filler neck. Start the
engine and let it run for about30 seconds. Then turn off the engine
8. Fill the reserve tank to the MAX mark. Install the reserve tank cap.
9. Check the level in the radiator, add coolant if needed.
10.Install the radiator cap, and
tighten it to the first stop.
Maintenance
RESERVE
TANK
RESERVE
TANK CAP
HOLDER
FILLER NECK
Fill up to hereMain Menu Table of Contents s t
Page 178 of 269
Cooling System
Maintenance
11.Start the engine and let it run until
the cooling fan comes on two
times. Then stop the engine.
12. Remove the radiator cap. Fill the radiator with coolant up to the
base of the filler neck.
13.Start the engine and hold it at 1,500 rpm until the cooling fan
comes on. Turn off the engine.
Check the coolant level in the radiator and add coolant if needed.
14.Install the radiator cap, and tighten it fully.
15.If necessary, fill the reserve tank to the MAX mark. Install thereserve tank cap.Main Menu Table of Contents s t
Page 229 of 269

If Your Engine Overheats
4. If the temperature gauge stays at
the red mark, turn off the engine.
5. Wait until you see no more signs of steam or spray, then open the
hood.
6. Look for any obvious coolant leaks, such as a split radiator hose.
Everything is still extremely hot, so use caution. If you find a leak, it
must be repaired before you
continue driving (see Emergency
Towing on page 241).
7. If you don't find an obvious leak, check the coolant level in the
radiator reserve tank (see page112). If the level is below the
MIN mark, add coolant to halfway
between the MIN and MAX marks.
8. If there was no coolant in the reserve tank, you may also have to
add coolant to the radiator. Let the
engine cool down until the pointer reaches the middle of the tempera-
ture gauge, or lower, before check-
ing the radiator.
9. Using gloves or a large heavy cloth, turn the radiator cap
counterclockwise, without pushing
down, to the first stop. This
releases any remaining pressure in
the cooling system. After the
pressure releases, push down on
the cap and turn it until it comes off. 10.Start the engine and set the
temperature control dial to
maximum. Add coolant to the
radiator up to the base of the filler
neck. If you do not have the
proper coolant mixture available,
you can add plain water.Remember to have the coolingsystem drained and refilled with
the proper mixture as soon as you
can.
11.Put the radiator cap back on tightly. Run the engine and watchthe temperature gauge. If it goes
back to the red mark, the engine
needs repair. (See Emergency
Towing on page 241.)
12.If the temperature stays normal, check the coolant level in the
radiator reserve tank. If it has
gone down, add coolant to the MAX mark. Put the cap back on
tightly.
Taking Care of the Unexpected
Removing the radiator cap
while the engine is hot can
cause the coolant to spray out, seriously scalding you.
Always let the engine and radiator cool down before
removing the radiator cap.Main Menu Table of Contents s t
Page 230 of 269

Low Oil Pressure Indicator
This indicator should light when the ignition switch is ON (II), and go out
after the engine starts. It should
never come on when the engine is running. If it starts flashing, itindicates that the oil pressure
dropped very low for a moment, then
recovered. If the indicator stays on
with the engine running, it shows that the engine has lost oil pressure
and serious engine damage is
possible. In either case, you should
take immediate action.
Running the engine with low oil
pressure can cause serious mechanical damage almost immediately. Turn offthe engine as soon as you can safely get
the car stopped.
1. Safely pull off the road and shut off the engine. Turn on the hazard
warning indicators.
2. Let the car sit for a minute. Open the hood and check the oil level(see page 111). Although oil level
and oil pressure are not directly
connected, an engine that is very
low on oil can lose pressure during cornering and other driving
maneuvers.
3. If necessary, add oil to bring the level back to the full mark on thedipstick (see page 171). 4. Start the engine and watch the oil
pressure indicator. If the lightdoes not go out within ten seconds,
turn off the engine. There is a
mechanical problem that needs to
be repaired before you can continue driving (see Emergency
Towing on page 241.)
Taking Care of the Unexpected
LOW OIL PRESSURE INDICATOR
NOTICEMain Menu Table of Contents s t
Page 231 of 269
Charging System Indicator
This indicator should come on when
the ignition switch is ON (II), and go out after the engine starts. If it
comes on brightly when the engine is running, it indicates that thecharging system has stopped
charging the battery. Immediately turn off all electrical
accessories: radio, heater, A/C, rear
defogger, cruise control, etc. Try not
to use other electrically-operated controls such as the power windows.
Keep the engine running and takeextra care not to stall it. Starting the
engine will discharge the battery
rapidly. By eliminating as much of the
electrical load as possible, you can
drive several miles (kilometers)
before the battery is too discharged
to keep the engine running. Drive to a service station or garage where
you can get technical assistance.
Taking Care of the Unexpected
CHARGING SYSTEM INDICATORMain Menu Table of Contents s t