Page 203 of 269
Lights
Replacing a Headlight Bulb
Your car has halogen headlight bulbs, one on each side. When
replacing a bulb, handle it by its steel
base and protect the glass fromcontact with your skin or hard
objects. If you touch the glass, clean
it with denatured alcohol and a clean
cloth.
Halogen headlight bulbs get very hot when lit. Oil, perspiration, or a scratch
on the glass can cause the bulb to
overheat and shatter.
1. Open the hood.
If you need to change the head-
light bulb on the driver's side, remove the power steeringreservoir tank by pulling it out of
its holder.
2. Remove the electrical connector
from the bulb by squeezing theconnector on both sides to unlock
the tab. Pull the connector straight
off.
3. Remove the rubber weather seal by pulling on the tab.
Maintenance
NOTICE
HOLDER
WEATHER SEAL
BULB
CONNECTOR
HOLD-DOWN WIREMain Menu Table of Contents s t
Page 204 of 269

Lights
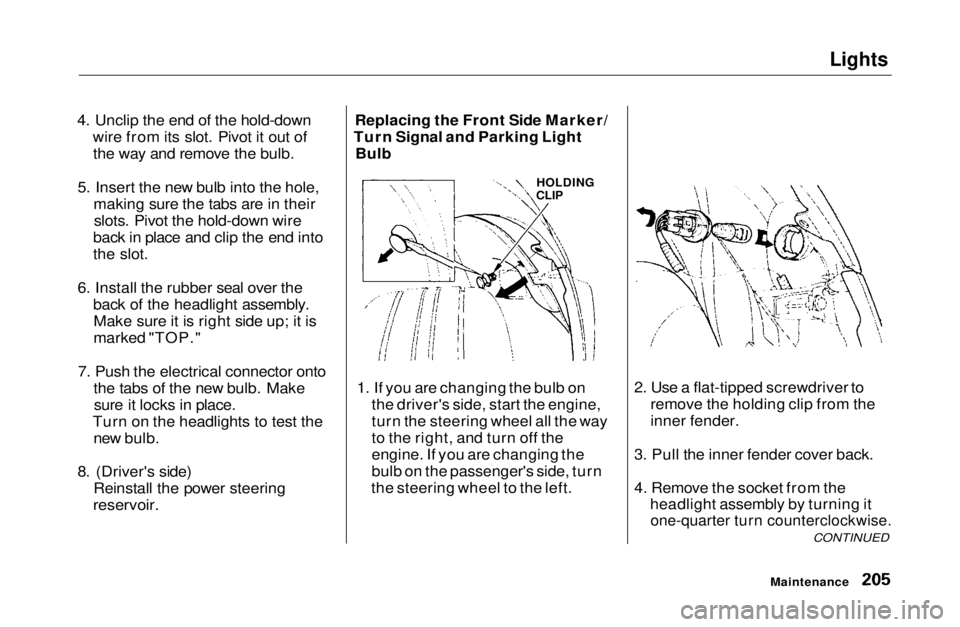
4. Unclip the end of the hold-down wire from its slot. Pivot it out ofthe way and remove the bulb.
5. Insert the new bulb into the hole, making sure the tabs are in theirslots. Pivot the hold-down wire
back in place and clip the end into
the slot.
6. Install the rubber seal over the back of the headlight assembly.Make sure it is right side up; it is
marked "TOP."
7. Push the electrical connector onto the tabs of the new bulb. Makesure it locks in place.
Turn on the headlights to test the new bulb.
8. (Driver's side) Reinstall the power steering
reservoir.
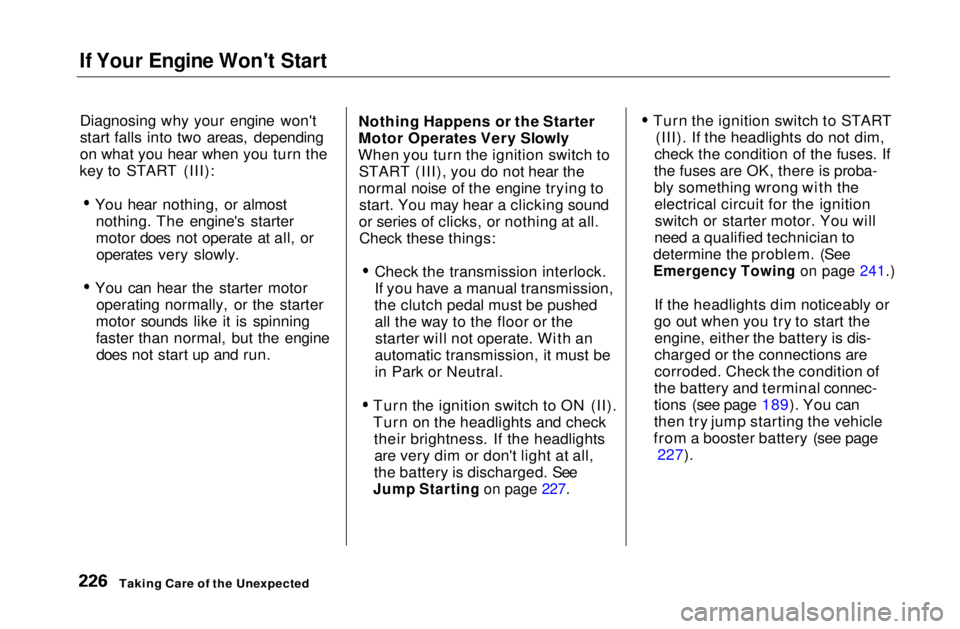
Replacing the Front Side Marker/
Turn Signal and Parking Light Bulb
1. If you are changing the bulb on the driver's side, start the engine,
turn the steering wheel all the way
to the right, and turn off the
engine. If you are changing the
bulb on the passenger's side, turn
the steering wheel to the left. 2. Use a flat-tipped screwdriver to
remove the holding clip from the
inner fender.
3. Pull the inner fender cover back.
4. Remove the socket from the headlight assembly by turning it
one-quarter turn counterclockwise.
CONTINUED
Maintenance
HOLDING
CLIPMain Menu Table of Contents s t
Page 225 of 269

If Your Engine Won't Start
Diagnosing why your engine won't
start falls into two areas, depending
on what you hear when you turn the
key to START (III):
You hear nothing, or almostnothing. The engine's starter
motor does not operate at all, oroperates very slowly.
You can hear the starter motor operating normally, or the starter
motor sounds like it is spinning
faster than normal, but the engine does not start up and run. Nothing Happens or the Starter
Motor Operates Very Slowly
When you turn the ignition switch to START (III), you do not hear the
normal noise of the engine trying to start. You may hear a clicking sound
or series of clicks, or nothing at all. Check these things:
Check the transmission interlock.
If you have a manual transmission,
the clutch pedal must be pushed all the way to the floor or thestarter will not operate. With an
automatic transmission, it must be
in Park or Neutral.
Turn the ignition switch to ON (II).
Turn on the headlights and check their brightness. If the headlightsare very dim or don't light at all,
the battery is discharged. See
Jump Starting on page 227.
Turn the ignition switch to START
(III). If the headlights do not dim,
check the condition of the fuses. If
the fuses are OK, there is proba-
bly something wrong with the electrical circuit for the ignitionswitch or starter motor. You will
need a qualified technician to
determine the problem. (See
Emergency Towing on page 241.)
If the headlights dim noticeably or
go out when you try to start the engine, either the battery is dis-
charged or the connections are
corroded. Check the condition of
the battery and terminal connec-
tions (see page 189). You can
then try jump starting the vehicle
from a booster battery (see page 227).
Taking Care of the UnexpectedMain Menu Table of Contents s t
Page 226 of 269

If Your Engine Won't Start, Jump Starting
The Starter Operates Normally In this case, the starter motor's
speed sounds normal, or even faster
than normal, when you turn the ignition switch to START (III), but
the engine does not run.
Are you using the proper startingprocedure? Refer to Starting the
Engine on page 137.Do you have fuel? Turn the
ignition switch to ON (II) for a
minute and watch the fuel gauge.
The low fuel level warning light may not be working, so you were
not reminded to fill the tank.
There may be an electrical problem, such as no power to the
fuel pump. Check all the fuses (see page 237).
If you find nothing wrong, you will
need a qualified technician to find
the problem. See Emergency
Towing on page 241. Jump Starting
If your car's battery has run down,
you may be able to start the engine by using a booster battery. Although
this seems like a simple procedure,
you should take several precautions.
You cannot start a Honda with an automatic transmission by pushingor pulling it. To jump start your car, follow these
directions closely:
1. Open the hood and check the physical condition of the battery(see page 189). In very cold
weather, check the condition of the electrolyte. If it seems slushyor like ice, do not try jump starting
until it thaws.
If a battery sits in extreme cold, the
electrolyte inside can freeze.
Attempting to jump start with a frozen
battery can cause it to rupture.
2. Turn off all the electrical acces-
sories: heater, A/C, stereo system,
lights, etc.
Put the transmission in Neutral or
Park and set the parking brake.
CONTINUED
Taking Care of the Unexpected
A battery can explode if you do
not follow the correct procedure,
seriously injuring anyone nearby.
Keep all sparks, open flames,
and smoking materials away
from the battery.
NOTICEMain Menu Table of Contents s t
Page 231 of 269
Charging System Indicator
This indicator should come on when
the ignition switch is ON (II), and go out after the engine starts. If it
comes on brightly when the engine is running, it indicates that thecharging system has stopped
charging the battery. Immediately turn off all electrical
accessories: radio, heater, A/C, rear
defogger, cruise control, etc. Try not
to use other electrically-operated controls such as the power windows.
Keep the engine running and takeextra care not to stall it. Starting the
engine will discharge the battery
rapidly. By eliminating as much of the
electrical load as possible, you can
drive several miles (kilometers)
before the battery is too discharged
to keep the engine running. Drive to a service station or garage where
you can get technical assistance.
Taking Care of the Unexpected
CHARGING SYSTEM INDICATORMain Menu Table of Contents s t
Page 235 of 269
Fuses
All the electrical circuits in your car have fuses to protect them from ashort circuit or overload. These
fuses are located in three fuse boxes. INTERIOR
The interior fuse box is underneath the dashboard on the driver's side.Remove the fuse box lid by swinging
the lid down and pulling it straight
out of its hinges. The under-hood fuse box is located
in the engine compartment next to
the battery. To open it, push the tab
as shown.
Taking Care of the Unexpected
TAB
UNDER-HOODMain Menu Table of Contents s t
Page 236 of 269
Fuses
Vehicles equipped with ABS have a third fuse box for the ABS. It is in
the engine compartment on the
passenger's side.
Checking and Replacing Fuses
If something electrical in your car stops working, the first thing you
should check for is a blown fuse.
Determine from the chart on pages 198 and 199, or the diagram on the
fuse box lid, which fuse or fuses control that component. Check those
fuses first, but check all the fuses
before deciding that a blown fuse is not the cause. Replace any blown
fuses and check the component's
operation.
1. Turn the ignition switch to LOCK (0). Make sure the headlights and
all other accessories are off.
2. Remove the cover from the fuse box. FUSE
3. Check each of the large fuses in the under-hood fuse box by
looking through the top at the wire
inside. Removing these fusesrequires a Phillips-head screw-
driver.
CONTINUED
Taking Care of the Unexpected
ABS FUSE BOX
BLOWNMain Menu Table of Contents s t
Page 237 of 269

Fuses
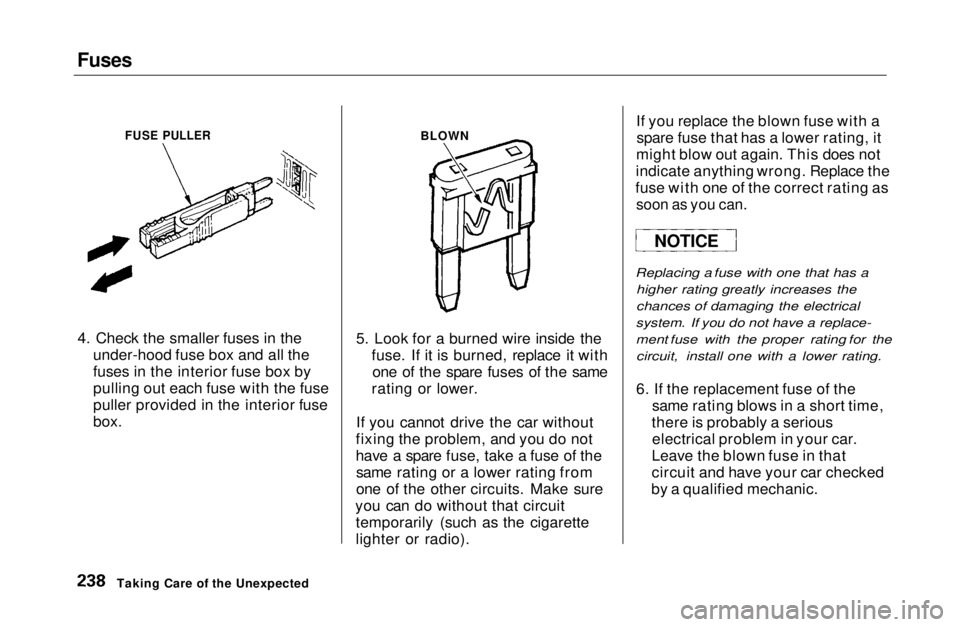
4. Check the smaller fuses in the under-hood fuse box and all the
fuses in the interior fuse box by
pulling out each fuse with the fuse
puller provided in the interior fuse
box. 5. Look for a burned wire inside the
fuse. If it is burned, replace it withone of the spare fuses of the same
rating or lower.
If you cannot drive the car without
fixing the problem, and you do not
have a spare fuse, take a fuse of the same rating or a lower rating from
one of the other circuits. Make sure
you can do without that circuit temporarily (such as the cigarette
lighter or radio). If you replace the blown fuse with a
spare fuse that has a lower rating, it
might blow out again. This does not
indicate anything wrong. Replace the
fuse with one of the correct rating as
soon as you can.
Replacing a fuse with one that has a higher rating greatly increases the
chances of damaging the electrical
system. If you do not have a replace-
ment fuse with the proper rating for the circuit, install one with a lower rating.
6. If the replacement fuse of the same rating blows in a short time,
there is probably a serious electrical problem in your car.
Leave the blown fuse in that
circuit and have your car checked
by a qualified mechanic.
Taking Care of the Unexpected
FUSE PULLER
NOTICE
BLOWNMain Menu Table of Contents s t