Page 61 of 413
1-48
A rear-facing infant restraint (B) positions an infant
to face the rear of the vehicle. Rear
-facing infant
restraints are designed for infants of up to about
20 lbs. (9 kg) and about one year of age. This type
of restraint faces the rear so that the infant's head,
neck and body can have the support they need in
a frontal crash. Some infant seats come in two
parts
-- the base stays secured in the vehicle and
the seat part is removable.
Page 62 of 413
1-49
A forward-facing child restraint (C-E) positions
a child upright to face forward in the vehicle.
These forward
-facing restraints are designed to
help protect children who are from 20 to 40 lbs.
(9 to 18 kg) and about 26 to 40 inches
(66 to 102 cm) in height, or up to around
four years of age. One type, a convertible restraint,
is designed to be used either as a rear
-facing infant
seat or a forward
-facing child seat.
Page 63 of 413

1-50
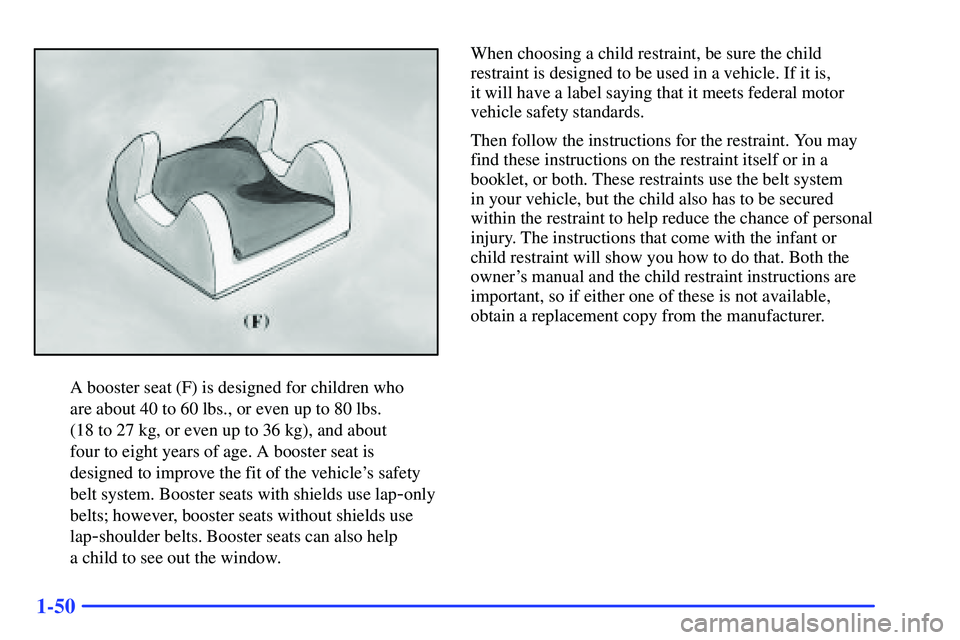
A booster seat (F) is designed for children who
are about 40 to 60 lbs., or even up to 80 lbs.
(18 to 27 kg, or even up to 36 kg), and about
four to eight years of age. A booster seat is
designed to improve the fit of the vehicle's safety
belt system. Booster seats with shields use lap
-only
belts; however, booster seats without shields use
lap
-shoulder belts. Booster seats can also help
a child to see out the window.When choosing a child restraint, be sure the child
restraint is designed to be used in a vehicle. If it is,
it will have a label saying that it meets federal motor
vehicle safety standards.
Then follow the instructions for the restraint. You may
find these instructions on the restraint itself or in a
booklet, or both. These restraints use the belt system
in your vehicle, but the child also has to be secured
within the restraint to help reduce the chance of personal
injury. The instructions that come with the infant or
child restraint will show you how to do that. Both the
owner's manual and the child restraint instructions are
important, so if either one of these is not available,
obtain a replacement copy from the manufacturer.
Page 114 of 413

2-37
If a bulb is burned out, replace it to help avoid an
accident. If the arrows don't go on at all when you
signal a turn, check for burned
-out bulbs and a blown
fuse (see ªFuses and Circuit Breakersº in the Index).
Turn Signal On Chime
If your turn signal is left on for more than 3/4 of a mile
(1.2 km), a chime will sound at each flash of the turn
signal. To turn off the chime, move the turn signal lever
to the off position.
Headlamp High/Low Beam Changer
To change the headlamps from low to high beam or high
to low beam, pull the multifunction lever all the way
toward you. Then release it.
When the high beams
are on, this light on the
instrument panel also
will be on.
Flash-To-Pass Feature
This feature allows you to use your high-beam
headlamps to signal a driver in front of you that you
want to pass. It works even if your headlamps are off.
To use it, pull the turn signal lever toward you, but not
so far that you hear it click.
If your headlamps are off or on low
-beam, your
high
-beam headlamps will turn on. They'll stay on
as long as you hold the lever toward you and the
high
-beam indicator on the instrument panel will
come on. Release the lever to turn the high
-beam
headlamps off.
Page 135 of 413

2-58 Convenience Net (If Equipped)
You may have a convenience net in the rear of your
vehicle to help keep small loads, like grocery bags, in
place during sharp turns or quick stops and starts.
The net is not designed for larger, heavier items.
To install the net, attach the hooks to the raised cargo
tie downs. Then, attach the cord loops to the button
retainers in the side trim.
You can unhook the net so that it will lie flat when
you're not using it.
Luggage Carrier (If Equipped)
If you have the luggage carrier, you can load things on
top of your vehicle.
The luggage carrier has slats and siderails attached to
the roof and crossrails which can be moved back and
forth to help secure cargo. Tie the load to the siderails or
siderail supports.
NOTICE:
Loading cargo that weighs more than 200 lbs.
(90.6 kg) on the luggage carrier may damage
your vehicle. When you carry large things, never
let them hang over the rear or the sides of your
vehicle. Load your cargo so that it rests on the
slats and does not scratch or damage the vehicle.
Put the cargo against the siderails and fasten it
securely to the luggage carrier.
Don't exceed the maximum vehicle capacity when
loading your vehicle. For more information on vehicle
capacity and loading, see ªLoading Your Vehicleº in
the Index.
To prevent damage or loss of cargo as you're leaving,
check now and then to make sure the luggage and cargo
are still securely fastened.
Page 253 of 413

4-50
For example, adding a 700 lb. ( 318 kg) snow plow
adds more than 700 lb. ( 318 kg) to the front axle.
Using the formula, if the snow plow is 4 ft. (122 cm)
in front of the front axle and the wheel base is
10 ft. (305 cm), then:
W= 700 lb. ( 318 kg), A= 4 ft. (122 cm) and
W.B.= 10 ft. (305 cm)
(W x (A+W.B.)) / W.B. = (700 x (4ft. + 10 ft.)) /
10 ft. = 980 lbs.
So, if your truck's front axle reserve capacity is more
than 980 lbs. (445 kg), you could add this snow plow
without exceeding the front GAWR.
You can add heavier equipment on the front of the
vehicle if you compensate for it by carrying fewer
passengers, less cargo or by positioning cargo more
towards the rear. This has the effect of reducing the
load on the front. However, the front GAWR, rear
GAWR and the GVWR must never be exceeded.Total Vehicle Reserve Capacity
This is the difference between your GVWR and the
weight of your truck with full fuel and passengers.
It is the amount of weight you can add to your vehicle
before reaching your GVWR.
The reserve capacity numbers are intended as a guide
when selecting the amount of equipment or cargo your
truck can carry. If you are unsure of your truck's front,
rear or total weight, go to a weigh station and weigh
your vehicle. Your dealer can help you with this.
Trailer Recommendations
You must subtract your hitch loads from the CWR
for your vehicle. Weigh your vehicle with the trailer
attached, so that you won't go over the GVWR or
GAWR. If you are using a weight
-distributing hitch,
weigh the vehicle without the equalizer bars in place.
You'll get the best performance if you spread out the
weight of your load the right way, and if you choose the
correct hitch and trailer brakes.
For more information, see ªTrailer Towingº in the Index.
Page 257 of 413
4-54
C-1500 (2WD)*
Engine (Trans.) Axle
RatioMax. Trailer Wt.
4800 V8 3.42 6,100 lbs. (2 767 kg)
3.73 7,100 lbs. (3 221 kg)
5300 V8 3.42 7,100 lbs. (3 221 kg)
3.73 8,100 lbs. (3 674 kg)
5300 V8 3.73 8,000 lbs. (3 629 kg)
(Suburban/
Yukon XL)4.10 9,000 lbs. (4 082 kg)
* Weight
-distributing hitch tongue weight 10% to 15%
of hitch pulling weight 1,200 lbs. (544 kg) maximum.K
-1500 (4WD)*
Engine (Trans.) Axle
RatioMax. Trailer Wt.
4800 V8 3.73 6,800 lbs. (3 084 kg)
4.10 7,800 lbs. (3 538 kg)
5300 V8 3.73 7,800 lbs. (3 538 kg)
4.10 8,800 lbs. (3 992 kg)
5300 V8 3.73 7,800 lbs. (3 538 kg)
(Suburban/
Yukon XL)4.10 8,800 lbs. (3 992 kg)
* Weight
-distributing hitch tongue weight 10% to 15%
of hitch pulling weight 1,200 lbs. (544 kg) maximum.
Page 258 of 413
4-55
C-2500 LD (2WD)*
Engine (Trans.) Axle
RatioMax. Trailer Wt.
6000 V8 3.73 8,500 lbs. (3 856 kg)
(Suburban/
Yukon XL)4.10 10,500 lbs. (4 763 kg)
* Weight
-distributing hitch tongue weight 10% to 15%
of hitch pulling weight 1,200 lbs. (544 kg) maximum.K
-2500 HD (4WD)*
Engine (Trans.) Axle
RatioMax. Trailer Wt.
6000 V8 3.73 8,100 lbs. (3 674 kg)
(Suburban/
Yukon XL)4.10 10,100 lbs. (4 581 kg)
* Weight
-distributing hitch tongue weight 10% to 15%
of hitch pulling weight 1,200 lbs. (544 kg) maximum.
You can ask your dealer for our trailering information or
advice, or you can write us at the address listed in your
Warranty and Owner Assistance Information Booklet.
In Canada, write to:
General Motors of Canada Limited
Customer Communication Centre
1908 Colonel Sam Drive
Oshawa, Ontario L1H 8P7