Page 10 of 391
ix
For example,
these symbols
are used on an
original battery:
CAUTION
POSSIBLE
INJURY
PROTECT
EYES BY
SHIELDING
CAUSTIC
BATTERY
ACID COULD
CAUSE
BURNS
AVOID
SPARKS OR
FLAMES
SPARK OR
FLAME
COULD
EXPLODE
BATTERY
These symbols
are important
for you and
your passengers
whenever your
vehicle is
driven:
DOOR LOCK
UNLOCK
FASTEN
SEAT
BELTS
POWER
WINDOW
AIR BAG
These symbols
have to do with
your lamps:
MASTER
LIGHTING
SWITCH
TURN
SIGNALS
PARKING
LAMPS
HAZARD
WARNING
FLASHER
DAYTIME
RUNNING
LAMPS
FOG LAMPS
These symbols
are on some of
your controls:
WINDSHIELD
WIPER
WINDSHIELD
WASHER
WINDSHIELD
DEFROSTER
REAR
WINDOW
DEFOGGER
VENTILATING
FAN
These symbols
are used on
warning and
indicator lights:
ENGINE
COOLANT
TEMP
BATTERY
CHARGING
SYSTEM
BRAKE
COOLANT
ENGINE OIL
PRESSURE
ANTI-LOCK
BRAKES
Here are some
other symbols
you may see:
FUSE
LIGHTER
HORN
SPEAKER
FUEL
Vehicle Symbols
These are some of the symbols you may find on your vehicle.
Page 14 of 391
1-2
Seats and Seat Controls
This section tells you about the seats -- how to adjust
them, take them out and put them back in. It also tells
you about bucket and bench seats, power seats and
head restraints.
Manual Front Seats
CAUTION:
You can lose control of the vehicle if you try to
adjust a manual driver's seat while the vehicle is
moving. The sudden movement could startle and
confuse you, or make you push a pedal when you
don't want to. Adjust the driver's seat only when
the vehicle is not moving.
2-Way Front Seat
The bucket seats can be
adjusted forward or
rearward by the lever
located at the front of
the seat.
Move the seat adjustment lever at the front of the seat
toward the driver's door to unlock it. Slide the seat to
where you want it. Then release the lever and try to
move the seat with your body, to make sure the seat
is locked into place.
Page 43 of 391

1-31
What makes an air bag inflate?
In an impact of sufficient severity, the air bag sensing
system detects that the vehicle is in a crash. The sensing
system triggers a release of gas from the inflator, which
inflates the air bag. The inflator, air bag and related
hardware are all part of the air bag modules inside the
steering wheel and in the instrument panel in front of
the right front passenger.
How does an air bag restrain?
In moderate to severe frontal or near
-frontal collisions,
even belted occupants can contact the steering wheel or
the instrument panel. Air bags supplement the protection
provided by safety belts. Air bags distribute the force of
the impact more evenly over the occupant's upper body,
stopping the occupant more gradually. But air bags would
not help you in many types of collisions, including
rollovers, rear impacts and side impacts, primarily
because an occupant's motion is not toward those air
bags. Air bags should never be regarded as anything
more than a supplement to safety belts, and then only
in moderate to severe frontal or near
-frontal collisions.What will you see after an air bag inflates?
After an air bag inflates, it quickly deflates, so
quickly that some people may not even realize the
air bag inflated. Some components of the air bag
module
-- the steering wheel hub for the driver's
air bag, or the instrument panel for the right front
passenger's bag
-- will be hot for a short time.
The parts of the bag that come into contact with you
may be warm, but not too hot to touch. There will
be some smoke and dust coming from vents in the
deflated air bags. Air bag inflation doesn't prevent
the driver from seeing or from being able to steer the
vehicle, nor does it stop people from leaving the vehicle.
CAUTION:
When an air bag inflates, there is dust in the air.
This dust could cause breathing problems for
people with a history of asthma or other breathing
trouble. To avoid this, everyone in the vehicle
should get out as soon as it is safe to do so. If you
have breathing problems but can't get out of the
vehicle after an air bag inflates, then get fresh air
by opening a window or door.
Page 76 of 391

2-
2-1
Section 2 Features and Controls
Here you can learn about the many standard and optional features on your vehicle, and information on starting,
shifting and braking. Also explained are the instrument panel and the warning systems that tell you if everything is
working properly
-- and what to do if you have a problem.
2
-2 Keys
2
-4 Front Doors
2
-4 Rear Doors
2
-6 Door Locks
2
-8 Keyless Entry System (Option)
2
-11 Sliding Door
2
-14 Hatch
2
-15 Theft
2
-16 Passlock�
2-16 New Vehicle ªBreak-Inº
2
-17 Ignition Positions
2
-18 Starting Your Engine
2
-20 Engine Coolant Heater (If Equipped)
2
-21 Automatic Transmission Operation
2
-24 Parking Brake
2
-25 Shifting Into PARK (P)
2
-28 Shifting Out of PARK (P)
2
-28 Parking Over Things That Burn
2
-29 Engine Exhaust2
-29 Running Your Engine While You're Parked
2
-30 Locking Rear Axle
2
-30 All-Wheel Drive (Option)
2
-31 Windows
2
-33 Horn
2
-33 Tilt Wheel (If Equipped)
2
-33 Turn Signal/Multifunction Lever
2
-39 Exterior Lamps
2
-41 Interior Lamps
2
-42 Mirrors
2
-44 Storage Compartments
2
-52 Ashtrays and Cigarette Lighter
2
-53 Sun Visors
2
-53 Accessory Power Outlets
2
-54 HomeLink� Transmitter (Option)
2
-58 The Instrument Panel - Your
Information System
2
-61 Warning Lights, Gages and Indicators
Page 79 of 391
2-4
Front Doors
To open the front side door from the outside, grasp the
handle and pull the door open.
To open the front side door
from the inside, pull the
lever toward you and push
the door open.
Rear Doors
If you have the Dutch doors, you must open the hatch
first. See ªHatch Releaseº in the Index.
Rear doors can only be
opened from the outside.
Open the passenger's side
rear door first. Grasp the
handle and pull the
door open.
Cargo Door Shown
Page 80 of 391
2-5
To open the driver's side
rear door, pull on the latch
release handle located on
the inside of the door.
To close the rear doors, close the driver's side door first.
Check to make sure both doors are completely closed.
The rear doors have a check assembly to keep the doors
from opening beyond 90 degrees.To fully open the rear doors,
push in on the clip and lift
the check assembly up off
the mounting bracket.
Do this on each door. Replace the check assemblies on
the mounting brackets before closing the doors.
See ªSwing
-Out Windowsº in the Index for important
safety cautions.
Page 82 of 391

2-7 Power Door Locks (If Equipped)
If your vehicle has power
door locks, press the power
door lock switch to lock or
unlock all the doors at once.
The power door lock switch will lock or unlock the
rear hatch and Dutch doors. See ªHatch Releaseº in
the Index.Every vehicle with power door locks has a pulse lock
system. A pulse lock system works like this:
If the sliding door is open and you press the power door
lock switch, the sliding door will not lock immediately.
After you close the door, the system comes on and locks
the sliding door in about five seconds.
When the key is in the ignition and the power door lock
button is pressed with a door open, all doors are locked
while the driver's side door is unlocked.
All models have overriding door locks. When a door
is locked, the inside door handle will not work the
latch. This will help stop a door from being
accidentally opened.
Leaving Your Vehicle
If you are leaving the vehicle, take your keys, open your
door and set the locks from inside. Then get out and
close the door.
Page 83 of 391

2-8
Keyless Entry System (Option)
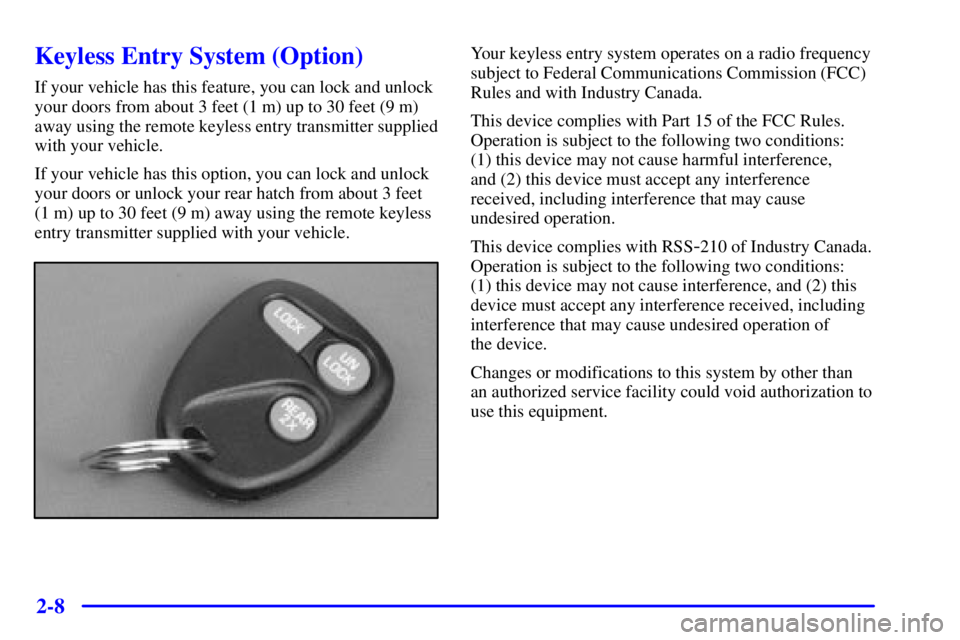
If your vehicle has this feature, you can lock and unlock
your doors from about 3 feet (1 m) up to 30 feet (9 m)
away using the remote keyless entry transmitter supplied
with your vehicle.
If your vehicle has this option, you can lock and unlock
your doors or unlock your rear hatch from about 3 feet
(1 m) up to 30 feet (9 m) away using the remote keyless
entry transmitter supplied with your vehicle.
Your keyless entry system operates on a radio frequency
subject to Federal Communications Commission (FCC)
Rules and with Industry Canada.
This device complies with Part 15 of the FCC Rules.
Operation is subject to the following two conditions:
(1) this device may not cause harmful interference,
and (2) this device must accept any interference
received, including interference that may cause
undesired operation.
This device complies with RSS
-210 of Industry Canada.
Operation is subject to the following two conditions:
(1) this device may not cause interference, and (2) this
device must accept any interference received, including
interference that may cause undesired operation of
the device.
Changes or modifications to this system by other than
an authorized service facility could void authorization to
use this equipment.