1999 FORD WINDSTAR bulb
[x] Cancel search: bulbPage 7 of 248

Traction ControlYoff light (if equipped)
This light momentarily illuminates
when the ignition is turned to ON
position and illuminates when the
Traction Controlysystem has been
disabled (by the driver or as a result
of a system failure). For more
information, refer to theDrivingchapter.
Safety belt
Momentarily illuminates when the
ignition is turned to the ON position
to remind you to fasten your safety
belts. For more information, refer to
theSeating and safety restraints
chapter.
Anti-theft system
Refer toSecuriLockypassive
anti-theft systemin theControls
and featureschapter.
Turn signal
Illuminates when the left or right
turn signal or the hazard lights are
turned on. If one or both of the
indicators stay on continuously or
flash faster, check for a burned-out
turn signal bulb. Refer toExterior bulbsin theMaintenance and care
chapter.
TRAC
OFF
THEFT
Instrumentation
7
Page 9 of 248

Brake system warning
Momentarily illuminates when the
ignition is turned to the ON
position, the engine is off and the
parking brake is engaged. If the
brake warning lamp does not
illuminate at this time, seek service immediately. Illumination after
releasing the parking brake indicates low brake fluid level and the brake
system should be inspected immediately.
O/D off
Illuminates when the ignition is
turned to the ON position and
transmission control switch has
been pushed. When the light is on,
the transmission does not shift into
overdrive. If the light does not come on when the transmission control
switch is depressed or if the light flashes when you are driving, have
your vehicle serviced.
Check engine
Your vehicle is equipped with a
computer that monitors the engine's
emission control system. This
system is commonly known as the
On Board Diagnostics System (OBD II). This OBD II system protects the
environment by ensuring that your vehicle continues to meet
government emission standards. The OBD II system also assists the
service technician in properly servicing your vehicle.
TheCheck Engineindicator light illuminates when the ignition is first
turned to the ON position to check the bulb. If it comes on after the
engine is started, one of the engine's emission control systems may be
malfunctioning. The light may illuminate without a driveability concern
being noted. The vehicle will usually be drivable and will not require
towing.
!
BRAKE
O/D
OFF
Instrumentation
9
Page 11 of 248

Bulb Warning
Illuminates when the ignition is in
the ON position and one of the
exterior bulbs has burned out.
Low washer fluid
Illuminates when the ignition is
turned to ON and when the
windshield washer fluid is low.
Safety belt warning chime
Chimes to remind you to fasten your safety belts.
For information on the safety belt warning chime, refer to theSeating
and safety restraintschapter.
Supplemental restraint system (SRS) warning chime
For information on the SRS warning chime, refer to theSeating and
safety restraintschapter.
Key-in-ignition warning chime
Sounds when the key is left in the ignition in the OFF/LOCK or ACC
position and the driver's door is opened.
Headlamps on warning chime (if equipped)
Sounds when the headlamps or parking lamps are on, the ignition is off
(and the key is not in the ignition) and the driver's door is opened.
Turn signal chime (if equipped)
Sounds when the turn signal lever has been activated to signal a turn
and not turned off after the vehicle is driven more than 0.8 km
(1/2 mile).
Instrumentation
11
Page 18 of 248

DRIVER'S DOOR AJAR.Displayed when the driver's door is not
completely closed.
PASSENGER DOOR AJAR.Displayed when the passenger side door is
not completely closed.
DRIVER'S REAR DOOR AJAR.Displayed when the driver's rear door
is not completely closed.
PASSENGER REAR DOOR AJAR.Displayed when the passenger side
rear door is not completely closed.
LIFTGATE AJAR.Displayed when the liftgate is not completely closed.
CHECK CHARGING SYSTEM.Displayed when the electrical system is
not maintaining proper voltage. If you are operating electrical accessories
when the engine is idling at a low speed, turn off as many of the
electrical loads as soon as possible. If the warning stays on or comes on
when the engine is operating at normal speeds, have the electrical
system checked as soon as possible.
LOW FUEL LEVEL.Displayed when you have approximately 1/16th of
a tank indicated on the fuel gauge.
CHECK TRANSMISSION.Indicates the transmission is not operating
properly. If this warning stays on, contact your dealer as soon as
possible.
TRANSMISSION OVERHEATED.Indicates the transmission is
overheating. This warning may appear when towing heavy loads or when
driving in a low gear at a high speed for an extended period of time.
Stop the vehicle as soon as safely possible, turn off the engine and let it
cool. Check the transmission fluid and level. Refer toTransmission
fluidin theMaintenance and carechapter. If the warning stays on or
continues to come on, contact your dealer for transmission service as
soon as possible.
CHECK BRAKE LAMPS.Displayed when the brake lamps are
activated and at least one is burned out. Check the lamps as soon as
safely possible and have the burned out lamp replaced. The center
high-mount brakelamp is not monitored.
CHECK HEADLAMPS.Displayed when the headlamps are activated
and at least one is burned out. Check the lamps as soon as safely
possible and have the burned out lamp replaced. Refer toReplacing
headlamp bulbsin theMaintenance and carechapter.
Instrumentation
18
Page 164 of 248

Safety chains
Always connect the trailer's safety chains to the vehicle. To connect the
trailer's safety chains, cross the chains under the trailer tongue and allow
slack for turning corners.
If you use a rental trailer, follow the instructions that the rental agency
gives to you.
Do not attach safety chains to the bumper.
Trailer brakes
Electric brakes and manual, automatic or surge-type brakes are safe if
installed properly and adjusted to the manufacturer's specifications. The
trailer brakes must meet local and Federal regulations.
Do not connect a trailer's hydraulic brake system directly to your
vehicle's brake system. Your vehicle may not have enough
braking power and your chances of having a collision greatly increase.
The braking system of the tow vehicle is rated for operation at the
GVWR not GCWR.
Trailer lamps
Trailer lamps are required on most towed vehicles. Ensure that your
trailer lamps conform to local and Federal Regulations.
Do not splice or modify the vehicle electrical wiring or lamps for
trailer towing.
Your vehicle uses an advanced electronic module with ground side
switching to control and monitor your vehicle lamps. Splicing into the
wiring or attaching wiring to the vehicle bulbs will DISABLE the rear
vehicle lamps from functioning. Your lamp outage feature will also be
disabled or provide incorrect information.
Your vehicle is ready to install a Trailer Tow module that will provide the
proper communication with the vehicle electrical system so your trailer
lamps will function properly. See your dealer or trailer rental agency for
proper instructions and equipment for hooking up trailer lamps.
Driving
164
Page 224 of 248

EXTERIOR BULBS
Replacing exterior bulbs
It is a good idea to check the operation of the following lights frequently:
²Headlamps
²Turn signals
²Cornering lamps
²High-mount brakelamp
²Tail lamps
²Brakelamps
²Backup lamps
²License plate lamps
Do not remove lamp bulbs unless they will be replaced immediately. If a
bulb is removed for an extended period of time, contaminants may enter
the lamp housings and affect performance.
Handle a halogen bulb carefully and keep out of children's reach.
Grasp the bulb only by its plastic base and do not touch the
glass; the oil from your hand could cause the bulb to break the next
time that the headlamps are operated.
Replacing headlamp bulbs
Handle a halogen headlamp bulb carefully and keep out of
children's reach. Grasp the bulb only by its plastic base and do
not touch the glass. The oil from your hand could cause the bulb to
break the next time the headlamps are operated.
To remove the headlamp bulb:
1. Make sure headlamp switch is in OFF position, then open the hood.
Maintenance and care
224
Page 225 of 248

Note size and location of retainer
pins for installation.
2. At the back of the headlamp, pull
two retainer pins up to release the
headlamp assembly.
3. Pull headlamp assembly forward
disengaging the lamp from the rear
retainer to expose the back of the
bulb.
4. Release clip and disconnect the
electrical connector from the bulb.
5. Remove the bulb retaining ring by
rotating it counterclockwise (when
viewed from the rear) about
1/8 turn to free it from the bulb
socket, and slide the ring off the
plastic base. Keep the ring to retain
the new bulb.
6. Without turning, remove the old
bulb from its socket by gently pulling it straight back out of the lamp
assembly.
To install the new bulb:
1. With the flat side of the new
bulb's plastic base facing upward,
insert the glass end of the bulb into
the lamp assembly. Turn the bulb
left or right to align the grooves in
the plastic base with the tabs in the
lamp assembly. When the grooves
are aligned, push the bulb into the
lamp assembly until the plastic base contacts the rear of the lamp
assembly.
Maintenance and care
225
Page 226 of 248

2. Install the bulb retaining ring over the plastic base until it contacts the
rear of the socket by rotating clockwise until you feel a ªstop.º
3. Connect the electrical connector into the rear of the plastic base until
it snaps, locking it into position.
4. Install the headlamp on vehicle by aligning the lamp with the rear
retainer, push rearward and secure with two retainer pins.
5. Turn the headlamps on and make sure they work properly. If the
headlamp was correctly aligned before you changed the bulb, you should
not need to align it again.
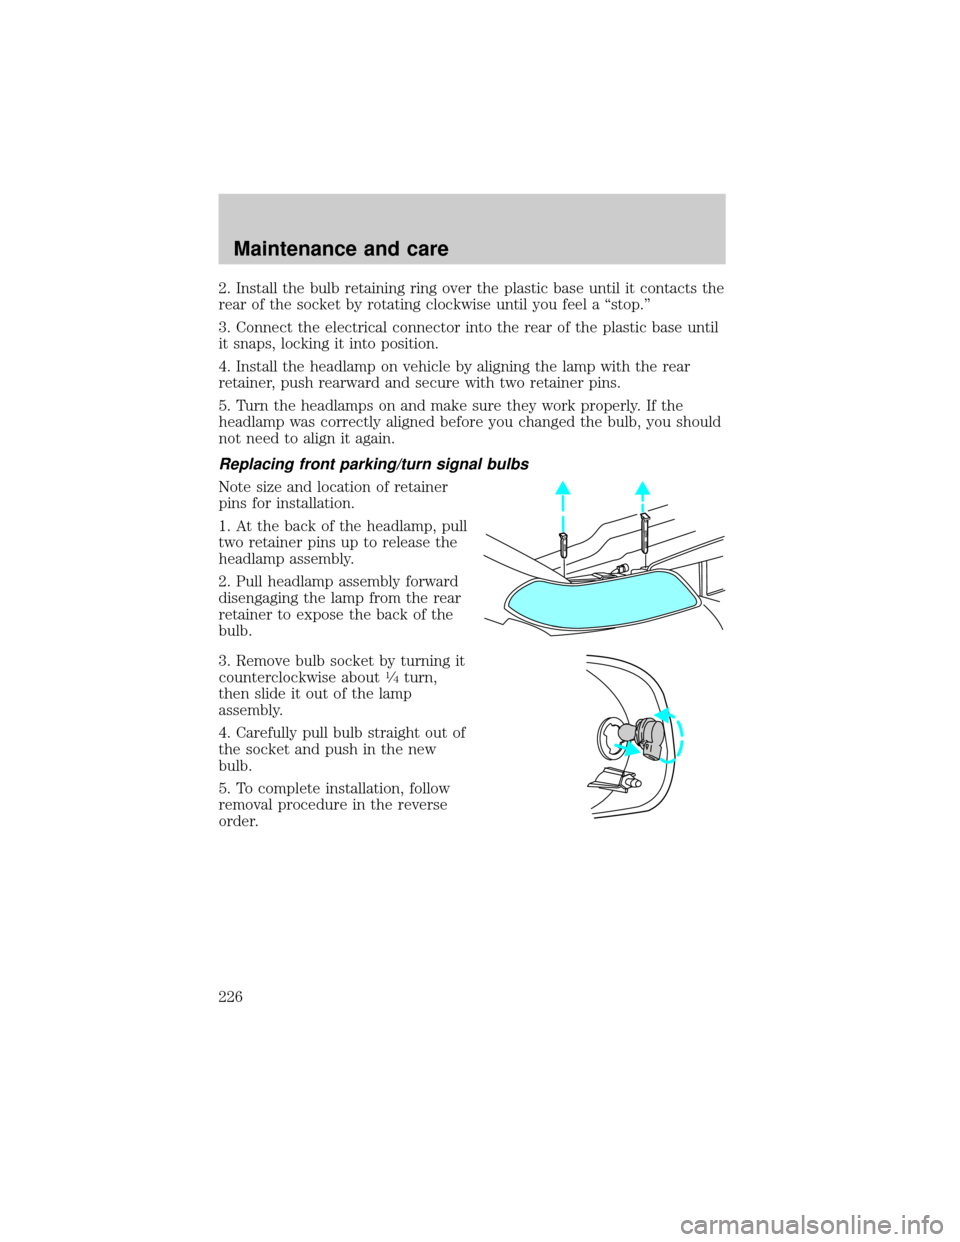
Replacing front parking/turn signal bulbs
Note size and location of retainer
pins for installation.
1. At the back of the headlamp, pull
two retainer pins up to release the
headlamp assembly.
2. Pull headlamp assembly forward
disengaging the lamp from the rear
retainer to expose the back of the
bulb.
3. Remove bulb socket by turning it
counterclockwise about
1¤4turn,
then slide it out of the lamp
assembly.
4. Carefully pull bulb straight out of
the socket and push in the new
bulb.
5. To complete installation, follow
removal procedure in the reverse
order.
Maintenance and care
226