Page 226 of 248

2. Install the bulb retaining ring over the plastic base until it contacts the
rear of the socket by rotating clockwise until you feel a ªstop.º
3. Connect the electrical connector into the rear of the plastic base until
it snaps, locking it into position.
4. Install the headlamp on vehicle by aligning the lamp with the rear
retainer, push rearward and secure with two retainer pins.
5. Turn the headlamps on and make sure they work properly. If the
headlamp was correctly aligned before you changed the bulb, you should
not need to align it again.
Replacing front parking/turn signal bulbs
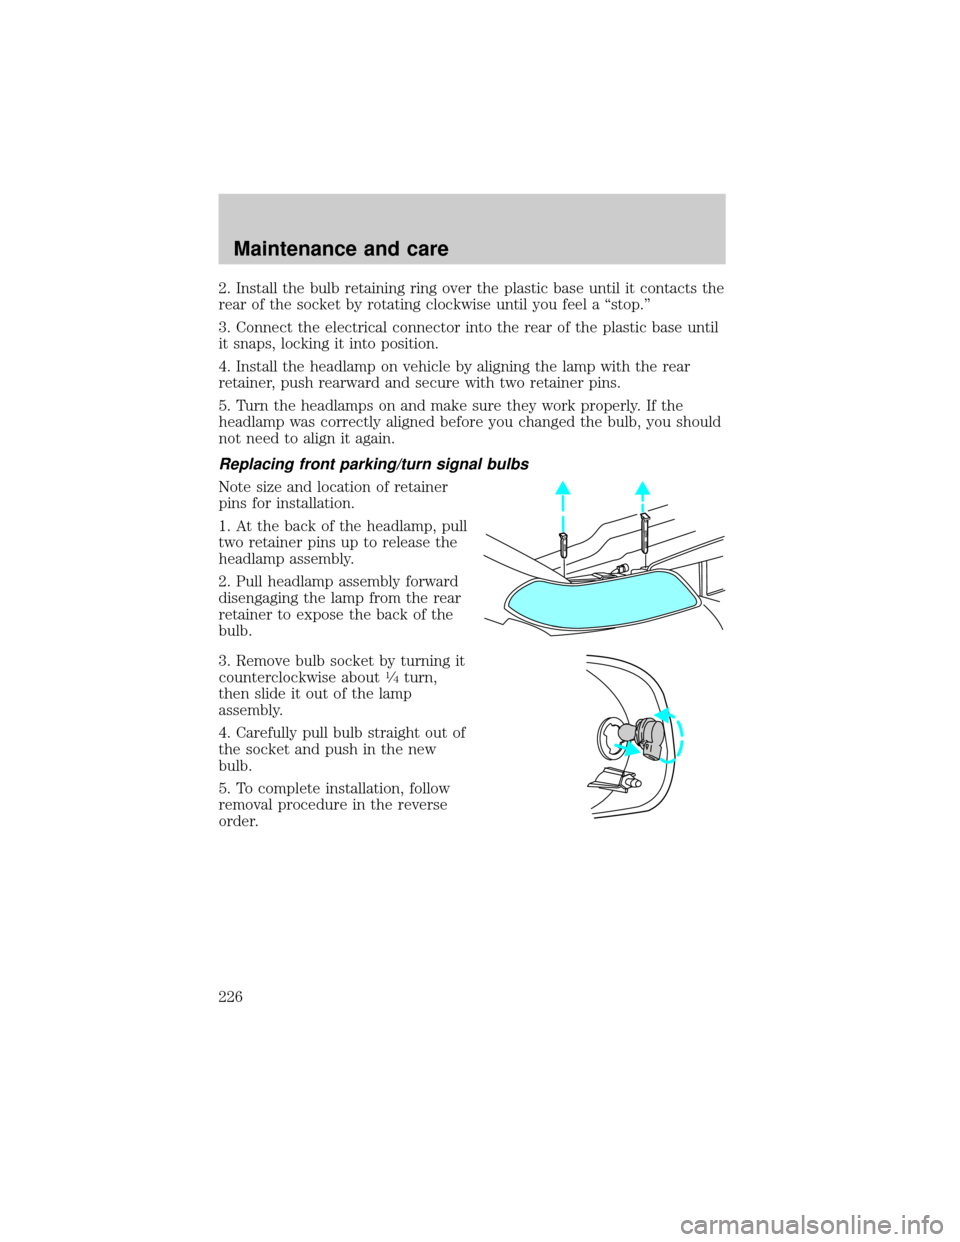
Note size and location of retainer
pins for installation.
1. At the back of the headlamp, pull
two retainer pins up to release the
headlamp assembly.
2. Pull headlamp assembly forward
disengaging the lamp from the rear
retainer to expose the back of the
bulb.
3. Remove bulb socket by turning it
counterclockwise about
1¤4turn,
then slide it out of the lamp
assembly.
4. Carefully pull bulb straight out of
the socket and push in the new
bulb.
5. To complete installation, follow
removal procedure in the reverse
order.
Maintenance and care
226
Page 227 of 248

Replacing tail lamp/backup lamp bulbs
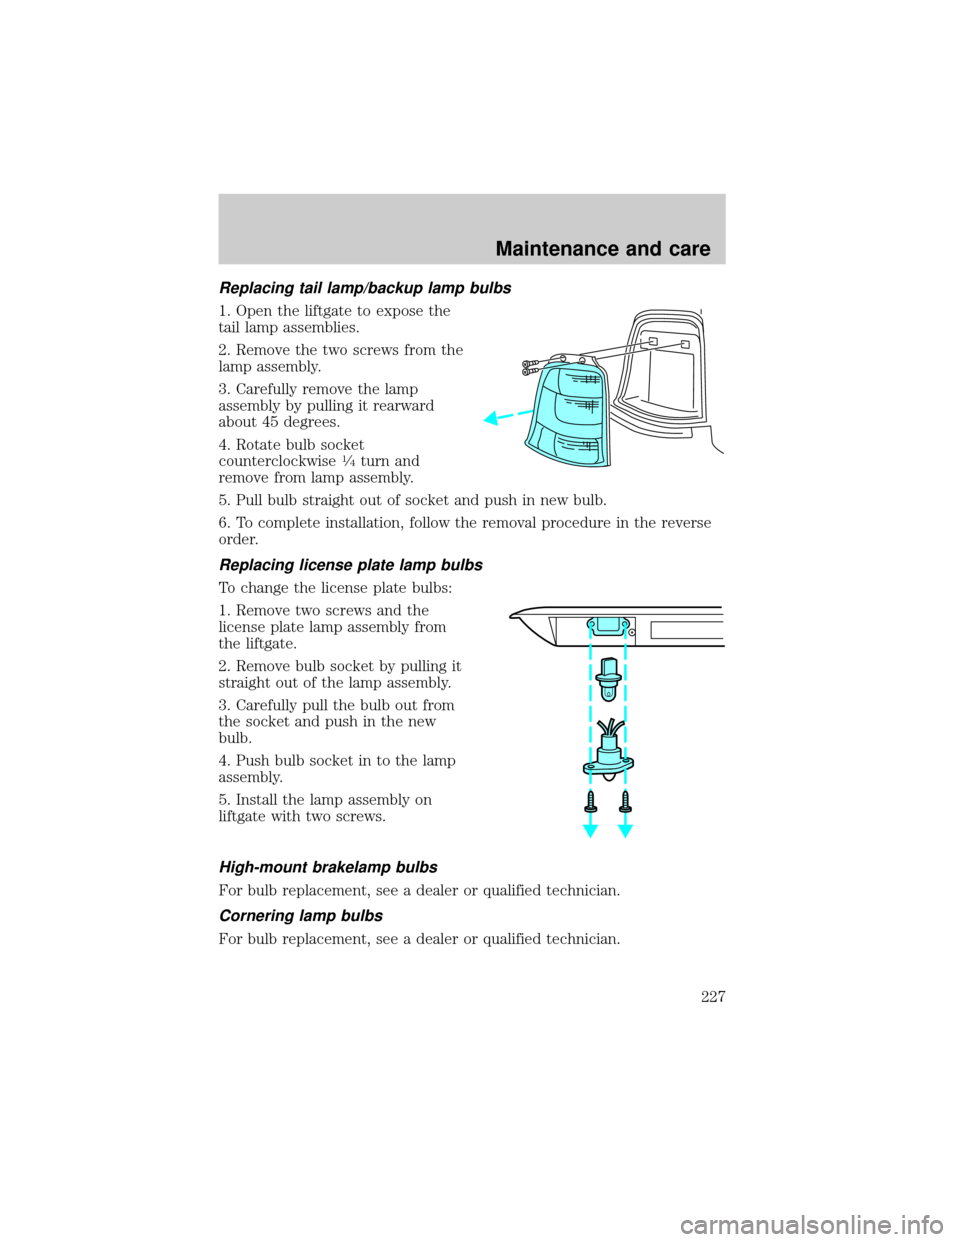
1. Open the liftgate to expose the
tail lamp assemblies.
2. Remove the two screws from the
lamp assembly.
3. Carefully remove the lamp
assembly by pulling it rearward
about 45 degrees.
4. Rotate bulb socket
counterclockwise
1¤4turn and
remove from lamp assembly.
5. Pull bulb straight out of socket and push in new bulb.
6. To complete installation, follow the removal procedure in the reverse
order.
Replacing license plate lamp bulbs
To change the license plate bulbs:
1. Remove two screws and the
license plate lamp assembly from
the liftgate.
2. Remove bulb socket by pulling it
straight out of the lamp assembly.
3. Carefully pull the bulb out from
the socket and push in the new
bulb.
4. Push bulb socket in to the lamp
assembly.
5. Install the lamp assembly on
liftgate with two screws.
High-mount brakelamp bulbs
For bulb replacement, see a dealer or qualified technician.
Cornering lamp bulbs
For bulb replacement, see a dealer or qualified technician.
Maintenance and care
227
Page 229 of 248

Horizontal aim adjustment
1. Park the vehicle on a level
surface
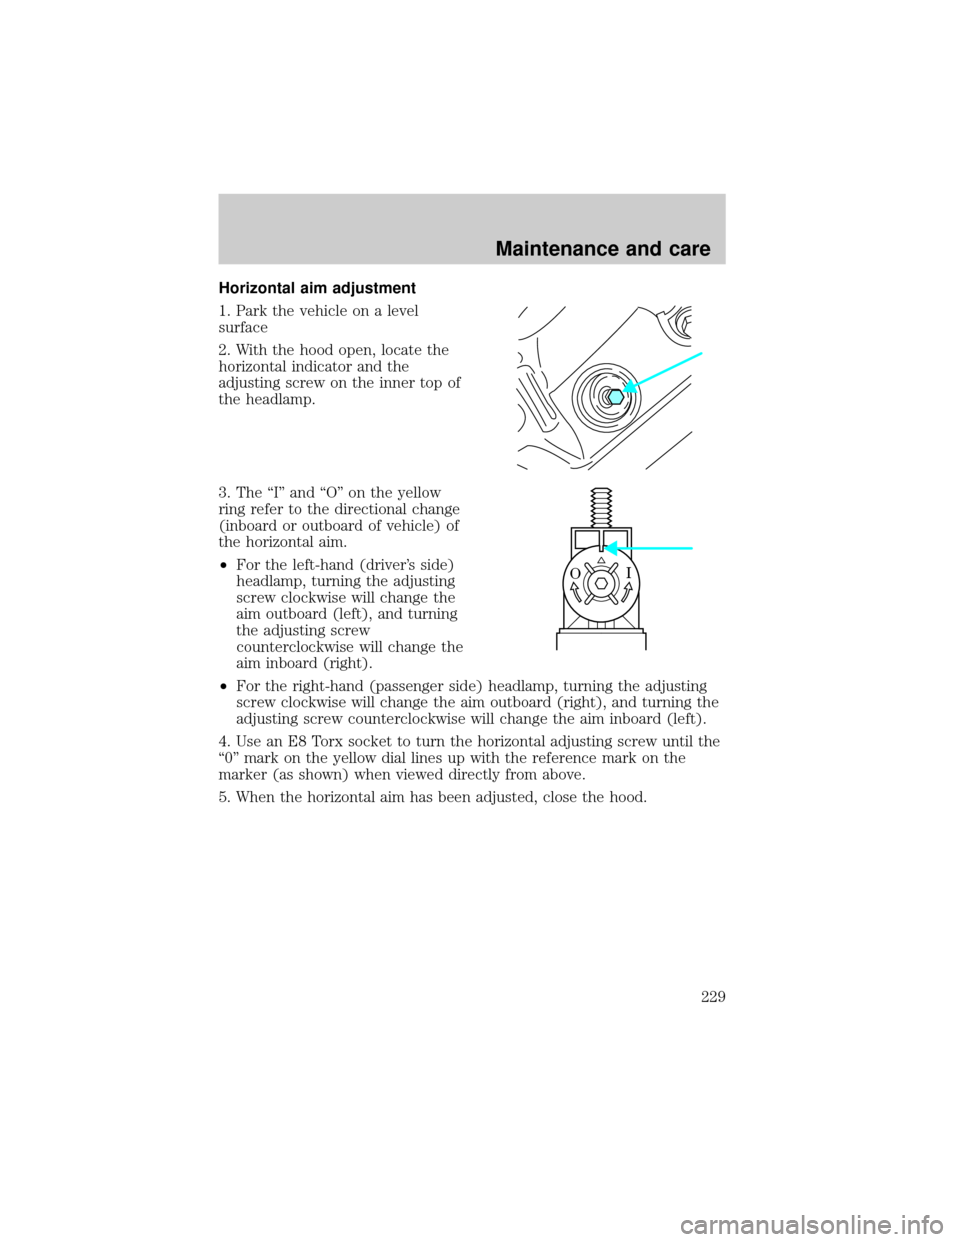
2. With the hood open, locate the
horizontal indicator and the
adjusting screw on the inner top of
the headlamp.
3. The ªIº and ªOº on the yellow
ring refer to the directional change
(inboard or outboard of vehicle) of
the horizontal aim.
²For the left-hand (driver's side)
headlamp, turning the adjusting
screw clockwise will change the
aim outboard (left), and turning
the adjusting screw
counterclockwise will change the
aim inboard (right).
²For the right-hand (passenger side) headlamp, turning the adjusting
screw clockwise will change the aim outboard (right), and turning the
adjusting screw counterclockwise will change the aim inboard (left).
4. Use an E8 Torx socket to turn the horizontal adjusting screw until the
ª0º mark on the yellow dial lines up with the reference mark on the
marker (as shown) when viewed directly from above.
5. When the horizontal aim has been adjusted, close the hood.
I O
Maintenance and care
229
Page:
< prev 1-8 9-16 17-24