1999 FORD F250 SUPER DUTY brake lights
[x] Cancel search: brake lightsPage 8 of 248
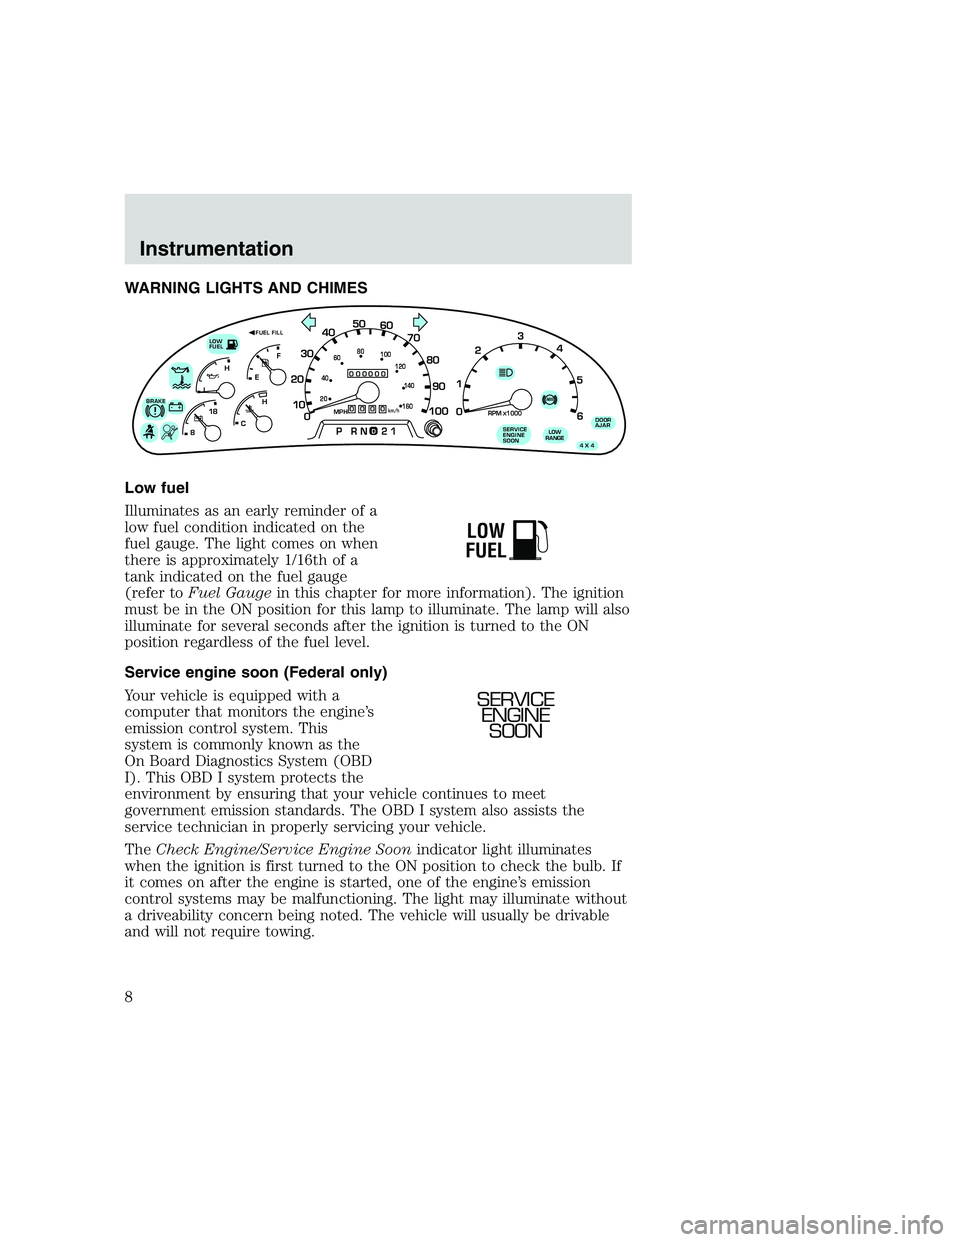
WARNING LIGHTS AND CHIMES
Low fuel
Illuminates as an early reminder of a
low fuel condition indicated on the
fuel gauge. The light comes on when
there is approximately 1/16th of a
tank indicated on the fuel gauge
(refer toFuel Gaugein this chapter for more information). The ignition
must be in the ON position for this lamp to illuminate. The lamp will also
illuminate for several seconds after the ignition is turned to the ON
position regardless of the fuel level.
Service engine soon (Federal only)
Your vehicle is equipped with a
computer that monitors the engine’s
emission control system. This
system is commonly known as the
On Board Diagnostics System (OBD
I). This OBD I system protects the
environment by ensuring that your vehicle continues to meet
government emission standards. The OBD I system also assists the
service technician in properly servicing your vehicle.
TheCheck Engine/Service Engine Soonindicator light illuminates
when the ignition is first turned to the ON position to check the bulb. If
it comes on after the engine is started, one of the engine’s emission
control systems may be malfunctioning. The light may illuminate without
a driveability concern being noted. The vehicle will usually be drivable
and will not require towing.
0
000000000
MPH20km/h
406080
100
120
140
160
010 20304050
60
70
80
90
100
LOW
FUEL
DOOR
AJAR BRAKE
LOW
RANGE
4 X 4
!ABS+ -
LEF
H
RPM1000X0123
5
6 4
PRN 218C 18
H
D
FUEL FILL
SERVICE
ENGINE
SOON
LOW
FUEL
SERVICE
ENGINE
SOON
Instrumentation
8
Page 109 of 248
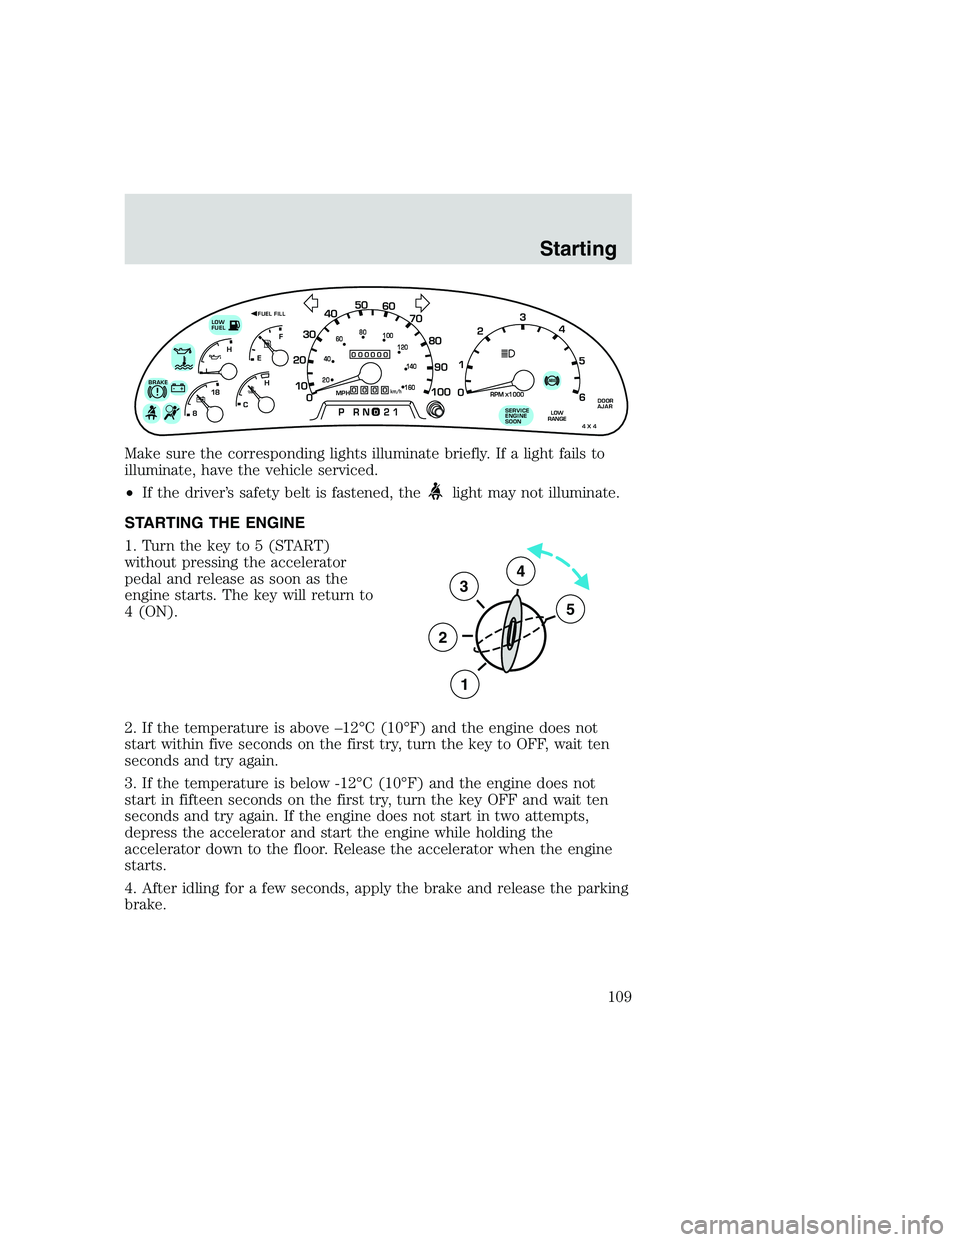
Make sure the corresponding lights illuminate briefly. If a light fails to
illuminate, have the vehicle serviced.
•If the driver’s safety belt is fastened, the
light may not illuminate.
STARTING THE ENGINE
1. Turn the key to 5 (START)
without pressing the accelerator
pedal and release as soon as the
engine starts. The key will return to
4 (ON).
2. If the temperature is above –12°C (10°F) and the engine does not
start within five seconds on the first try, turn the key to OFF, wait ten
seconds and try again.
3. If the temperature is below -12°C (10°F) and the engine does not
start in fifteen seconds on the first try, turn the key OFF and wait ten
seconds and try again. If the engine does not start in two attempts,
depress the accelerator and start the engine while holding the
accelerator down to the floor. Release the accelerator when the engine
starts.
4. After idling for a few seconds, apply the brake and release the parking
brake.
0
000000000
MPH20km/h
406080
100
120
140
160
010 20304050
60
70
80
90
100
LOW
FUEL
DOOR
AJAR BRAKE
LOW
RANGE
4 X 4
!ABS+ -
LEF
H
RPM1000X0123
5
6 4
PRN 218C 18
H
D
FUEL FILL
SERVICE
ENGINE
SOON
3
2
1
5
4
Starting
109
Page 203 of 248
sells, leases, trades vehicles, or supervises a fleet of vehicles are not
permitted to intentionally remove an emission control device or prevent
it from working. Information about your vehicle’s emission system is on
the Vehicle Emission Control Information Decal located on or near the
engine. This decal identifies engine displacement and gives some tune up
specifications.
Please consult your “Warranty Guide” for complete emission warranty
information.
Readiness for Inspection/Maintenance (I/M) testing
In some localities, it may be a legal requirement to pass an I/M test of
the on-board diagnostics system. If your “Check Engine/Service Engine
Soon” light is on, refer to the description in theWarning Lights and
Chimessection of theInstrumentationchapter. Your vehicle may not
pass the I/M test with the “Check Engine/Service Engine Soon” light on.
If the vehicle’s powertrain system or its battery has just been serviced,
the on-board diagnostics system is reset to a “not ready for I/M test”
condition. To ready the on-board diagnostics system for I/M testing, a
minimum of 30 minutes of city and highway driving is necessary as
described below:
•First, at least 10 minutes of driving on an expressway or highway.
•Next, at least 20 minutes driving in stop-and-go, city-type traffic with
at least four idle periods.
Allow the vehicle to sit for at least eight hours without starting the
engine. Then, start the engine and complete the above driving cycle. The
engine must warm up to its normal operating temperature. Once started,
do not turn off the engine until the above driving cycle is complete.
EXTERIOR BULBS
Replacing exterior bulbs
Check the operation of the following lamps frequently:
•Headlamps
•High-mount brakelamp
•Brakelamps
•Turn signals
•License plate lamp
Maintenance and care
203
Page 207 of 248
To install the brakelamp assembly:
1. Install the bulb into the lamp assembly and rotate clockwise.
2. Install the lamp assembly on the vehicle with two screws.
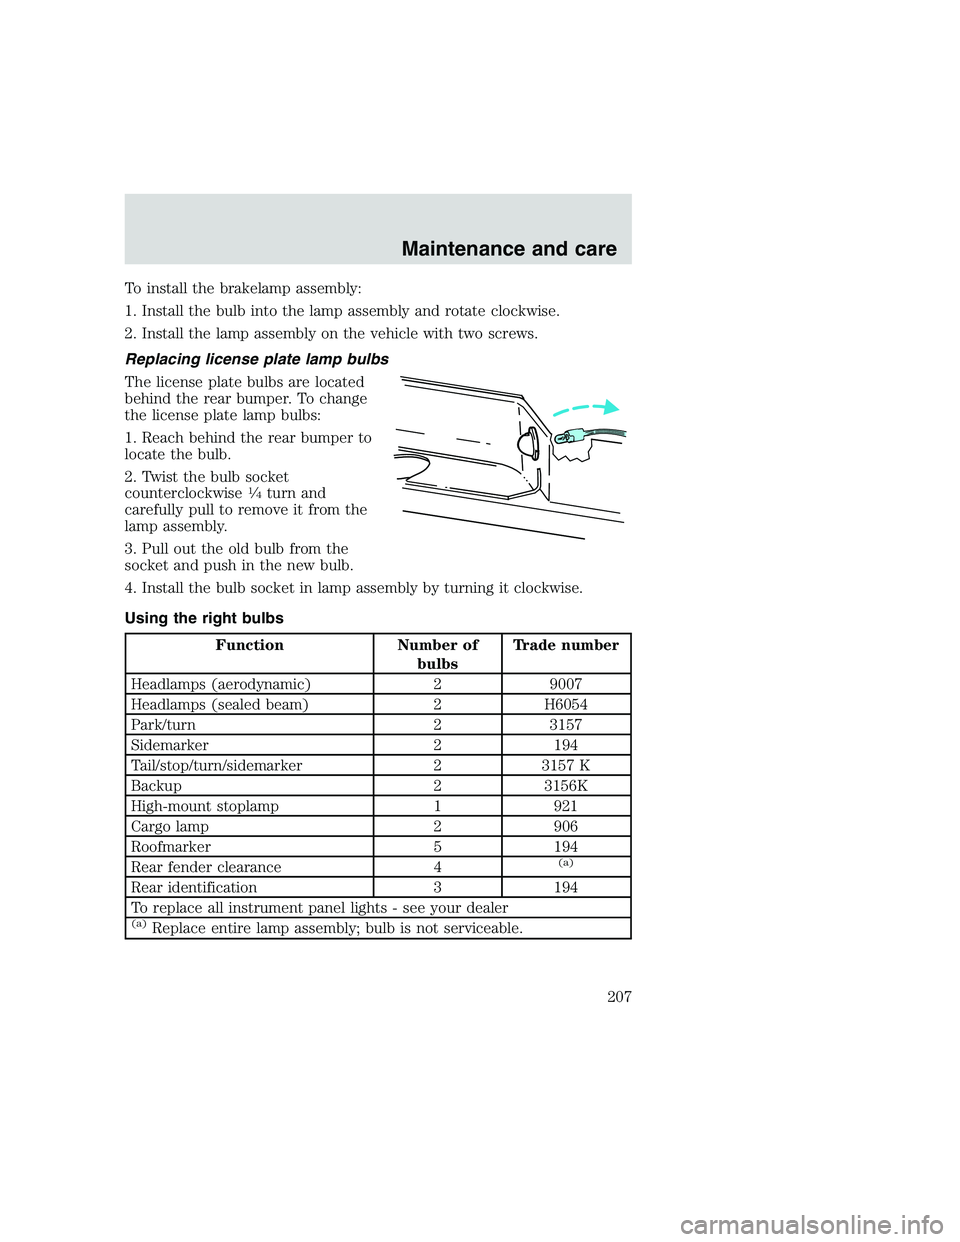
Replacing license plate lamp bulbs
The license plate bulbs are located
behind the rear bumper. To change
the license plate lamp bulbs:
1. Reach behind the rear bumper to
locate the bulb.
2. Twist the bulb socket
counterclockwise
14turn and
carefully pull to remove it from the
lamp assembly.
3. Pull out the old bulb from the
socket and push in the new bulb.
4. Install the bulb socket in lamp assembly by turning it clockwise.
Using the right bulbs
Function Number of
bulbsTrade number
Headlamps (aerodynamic) 2 9007
Headlamps (sealed beam) 2 H6054
Park/turn 2 3157
Sidemarker 2 194
Tail/stop/turn/sidemarker 2 3157 K
Backup 2 3156K
High-mount stoplamp 1 921
Cargo lamp 2 906
Roofmarker 5 194
Rear fender clearance 4
(a)
Rear identification 3 194
To replace all instrument panel lights - see your dealer
(a)Replace entire lamp assembly; bulb is not serviceable.
Maintenance and care
207
Page 238 of 248
GAWR
(Gross Axle Weight Rating) .....132
calculating ...............................134
definition .................................132
driving with a heavy load ......132
location ....................................132
GVWR (Gross Vehicle
Weight Rating) ..........................132
calculating ........................132,134
definition .................................132
driving with a heavy load ......132
location ....................................132
Hazard flashers .........................144
Headlamps ...................................22
aiming ......................................208
daytime running lights .............22
flash to pass .........................23,73
high beam .......................12,22,72
turning on and off ....................22
warning chime ..........................13
Heating ........................................24
heater only system ...................24
heating and air
conditioning system .................26
Hood ..........................................171
Ignition .......................................217
positions of the ignition ...........66
removing the key ....................124
Infant seats (see Safety seats)...102
Inspection/maintenance
(I/M) testing ..............................203
Instrument panel
cleaning ...................................210
lighting up panel and interior....23
location of components ..............8
Jump-starting your vehicle ......163
Keys
key in ignition chime ...............13
positions of the ignition ...........66
Lamps
autolamp system .....................203
cargo lamps ...............................23daytime running light ...............22
headlamps .................................22
headlamps, flash to pass .....23,73
instrument panel, dimming .....23
replacing
bulbs ............203,204,205,206,207
Lane change indicator
(see Turn signal) ........................66
Lights, warning and indicator ......8
air bag ........................................10
anti-lock brakes (ABS) .....11,113
brake ..........................................11
charging system ........................12
check coolant ............................13
door ajar ....................................13
engine oil pressure ...................13
high beam .................................12
low fuel ........................................8
safety belt .................................11
service engine soon .................8,9
turn signal indicator .................12
Load limits .................................132
GAWR ......................................132
GVWR ......................................132
trailer towing ..........................132
Lubricant specifications ....215,217
Lumbar support, seats ...............84
Manual transmission .................119
fluid capacities ........................212
lubricant specifications ..........217
Message center ...........................17
english/metric button ...............17
menu button .............................18
Mirrors
fold away ...................................76
side view mirrors (power) .......75
Motorcraft parts .................198,212
Octane rating ............................196
Odometer .....................................15
Overdrive .....................................73
Panic alarm feature,
remote entry system ..................78
Index
238