1999 FORD F250 clock
[x] Cancel search: clockPage 198 of 248
4. To install the cap, align the tabs on the cap with the notches on the
filler pipe.
5. Turn the filler cap clockwise 1/8 of a turn until it stops.
If the “Service Engine Soon/Check Engine” indicator comes on and stays
on when you start the engine, the fuel filler cap may not be properly
installed. Turn off the engine, remove the fuel filler cap, align the cap
properly and reinstall it.
If you must replace the fuel filler cap, replace it with a fuel filler
cap that is designed for your vehicle. The customer warranty may
be void for any damage to the fuel tank or fuel system if the
correct genuine Ford or Motorcraft fuel filler cap is not used.
The fuel system may be under pressure. If the fuel filler cap is
venting vapor or if you hear a hissing sound, wait until it stops
before completely removing the fuel filler cap. Otherwise, fuel may
spray out and injure you or others.
If you do not use the proper fuel filler cap, excessive pressure or
vacuum in the fuel tank may damage the fuel system or cause
the fuel system to work improperly in a collision, which may result in
possible personal injury.
Fuel Filter
For fuel filter replacement, see your dealer or a qualified service
technician. Refer to the Scheduled Maintenance Guide for the
appropriate intervals for changing the fuel filter.
Replace the fuel filter with an authorized Motorcraft part. The
customer warranty may be void for any damage to the fuel system
if an authorized Motorcraft fuel filter is not used.
ESSENTIALS OF GOOD FUEL ECONOMY
Measuring techniques
Your best source of information about actual fuel economy is you, the
driver. You must gather information as accurately and consistently as
possible. Fuel expense, frequency of fillups or fuel gauge readings are
NOT accurate as a measure of fuel economy. We do not recommend taking
fuel economy measurements during the first 1 600 km (1 000 miles) of
Maintenance and care
198
ProCarManuals.com
Page 204 of 248
•Tail lamps
•Back-up lamps
Do not remove lamp bulbs unless they can be replaced immediately with
new ones. If a bulb is removed for an extended period of time,
contaminants may enter the lamp housings and affect lamp performance.
Replacing headlamp bulbs (aerodynamic)
Handle a halogen headlamp bulb carefully and keep out of
children’s reach. Grasp the bulb only by its plastic base and do
not touch the glass. The oil from your hand could cause the bulb to
break the next time the headlamps are operated.
1. Make sure that the headlamp control is in the OFF position.
2. Open the hood.
3. Release clip and disconnect the electrical connector from the bulb.
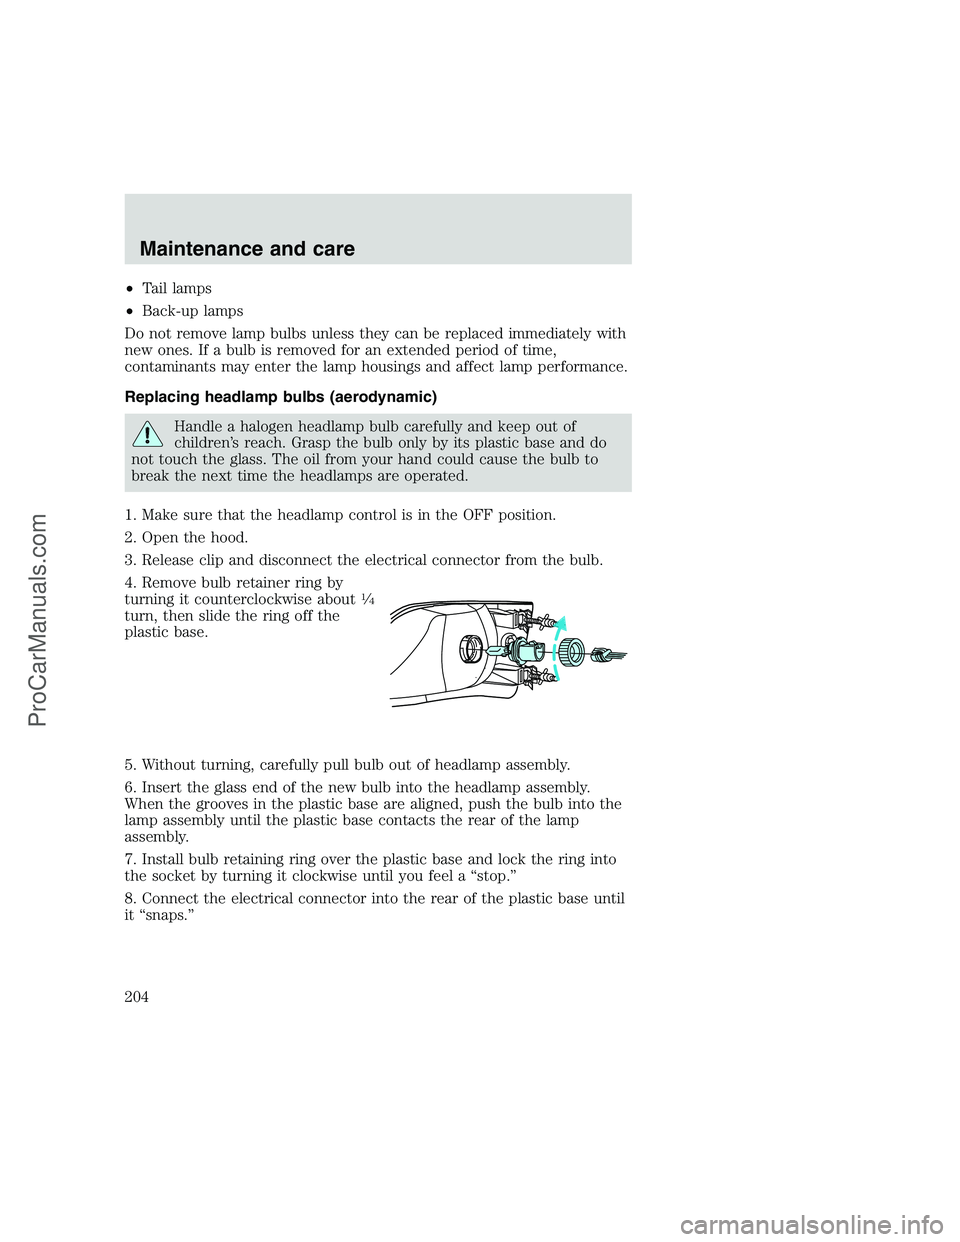
4. Remove bulb retainer ring by
turning it counterclockwise about
1�4
turn, then slide the ring off the
plastic base.
5. Without turning, carefully pull bulb out of headlamp assembly.
6. Insert the glass end of the new bulb into the headlamp assembly.
When the grooves in the plastic base are aligned, push the bulb into the
lamp assembly until the plastic base contacts the rear of the lamp
assembly.
7. Install bulb retaining ring over the plastic base and lock the ring into
the socket by turning it clockwise until you feel a “stop.”
8. Connect the electrical connector into the rear of the plastic base until
it “snaps.”
Maintenance and care
204
ProCarManuals.com
Page 206 of 248
Replacing tail lamp/Backup lamp bulbs
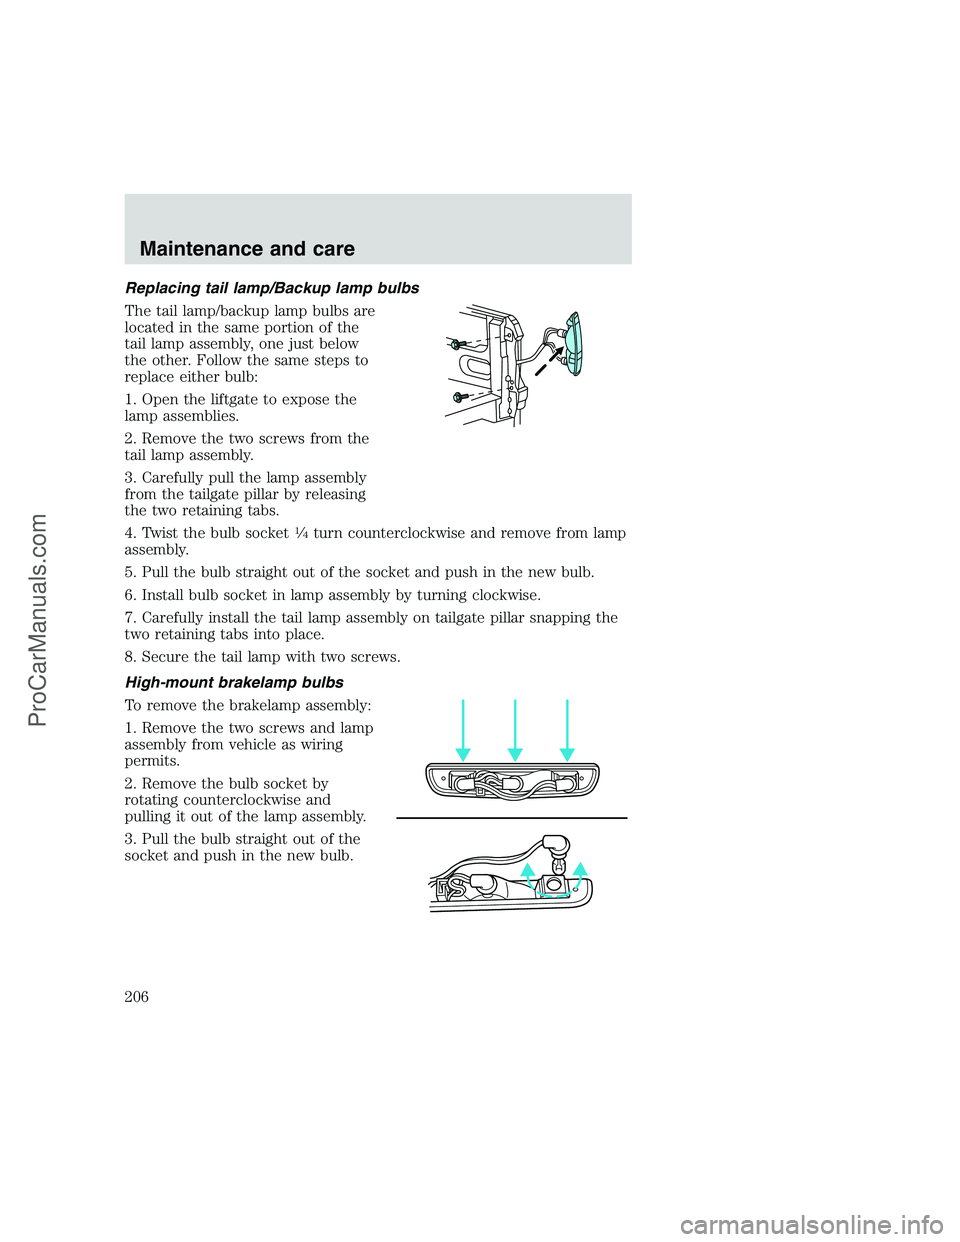
The tail lamp/backup lamp bulbs are
located in the same portion of the
tail lamp assembly, one just below
the other. Follow the same steps to
replace either bulb:
1. Open the liftgate to expose the
lamp assemblies.
2. Remove the two screws from the
tail lamp assembly.
3. Carefully pull the lamp assembly
from the tailgate pillar by releasing
the two retaining tabs.
4. Twist the bulb socket
1�4turn counterclockwise and remove from lamp
assembly.
5. Pull the bulb straight out of the socket and push in the new bulb.
6. Install bulb socket in lamp assembly by turning clockwise.
7. Carefully install the tail lamp assembly on tailgate pillar snapping the
two retaining tabs into place.
8. Secure the tail lamp with two screws.
High-mount brakelamp bulbs
To remove the brakelamp assembly:
1. Remove the two screws and lamp
assembly from vehicle as wiring
permits.
2. Remove the bulb socket by
rotating counterclockwise and
pulling it out of the lamp assembly.
3. Pull the bulb straight out of the
socket and push in the new bulb.
Maintenance and care
206
ProCarManuals.com
Page 207 of 248
To install the brakelamp assembly:
1. Install the bulb into the lamp assembly and rotate clockwise.
2. Install the lamp assembly on the vehicle with two screws.
Replacing license plate lamp bulbs
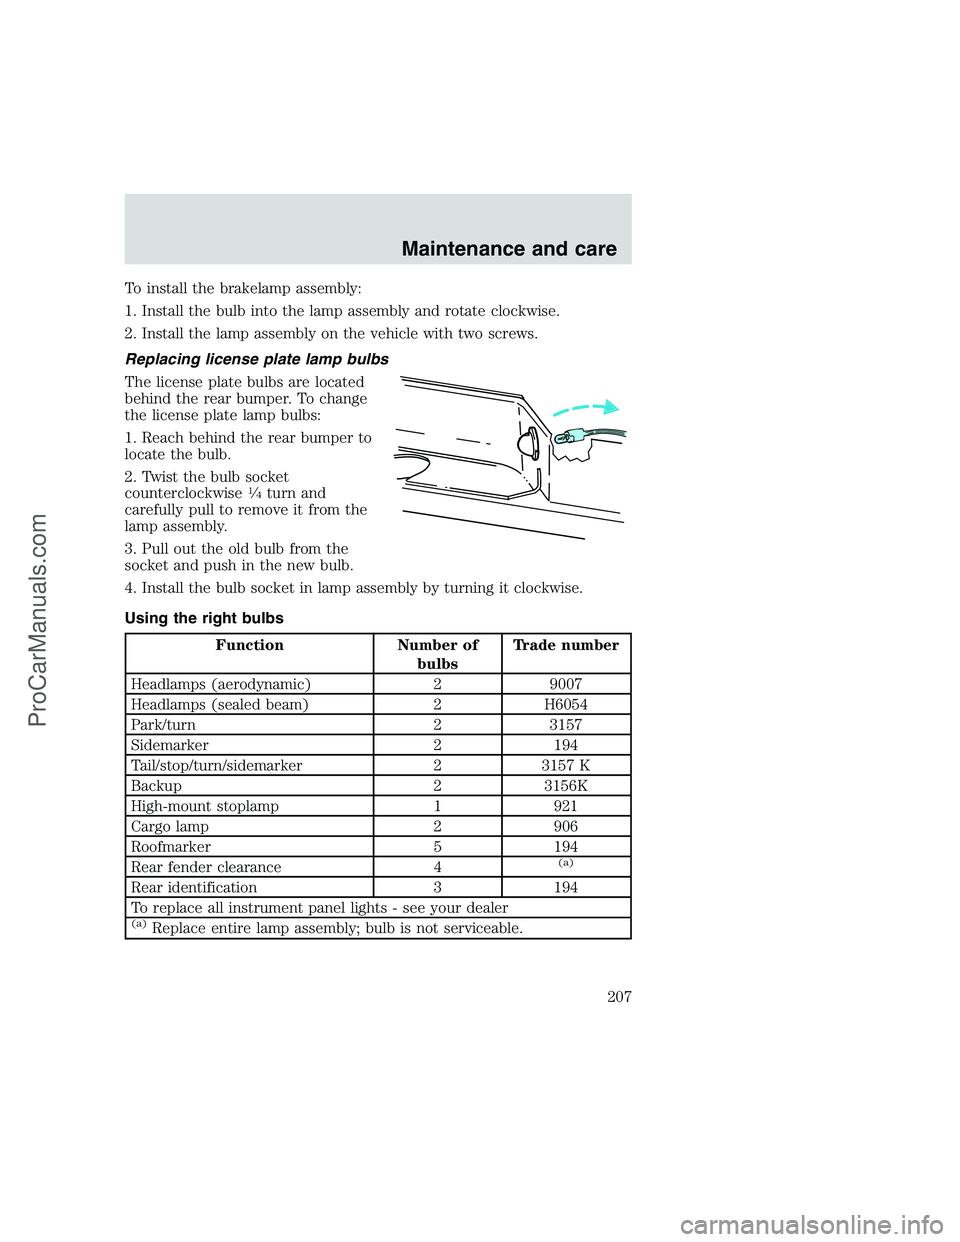
The license plate bulbs are located
behind the rear bumper. To change
the license plate lamp bulbs:
1. Reach behind the rear bumper to
locate the bulb.
2. Twist the bulb socket
counterclockwise
1�4turn and
carefully pull to remove it from the
lamp assembly.
3. Pull out the old bulb from the
socket and push in the new bulb.
4. Install the bulb socket in lamp assembly by turning it clockwise.
Using the right bulbs
Function Number of
bulbsTrade number
Headlamps (aerodynamic) 2 9007
Headlamps (sealed beam) 2 H6054
Park/turn 2 3157
Sidemarker 2 194
Tail/stop/turn/sidemarker 2 3157 K
Backup 2 3156K
High-mount stoplamp 1 921
Cargo lamp 2 906
Roofmarker 5 194
Rear fender clearance 4
(a)
Rear identification 3 194
To replace all instrument panel lights - see your dealer
(a)Replace entire lamp assembly; bulb is not serviceable.
Maintenance and care
207
ProCarManuals.com
Page 236 of 248
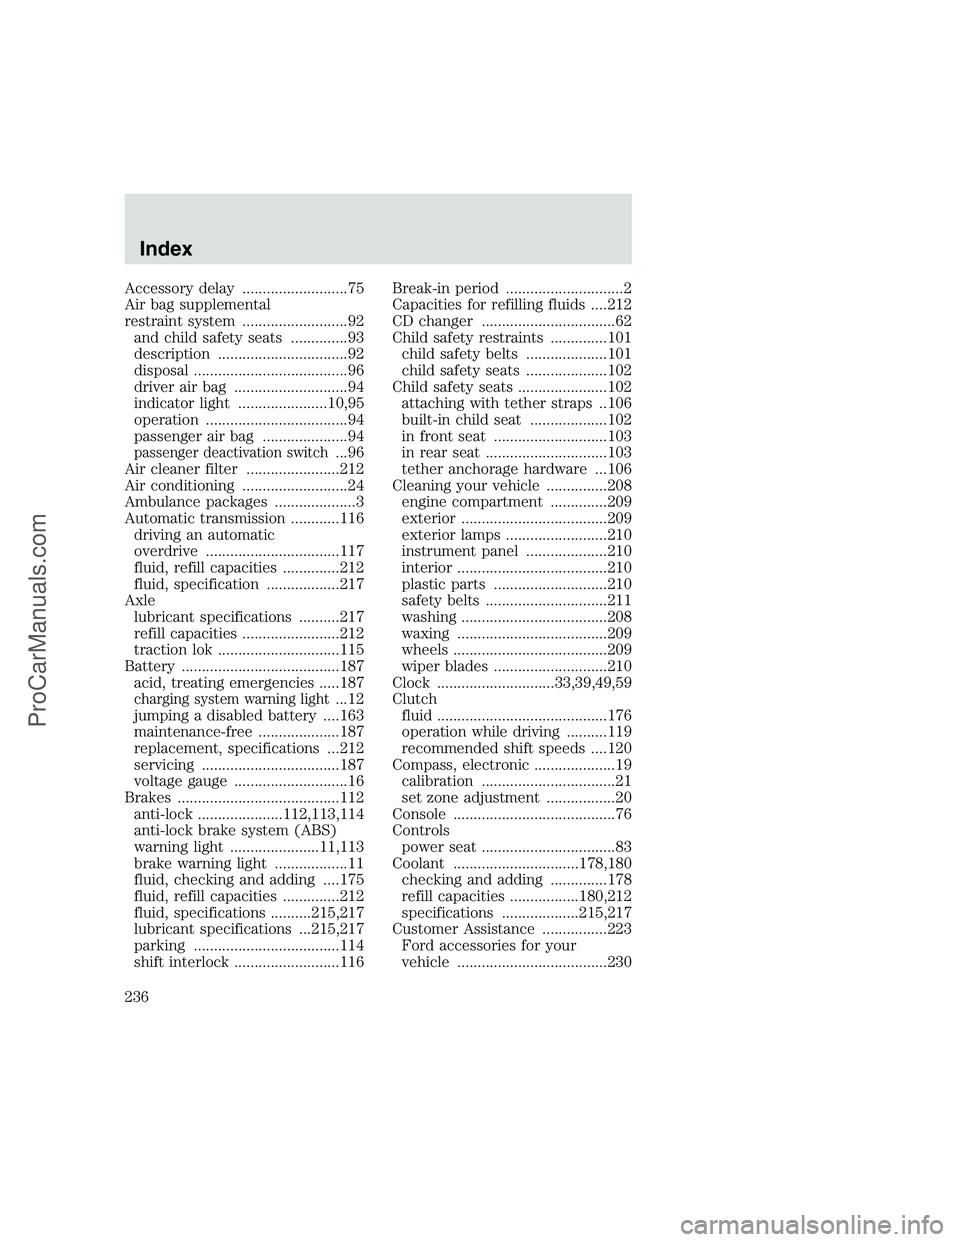
Accessory delay ..........................75
Air bag supplemental
restraint system ..........................92
and child safety seats ..............93
description ................................92
disposal ......................................96
driver air bag ............................94
indicator light ......................10,95
operation ...................................94
passenger air bag .....................94
passenger deactivation switch...96
Air cleaner filter .......................212
Air conditioning ..........................24
Ambulance packages ....................3
Automatic transmission ............116
driving an automatic
overdrive .................................117
fluid, refill capacities ..............212
fluid, specification ..................217
Axle
lubricant specifications ..........217
refill capacities ........................212
traction lok ..............................115
Battery .......................................187
acid, treating emergencies .....187
charging system warning light...12
jumping a disabled battery ....163
maintenance-free ....................187
replacement, specifications ...212
servicing ..................................187
voltage gauge ............................16
Brakes ........................................112
anti-lock .....................112,113,114
anti-lock brake system (ABS)
warning light ......................11,113
brake warning light ..................11
fluid, checking and adding ....175
fluid, refill capacities ..............212
fluid, specifications ..........215,217
lubricant specifications ...215,217
parking ....................................114
shift interlock ..........................116Break-in period .............................2
Capacities for refilling fluids ....212
CD changer .................................62
Child safety restraints ..............101
child safety belts ....................101
child safety seats ....................102
Child safety seats ......................102
attaching with tether straps ..106
built-in child seat ...................102
in front seat ............................103
in rear seat ..............................103
tether anchorage hardware ...106
Cleaning your vehicle ...............208
engine compartment ..............209
exterior ....................................209
exterior lamps .........................210
instrument panel ....................210
interior .....................................210
plastic parts ............................210
safety belts ..............................211
washing ....................................208
waxing .....................................209
wheels ......................................209
wiper blades ............................210
Clock .............................33,39,49,59
Clutch
fluid ..........................................176
operation while driving ..........119
recommended shift speeds ....120
Compass, electronic ....................19
calibration .................................21
set zone adjustment .................20
Console ........................................76
Controls
power seat .................................83
Coolant ...............................178,180
checking and adding ..............178
refill capacities .................180,212
specifications ...................215,217
Customer Assistance ................223
Ford accessories for your
vehicle .....................................230
Index
236
ProCarManuals.com