1999 FORD F150 key
[x] Cancel search: keyPage 120 of 232

again. If the warning light reappears, turn the air suspension switch off
and have the vehicle serviced by a dealer or qualified service technician.
If the vehicle is loaded beyond the recommended maximum payload, the
CK SUSP light may illuminate. To correct this condition, remove or
redistribute the payload according to the recommended requirements
and follow the procedure outlined above.
AUTOMATIC TRANSMISSION OPERATION (IF EQUIPPED)
Brake-shift interlock
This vehicle is equipped with a brake-shift interlock feature that prevents
the gearshift from being moved from P (Park) unless the brake pedal is
depressed.
If you cannot move the gearshift out of P (Park) with the brake pedal
depressed:
1. Apply the parking brake, turn ignition key to LOCK, then remove the
key.
2. Insert the key and turn it to OFF. Apply the brake pedal and shift to N
(Neutral).
3. Start the vehicle.
If it is necessary to use the above procedure to move the gearshift, it is
possible that a fuse has blown or the vehicle's brakelamps are not
operating properly. Refer toFuses and relaysin theRoadside
emergencieschapter.
Do not drive your vehicle until you verify that the brakelamps
are working.
If your vehicle gets stuck in mud or snow it may be rocked out by
shifting from forward and reverse gears, stopping between shifts, in a
steady pattern. Press lightly on the accelerator in each gear.
Do not rock the vehicle for more than a few minutes. The
transmission and tires may be damaged or the engine may
overheat.
Always set the parking brake fully and make sure the gearshift is
latched in P (Park). Turn off the ignition whenever you leave
your vehicle.
Driving
120
Page 126 of 232

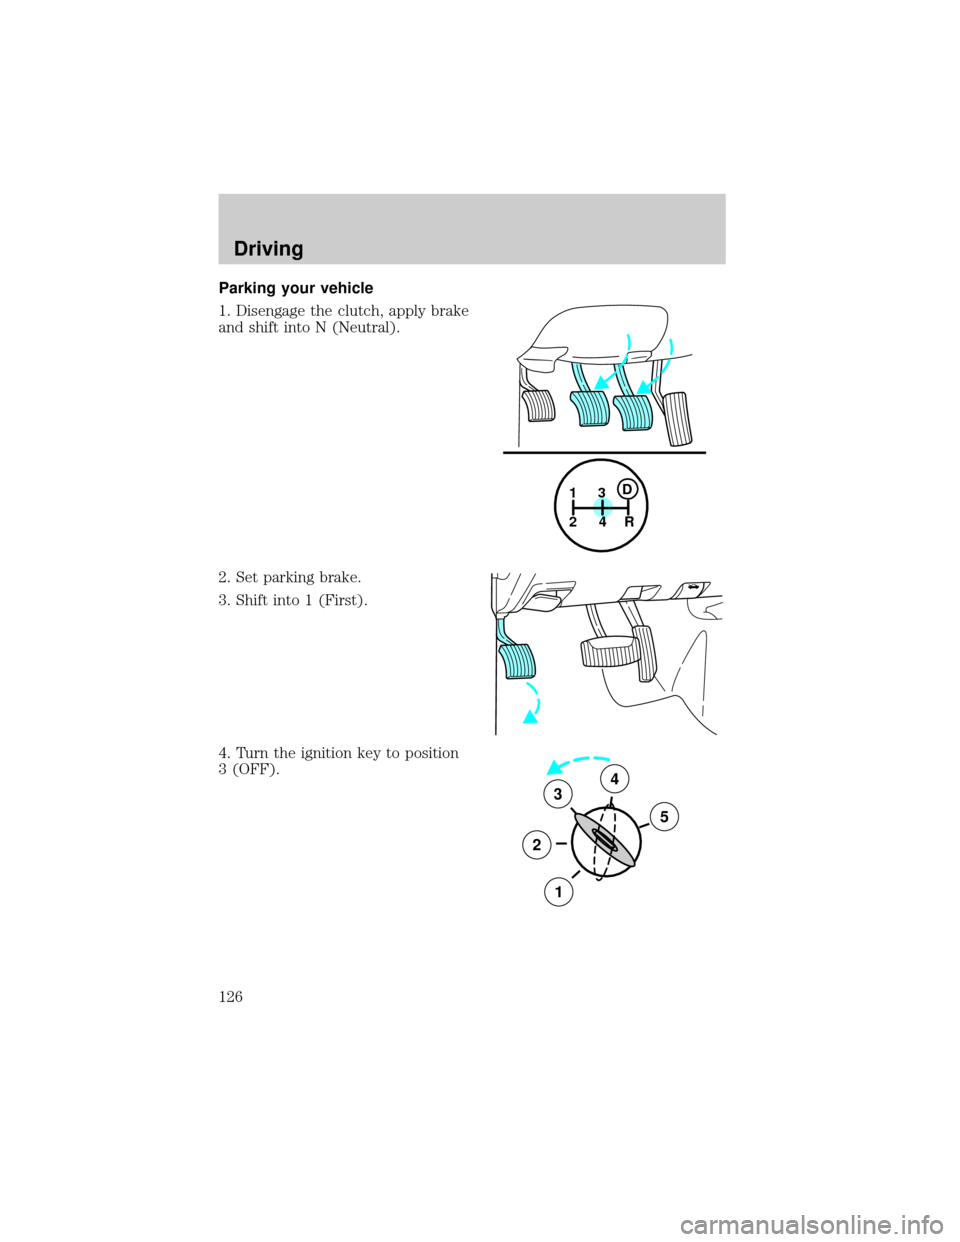
Parking your vehicle
1. Disengage the clutch, apply brake
and shift into N (Neutral).
2. Set parking brake.
3. Shift into 1 (First).
4. Turn the ignition key to position
3 (OFF).
1
24R3D
3
2
1
5
4
Driving
126
Page 127 of 232

Do not park your vehicle in Neutral, it may move unexpectedly
and injure someone. Use 1 (First) gear and set the parking brake
fully.
Reverse
Make sure that your vehicle is at a complete stop before you shift into
R (Reverse). Failure to do so may damage the transmission.
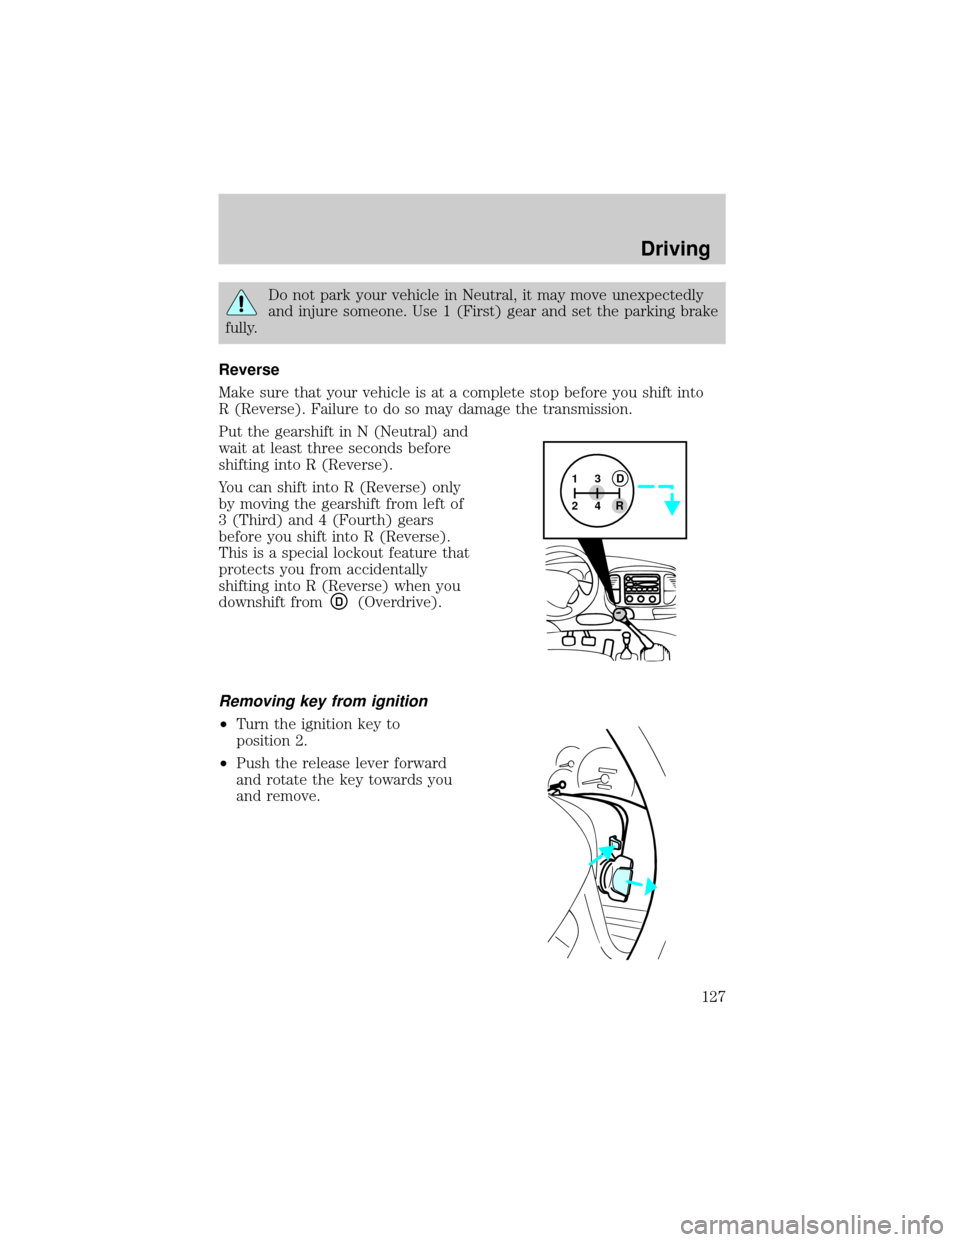
Put the gearshift in N (Neutral) and
wait at least three seconds before
shifting into R (Reverse).
You can shift into R (Reverse) only
by moving the gearshift from left of
3 (Third) and 4 (Fourth) gears
before you shift into R (Reverse).
This is a special lockout feature that
protects you from accidentally
shifting into R (Reverse) when you
downshift from
D(Overdrive).
Removing key from ignition
²Turn the ignition key to
position 2.
²Push the release lever forward
and rotate the key towards you
and remove.
13
24RD
Driving
127
Page 149 of 232

HAZARD FLASHER
Use only in an emergency to warn traffic of vehicle breakdown,
approaching danger, etc. The hazard flashers can be operated when the
ignition is off.
²The hazard lights control is
located on top of the steering
column.
²Depress hazard lights control to
activate all hazard flashers
simultaneously.
²Depress control again to turn the
flashers off.
FUEL PUMP SHUT-OFF SWITCH
After a collision, if the engine cranks but does not start, the fuel pump
shut-off switch may have been activated. The ªFuel Resetº indicator light
will illuminate in the instrument cluster. The shut-off switch is a device
intended to stop the electric fuel pump when your vehicle has been
involved in a substantial jolt.
1. Turn the ignition to the OFF position.
2. Check the fuel system for leaks.
3. If no fuel leak is apparent, reset the fuel pump shut-off switch by
pushing in the reset button.
4. Turn the ignition to the ON position. Pause for a few seconds and
return the key to the OFF position.
5. Make a further check for leaks in the fuel system.
Roadside emergencies
149
Page 168 of 232

SERVICE RECOMMENDATIONS
To help you service your vehicle:
²We highlight do-it-yourself items in the engine compartment for easy
location.
²We provide a Scheduled Maintenance Guide which makes tracking
routine service easy.
If your vehicle requires professional service, your dealership can provide
necessary parts and service. Check your ªWarranty Guideº to find out
which parts and services are covered.
Use only recommended fuels, lubricants, fluids and service parts
conforming to specifications. Motorcraft parts are designed and built to
provide the best performance in your vehicle.
PRECAUTIONS WHEN SERVICING YOUR VEHICLE
Be especially careful when inspecting or servicing your vehicle.
²Do not work on a hot engine.
²When the engine is running, keep loose clothing, jewelry or long hair
away from moving parts.
²Do not work on a vehicle with the engine running in an enclosed
space, unless you are sure you have enough ventilation.
²Keep all lit cigarettes, open flames and other lit material away from
the battery and all fuel related parts.
If you disconnect the battery, the engine must ªrelearnº its idle
conditions before your vehicle will drive properly, as explained in the
Batterysection in this chapter.
Working with the engine off
²Automatic transmission:
1. Set the parking brake and ensure the gearshift is securely latched in P
(Park).
2. Turn off the engine and remove the key.
3. Block the wheels to prevent the vehicle from moving unexpectedly.
²Manual transmission:
1. Set the parking brake.
2. Depress the clutch and place the gearshift in 1 (First).
Maintenance and care
168
Page 169 of 232

3. Turn off the engine and remove the key.
4. Block the wheels to prevent the vehicle from moving unexpectedly.
Working with the engine on
²Automatic transmission:
1. Set the parking brake and ensure the gearshift is securely latched in P
(Park).
2. Block the wheels to prevent the vehicle from moving unexpectedly.
Do not start your engine with the air cleaner removed and do
not remove it while the engine is running.
²Manual transmission:
1. Set the parking brake, depress the clutch and place the gearshift in N
(Neutral).
2. Block the wheels to prevent the vehicle from moving unexpectedly.
Do not start your engine with the air cleaner removed and do
not remove it while the engine is running.
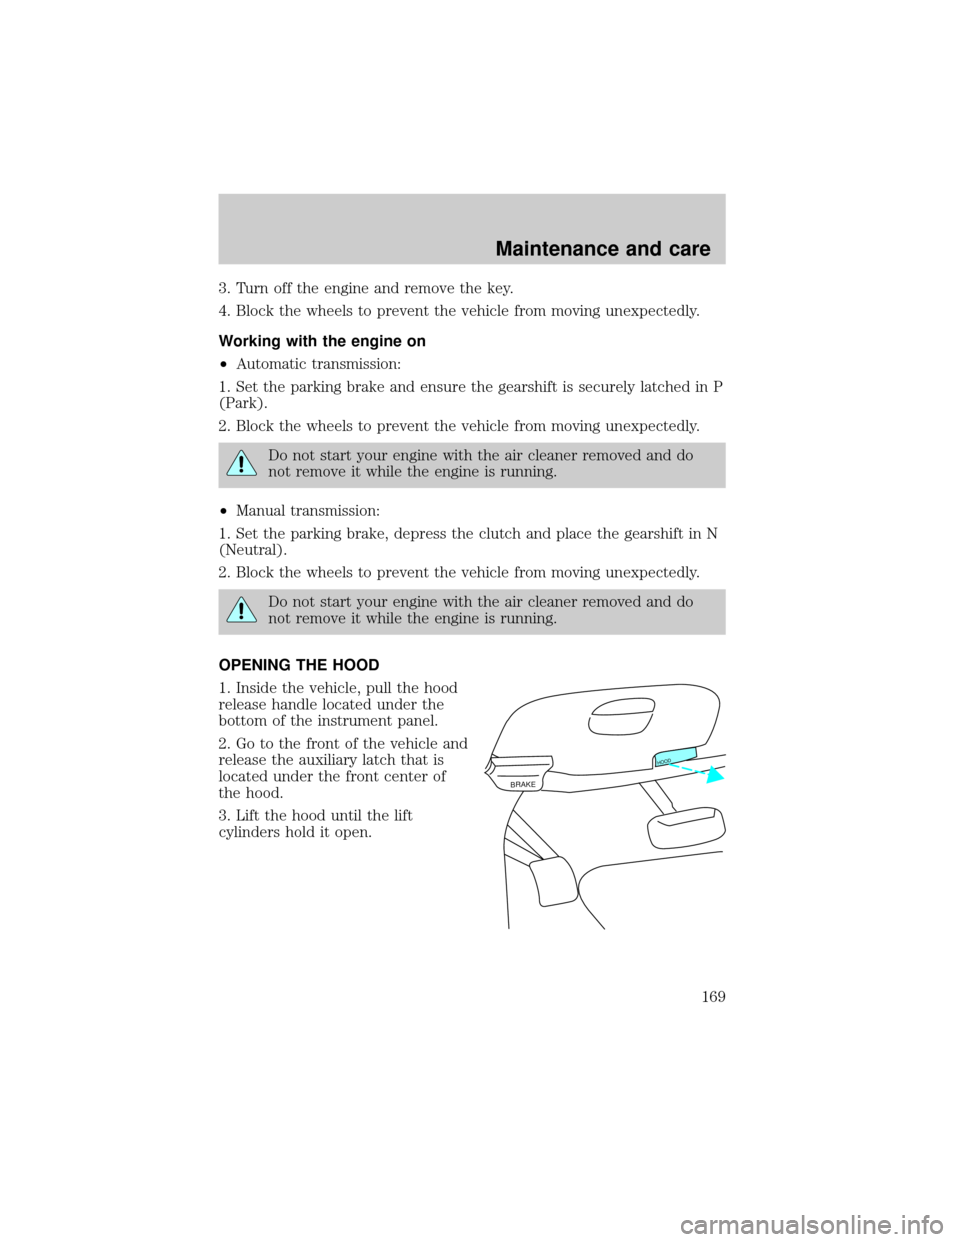
OPENING THE HOOD
1. Inside the vehicle, pull the hood
release handle located under the
bottom of the instrument panel.
2. Go to the front of the vehicle and
release the auxiliary latch that is
located under the front center of
the hood.
3. Lift the hood until the lift
cylinders hold it open.
BRAKE
HOOD
Maintenance and care
169
Page 226 of 232

detergent in fuel .....................197
filling your vehicle
with fuel ...........................195,198
quality ......................................197
running out of fuel .................197
safety information relating to
automotive fuels .....................195
Fuses ...................................150,151
Gas mileage
(see Fuel economy) ...199,200,201
Gauges .........................................12
engine coolant temperature
gauge .........................................13
engine oil pressure gauge ........15
fuel gauge ..................................12
GVWR
(Gross Vehicle Weight Rating)
calculating ...............................135
Hazard flashers .........................149
Headlamps
aiming ......................................209
bulb specifications ..................208
high beam ..............................9,68
warning chime ..........................11
Heating ........................................56
heater only system ..............56,57
heating and air
conditioning system ............58,60
Hood ..........................................169
Ignition .......................................219
Inspection/maintenance
(I/M) testing ..............................203
Instrument panel ..........................6
cleaning ...................................212
Keys
key in ignition chime ...............11
positions of the ignition ...........61
removing from the ignition ....127
Lamps
autolamp system .......................17
daytime running light ...............16
fog lamps ...................................16headlamps .................................16
headlamps, flash to pass ..........68
instrument panel, dimming .....17
interior lamps ...........................69
replacing bulbs ..204,206,207,208
Lane change indicator
(see Turn signal) ........................62
Lights, warning and indicator
air bag ..........................................8
air suspension .........................119
anti-lock brakes (ABS) ..............9
anti-theft .....................................9
brake ............................................8
charging system ..........................9
door ajar ....................................11
engine oil pressure ...................10
fuel reset ...................................11
low fuel ........................................6
safety belt ...................................8
service engine soon ....................7
turn signal indicator ...................9
Lumbar support, seats ..........87,88
Manual transmission
reverse .....................................127
Mirrors
fold away ...................................72
side view mirrors (power) .......71
Motorcraft parts ........................198
Octane rating ............................197
Odometer .....................................13
Overdrive .....................................68
Parking brake ............................117
Power distribution box
(see Fuses) ...............................154
Power door locks ..............70,80,81
Power steering ..........................118
fluid,
checking and adding .......181,182
Radio ....19,20,21,22,24,25,26,27,28
29,30,31,33,34,35,36
Relays ........................................150
Remote entry system ............79,80
Index
226