1999 FORD F150 oil
[x] Cancel search: oilPage 173 of 232
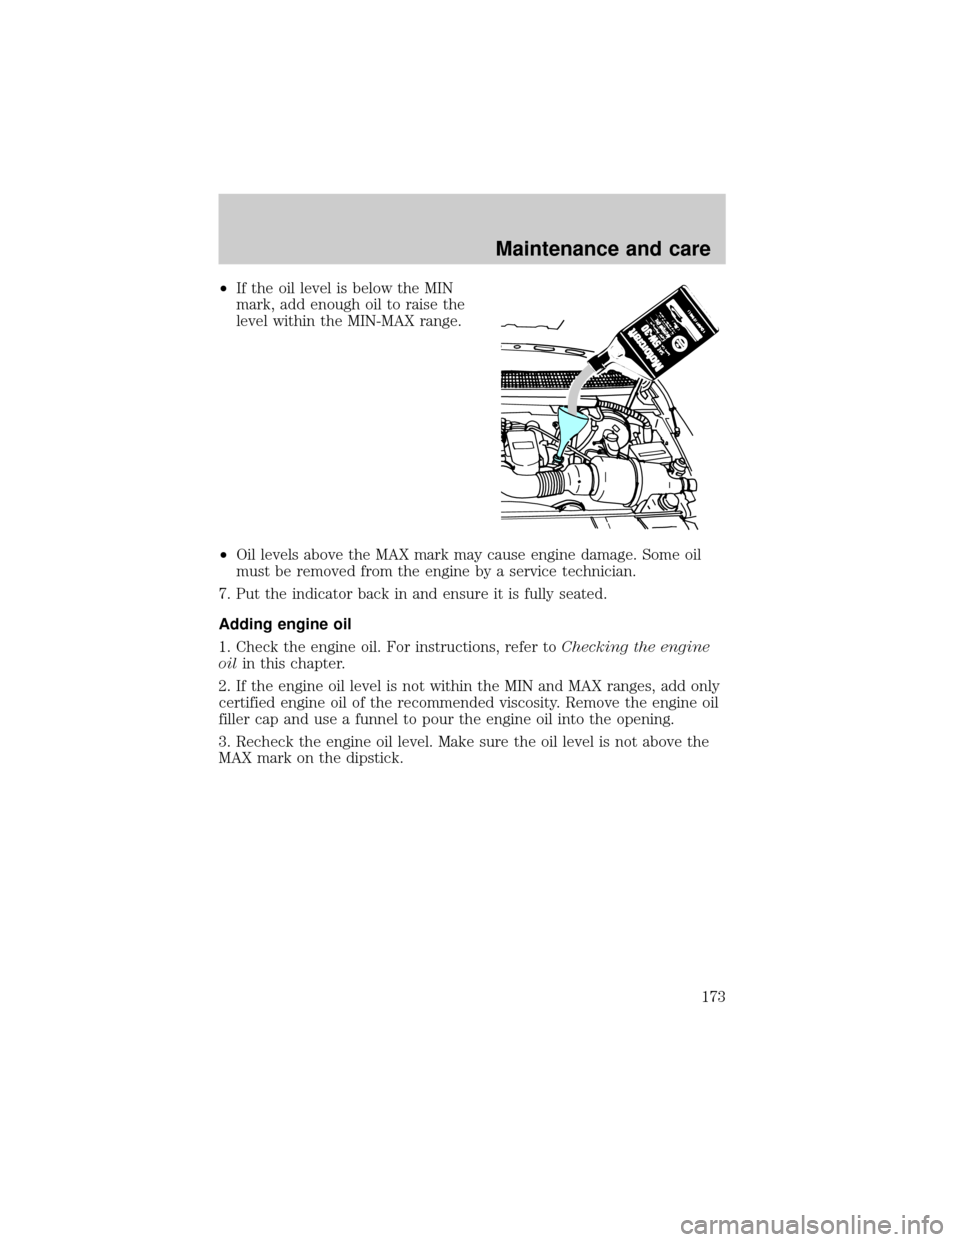
²If the oil level is below the MIN
mark, add enough oil to raise the
level within the MIN-MAX range.
²Oil levels above the MAX mark may cause engine damage. Some oil
must be removed from the engine by a service technician.
7. Put the indicator back in and ensure it is fully seated.
Adding engine oil
1. Check the engine oil. For instructions, refer toChecking the engine
oilin this chapter.
2. If the engine oil level is not within the MIN and MAX ranges, add only
certified engine oil of the recommended viscosity. Remove the engine oil
filler cap and use a funnel to pour the engine oil into the opening.
3. Recheck the engine oil level. Make sure the oil level is not above the
MAX mark on the dipstick.
Maintenance and care
173
Page 174 of 232
Engine oil and filter recommendations
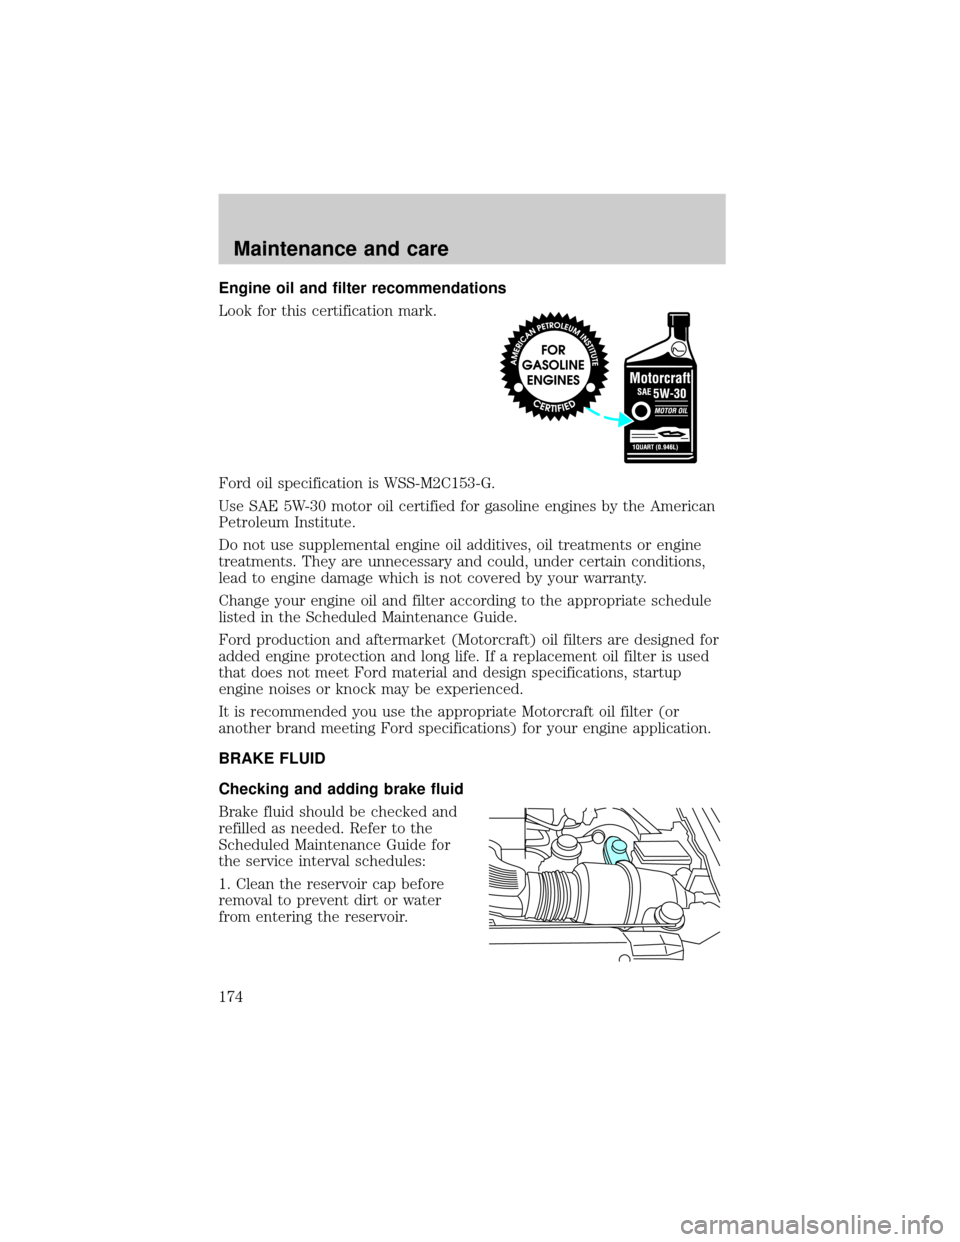
Look for this certification mark.
Ford oil specification is WSS-M2C153-G.
Use SAE 5W-30 motor oil certified for gasoline engines by the American
Petroleum Institute.
Do not use supplemental engine oil additives, oil treatments or engine
treatments. They are unnecessary and could, under certain conditions,
lead to engine damage which is not covered by your warranty.
Change your engine oil and filter according to the appropriate schedule
listed in the Scheduled Maintenance Guide.
Ford production and aftermarket (Motorcraft) oil filters are designed for
added engine protection and long life. If a replacement oil filter is used
that does not meet Ford material and design specifications, startup
engine noises or knock may be experienced.
It is recommended you use the appropriate Motorcraft oil filter (or
another brand meeting Ford specifications) for your engine application.
BRAKE FLUID
Checking and adding brake fluid
Brake fluid should be checked and
refilled as needed. Refer to the
Scheduled Maintenance Guide for
the service interval schedules:
1. Clean the reservoir cap before
removal to prevent dirt or water
from entering the reservoir.
Maintenance and care
174
Page 201 of 232
![FORD F150 1999 10.G Owners Manual ²Drive at reasonable speeds (traveling at 105 km /h [65 mph] uses 15%
more fuel than traveling at 88 km/h [55 mph]).
²Revving the engine before turning it off may reduce fuel economy.
²Use of the a FORD F150 1999 10.G Owners Manual ²Drive at reasonable speeds (traveling at 105 km /h [65 mph] uses 15%
more fuel than traveling at 88 km/h [55 mph]).
²Revving the engine before turning it off may reduce fuel economy.
²Use of the a](/manual-img/11/5018/w960_5018-200.png)
²Drive at reasonable speeds (traveling at 105 km /h [65 mph] uses 15%
more fuel than traveling at 88 km/h [55 mph]).
²Revving the engine before turning it off may reduce fuel economy.
²Use of the air conditioner or defroster may reduce fuel economy.
²Use of speed control (if equipped) may improve fuel economy. Speed
control can help maintain a constant speed and reduce speed changes.
You may want to turn off the speed control in hilly terrain as
unnecessary shifting between third and fourth gears may occur and
could result in reduced fuel economy.
²Warming up a vehicle on cold mornings is not required and may
reduce fuel economy.
²Resting your foot on the brake pedal while driving may reduce fuel
economy.
²Combine errands and minimize stop-and-go driving.
Maintenance
²Keep tires properly inflated and use only recommended size.
²Operating a vehicle with the wheels out of alignment will reduce fuel
economy.
²Use recommended engine oil. Refer toLubricant Specifications.
²Perform all regularly scheduled maintenance items. Follow the
recommended maintenance schedule and owner maintenance checks
found in your vehicle Scheduled Maintenance Guide.
Conditions
²Heavily loading a vehicle or towing a trailer may reduce fuel economy
at any speed.
²Carrying unnecessary weight may reduce fuel economy (approximately
2 km/h [1 mpg] is lost for every 180 kg [400 lb] of weight carried).
²Adding certain accessories to your vehicle (for example bug
deflectors, rollover/light bars, running boards, ski/luggage racks) may
reduce fuel economy.
²To maximize the fuel economy, drive with the tonneau cover installed
(if equipped).
²Use of fuel blended with alcohol may lower fuel economy.
Maintenance and care
201
Page 203 of 232
Do not park, idle, or drive your vehicle in dry grass or other dry
ground cover. The emission system heats up the engine
compartment and exhaust system, which can start a fire.
Illumination of the charging system warning light,Check Engine
indicator light or the temperature warning light, fluid leaks, strange
odors, smoke or loss of oil pressure, could indicate that the emission
control system is not working properly.
Exhaust leaks may result in entry of harmful and potentially
lethal fumes into the passenger compartment.
Do not make any unauthorized changes to your vehicle or engine. By law,
vehicle owners and anyone who manufactures, repairs, services, sells, leases,
trades vehicles, or supervises a fleet of vehicles are not permitted to
intentionally remove an emission control device or prevent it from working.
Information about your vehicle's emission system is on the Vehicle Emission
Control Information Decal located on or near the engine. This decal
identifies engine displacement and gives some tune up specifications.
Please consult your ªWarranty Guideº for complete emission warranty
information.
Readiness for Inspection/Maintenance (I/M) testing
In some localities, it may be a legal requirement to pass an I/M test of the
on-board diagnostic (OBD-II) system. If your ªCheck Engine/Service Engine
Soonº light is on, refer to the description in theWarning Lights and
Chimessection of theInstrumentationchapter. Your vehicle may not pass
the I/M test with the ªCheck Engine/Service Engine Soonº light on.
If the vehicle's powertrain system or its battery has just been serviced,
the OBD-II system is reset to a ªnot ready for I/M testº condition. To
ready the OBD-II system for I/M testing, a minimum of 30 minutes of city
and highway driving is necessary as described below:
²First, at least 10 minutes of driving on an expressway or highway.
²Next, at least 20 minutes driving in stop-and-go, city-type traffic with
at least four idle periods.
Allow the vehicle to sit for at least eight hours without starting the
engine. Then, start the engine and complete the above driving cycle. The
engine must warm up to its normal operating temperature. Once started,
do not turn off the engine until the above driving cycle is complete.
Maintenance and care
203
Page 204 of 232
EXTERIOR BULBS
Replacing exterior bulbs
Check the operation of the following lamps frequently:
²Headlamps
²Foglamps (if equipped)
²High-mount brakelamp
²Brakelamps
²Turn signals
²License plate lamp
²Tail lamps
²Back-up lamps
Do not remove lamp bulbs unless they can be replaced immediately with
new ones. If a bulb is removed for an extended period of time,
contaminants may enter the lamp housings and affect lamp performance.
Replacing headlamp bulbs
Handle a halogen headlamp bulb carefully and keep out of
children's reach. Grasp the bulb only by its plastic base and do
not touch the glass. The oil from your hand could cause the bulb to
break the next time the headlamps are operated.
1. Make sure that the headlamp control is in the OFF position.
2. Open the hood.
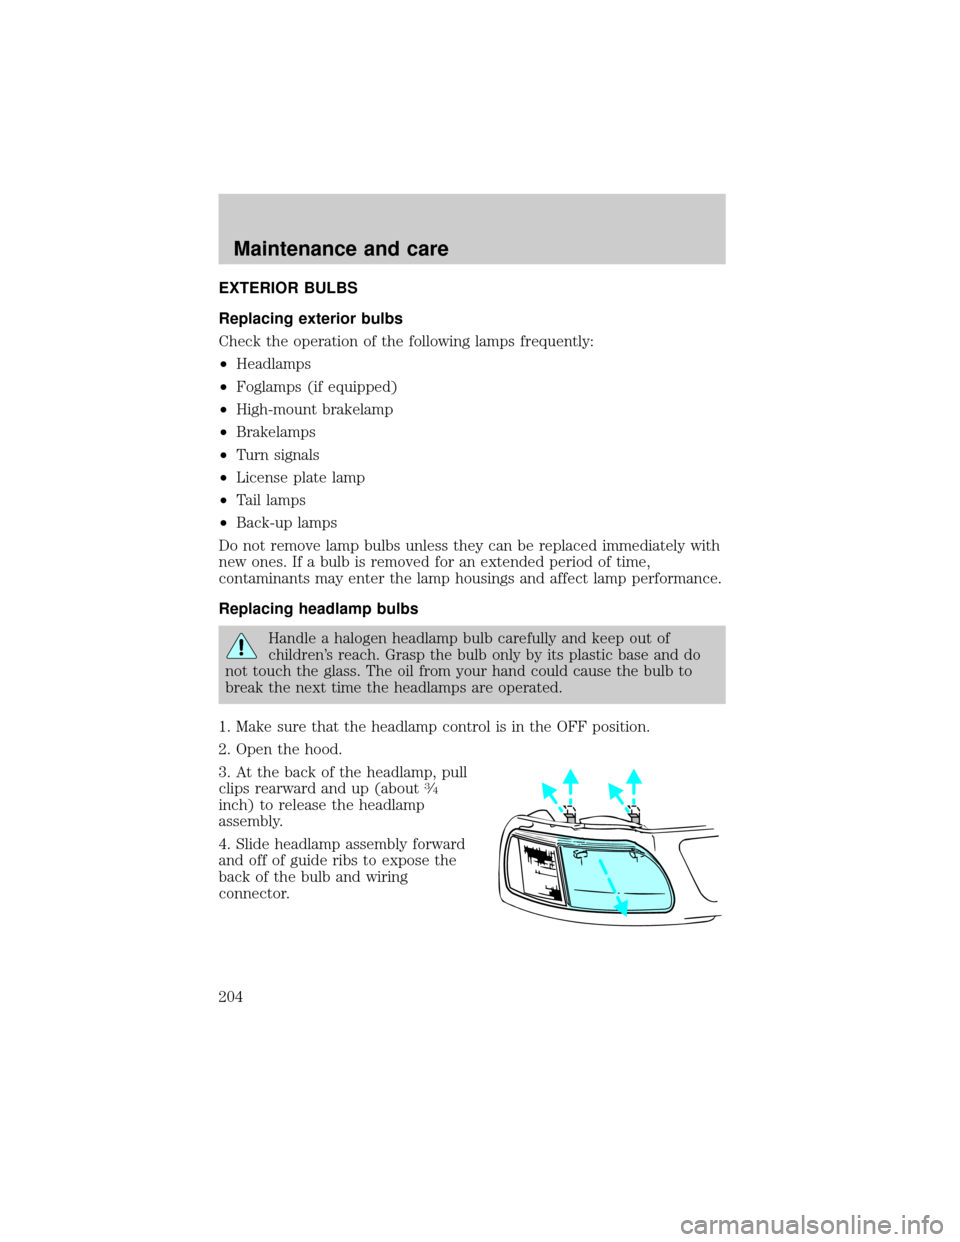
3. At the back of the headlamp, pull
clips rearward and up (about
3¤4
inch) to release the headlamp
assembly.
4. Slide headlamp assembly forward
and off of guide ribs to expose the
back of the bulb and wiring
connector.
Maintenance and care
204
Page 210 of 232

Waxing your vehicle
Wax when water stops beading on the surface. This could be every three
or four months, depending on operating conditions.
Use only carnauba or synthetic-based waxes. Use cleaning fluid or
alcohol with a clean cloth to remove any bugs and tar before waxing
vehicle. Use tar remover to remove any tar spots.
Avoid getting wax on the windshield. If you have wax applied at a
commercial car wash, it is recommended that you clean the wiper blades
and windshield as described inCleaning the wiper blades and
windshield.
Repairing paint chips
Minor scratches or paint damage from road debris may be repaired with
touch-up paint, repair foil or aerosol paint spray from the Ford accessory
line. Observe the application instructions on the products.
Remove particles such as bird droppings, tree sap, insect remains, tar
spots, road salt and industrial fallout immediately.
Cleaning the wheels
Wash with the same detergent as the body of your vehicle. Do not use
acid-based or alcohol-based wheel cleaners, steel wool, fuel or strong
detergents. Never use abrasives that will damage the finish of special
wheel surfaces. Use a tar remover to remove grease and tar.
Maintenance and care
210
Page 213 of 232
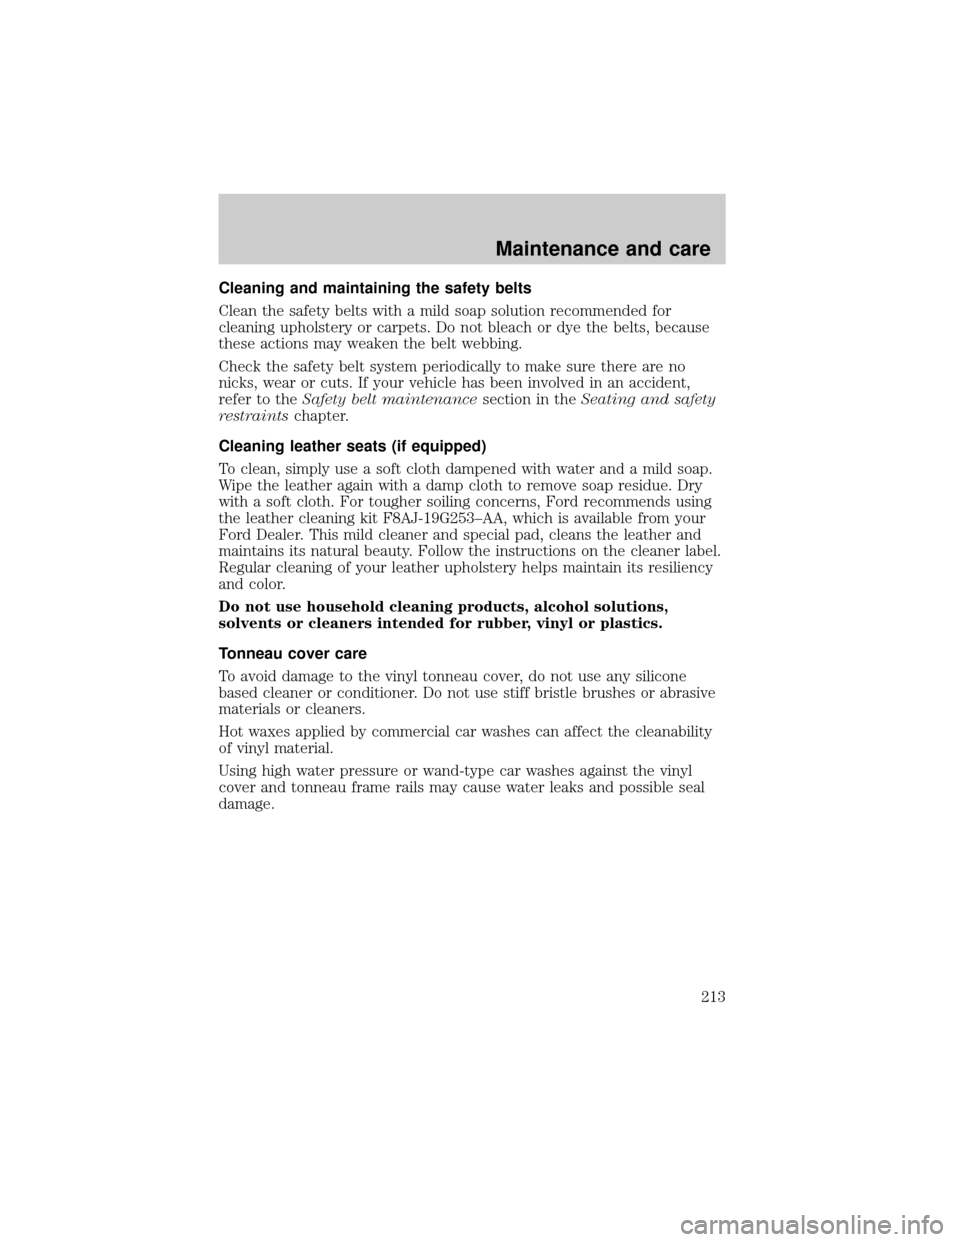
Cleaning and maintaining the safety belts
Clean the safety belts with a mild soap solution recommended for
cleaning upholstery or carpets. Do not bleach or dye the belts, because
these actions may weaken the belt webbing.
Check the safety belt system periodically to make sure there are no
nicks, wear or cuts. If your vehicle has been involved in an accident,
refer to theSafety belt maintenancesection in theSeating and safety
restraintschapter.
Cleaning leather seats (if equipped)
To clean, simply use a soft cloth dampened with water and a mild soap.
Wipe the leather again with a damp cloth to remove soap residue. Dry
with a soft cloth. For tougher soiling concerns, Ford recommends using
the leather cleaning kit F8AJ-19G253±AA, which is available from your
Ford Dealer. This mild cleaner and special pad, cleans the leather and
maintains its natural beauty. Follow the instructions on the cleaner label.
Regular cleaning of your leather upholstery helps maintain its resiliency
and color.
Do not use household cleaning products, alcohol solutions,
solvents or cleaners intended for rubber, vinyl or plastics.
Tonneau cover care
To avoid damage to the vinyl tonneau cover, do not use any silicone
based cleaner or conditioner. Do not use stiff bristle brushes or abrasive
materials or cleaners.
Hot waxes applied by commercial car washes can affect the cleanability
of vinyl material.
Using high water pressure or wand-type car washes against the vinyl
cover and tonneau frame rails may cause water leaks and possible seal
damage.
Maintenance and care
213
Page 214 of 232
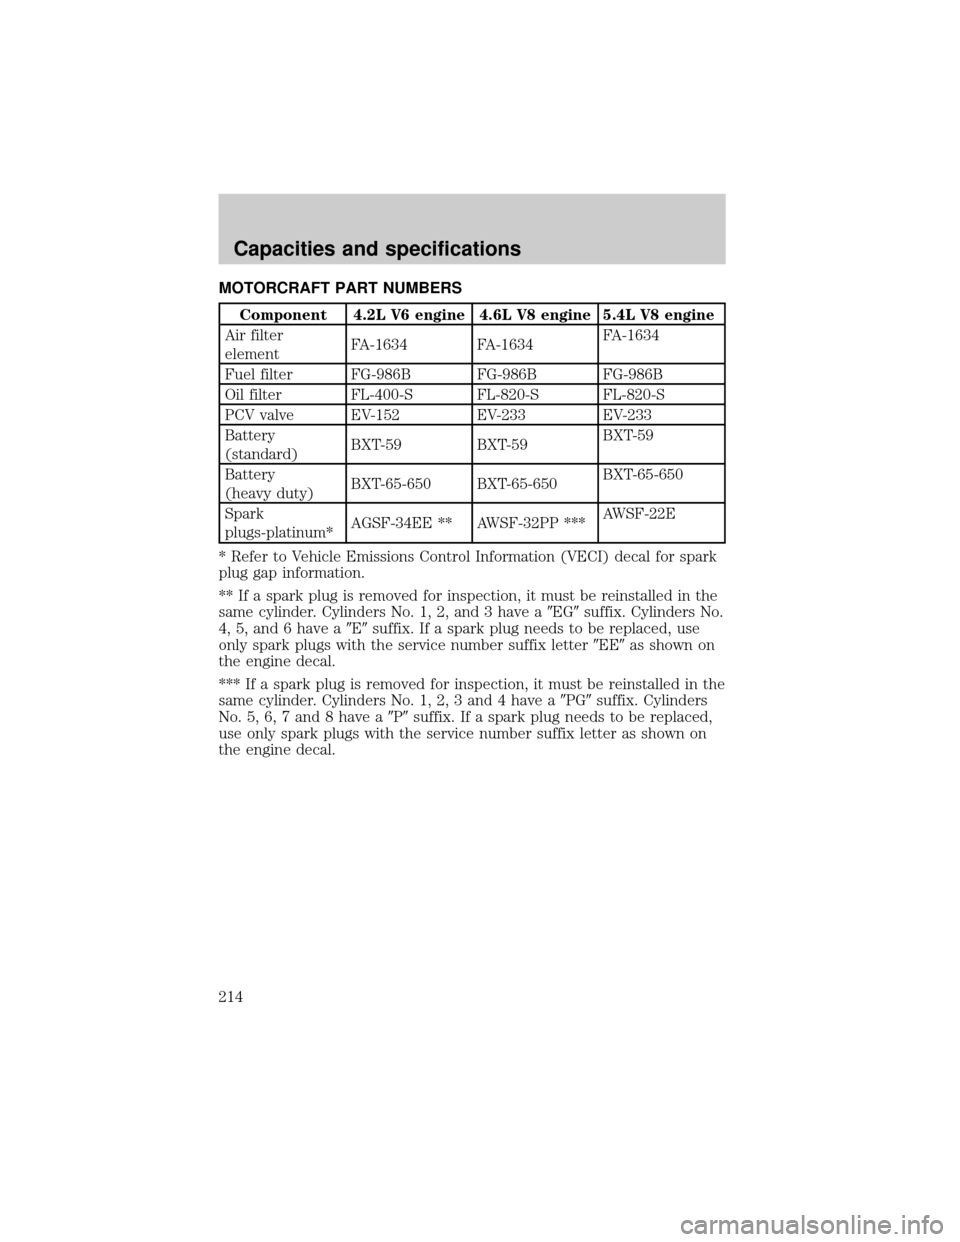
MOTORCRAFT PART NUMBERS
Component 4.2L V6 engine 4.6L V8 engine 5.4L V8 engine
Air filter
elementFA-1634 FA-1634FA-1634
Fuel filter FG-986B FG-986B FG-986B
Oil filter FL-400-S FL-820-S FL-820-S
PCV valve EV-152 EV-233 EV-233
Battery
(standard)BXT-59 BXT-59BXT-59
Battery
(heavy duty)BXT-65-650 BXT-65-650BXT-65-650
Spark
plugs-platinum*AGSF-34EE ** AWSF-32PP ***AWSF-22E
* Refer to Vehicle Emissions Control Information (VECI) decal for spark
plug gap information.
** If a spark plug is removed for inspection, it must be reinstalled in the
same cylinder. Cylinders No. 1, 2, and 3 have a9EG9suffix. Cylinders No.
4, 5, and 6 have a9E9suffix. If a spark plug needs to be replaced, use
only spark plugs with the service number suffix letter9EE9as shown on
the engine decal.
*** If a spark plug is removed for inspection, it must be reinstalled in the
same cylinder. Cylinders No. 1, 2, 3 and 4 have a9PG9suffix. Cylinders
No. 5, 6, 7 and 8 have a9P9suffix. If a spark plug needs to be replaced,
use only spark plugs with the service number suffix letter as shown on
the engine decal.
Capacities and specifications
214