1999 FORD F SERIES MOTORHOME AND COMMERCIAL CHASSIS fuel pressure
[x] Cancel search: fuel pressurePage 4 of 96
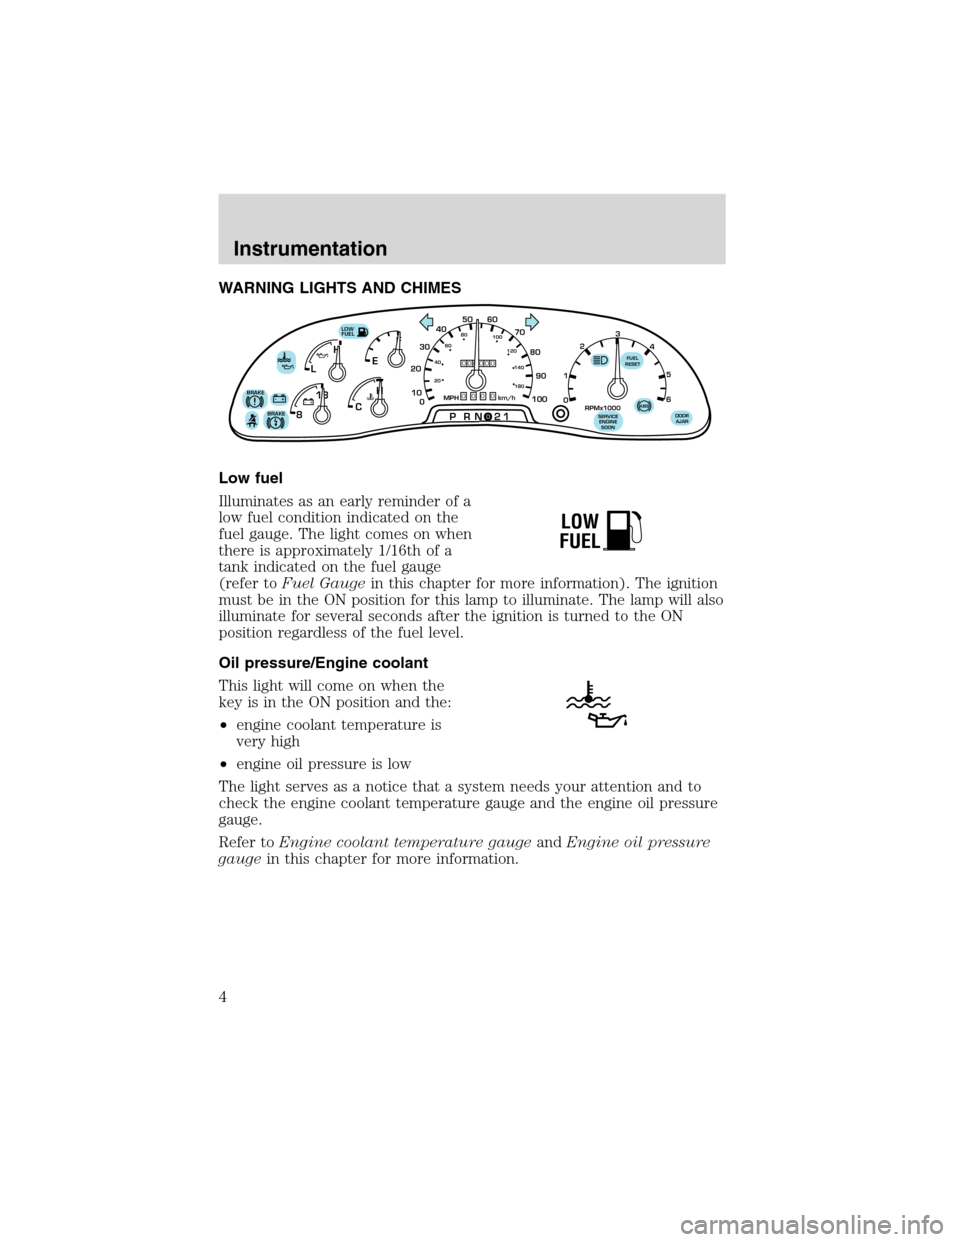
WARNING LIGHTS AND CHIMES
Low fuel
Illuminates as an early reminder of a
low fuel condition indicated on the
fuel gauge. The light comes on when
there is approximately 1/16th of a
tank indicated on the fuel gauge
(refer toFuel Gaugein this chapter for more information). The ignition
must be in the ON position for this lamp to illuminate. The lamp will also
illuminate for several seconds after the ignition is turned to the ON
position regardless of the fuel level.
Oil pressure/Engine coolant
This light will come on when the
key is in the ON position and the:
•engine coolant temperature is
very high
•engine oil pressure is low
The light serves as a notice that a system needs your attention and to
check the engine coolant temperature gauge and the engine oil pressure
gauge.
Refer toEngine coolant temperature gaugeandEngine oil pressure
gaugein this chapter for more information.
F
E
CH H
L
18
8
PRN 21LOW
FUEL
BRAKE!+ -+ -000000000
0
50
60
70
20
10
0 3040
80
90
100
20406080
100
120
140
180
MPH km/h
1
02
RPMx1000
3
4
5
6
SERVICE
ENGINE
SOONABS
FUEL
RESET
DOOR
AJARBRAKE
LOW
FUEL
Instrumentation
4
Page 10 of 96
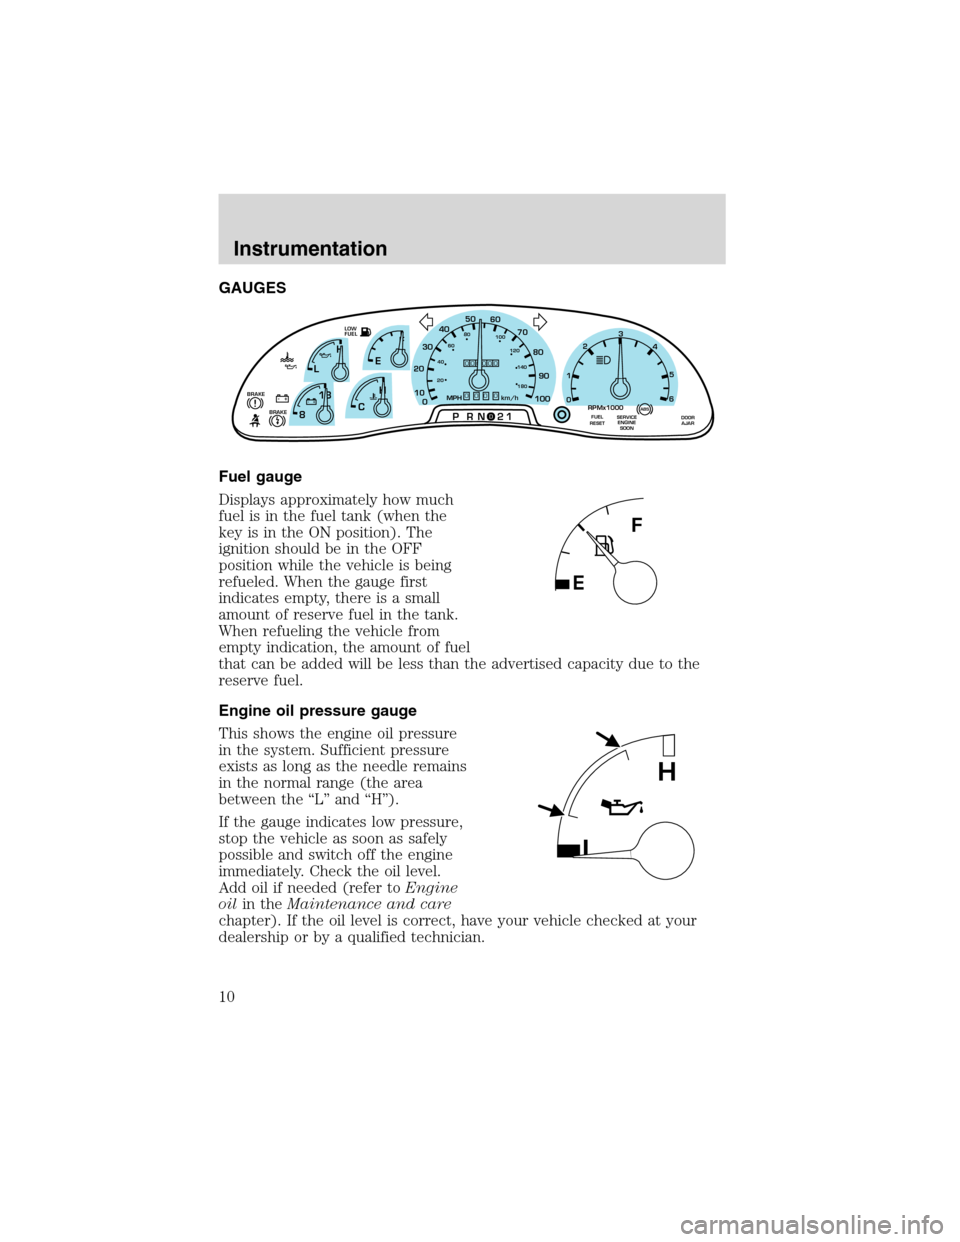
GAUGES
Fuel gauge
Displays approximately how much
fuel is in the fuel tank (when the
key is in the ON position). The
ignition should be in the OFF
position while the vehicle is being
refueled. When the gauge first
indicates empty, there is a small
amount of reserve fuel in the tank.
When refueling the vehicle from
empty indication, the amount of fuel
that can be added will be less than the advertised capacity due to the
reserve fuel.
Engine oil pressure gauge
This shows the engine oil pressure
in the system. Sufficient pressure
exists as long as the needle remains
in the normal range (the area
between the “L” and “H”).
If the gauge indicates low pressure,
stop the vehicle as soon as safely
possible and switch off the engine
immediately. Check the oil level.
Add oil if needed (refer toEngine
oilin theMaintenance and care
chapter). If the oil level is correct, have your vehicle checked at your
dealership or by a qualified technician.
F
E
CH H
L
18
8
PRN 21LOW
FUEL
+ -+ -000000000
0
50
60
70
20
10
0 3040
80
90
100
20406080
100
120
140
180
MPH km/hBRAKE!
1
02
RPMx1000
3
4
5
6
SERVICE
ENGINE
SOONABSFUEL
RESETDOOR
AJARBRAKE
L
H
Instrumentation
10
Page 44 of 96
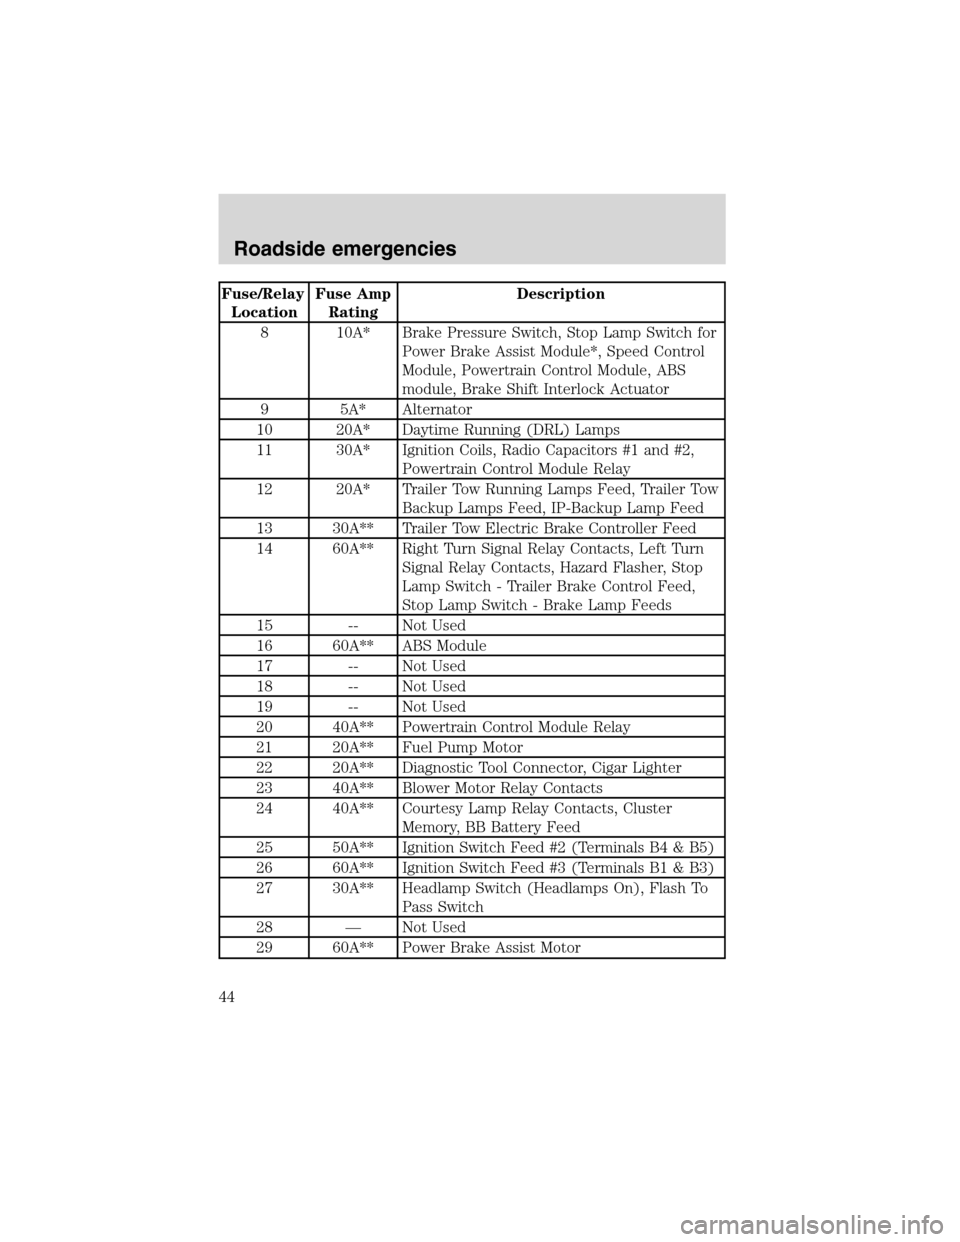
Fuse/Relay
LocationFuse Amp
RatingDescription
8 10A* Brake Pressure Switch, Stop Lamp Switch for
Power Brake Assist Module*, Speed Control
Module, Powertrain Control Module, ABS
module, Brake Shift Interlock Actuator
9 5A* Alternator
10 20A* Daytime Running (DRL) Lamps
11 30A* Ignition Coils, Radio Capacitors #1 and #2,
Powertrain Control Module Relay
12 20A* Trailer Tow Running Lamps Feed, Trailer Tow
Backup Lamps Feed, IP-Backup Lamp Feed
13 30A** Trailer Tow Electric Brake Controller Feed
14 60A** Right Turn Signal Relay Contacts, Left Turn
Signal Relay Contacts, Hazard Flasher, Stop
Lamp Switch - Trailer Brake Control Feed,
Stop Lamp Switch - Brake Lamp Feeds
15 -- Not Used
16 60A** ABS Module
17 -- Not Used
18 -- Not Used
19 -- Not Used
20 40A** Powertrain Control Module Relay
21 20A** Fuel Pump Motor
22 20A** Diagnostic Tool Connector, Cigar Lighter
23 40A** Blower Motor Relay Contacts
24 40A** Courtesy Lamp Relay Contacts, Cluster
Memory, BB Battery Feed
25 50A** Ignition Switch Feed #2 (Terminals B4 & B5)
26 60A** Ignition Switch Feed #3 (Terminals B1 & B3)
27 30A** Headlamp Switch (Headlamps On), Flash To
Pass Switch
28 — Not Used
29 60A** Power Brake Assist Motor
Roadside emergencies
44
Page 68 of 96
Batteries normally produce explosive gases which can cause
personal injury. Therefore, do not allow flames, sparks or lighted
substances to come near the battery. When working near the battery,
always shield your face and protect your eyes. Always provide proper
ventilation.
When lifting a plastic-cased battery, excessive pressure on the
end walls could cause acid to flow through the vent caps,
resulting in personal injury and/or damage to the vehicle or battery.
Lift the battery with a battery carrier or with your hands on opposite
corners.
Keep batteries out of reach of children. Batteries contain sulfuric
acid. Avoid contact with skin, eyes or clothing. Shield your eyes
when working near the battery to protect against possible splashing of
acid solution. In case of acid contact with skin or eyes, flush
immediately with water for a minimum of 15 minutes and get prompt
medical attention. If acid is swallowed, call a physician immediately.
To account for customer driving habits and conditions, your automatic
transmission electronically controls the shift quality by using an adaptive
learning strategy. The adaptive learning strategy is maintained by power
from the battery. When the battery is disconnected or a new battery is
installed, the transmission must relearn its adaptive strategy. Optimal
shifting will resume within a few hundred kilometers (miles) of
operation.
If the shift quality does not improve within a few hundred
kilometers (miles) of operation, or if the downshifts and other
throttle conditions do not function normally, see your dealer or a
qualified service technician as soon as possible.
Because your vehicle’s engine is also electronically controlled by a
computer, some control conditions are maintained by power from the
battery. When the battery is disconnected or a new battery is installed,
the engine must relearn its idle and fuel trim strategy for optimum
driveability and performance. To begin this process:
1. Set your parking brake.
Maintenance and care
68
Page 69 of 96
2. Put the gearshift in P (Park), turn off all accessories and start the
engine.
3. Let the engine idle for at least one minute.
4. The relearning process will automatically complete as you drive the
vehicle.
•The vehicle may need to be driven 16 km (10 miles) or more to
relearn the idle and fuel trim strategy.
•If you do not allow the engine to relearn its idle trim, the idle quality
of your vehicle may be adversely affected until the idle trim is
eventually relearned.
If the battery has been disconnected or a new battery has been installed,
the clock and the preset radio stations must be reset once the battery is
reconnected.
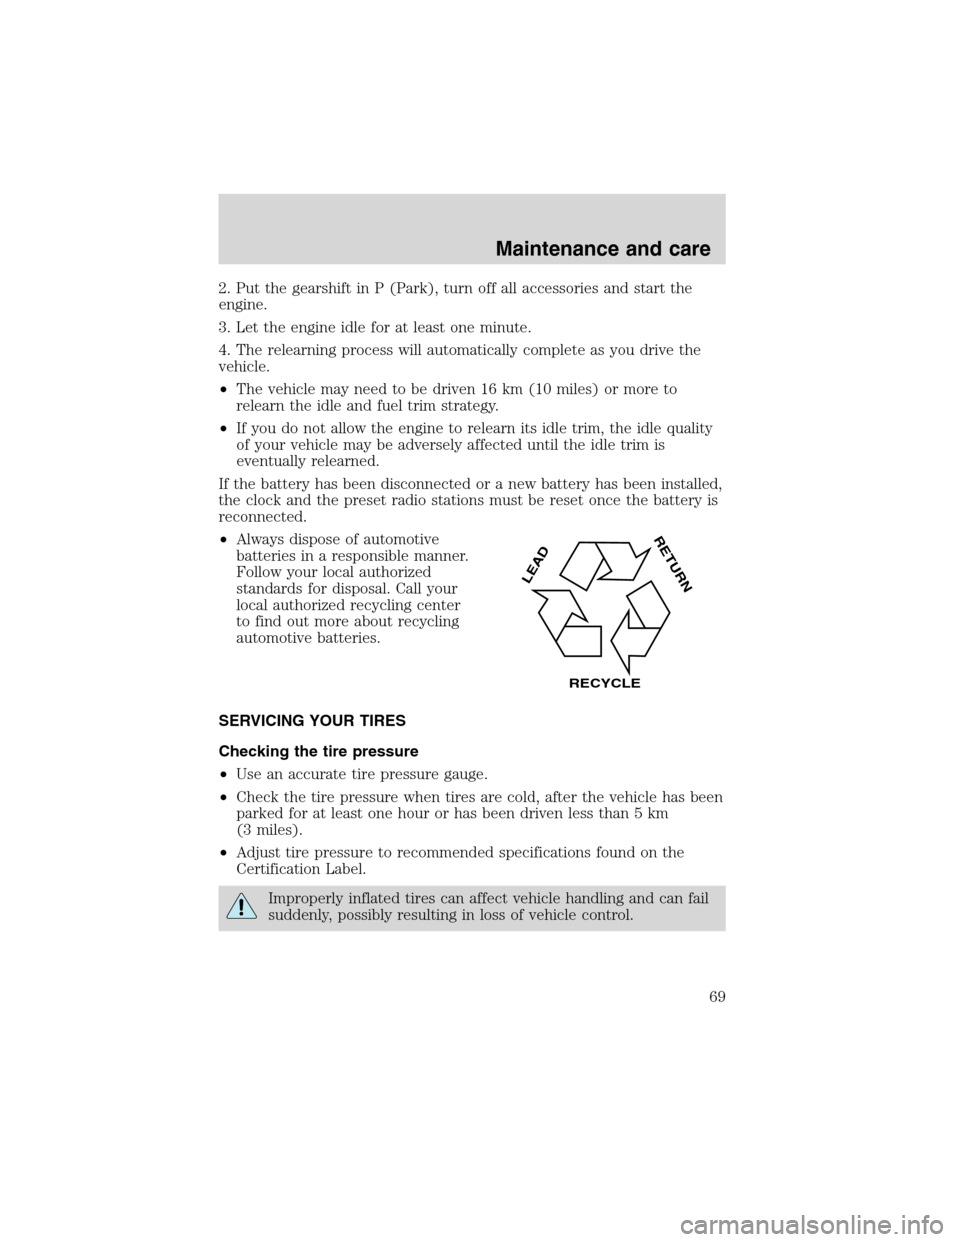
•Always dispose of automotive
batteries in a responsible manner.
Follow your local authorized
standards for disposal. Call your
local authorized recycling center
to find out more about recycling
automotive batteries.
SERVICING YOUR TIRES
Checking the tire pressure
•Use an accurate tire pressure gauge.
•Check the tire pressure when tires are cold, after the vehicle has been
parked for at least one hour or has been driven less than 5 km
(3 miles).
•Adjust tire pressure to recommended specifications found on the
Certification Label.
Improperly inflated tires can affect vehicle handling and can fail
suddenly, possibly resulting in loss of vehicle control.
LEAD
RETURN
RECYCLE
Maintenance and care
69
Page 71 of 96
Follow these guidelines when using snow tires and chains:
•Use only SAE Class S chains.
•Install chains securely, verifying that the chains do not touch any
wiring, brake lines or fuel lines.
•Drive cautiously. If you hear the chains rub or bang against your
vehicle, stop and re-tighten the chains. If this does not work, remove
the chains to prevent damage to your vehicle.
•If possible, avoid fully loading your vehicle.
•Remove the tire chains when they are no longer needed. Do not use
tire chains on dry roads.
•The suspension insulation and bumpers will help prevent vehicle
damage. Do not remove these components from your vehicle when
using snow tires and chains.
WHAT YOU SHOULD KNOW ABOUT AUTOMOTIVE FUELS
Important safety precautions
Do not overfill the fuel tank. The pressure in an overfilled tank
may cause leakage and lead to fuel spray and fire.
The fuel system may be under pressure. If the fuel filler cap is
venting vapor or if you hear a hissing sound, wait until it stops
before completely removing the fuel filler cap. Otherwise, fuel may
spray out and injure you or others.
If you do not use the proper fuel filler cap, excessive pressure or
vacuum in the fuel tank may damage the fuel system or cause
the fuel system to work improperly in a collision, which may result in
possible personal injury.
Automotive fuels can cause serious injury or death if misused or
mishandled.
Maintenance and care
71
Page 77 of 96
Cleaning the engine
Engines are more efficient when they are clean because grease and dirt
buildup keep the engine warmer than normal. When washing:
•Take care when using a power washer to clean the engine. The high
pressure fluid could penetrate the sealed parts and cause damage.
•Do not spray with cold water to avoid cracking the engine block or
other engine components.
•Cover the air cleaner and battery to prevent water damage when
cleaning the engine.
•Never wash or rinse the engine while it is running; water in the
running engine may cause internal damage.
Underbody
Flush the complete underside of vehicle frequently. Keep body drain
holes unplugged. Inspect for road damage.
FUEL FILTER REPLACEMENT
The fuel filter assembly is located inside the driver side frame rail, near
the transmission.
The fuel filter should be replaced every 24 000 km (15 000 miles).
Removal
If the fuel filter is being serviced with the rear of the vehicle
higher than the front, or if the fuel tank is pressurized, fuel
leakage or siphoning from the tank fuel tubes could occur. To prevent
this condition, maintain the vehicle front end at or above the level of
the rear of the vehicle.
Do not smoke or carry lighted tobacco or open flame of any type
when working on or near any fuel related component. Highly
flammable mixtures are always present and may be ignited, resulting in
possible personal injury.
Maintenance and care
77
Page 78 of 96
Fuel in the fuel system remains under high pressure even when
the engine is not running. Before servicing or disconnecting any
of the fuel lines or fuel system components, the fuel system pressure
must be relieved in order to prevent accidental spraying of fuel,
causing personal injury or a fire hazard.
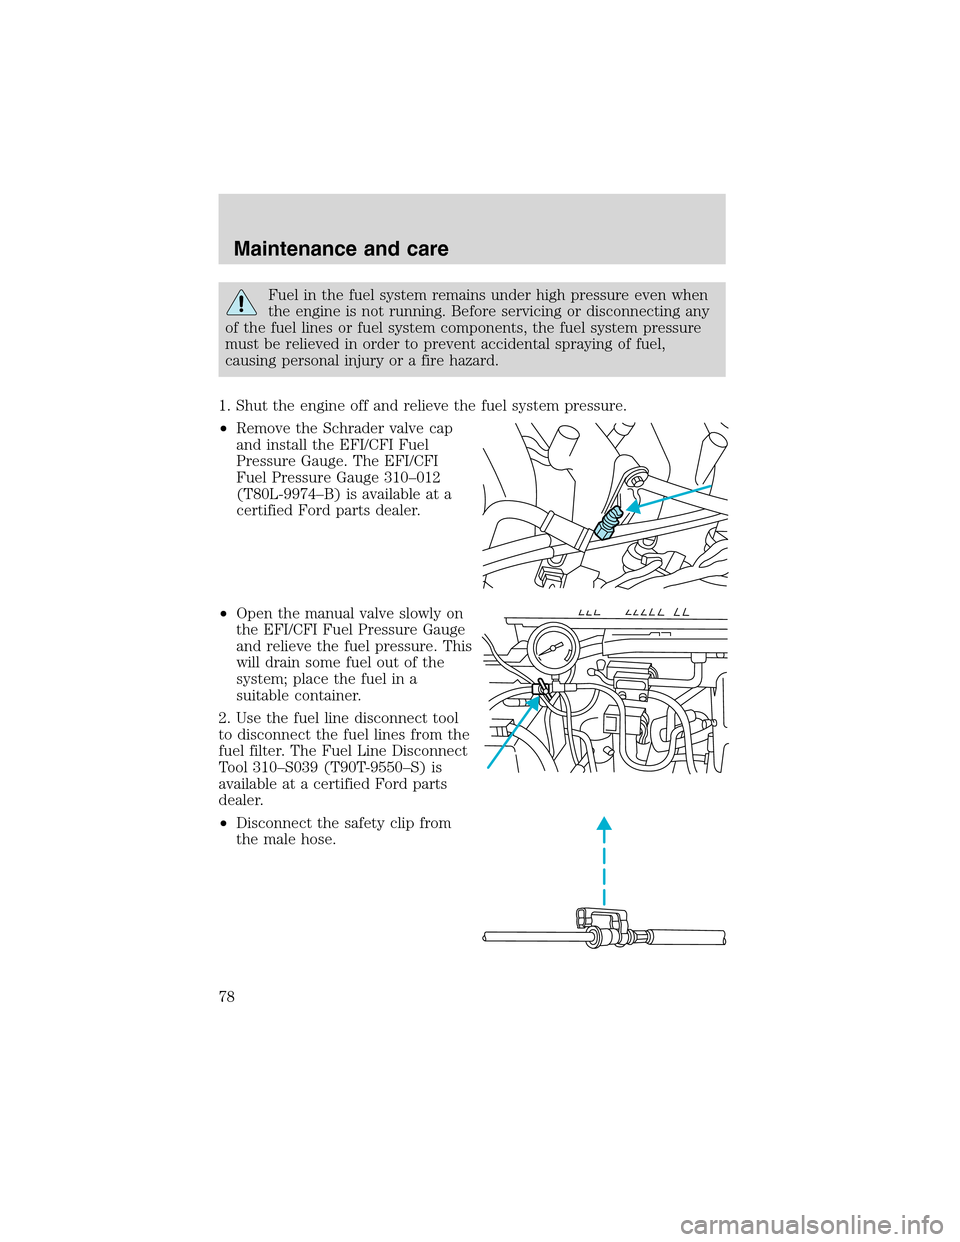
1. Shut the engine off and relieve the fuel system pressure.
•Remove the Schrader valve cap
and install the EFI/CFI Fuel
Pressure Gauge. The EFI/CFI
Fuel Pressure Gauge 310–012
(T80L-9974–B) is available at a
certified Ford parts dealer.
•Open the manual valve slowly on
the EFI/CFI Fuel Pressure Gauge
and relieve the fuel pressure. This
will drain some fuel out of the
system; place the fuel in a
suitable container.
2. Use the fuel line disconnect tool
to disconnect the fuel lines from the
fuel filter. The Fuel Line Disconnect
Tool 310–S039 (T90T-9550–S) is
available at a certified Ford parts
dealer.
•Disconnect the safety clip from
the male hose.
Maintenance and care
78