Page 141 of 264
If starting a vehicle with an automatic transmission:
²Make sure the parking brake is
set.
²Make sure the gearshift is in P (Park).
If starting a vehicle with a manual transmission:
²Make sure the parking brake is set.
²Push the clutch pedal to the
floor.
3. Turn the key to 4 (ON) without
turning the key to 5 (START).
1
2
34
5
Starting
141
Page 147 of 264

The BRAKE warning lamp in the
instrument cluster illuminates and
remains illuminated (when the
ignition is turned ON) until the
parking brake is released.
Always set the parking brake fully and make sure that the
gearshift is securely latched in P (Park) (automatic
transmission) or in 1 (First) (manual transmission).
The parking brake is not recommended to stop a moving vehicle.
However, if the normal brakes fail, the parking brake can be used to stop
your vehicle in an emergency. Since the parking brake applies only the
rear brakes, the vehicle's stopping distance will increase greatly and the
handling of your vehicle will be adversely affected.
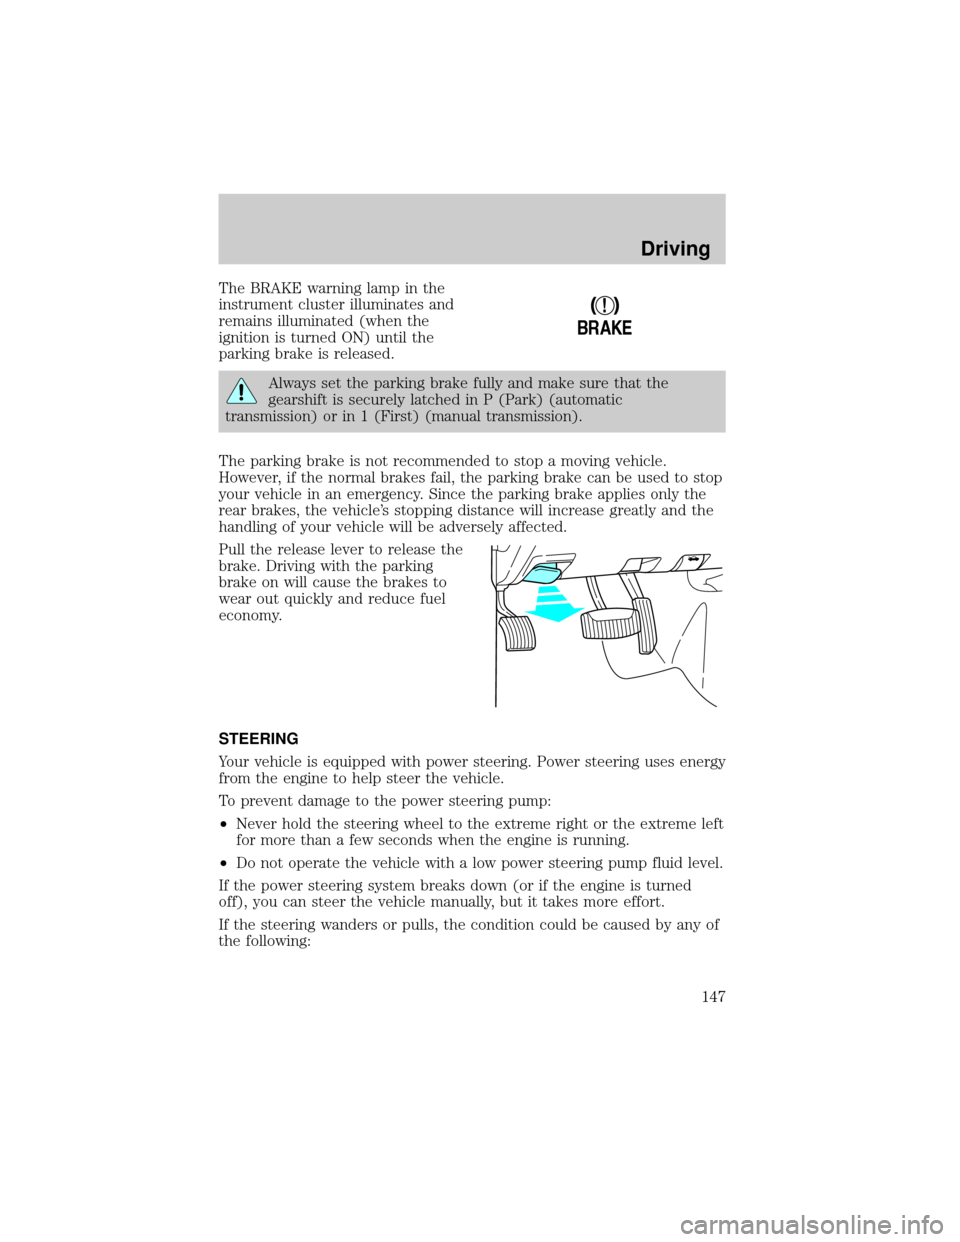
Pull the release lever to release the
brake. Driving with the parking
brake on will cause the brakes to
wear out quickly and reduce fuel
economy.
STEERING
Your vehicle is equipped with power steering. Power steering uses energy
from the engine to help steer the vehicle.
To prevent damage to the power steering pump:
²Never hold the steering wheel to the extreme right or the extreme left
for more than a few seconds when the engine is running.
²Do not operate the vehicle with a low power steering pump fluid level.
If the power steering system breaks down (or if the engine is turned
off), you can steer the vehicle manually, but it takes more effort.
If the steering wanders or pulls, the condition could be caused by any of
the following:
!
BRAKE
Driving
147
Page 154 of 264

2 (Second)
Use 2 (Second) to start-up on
slippery roads or to provide
additional engine braking on
downgrades. Transmission operates
in third gear.
1 (First)
Use 1 (First) to provide maximum
engine braking on steep
downgrades. Upshifts can be made
by shifting to 2 (Second) or to
(Overdrive). Selecting 1 (Low)
at higher speeds causes the transmission to shift to a lower gear and will
shift to 1 (First) after the vehicle decelerates to the proper vehicle
speed.
Forced Downshifts
To gain acceleration in(Overdrive) or Drive (O/D OFF) when passing
another vehicle, push the accelerator to the floor. The transmission will
downshift to the appropriate gear: fourth, third, second or first gear.
Driving a manual transmission (if equipped)
Using the clutch
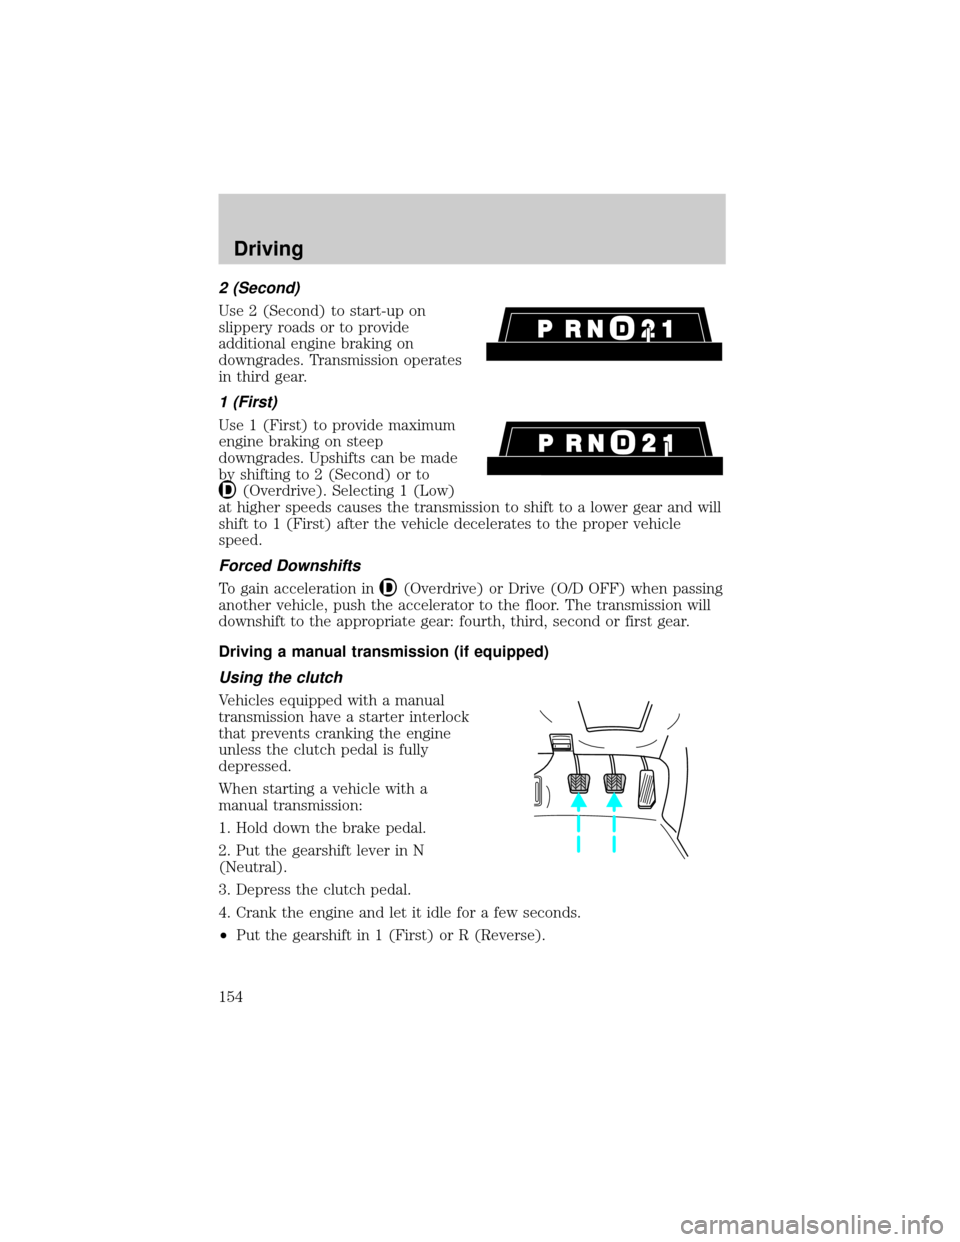
Vehicles equipped with a manual
transmission have a starter interlock
that prevents cranking the engine
unless the clutch pedal is fully
depressed.
When starting a vehicle with a
manual transmission:
1. Hold down the brake pedal.
2. Put the gearshift lever in N
(Neutral).
3. Depress the clutch pedal.
4. Crank the engine and let it idle for a few seconds.
²Put the gearshift in 1 (First) or R (Reverse).
Driving
154
Page 159 of 264
Using the Control-Trac system
Shifting between 4WD AUTO and 4WD HIGH
When you move the control to 4WD
HIGH, the indicator light will
illuminate in the instrument cluster.
When you move the control to 4WD
AUTO, the indicator light will turn
off.
Either shift can be done at a stop or
while driving at any speed.
Shifting from 4WD AUTO or 4WD HIGH to 4WD LOW
1. Bring the vehicle to a stop.
2. Depress the brake.
3. Place the gearshift in N (Neutral)
(automatic transmission) or depress
the clutch (manual transmission).
4. Move the 4WD control to the
4WD LOW position.
Shifting from 4WD LOW to 4WD AUTO or 4WD HIGH
1. Bring the vehicle to a stop.
2. Depress the brake.
3. Place the gearshift in N (Neutral)
(automatic transmission) or depress
the clutch (manual transmission).
4. Move the 4WD control to the
4WD AUTO or 4WD HIGH position.
HIGH
LOW AUTO4x4
HIGH
LOW AUTO4x4
HIGH
LOW AUTO4x4
Driving
159
Page 169 of 264
Trailer towing table (4x2 manual transmission)
GCWR (Gross Combined Weight Rating)/Trailer weights
EngineRear
axle
ratioMaximum
GCWR-kg
(lbs.)Trailer weight
range-kg
(lbs.)
(0-Maximum)Maximum
frontal area of
trailer-m
2(ft2)
2-door
4.0L OHV 3.272 721
(6 000)0-907
(0-2 000)4.64
(50)
4.0L OHV 3.733 175
(7 000)0-1 433
(0-3 160)4.64
(50)
4-door
4.0L OHV 3.272 721
(6 000)0-889
(0-1 960)4.64
(50)
4.0L OHV 3.733 175
(7 000)0-1 343
(0-2 960)4.64
(50)
Notes:-For high altitude operation, reduce GCW by 2% per 300
meters (1 800 ft) elevation. For definitions of terms used in this table
and instructions on how to calculate your vehicle load, refer toVehicle
loadingin this chapter. Maximum trailer weights shown. The
combined weight of the completed towing vehicle and the loaded
trailer must not exceed the GCWR.
Towing a trailer over 1 588 kg (3 500 lbs.) requires a weight
distributing hitch.
Driving
169
Page 170 of 264

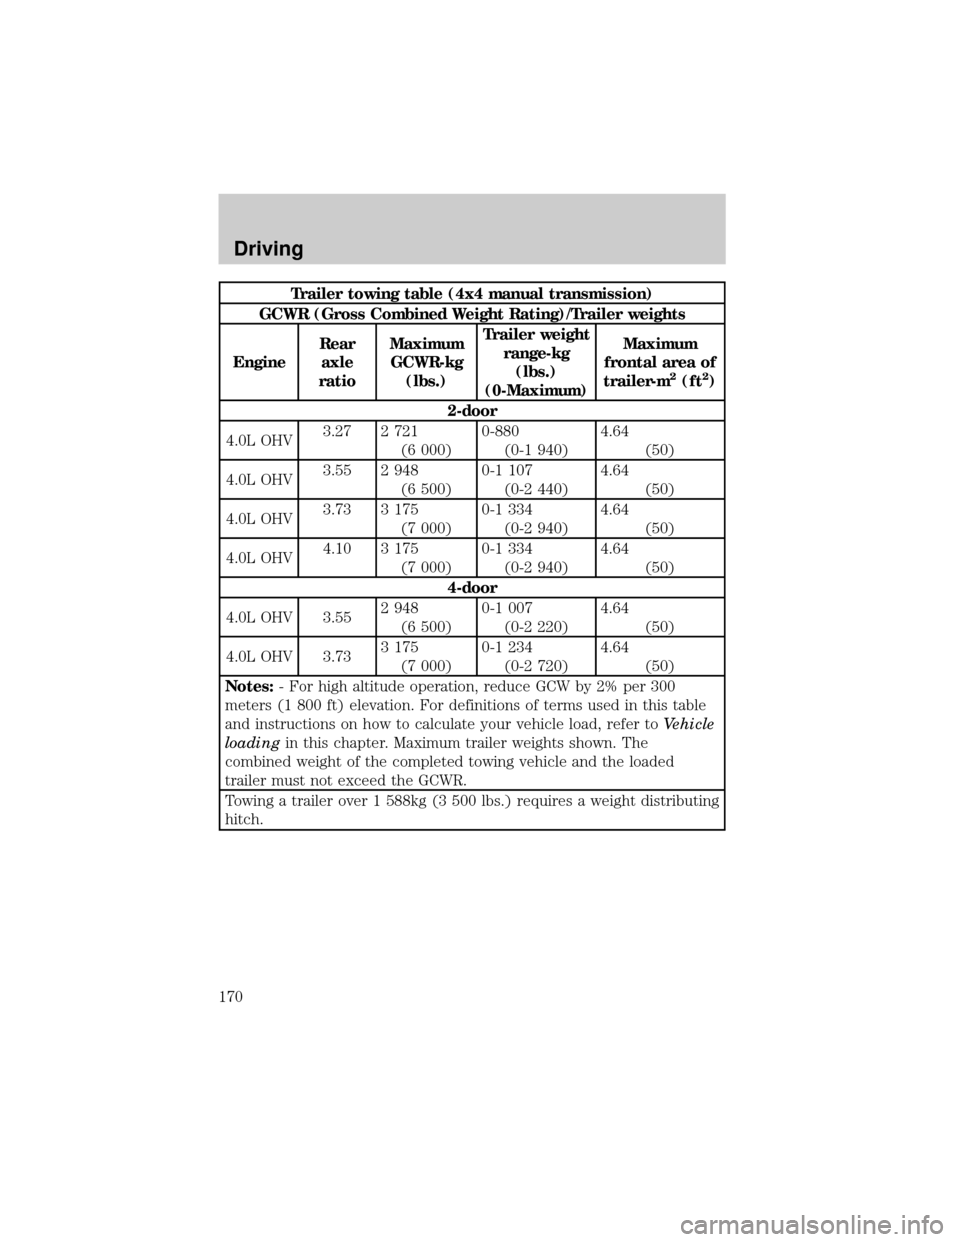
Trailer towing table (4x4 manual transmission)
GCWR (Gross Combined Weight Rating)/Trailer weights
EngineRear
axle
ratioMaximum
GCWR-kg
(lbs.)Trailer weight
range-kg
(lbs.)
(0-Maximum)Maximum
frontal area of
trailer-m
2(ft2)
2-door
4.0L OHV3.27 2 721
(6 000)0-880
(0-1 940)4.64
(50)
4.0L OHV3.55 2 948
(6 500)0-1 107
(0-2 440)4.64
(50)
4.0L OHV3.73 3 175
(7 000)0-1 334
(0-2 940)4.64
(50)
4.0L OHV4.10 3 175
(7 000)0-1 334
(0-2 940)4.64
(50)
4-door
4.0L OHV 3.552 948
(6 500)0-1 007
(0-2 220)4.64
(50)
4.0L OHV 3.733 175
(7 000)0-1 234
(0-2 720)4.64
(50)
Notes:- For high altitude operation, reduce GCW by 2% per 300
meters (1 800 ft) elevation. For definitions of terms used in this table
and instructions on how to calculate your vehicle load, refer toVehicle
loadingin this chapter. Maximum trailer weights shown. The
combined weight of the completed towing vehicle and the loaded
trailer must not exceed the GCWR.
Towing a trailer over 1 588kg (3 500 lbs.) requires a weight distributing
hitch.
Driving
170
Page 175 of 264

Driving while you tow
Do not drive faster than 88 km/h (55 mph) when towing a trailer.
Speed control may shut off if you are towing on long, steep grades.
When towing a trailer:
²Use a lower gear when towing up or down steep hills. This will
eliminate excessive downshifting and upshifting for optimum fuel
economy and transmission cooling.
²Anticipate stops and brake gradually.
Exceeding the GCWR rating may cause internal transmission
damage and void your warranty coverage.
Servicing after towing
If you tow a trailer for long distances, your vehicle will require more
frequent service intervals. Refer to your Scheduled Maintenance guide
for more information.
Trailer towing tips
²Practice turning, stopping and backing up in an area before starting on
a trip to get the feel of the vehicle trailer combination. When turning,
make wider turns so the trailer wheels will clear curbs and other
obstacles.
²Allow more distance for stopping with a trailer attached.
²The trailer tongue weight should be 10±15% of the loaded trailer
weight.
²After you have traveled 80 km (50 miles), thoroughly check your
hitch, electrical connections and trailer wheel lug nuts.
²When stopped in traffic for long periods of time in hot weather, place
the gearshift in P (Park) (automatic transmissions) or N (Neutral)
(manual transmissions). This aids engine cooling and air conditioner
efficiency.
²Vehicles with trailers should not be parked on a grade. If you must
park on a grade, place wheel chocks under the trailer's wheels.
Driving
175
Page 189 of 264
Refer to the instruction sheet for detailed tire change instructions.
1. Park on a level surface, activate
hazard flashers and set the parking
brake.
2. Place gearshift lever in P (Park)
or in the reverse gear (manual
transmission) and turn engine OFF.
When one of the rear
wheels is off the ground,
the transmission alone will not
prevent the vehicle from moving
or slipping off the jack, even if the
transmission is in P (Park)
(automatic transmission) or
reverse (manual transmission).
3. Block the diagonally opposite
wheel.
4. Use the tip of the lug wrench to
remove any wheel trim.
5. Loosen each wheel lug nut, but
do not remove them until the wheel
is raised off the ground.
Roadside emergencies
189