Page 79 of 264

²Station overload.Weak signals are sometimes captured by stronger
signals when you pass a broadcast tower. A stronger signal may
temporarily overtake a weaker signal and play while the weak station
frequency is displayed.
The audio system automatically switches to single channel reception if it
will improve the reception of a station normally received in stereo.
Audio system warranties and service
Refer to the ªWarranty Guideº for audio system warranty information.
If service is necessary, see your dealer or a qualified technician.
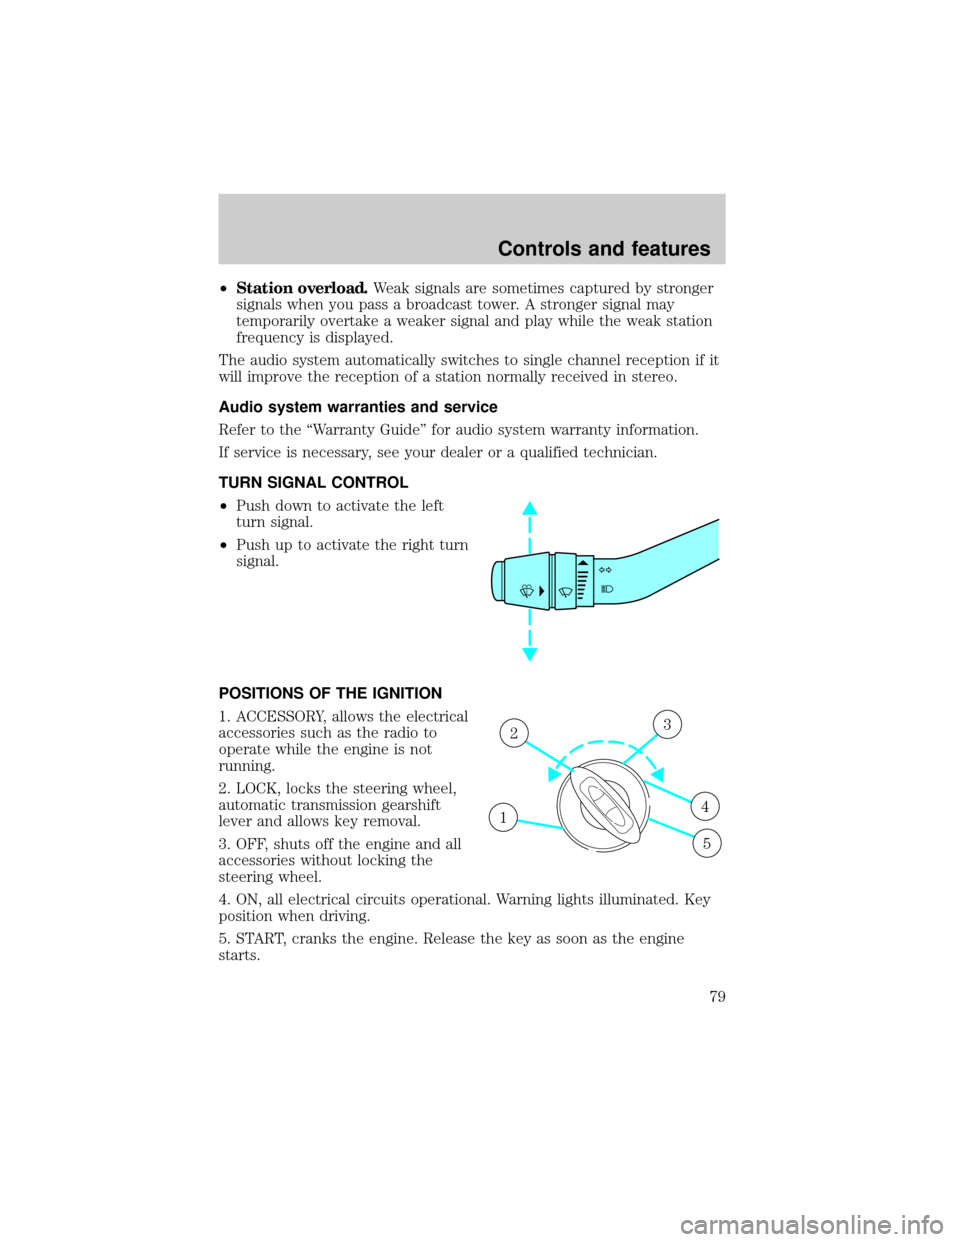
TURN SIGNAL CONTROL
²Push down to activate the left
turn signal.
²Push up to activate the right turn
signal.
POSITIONS OF THE IGNITION
1. ACCESSORY, allows the electrical
accessories such as the radio to
operate while the engine is not
running.
2. LOCK, locks the steering wheel,
automatic transmission gearshift
lever and allows key removal.
3. OFF, shuts off the engine and all
accessories without locking the
steering wheel.
4. ON, all electrical circuits operational. Warning lights illuminated. Key
position when driving.
5. START, cranks the engine. Release the key as soon as the engine
starts.
1
23
4
5
Controls and features
79
Page 86 of 264
Push the control on the end of the
stalk to activate washer. Push and
hold for a longer wash cycle. The
washer will automatically shut off
after ten seconds of continuous use.
Speed dependent wipers
When the windshield wiper control is set on the intermittent settings,
speed-sensitive front wipers automatically adjust as the vehicle's speed
increases.
Rear window wiper and washer
For rear wiper operation, rotate the
rear window wiper and washer
control to the desired interval
position.
Press the control for rear washer
fluid operation.
STEERING WHEEL CONTROLS (IF EQUIPPED)
These controls allow you to operate some radio and climate control
features.
PUSH
OFFR.WIPE
HI
PUSH
OFFR.WIPE
HI
Controls and features
86
Page 87 of 264
Radio control features
²Press BAND/MODE to select AM,
FM1, FM2, TAPE or CD (if
equipped).
In Radio mode:
²Press MEM/NEXT to select a
preset station from memory.
In Tape mode:
²Press MEM/NEXT to listen to the next selection on the tape.
In CD mode:
²Press MEM/NEXT to listen to the next track on the disc.
In any mode:
²Press VOL up or down to adjust the volume.
Climate control features
²Press TEMP up or down to adjust temperature.
²Press FAN up or down to adjust fan speed.
OVERHEAD CONSOLE (IF EQUIPPED)
The appearance of your vehicle's overhead console will vary according to
your option package. All overhead consoles show the outside
temperature and compass display.
NEXT
MODE
Controls and features
87
Page 92 of 264

Compass calibration adjustment
Perform this adjustment in an open
area free from steel structures and
high voltage lines:
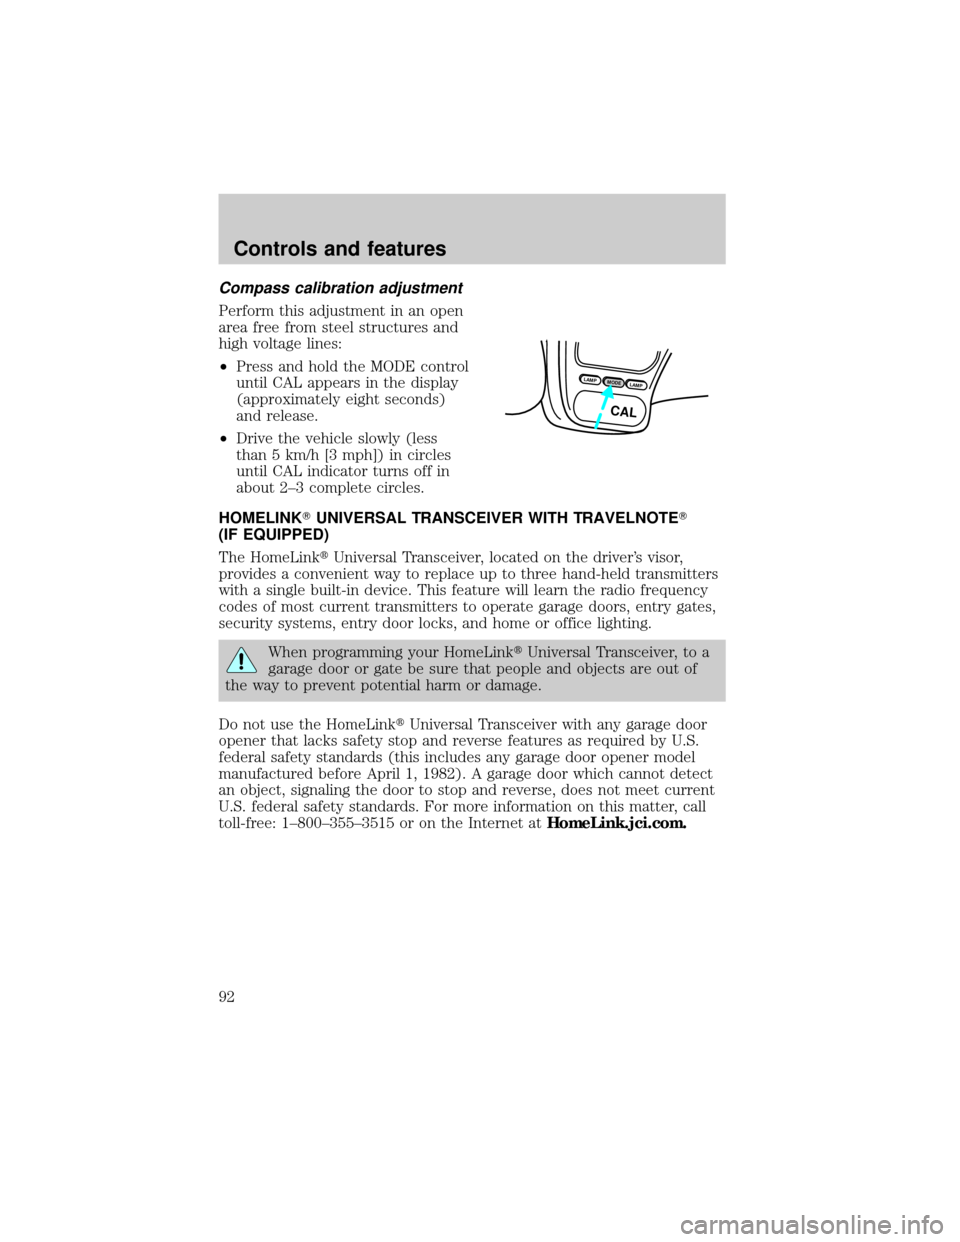
²Press and hold the MODE control
until CAL appears in the display
(approximately eight seconds)
and release.
²Drive the vehicle slowly (less
than 5 km/h [3 mph]) in circles
until CAL indicator turns off in
about 2±3 complete circles.
HOMELINKTUNIVERSAL TRANSCEIVER WITH TRAVELNOTET
(IF EQUIPPED)
The HomeLinktUniversal Transceiver, located on the driver's visor,
provides a convenient way to replace up to three hand-held transmitters
with a single built-in device. This feature will learn the radio frequency
codes of most current transmitters to operate garage doors, entry gates,
security systems, entry door locks, and home or office lighting.
When programming your HomeLinktUniversal Transceiver, to a
garage door or gate be sure that people and objects are out of
the way to prevent potential harm or damage.
Do not use the HomeLinktUniversal Transceiver with any garage door
opener that lacks safety stop and reverse features as required by U.S.
federal safety standards (this includes any garage door opener model
manufactured before April 1, 1982). A garage door which cannot detect
an object, signaling the door to stop and reverse, does not meet current
U.S. federal safety standards. For more information on this matter, call
toll-free: 1±800±355±3515 or on the Internet atHomeLink.jci.com.
LAMPMODELAMP
CAL
Controls and features
92
Page 108 of 264
The memory feature will continue to work from the door control even
when deactivated at the remote entry module.
Replacing the battery
The transmitter is powered by one coin type three-volt lithium battery
CR2032 or equivalent. Typical operating range will allow you to be up to
10 meters (33 feet) away from your vehicle. A decrease in operating
range can be caused by:
²weather conditions
²nearby radio towers
²structures around the vehicle
²other vehicles parked next to the vehicle
To replace the battery:
1. Twist a thin coin between the two
halves of the transmitter near the
key ring. DO NOT TAKE THE
FRONT PART OF THE
TRANSMITTER APART.
2. Place the positive (+) side of new
battery in the same orientation.
Refer to the diagram inside the
transmitter unit.
3. Snap the two halves back
together.
Controls and features
108
Page 140 of 264

PREPARING TO START YOUR VEHICLE
Engine starting is controlled by the ignition system. This system meets
all Canadian Interference-Causing Equipment standard requirements
regulating the impulse electrical field strength of radio noise.
When starting a fuel-injected engine, avoid pressing the accelerator
before or during starting. Only use the accelerator when you have
difficulty starting the engine. For more information on starting the
vehicle, refer toStarting the enginein this chapter.
Extended idling at high engine speeds can produce very high
temperatures in the engine and exhaust system, creating the risk
of fire or other damage.
Do not park, idle, or drive your vehicle in dry grass or other dry
ground cover. The emission system heats up the engine
compartment and exhaust system, which can start a fire.
Do not start your vehicle in a closed garage or in other enclosed
areas. Exhaust fumes can be toxic. Always open the garage door
before you start the engine. SeeGuarding against exhaust fumesin
this chapter for more instructions.
If you smell exhaust fumes inside your vehicle, have your dealer
inspect your vehicle immediately. Do not drive if you smell
exhaust fumes.
Important safety precautions
A computer system controls the engine's idle revolutions per minute
(RPM). When the engine starts, the idle RPM runs faster to warm the
engine. If the engine idle speed does not slow down automatically, have
the vehicle checked.
Before starting the vehicle:
1. Make sure all vehicle occupants have buckled their safety belts. For
more information on safety belts and their proper usage, refer to the
Seating and safety restraintschapter.
2. Make sure the headlamps and vehicle accessories are off.
Starting
140
Page 183 of 264
Fuse/Relay
LocationFuse Amp
RatingDescription
20 7.5A RAP Module, Generic Electronic Module
(GEM), Radio
21 15A Flasher (Hazard)
22 20A Auxiliary Power Socket
23 Ð Not Used
24 7.5A Clutch Pedal Position (CPP) Switch, Starter
Interrupt Relay, Anti-Theft
25 7.5A Generic Electronic Module (GEM),
Instrument Cluster, Securi-Lock
26 10A Battery Saver Relay, Electronic Shift Relay,
Interior Lamp Relay, Electronic Shift Control
Module
27 15A DRL, Backup Lamps Switch, DTR Sensor,
Electric Shift
28 7.5A Generic Electronic Module (GEM), Radio,
Memory Seat
29 10A Radio
30 15A Park Lamp/Trailer Tow Relay
31 Ð Not Used
32 10A Heated Mirror
33 15A Headlamps, Daytime Running Lamps (DRL)
Module, Instrument Cluster
34 7.5A Rear Integrated Control Panel, CD
35 7.5A Rear Blower Motor (w/EATC)
36 7.5A EATC Memory, CD, Rear Integrated Control
Panel, Memory Seat, Message Center
Roadside emergencies
183
Page 221 of 264

1. Set your parking brake.
2. Put the gearshift in P (Park) (automatic transmission) or the neutral
position (manual transmission), turn off all accessories and start the
engine.
3. Let the engine idle for at least one minute.
4. The relearning process will automatically complete as you drive the
vehicle.
²The vehicle may need to be driven 16 km (10 miles) or more to
relearn the idle and fuel trim strategy.
²If you do not allow the engine to relearn its idle trim, the idle quality
of your vehicle may be adversely affected until the idle trim is
eventually relearned.
If the battery has been disconnected or a new battery has been installed,
the clock and the preset radio stations must be reset once the battery is
reconnected.
²Always dispose of automotive
batteries in a responsible manner.
Follow your local authorized
standards for disposal. Call your
local authorized recycling center
to find out more about recycling
automotive batteries.
WINDSHIELD WIPER BLADES
Check the wiper blades at least twice a year or when they seem less
effective. Substances such as tree sap and some hot wax treatments used
by commercial car washes reduce the effectiveness of wiper blades.
Checking the wiper blades
If the wiper blades do not wipe properly, clean both the windshield and
wiper blades using undiluted windshield wiper solution or a mild
detergent. Rinse thoroughly with clean water. To avoid damaging the
blades, do not use fuel, kerosene, paint thinner or other solvents.
LEAD
RETURN
RECYCLE
Maintenance and care
221