1999 FORD E-450 warning
[x] Cancel search: warningPage 105 of 208
RABS warning lamp
TheABSwarning lamp in the instrument cluster illuminates if a RABS
fault is detected. Have your vehicle serviced as soon as possible.
Normal braking is still effective
unless the BRAKE warning lamp is
also illuminated.
Using RABS
²In an emergency, applying full pressure may cause the front wheels to
lock.If the front brakes lock, the vehicle cannot be steered.Yo u
should apply the brakes with steadily increasing force, as if
ªsqueezingº the brakes. If you feel the front wheels begin to lock,
momentarily release the pedal and repeat the ªsqueezeº technique.
²We recommend that you familiarize yourself with how the RABS
performs. However, avoid unnecessary risks.
Parking brake
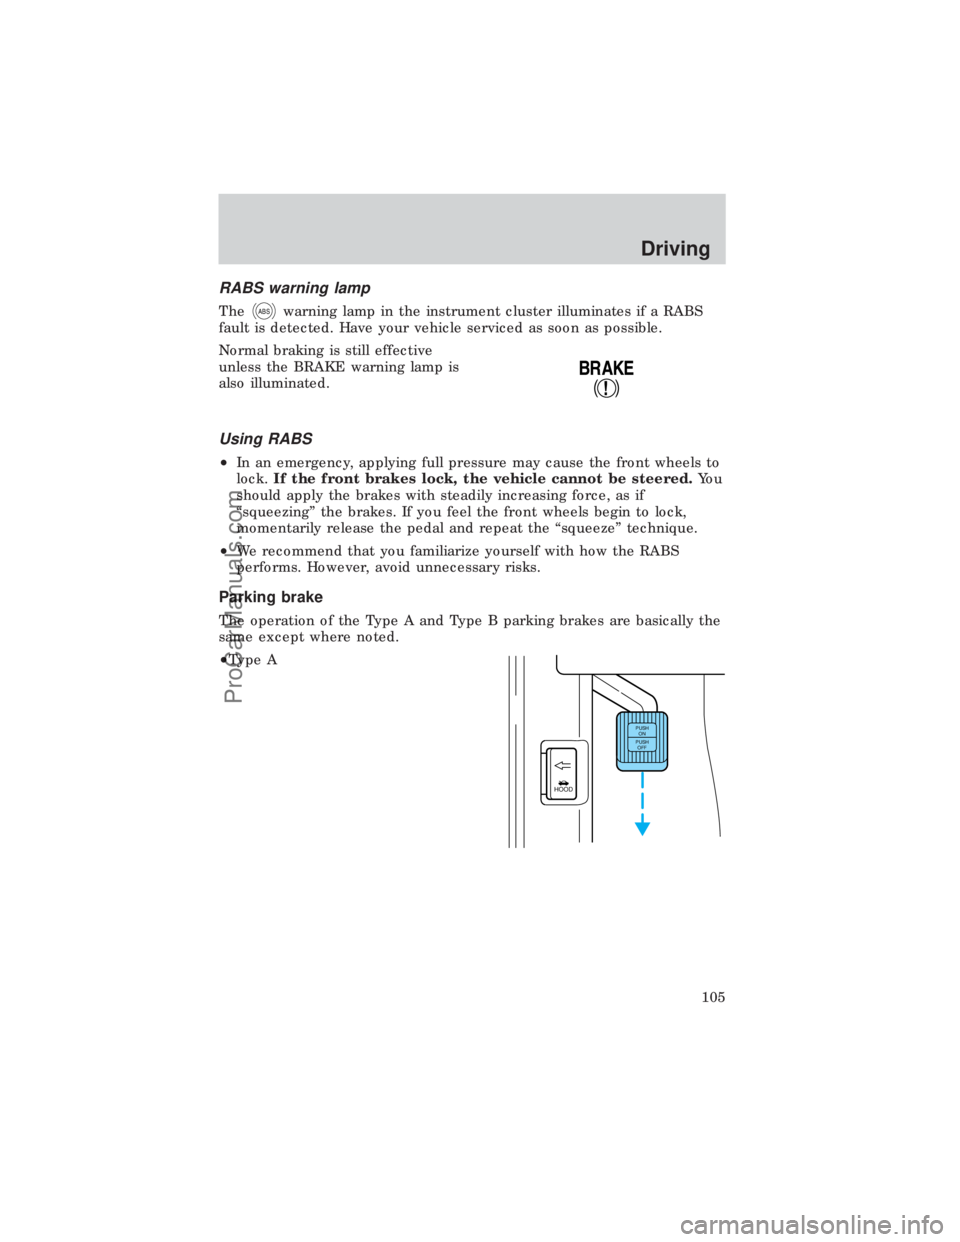
The operation of the Type A and Type B parking brakes are basically the
same except where noted.
²Type A
!
BRAKE
HOOD
PUSH
ON
PUSH
OFF
Driving
105
ProCarManuals.com
Page 106 of 208
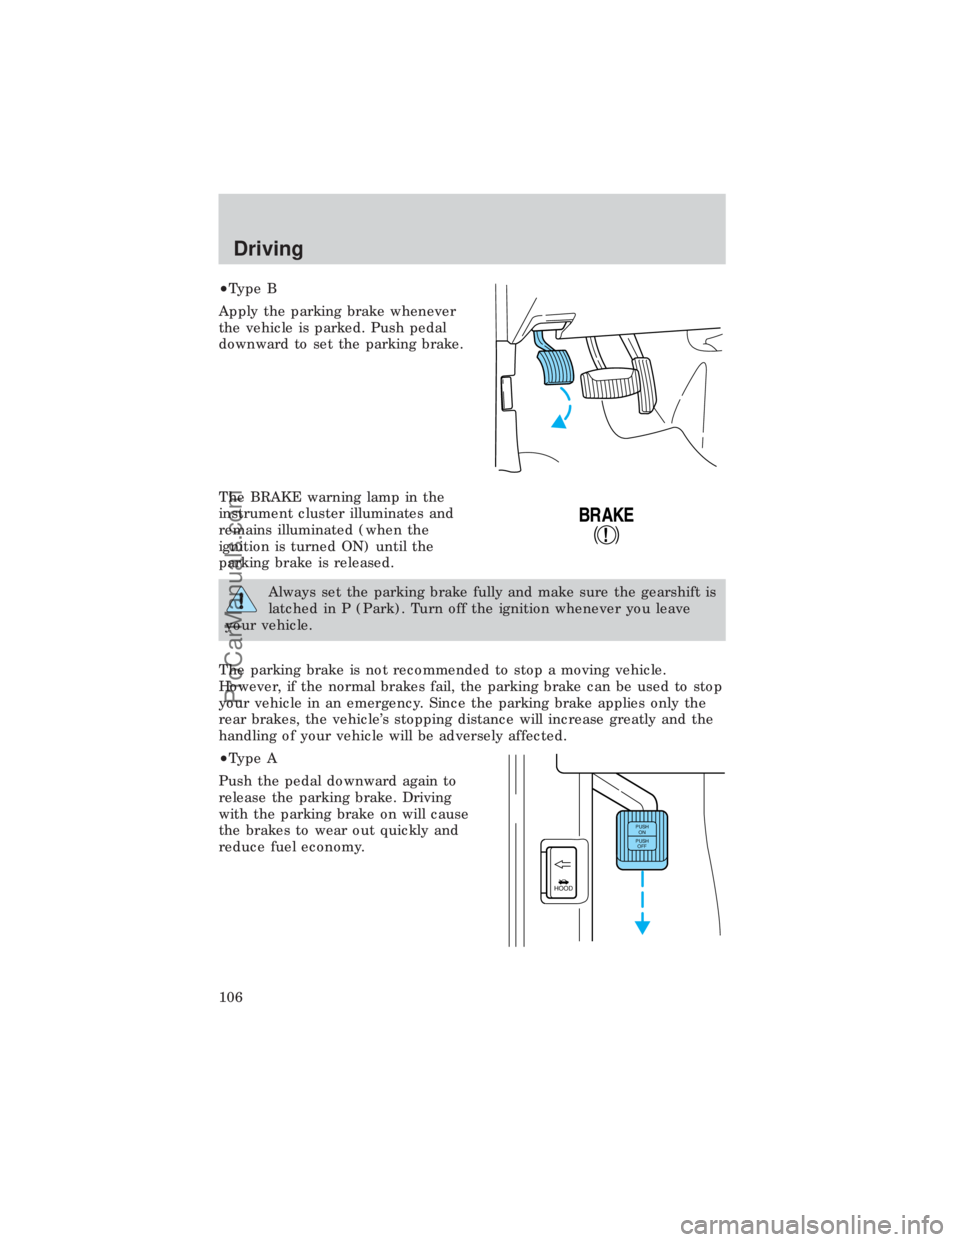
²Type B
Apply the parking brake whenever
the vehicle is parked. Push pedal
downward to set the parking brake.
The BRAKE warning lamp in the
instrument cluster illuminates and
remains illuminated (when the
ignition is turned ON) until the
parking brake is released.
Always set the parking brake fully and make sure the gearshift is
latched in P (Park). Turn off the ignition whenever you leave
your vehicle.
The parking brake is not recommended to stop a moving vehicle.
However, if the normal brakes fail, the parking brake can be used to stop
your vehicle in an emergency. Since the parking brake applies only the
rear brakes, the vehicle's stopping distance will increase greatly and the
handling of your vehicle will be adversely affected.
²Type A
Push the pedal downward again to
release the parking brake. Driving
with the parking brake on will cause
the brakes to wear out quickly and
reduce fuel economy.
!
BRAKE
HOOD
PUSH
ON
PUSH
OFF
Driving
106
ProCarManuals.com
Page 109 of 208
Do not rock the vehicle for more than a few minutes. The
transmission and tires may be damaged or the engine may
overheat.
Always set the parking brake fully and make sure the gearshift is
latched in P (Park). Turn off the ignition whenever you leave
your vehicle.
If the parking brake is fully released, but the brake warning lamp
remains illuminated, the brakes may not be working properly.
See your dealer or a qualified service technician.
Driving with a 4±speed automatic transmission
Understanding gearshift positions
Pull the gearshift lever towards you and downward to move the
automatic gearshift.
Hold the brake pedal down while you move the gearshift lever
from P (Park) to another position. If you do not hold the brake
pedal down, your vehicle may move unexpectedly and injure someone.
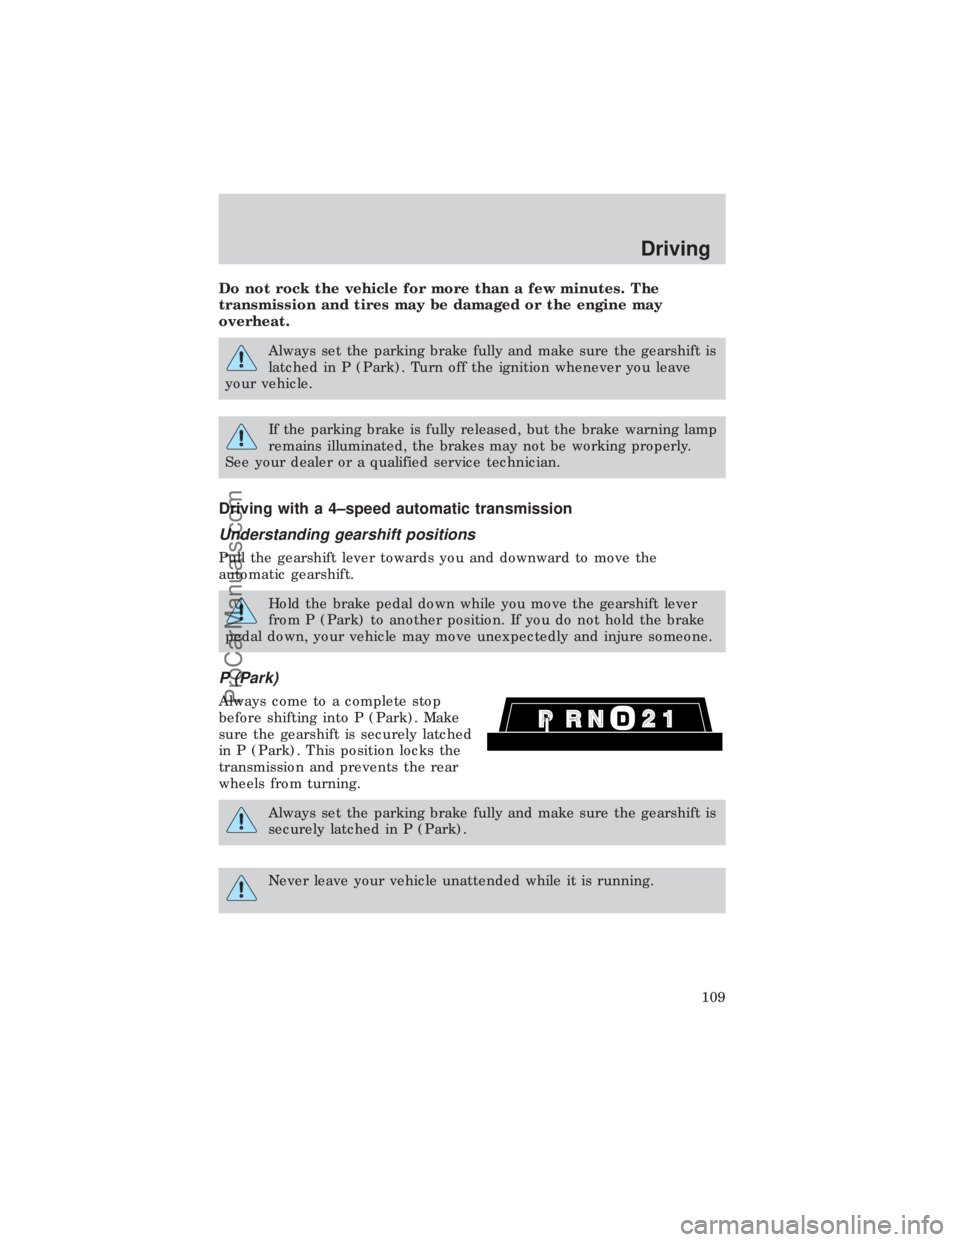
P (Park)
Always come to a complete stop
before shifting into P (Park). Make
sure the gearshift is securely latched
in P (Park). This position locks the
transmission and prevents the rear
wheels from turning.
Always set the parking brake fully and make sure the gearshift is
securely latched in P (Park).
Never leave your vehicle unattended while it is running.
Driving
109
ProCarManuals.com
Page 127 of 208
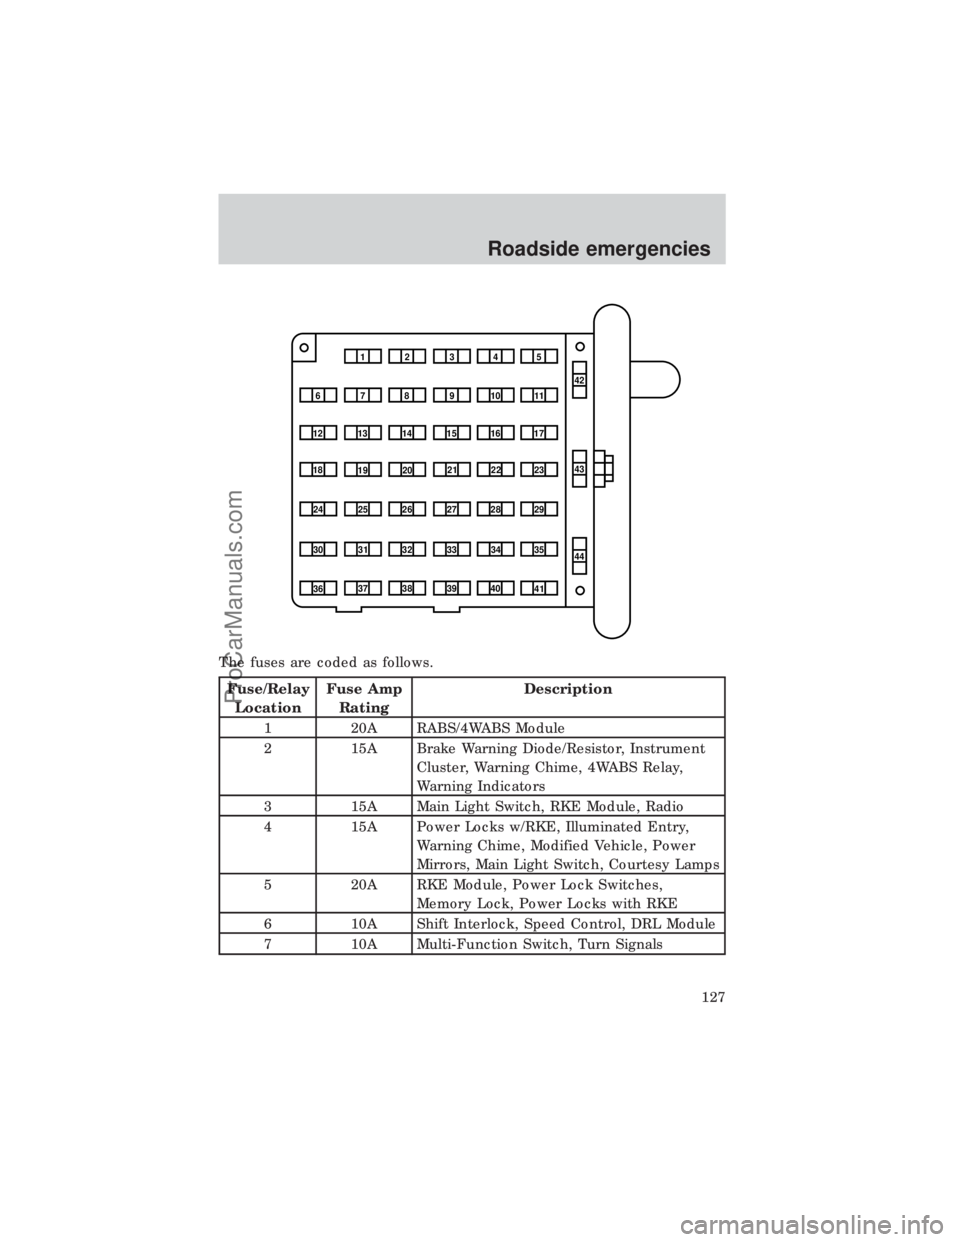
The fuses are coded as follows.
Fuse/Relay
LocationFuse Amp
RatingDescription
1 20A RABS/4WABS Module
2 15A Brake Warning Diode/Resistor, Instrument
Cluster, Warning Chime, 4WABS Relay,
Warning Indicators
3 15A Main Light Switch, RKE Module, Radio
4 15A Power Locks w/RKE, Illuminated Entry,
Warning Chime, Modified Vehicle, Power
Mirrors, Main Light Switch, Courtesy Lamps
5 20A RKE Module, Power Lock Switches,
Memory Lock, Power Locks with RKE
6 10A Shift Interlock, Speed Control, DRL Module
7 10A Multi-Function Switch, Turn Signals
1234
5
7
689101142
43
44 13 12 14
15 16 17
19 18
2021 22 23
25 24
26 27 28 29
31 30 32 33 3435
37
3638 3940
41
Roadside emergencies
127
ProCarManuals.com
Page 133 of 208
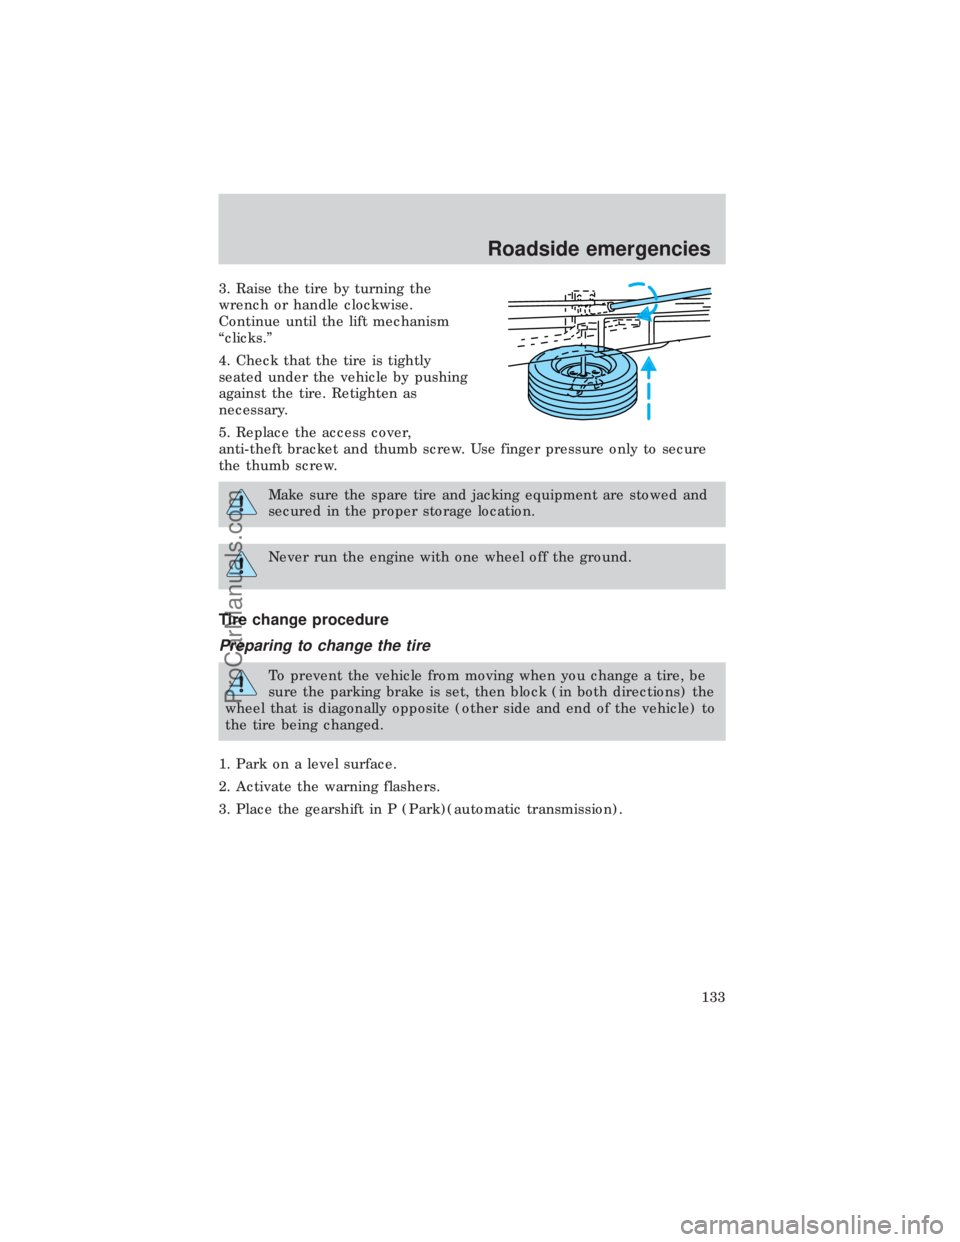
3. Raise the tire by turning the
wrench or handle clockwise.
Continue until the lift mechanism
ªclicks.º
4. Check that the tire is tightly
seated under the vehicle by pushing
against the tire. Retighten as
necessary.
5. Replace the access cover,
anti-theft bracket and thumb screw. Use finger pressure only to secure
the thumb screw.
Make sure the spare tire and jacking equipment are stowed and
secured in the proper storage location.
Never run the engine with one wheel off the ground.
Tire change procedure
Preparing to change the tire
To prevent the vehicle from moving when you change a tire, be
sure the parking brake is set, then block (in both directions) the
wheel that is diagonally opposite (other side and end of the vehicle) to
the tire being changed.
1. Park on a level surface.
2. Activate the warning flashers.
3. Place the gearshift in P (Park)(automatic transmission).
Roadside emergencies
133
ProCarManuals.com
Page 178 of 208
EMISSION CONTROL SYSTEM
Your vehicle is equipped with various emission control components and a
catalytic converter which will enable your vehicle to comply with
applicable exhaust emission standards. To make sure that the catalytic
converter and other emission control components continue to work
properly:
²Use only unleaded fuel.
²Avoid running out of fuel.
²Do not turn off the ignition while your vehicle is moving, especially at
high speeds.
²Have the items listed in your maintenance guide and or service guide
performed according to the specified schedule.
The scheduled maintenance items listed in the maintenance guide and or
service guide are essential to the life and performance of your vehicle
and to its emissions system.
If other than Ford, Motorcraft or Ford-authorized parts are used for
maintenance replacements or for service of components affecting
emission control, such non-Ford parts should be equivalent to genuine
Ford Motor Company parts in performance and durability.
Do not park, idle, or drive your vehicle in dry grass or other dry
ground cover. The emission system heats up the engine
compartment and exhaust system, which can start a fire.
Illumination of the charging system warning light, ªService Engine Soonº
light or the temperature warning light, fluid leaks, strange odors, smoke
or loss of oil pressure, could indicate that the emission control system is
not working properly.
Exhaust leaks may result in entry of harmful and potentially
lethal fumes into the passenger compartment.
Do not make any unauthorized changes to your vehicle or engine. By
law, vehicle owners and anyone who manufactures, repairs, items, sells,
leases, trades vehicles, or supervises a fleet of vehicles are not permitted
to intentionally remove an emission control device or prevent it from
working. Information about your vehicle's emission system is on the
Vehicle Emission Control Information Decal located on or near the
Maintenance and care
178
ProCarManuals.com
Page 179 of 208
engine. This decal identifies engine displacement and gives some tune up
specifications.
Please consult your ªWarranty Guideº for complete emission warranty
information.
Readiness for inspection/maintenance (I/M) testing
In some localities, it may be a legal requirement to pass an I/M test of
the on-board diagnostic (OBD-II) system. If your ªCheck Engine/Service
Engine Soonº light is on, refer to the description in theWarning Lights
and Chimessection of theInstrumentationchapter. Your vehicle may
not pass the I/M test with the ªCheck Engine/Service Engine Soonº light
on.
If the vehicle's powertrain system or its battery has just been serviced,
the OBD-II system is reset to a ªnot ready for I/M testº condition. To
ready the OBD-II system for I/M testing, a minimum of 30 minutes of city
and highway driving is necessary as described below:
²First, at least 10 minutes of driving on an expressway or highway.
²Next, at least 20 minutes driving in stop-and-go, city-type traffic with
at least four idle periods.
Allow the vehicle to sit for at least eight hours without starting the
engine. Then, start the engine and complete the above driving cycle. The
engine must warm up to its normal operating temperature. Once started,
do not turn off the engine until the above driving cycle is complete.
EXTERIOR BULBS
Replacing exterior bulbs
Check the operation of the following lamps frequently:
²Headlamps
²Tail lamps
²Brakelamps
²High-mount brakelamp
²Turn signals
²Backup lamps
²License plate lamp
Maintenance and care
179
ProCarManuals.com
Page 200 of 208
Air bag supplemental restraint
system ..........................................83
and child safety seats ..............84
description ................................83
disposal ......................................87
indicator light ...........................86
passenger air bag .....................85
Automatic transmission
driving an automatic
overdrive ...................109,110,111
Axle
refill capacities ........................189
Battery
disconnecting ............161,162,163
voltage gauge ............................14
Brakes ........................................103
anti-lock .....................103,104,105
anti-lock brake system (ABS)
warning light ...........................104
fluid, checking and adding ....150
shift interlock ..........................108
Break-in period ..........................2,3
CD player ....................................53
Child safety seats
attaching with tether straps ....93
in rear seat ................................90
tether anchorage
hardware ..............................93,97
Cleaning your vehicle ...............183
engine compartment ..............185
exterior .............................184,187
exterior lamps .........................186
interior .....................................186
plastic parts ............................186
washing ....................................184
waxing .....................................184
wheels ......................................185
windows ..................................187
wiper blades ............................186
Controls
power seat .................................72
Coolant ...............................153,154checking and adding ..............152
refill capacities ........................154
Driveline universal joint and
slip yoke ....................................159
Emission control system ..........178
Engine
coolant .....................................151
idle speed control ...................159
service points ..........................147
starting after a collision .........123
Engine block heater .................101
Engine oil
checking and adding ..............149
dipstick ....................................147
specifications ...................147,149
Exhaust fumes ..........................101
Fail safe cooling .................154,155
Fuel
choosing the right fuel ...........171
comparisons with EPA fuel
economy estimates .................177
detergent in fuel .....................172
filling your vehicle
with fuel ...........................170,173
gauge .........................................12
quality ......................................172
running out of fuel .................172
safety information relating to
automotive fuels .....................170
Fuses ...................................125,126
Gas mileage (see Fuel
economy) ..............174,175,176,177
Gauges .........................................12
engine coolant temperature
gauge .........................................13
engine oil pressure gauge ........13
GVWR
(Gross Vehicle Weight Rating)
calculating ...............................113
Hazard flashers .........................123
Headlamps
aiming ......................................183
Index
200
ProCarManuals.com