Page 56 of 208
Radio reception factors
Three factors can affect radio reception:
²Distance/strength.The further an FM signal travels, the weaker it is.
The listenable range of the average FM station is approximately 40 km
(24 miles). This range can be affected by ªsignal modulation.º Signal
modulation is a process radio stations use to increase their
strength/volume relative to other stations.
²Terrain.Hills, mountains and tall buildings between your vehicle's
antenna and the radio station signal can cause FM reception problems.
Static can be caused on AM stations by power lines, electric fences,
traffic lights and thunderstorms. Moving away from an interfering
structure (out of its ªshadowº) returns your reception to normal.
²Station overload.Weak signals are sometimes captured by stronger
signals when you pass a broadcast tower. A stronger signal may
temporarily overtake a weaker signal and play while the weak station
frequency is displayed.
The audio system automatically switches to single channel reception if it
will improve the reception of a station normally received in stereo.
Audio system warranties and service
Refer to the ªWarranty Guideº for audio system warranty information.
If service is necessary, see your dealer or a qualified technician.
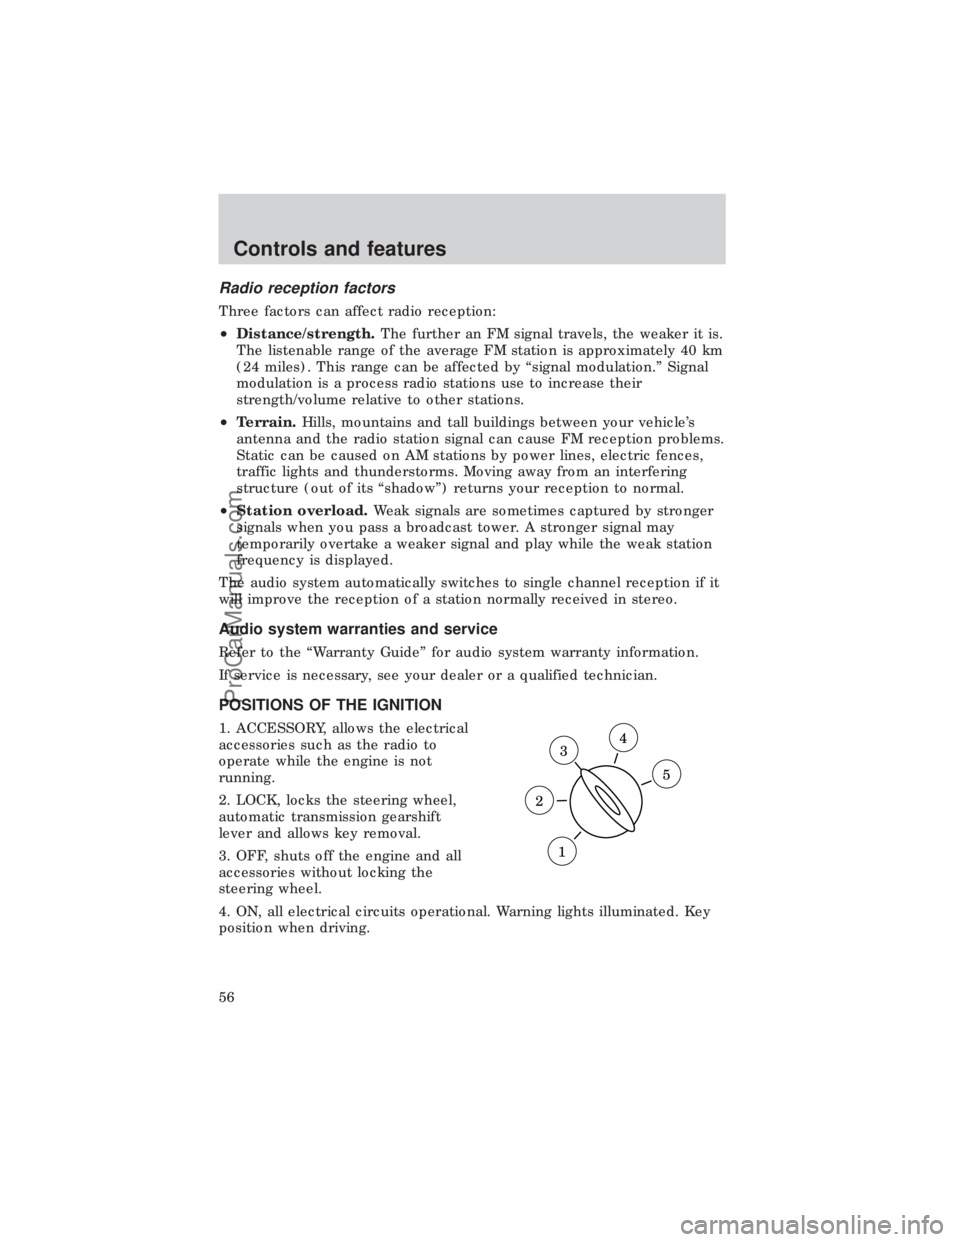
POSITIONS OF THE IGNITION
1. ACCESSORY, allows the electrical
accessories such as the radio to
operate while the engine is not
running.
2. LOCK, locks the steering wheel,
automatic transmission gearshift
lever and allows key removal.
3. OFF, shuts off the engine and all
accessories without locking the
steering wheel.
4. ON, all electrical circuits operational. Warning lights illuminated. Key
position when driving.
3
1
2
5
4
Controls and features
56
ProCarManuals.com
Page 62 of 208
Push the control on the end of the
stalk to activate washer. Push and
hold for a longer wash cycle. The
washer will automatically shut off
after ten seconds of continuous use.
OVERDRIVE CONTROL
Activating overdrive
(Overdrive) is the normal drive position for the best fuel economy.
The overdrive function allows automatic upshifts to second, third and
fourth gear.
Deactivating overdrive
Press the Transmission Control
Switch (TCS) located on the end of
the gearshift lever. The
Transmission Control Indicator Light
(TCIL) (the word OFF) will
illuminate on the end of the gearshift lever.
The transmission will operate in
gears one through three. To return
to normal overdrive mode, press the
Transmission Control Switch again.
The TCIL (the word OFF) will no
longer be illuminated.
When you shut off and re-start your vehicle, the transmission will
automatically return to normal
(Overdrive) mode.
OVERDRIVE
OVERDRIVEOFF
Controls and features
62
ProCarManuals.com
Page 109 of 208
Do not rock the vehicle for more than a few minutes. The
transmission and tires may be damaged or the engine may
overheat.
Always set the parking brake fully and make sure the gearshift is
latched in P (Park). Turn off the ignition whenever you leave
your vehicle.
If the parking brake is fully released, but the brake warning lamp
remains illuminated, the brakes may not be working properly.
See your dealer or a qualified service technician.
Driving with a 4±speed automatic transmission
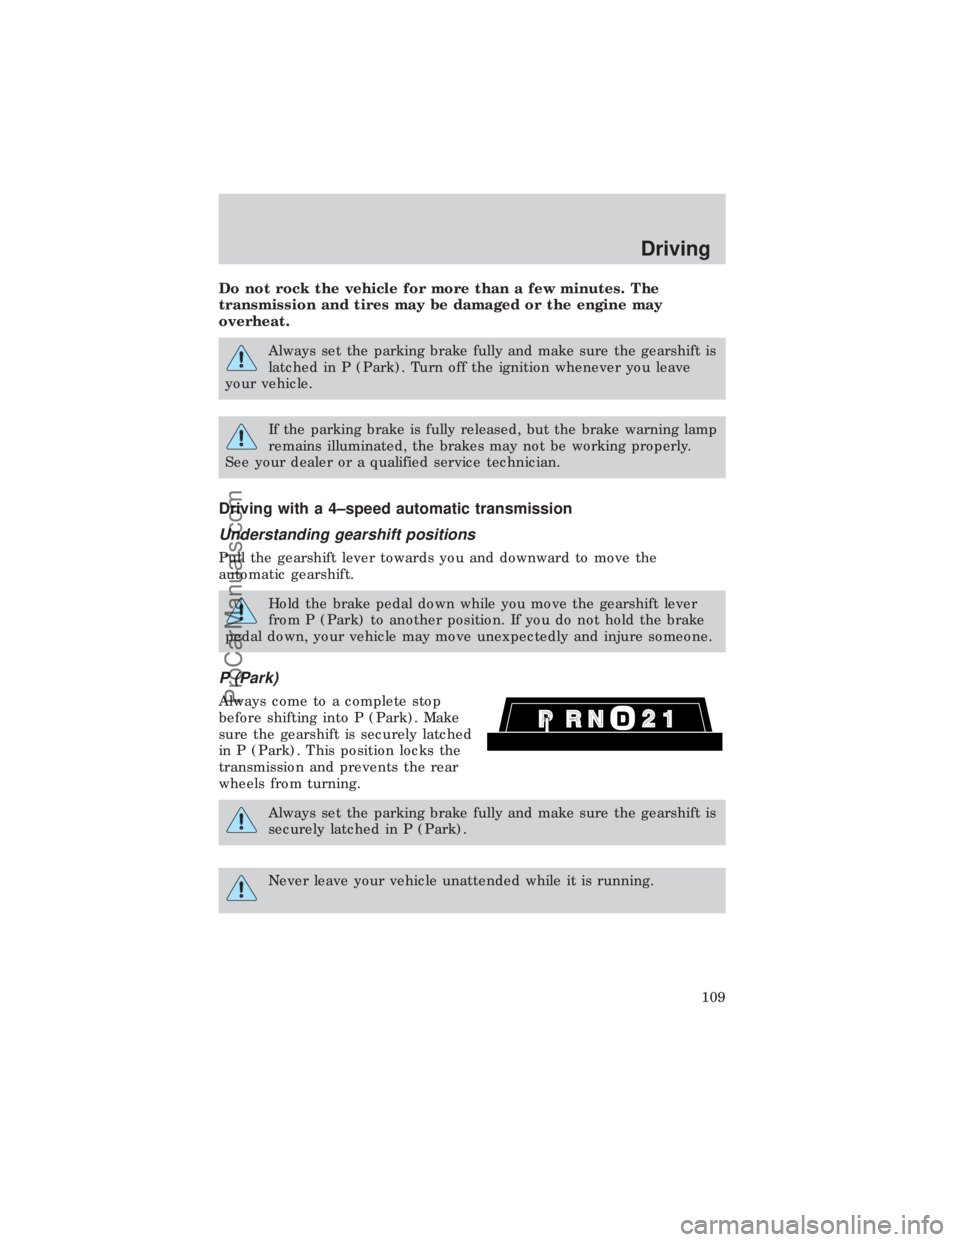
Understanding gearshift positions
Pull the gearshift lever towards you and downward to move the
automatic gearshift.
Hold the brake pedal down while you move the gearshift lever
from P (Park) to another position. If you do not hold the brake
pedal down, your vehicle may move unexpectedly and injure someone.
P (Park)
Always come to a complete stop
before shifting into P (Park). Make
sure the gearshift is securely latched
in P (Park). This position locks the
transmission and prevents the rear
wheels from turning.
Always set the parking brake fully and make sure the gearshift is
securely latched in P (Park).
Never leave your vehicle unattended while it is running.
Driving
109
ProCarManuals.com
Page 111 of 208
Each time the vehicle is started, the transmission will automatically
return to normal overdrive mode.
Every time the vehicle is shut off and restarted, you must press the
transmission control switch to cancel overdrive operation if driving in
overdrive is not desired.
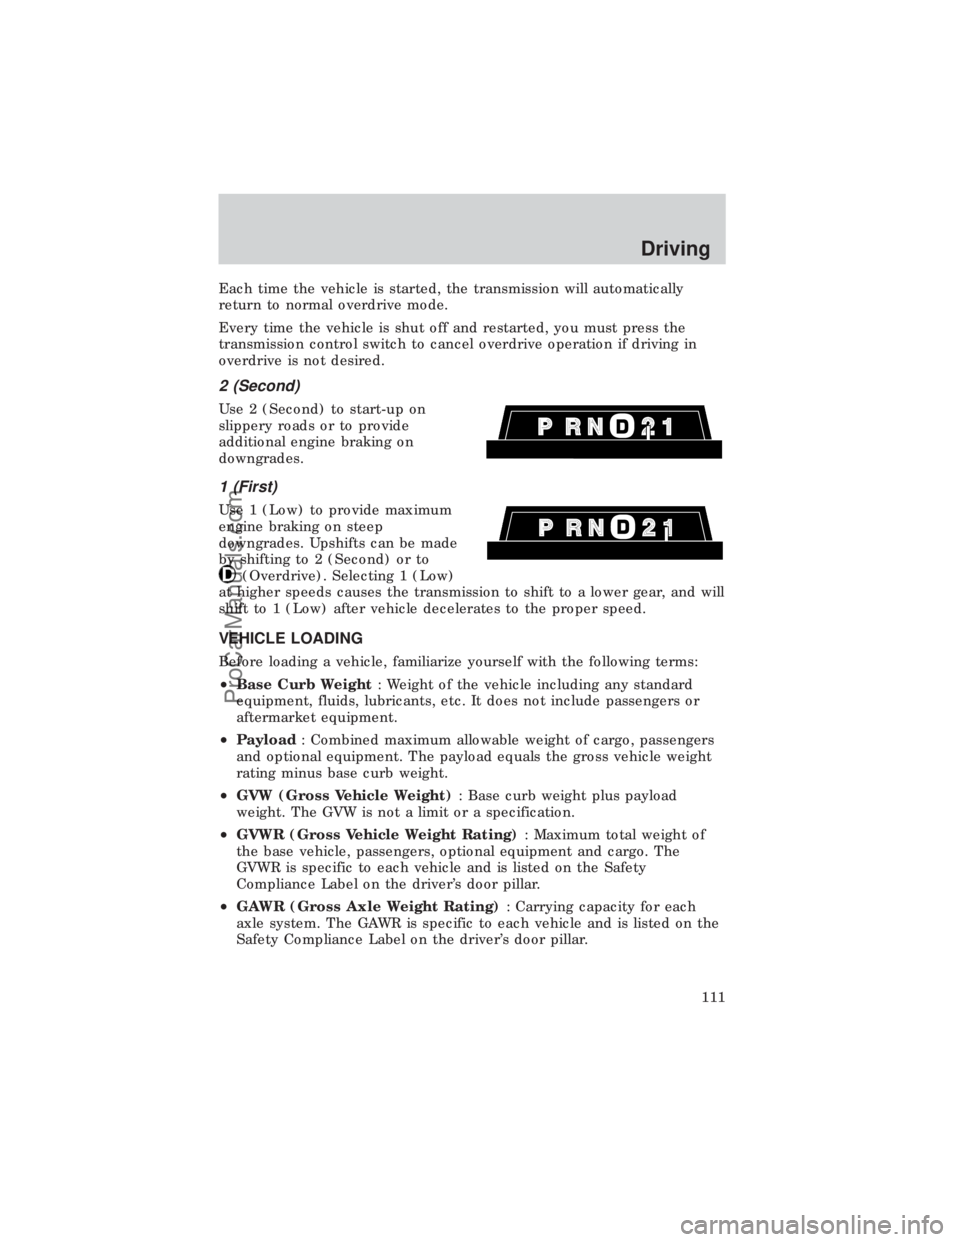
2 (Second)
Use 2 (Second) to start-up on
slippery roads or to provide
additional engine braking on
downgrades.
1 (First)
Use 1 (Low) to provide maximum
engine braking on steep
downgrades. Upshifts can be made
by shifting to 2 (Second) or to
(Overdrive). Selecting 1 (Low)
at higher speeds causes the transmission to shift to a lower gear, and will
shift to 1 (Low) after vehicle decelerates to the proper speed.
VEHICLE LOADING
Before loading a vehicle, familiarize yourself with the following terms:
²Base Curb Weight: Weight of the vehicle including any standard
equipment, fluids, lubricants, etc. It does not include passengers or
aftermarket equipment.
²Payload: Combined maximum allowable weight of cargo, passengers
and optional equipment. The payload equals the gross vehicle weight
rating minus base curb weight.
²GVW (Gross Vehicle Weight): Base curb weight plus payload
weight. The GVW is not a limit or a specification.
²GVWR (Gross Vehicle Weight Rating): Maximum total weight of
the base vehicle, passengers, optional equipment and cargo. The
GVWR is specific to each vehicle and is listed on the Safety
Compliance Label on the driver's door pillar.
²GAWR (Gross Axle Weight Rating): Carrying capacity for each
axle system. The GAWR is specific to each vehicle and is listed on the
Safety Compliance Label on the driver's door pillar.
Driving
111
ProCarManuals.com
Page 120 of 208
Trailer brakes
Electric brakes and manual, automatic or surge-type brakes are safe if
installed properly and adjusted to the manufacturer's specifications. The
trailer brakes must meet local and Federal regulations.
Do not connect a trailer's hydraulic brake system directly to your
vehicle's brake system. Your vehicle may not have enough
braking power and your chances of having a collision greatly increase.
The braking system of the tow vehicle is rated for operation at the
GVWR not GCWR.
Trailer lamps
Trailer lamps are required on most towed vehicles. Make sure your
trailer lamps conform to local and Federal regulations. See your dealer or
trailer rental agency for proper instructions and equipment for hooking
up trailer lamps.
Using a step bumper
The rear bumper is equipped with an integral hitch and requires only a
ball with a 25.4 mm (one inch) shank diameter. The bumper has a
2 270 kg (5 000 lb.) trailer weight and 227 kg (500 lb.) tongue weight
capability.
If it is necessary to relocate the trailer hitch ball position, a
frame-mounted trailer hitch must be installed.
Driving while you tow
Do not drive faster than 88 km/h (55 mph) when towing a trailer. Do not
drive faster than 72 km/h (45 mph) with any weight on the trailer while
towing on a hot day or in hilly country.
Speed control may shut off if you are towing on long, steep grades.
When towing a trailer:
²Use D (Drive) or a lower gear when towing up or down steep hills.
This will eliminate excessive downshifting and upshifting for optimum
fuel economy and transmission cooling.
²Anticipate stops and brake gradually.
When descending long, steep downhill grades, always use a lower gear to
provide engine braking to save wear on brakes. Use Drive (Overdrive
Driving
120
ProCarManuals.com
Page 133 of 208
3. Raise the tire by turning the
wrench or handle clockwise.
Continue until the lift mechanism
ªclicks.º
4. Check that the tire is tightly
seated under the vehicle by pushing
against the tire. Retighten as
necessary.
5. Replace the access cover,
anti-theft bracket and thumb screw. Use finger pressure only to secure
the thumb screw.
Make sure the spare tire and jacking equipment are stowed and
secured in the proper storage location.
Never run the engine with one wheel off the ground.
Tire change procedure
Preparing to change the tire
To prevent the vehicle from moving when you change a tire, be
sure the parking brake is set, then block (in both directions) the
wheel that is diagonally opposite (other side and end of the vehicle) to
the tire being changed.
1. Park on a level surface.
2. Activate the warning flashers.
3. Place the gearshift in P (Park)(automatic transmission).
Roadside emergencies
133
ProCarManuals.com
Page 139 of 208
JUMP STARTING YOUR VEHICLE
The gases around the battery can explode if exposed to flames,
sparks, or lit cigarettes. An explosion could result in injury or
vehicle damage.
Do not push start your vehicle. You could damage the catalytic
converter.
Batteries contain sulfuric acid which can burn skin, eyes, and
clothing, if contacted.
Do not attempt to push start your vehicle. Automatic
transmissions do not have push-start capability.
Preparing your vehicle
1.Use only a 12±volt supply to start your vehicle.
2. Do not disconnect the battery of the disabled vehicle as this could
damage the vehicle's electrical system.
3. Park the booster vehicle close to the hood of the disabled vehicle
making sure the two vehiclesdo nottouch. Set the parking brake on
both vehicles and stay clear of the engine cooling fan and other moving
parts.
4. Check all battery terminals and remove any excessive corrosion before
you attach the battery cables. Ensure that vent caps are tight and level.
5. Turn the heater fan on in both vehicles to protect any electrical
surges. Turn all other accessories off.
Roadside emergencies
139
ProCarManuals.com
Page 147 of 208
IDENTIFYING COMPONENTS IN THE ENGINE COMPARTMENT
Engine compartment component locations
1. Windshield washer fluid reservoir
2. Engine oil filler cap
3. Automatic transmission fluid dipstick
4. Air filter assembly
5. Engine oil dipstick
6. Power steering fluid reservoir
7. Brake fluid reservoir
8. Engine coolant reservoir
9. Battery
ENGINE OIL
Checking the engine oil
Refer to the maintenance guide and or service guide for the appropriate
intervals for checking the engine oil.
1. Make sure the vehicle is on level ground.
2. Turn the engine off and wait a few minutes for the oil to drain into the
oil pan.
91234
5
6
7
8
Maintenance and care
147
ProCarManuals.com