1999 FORD CROWN VICTORIA CD changer
[x] Cancel search: CD changerPage 53 of 208
Tune adjust
The tune control works in radio or CD mode (if equipped).
Tune adjust in radio mode
²Pressto move to the next
frequency down the band
(whether or not a listenable
station is located there). Hold the
control to move through the frequencies quickly.
²Press
to move to the next frequency up the band (whether or not
a listenable station is located there). Hold for quick movement.
Tune adjust for CD changer (if equipped)
²Pressto select the previous
disc in the CD changer. (Play will
begin on the first track of the
disc unless the CD changer is in
shuffle mode.) Refer toShuffle featurefor more information. Hold the
control to continue reversing through the disc.
²Press
to select the next disc in the CD changer. Hold the control
to fast-forward through the remaining discs.
Seek function
The seek function control works in radio, tape or CD mode (if
equipped).
Seek function in radio mode
²Pressto find the next
listenable station down the
frequency band.
²Press
to find the next
listenable station up the frequency band.
Seek function in tape mode
²Pressto listen to the previous selection on the tape or return to
the beginning of the current selection.
²Press
to listen to the next selection on the tape.
TUNE
TUNE
SEEK
Controls and features
53
Page 54 of 208
Seek function for CD changer (if equipped)
²Pressto seek to the previous
track of the current disc. If a
selection has been playing for
three seconds or more and you
press
, the CD changer will replay that selection from the
beginning.
²Press
to seek forward to the next track of the current disc. After
the last track has been completed, the first track of the current disc
will automatically replay.
Scan function
The scan function works in radio,
tape or CD mode (if equipped).
Scan function in radio mode
Press the SCAN control to hear a brief sampling of all listenable stations
on the frequency band. Press the SCAN control again to stop the scan
mode.
Scan function in tape mode
Press the SCAN control to hear a short sampling of all selections on the
tape. (The tape scans in a forward direction. At the end of the tape's
first side, direction automatically reverses to the opposite side of the
tape.) To stop on a particular selection, press the control again.
Scan function in CD mode (if equipped)
Press the SCAN control to hear a short sampling of all selections on the
CD. (The CD scans in a forward direction, wrapping back to the first
track at the end of the CD.) To stop on a particular selection, press the
control again.
Radio station memory preset
The radio is equipped with four or six station memory preset controls.
These controls can be used to select up to four or six preset AM stations
and eight or twelve FM stations (four to six in FM1 and four to six in
FM2).
SEEK
SCAN
Controls and features
54
Page 58 of 208
Compression feature
Compression adjust brings soft and
loud CD passages together for a
more consistent listening level.
Press the COMP control to activate
and deactivate compression adjust.
Shuffle feature
The shuffle feature operates in CD
mode and plays all tracks on the
current disc in random order. If
equipped with the CD changer, the
shuffle feature continues to the next disc after all tracks are played.
Press the SHUFFLE control to start this feature. Random order play will
continue until the SHUFFLE control is pressed again.
Radio data system (RDS) feature
When selected, the RDS (Radio
Data System) function performs the
following:
²Displays the radio station call
letters
²Displays the type of music format (jazz, country, rock)
²Searches for a particular type of music format by selecting the SEEK
control
²Allows traffic information broadcasts to be turned on and off with the
SEL control
Press the RDS control. Use the SEL
control to select ON or OFF to
enable or disable the feature.
COMP
SHUFF
5
6
COMP
SHUFF5
6
RDS
SEL
Controls and features
58
Page 61 of 208
²NEWSЪvoice-onlyº type of sound with a limited audio band.
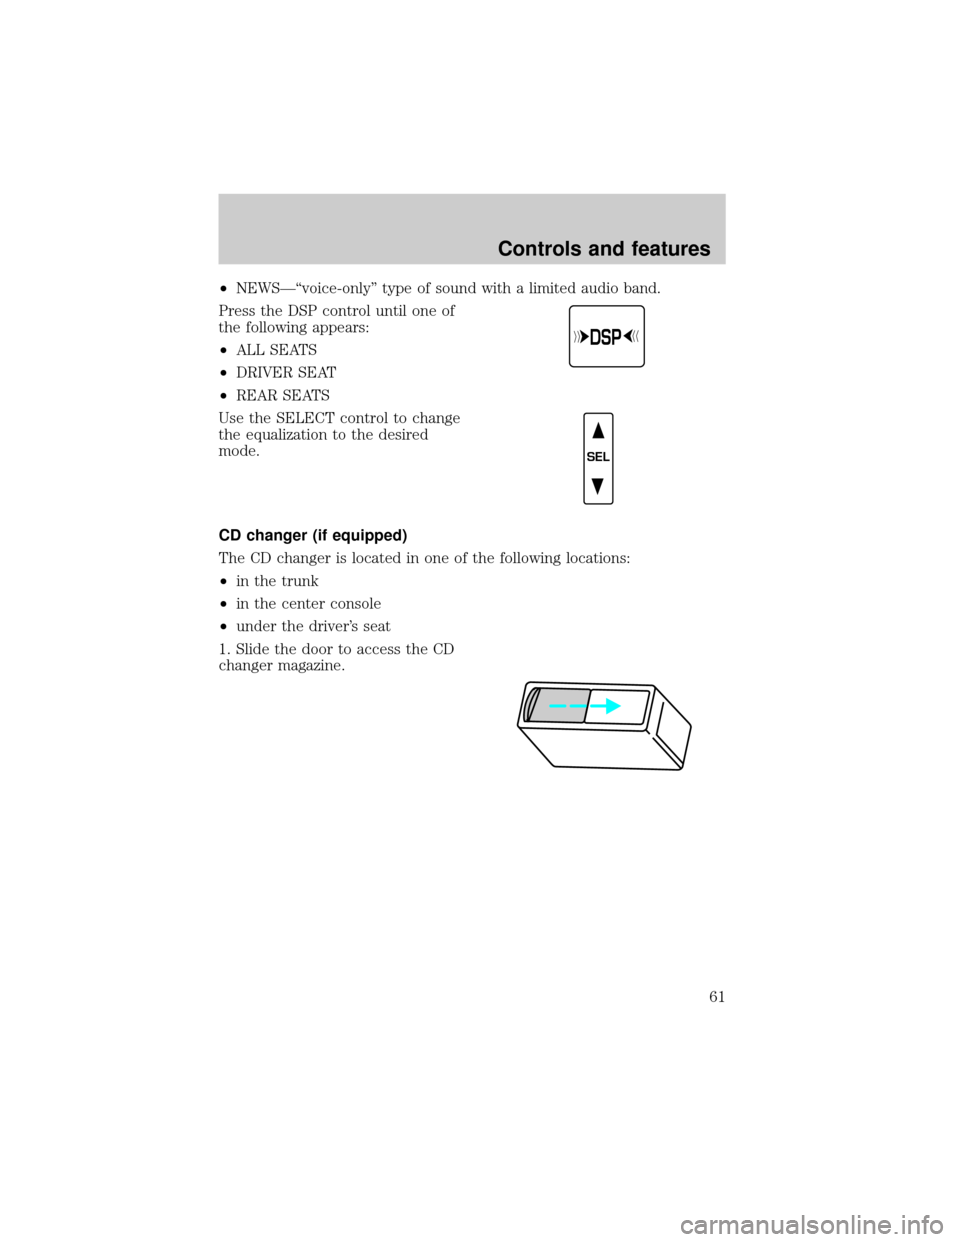
Press the DSP control until one of
the following appears:
²ALL SEATS
²DRIVER SEAT
²REAR SEATS
Use the SELECT control to change
the equalization to the desired
mode.
CD changer (if equipped)
The CD changer is located in one of the following locations:
²in the trunk
²in the center console
²under the driver's seat
1. Slide the door to access the CD
changer magazine.
DSP
SEL
Controls and features
61
Page 63 of 208
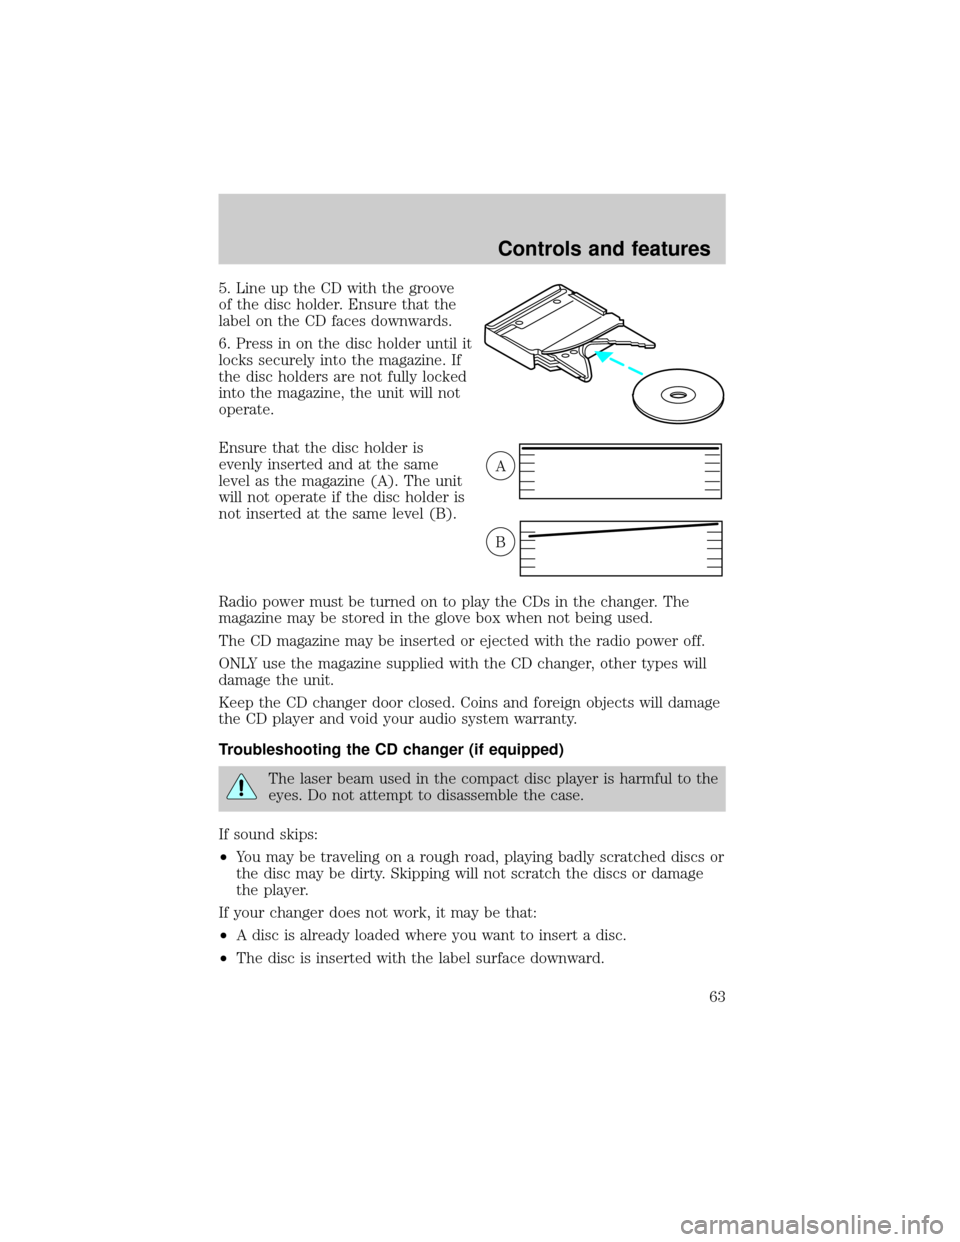
5. Line up the CD with the groove
of the disc holder. Ensure that the
label on the CD faces downwards.
6. Press in on the disc holder until it
locks securely into the magazine. If
the disc holders are not fully locked
into the magazine, the unit will not
operate.
Ensure that the disc holder is
evenly inserted and at the same
level as the magazine (A). The unit
will not operate if the disc holder is
not inserted at the same level (B).
Radio power must be turned on to play the CDs in the changer. The
magazine may be stored in the glove box when not being used.
The CD magazine may be inserted or ejected with the radio power off.
ONLY use the magazine supplied with the CD changer, other types will
damage the unit.
Keep the CD changer door closed. Coins and foreign objects will damage
the CD player and void your audio system warranty.
Troubleshooting the CD changer (if equipped)
The laser beam used in the compact disc player is harmful to the
eyes. Do not attempt to disassemble the case.
If sound skips:
²You may be traveling on a rough road, playing badly scratched discs or
the disc may be dirty. Skipping will not scratch the discs or damage
the player.
If your changer does not work, it may be that:
²A disc is already loaded where you want to insert a disc.
²The disc is inserted with the label surface downward.
A
B
Controls and features
63
Page 64 of 208
²The disc is dusty or defective.
²The player's internal temperature is above 60ÉC (140ÉF). Allow the
player to cool down before operating.
²A disc with format and dimensions not within industry standards is
inserted.
Cleaning compact discs
Inspect all discs for contamination before playing. If necessary, clean
discs only with an approved CD cleaner and wipe from the center out to
the edge. Do not use circular motion.
CD and CD changer care
²Handle discs by their edges only. Never touch the playing surface.
²Do not expose discs to direct sunlight or heat sources for extended
periods of time.
²Do not insert more than one disc into each slot of the CD changer
magazine.
Cleaning cassette player (if equipped)
Clean the tape player head with a cassette cleaning cartridge after ten to
twelve hours of play in order to maintain the best sound and operation.
Cassette and cassette player care
²Use only cassettes that are 90 minutes long or less.
²Do not expose tapes to direct sunlight, high humidity, extreme heat or
extreme cold. Allow tapes that may have been exposed to extreme
temperatures to reach a moderate temperature before playing.
²Tighten very loose tapes by inserting a finger or pencil into the hole
and turning the hub.
²Remove loose labels before inserting tapes.
²Do not leave tapes in the cassette player for a long time when not
being played.
Controls and features
64
Page 137 of 208
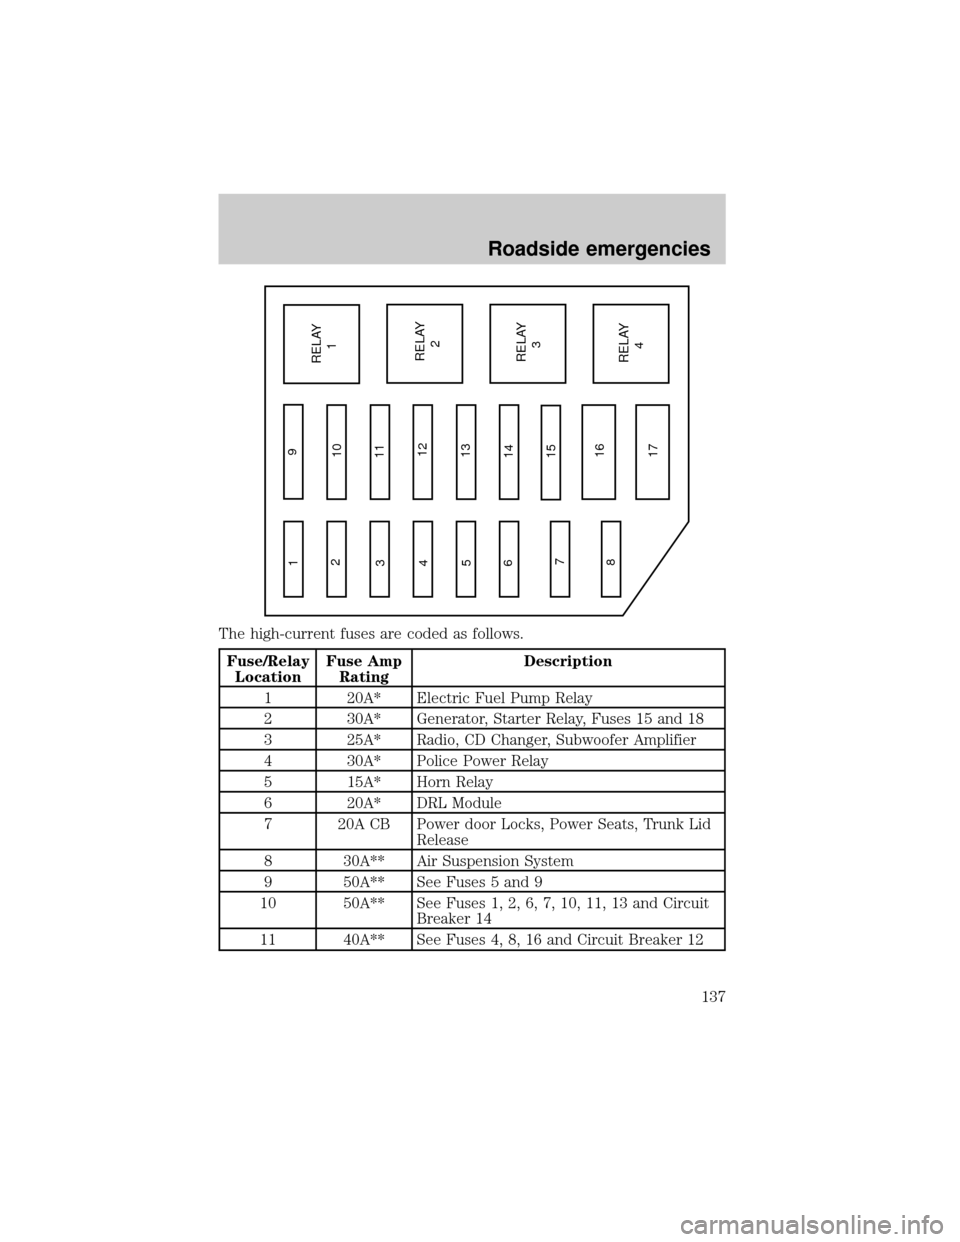
The high-current fuses are coded as follows.
Fuse/Relay
LocationFuse Amp
RatingDescription
1 20A* Electric Fuel Pump Relay
2 30A* Generator, Starter Relay, Fuses 15 and 18
3 25A* Radio, CD Changer, Subwoofer Amplifier
4 30A* Police Power Relay
5 15A* Horn Relay
6 20A* DRL Module
7 20A CB Power door Locks, Power Seats, Trunk Lid
Release
8 30A** Air Suspension System
9 50A** See Fuses 5 and 9
10 50A** See Fuses 1, 2, 6, 7, 10, 11, 13 and Circuit
Breaker 14
11 40A** See Fuses 4, 8, 16 and Circuit Breaker 12
1
2
3
4
5
6
7
89
10
11
12
13
14
15
16
17RELAY
1
RELAY
2
RELAY
3
RELAY
4
Roadside emergencies
137
Page 205 of 208

Air bag supplemental
restraint system ........................101
and child safety seats ............102
description ..............................101
disposal ....................................105
indicator light .........................104
passenger air bag ...................103
Air conditioning
automatic temperature
control system ......27,28,29,30,32
Air suspension ...........................122
Anti-theft system ........................87
Automatic transmission
driving an automatic
overdrive ...................124,125,126
Axle
refill capacities ........................187
Brakes ........................................117
anti-lock ............................117,118
anti-lock brake system
(ABS) warning light ...............118
fluid, checking and adding ....153
shift interlock ..........................123
Break-in period .............................2
CD changer ..................61,63,64,65
Child safety seats
attaching with tether straps ..111
in rear seat .......................108,110
tether anchorage hardware ...111
Cleaning your vehicle ...............182
engine compartment ..............184
exterior .............................183,186
exterior lamps .........................185
interior .....................................186
plastic parts ............................185
washing ....................................183
waxing .....................................183
wheels ......................................184
windows ..................................186
wiper blades ............................185
Clock ............................................33
Compass, electronic ....................76calibration .................................77
set zone adjustment .................77
Controls ........................72,73,74,75
power seat ............................93,94
Coolant ......................................156
checking and adding ..............155
refill capacities ........................156
Customer Assistance
Ford accessories for
your vehicle ..............199,200,201
Ford Extended Service Plan .193
Getting assistance outside
the U.S. and Canada ..............198
Getting roadside assistance ...192
Getting the
service you need ....................194
Ordering additional
owner's literature ...................203
The Dispute Settlement
Board ..................195,196,197,198
Defrost
rear window ..............................24
Emission control system ..........176
Engine
check engine/
service engine soon light ...........7
coolant .....................................154
idle speed control ...................162
service points ..........................150
starting after a collision .........132
Engine block heater .................115
Engine oil
checking and adding ..............152
dipstick ....................................151
specifications ...................151,152
Exhaust fumes ..........................116
Fail safe cooling .................157,158
Floor mats ...................................81
Fuel
choosing the right fuel ...........171
comparisons with EPA fuel
economy estimates .................176
Index
205