Page 128 of 208
Always ensure that the weight of passengers, cargo and equipment being
carried is within the weight limitations that have been established for
your vehicle including both Gross Vehicle Weight and Front and Rear
Gross Axle Weight Rating limits. Under no circumstance should these
limitations be exceeded. Exceeding any vehicle weight rating limitation
could result in serious damage to the vehicle and/or personal injury.
The weight of your loaded trailer should not exceed 907 kg (2 000 lbs).
The GCW of your vehicle and trailer should not exceed 2 993 kg
(6 600 lbs).
TRAILER TOWING
Your vehicle is classified as a light duty towing vehicle. Do not tow a
trailer until your vehicle has been driven at least 3 200 km (2 000 miles).
Towing a trailer places an additional load on your vehicle's engine,
transmission, brakes, tires and suspension. Inspect these components
carefully after towing.
Your loaded trailer should weigh no more than 907 kg (2 000 lbs.).
Do not exceed the GVWR or the GAWR specified on the Safety
Compliance Certification Label.
Towing trailers beyond the maximum recommended gross trailer
weight could result in engine damage, transmission/axle damage,
structural damage, loss of control, and personal injury.
Preparing to tow
Use the proper equipment for towing a trailer, and make sure it is
properly attached to your vehicle. See your dealer or a reliable trailer
dealer if you require assistance.
Hitches
Do not use hitches that clamp onto the vehicle bumper. Use a load
carrying hitch. You must distribute the load in your trailer so that 10% of
the total weight of the trailer is on the tongue.
Safety chains
Always connect the trailer's safety chains to the vehicle. To connect the
trailer's safety chains, cross the chains under the trailer tongue and allow
slack for turning corners.
Driving
128
Page 135 of 208
The fuses are coded as follows.
Fuse/Relay
LocationFuse Amp
RatingDescription
1 15A Brake Pedal Position (BPP) Switch,
Multi-Function Switch, Speed Control
2 30A Wiper Control Module, Windshield Wiper
Motor
3 Ð Not Used
4 15A Lighting Control Module, Main Light Switch
5 15A Backup Lamps, Variable Assist Power
Steering (VAPS), Turn Signals, Air
Suspension, Daytime Running Lamps,
Electronic Day/Night Mirror, Shift Lock,
EATC, Speed Chime Warning
6 15A Speed Control, Main Light Switch, Lighting
Control Module, Clock, Police Power Relay
7 25A Powertrain Control Module (PCM) Power
Diode, Ignition Coils
8 15A Lighting Control Module, Power Mirrors,
PATS Module, Keyless Entry, Clock
Memory, Electronic Automatic Temperature
Control (EATC), Power Windows, Police
Spot Light, SecuriLock
18 17
15 16
8
412 7659 12 101114
13
3
Roadside emergencies
135
Page 137 of 208
The high-current fuses are coded as follows.
Fuse/Relay
LocationFuse Amp
RatingDescription
1 20A* Electric Fuel Pump Relay
2 30A* Generator, Starter Relay, Fuses 15 and 18
3 25A* Radio, CD Changer, Subwoofer Amplifier
4 30A* Police Power Relay
5 15A* Horn Relay
6 20A* DRL Module
7 20A CB Power door Locks, Power Seats, Trunk Lid
Release
8 30A** Air Suspension System
9 50A** See Fuses 5 and 9
10 50A** See Fuses 1, 2, 6, 7, 10, 11, 13 and Circuit
Breaker 14
11 40A** See Fuses 4, 8, 16 and Circuit Breaker 12
1
2
3
4
5
6
7
89
10
11
12
13
14
15
16
17RELAY
1
RELAY
2
RELAY
3
RELAY
4
Roadside emergencies
137
Page 138 of 208
Fuse/Relay
LocationFuse Amp
RatingDescription
12 30A** PCM Power Relay, PCM, Natural Gas
Vehicle Module
13 50A** High Speed Cooling Fan Relay
14 40A** Rear Window Defrost Relay, Also see Fuse
17
15 50A** Anti-Lock Brake Module
16 50A** Police Option Fuse Holder
17 30A CB Cooling Fan Relay
Relay 1 Ð Rear Defrost Relay
Relay 2 Ð Horn Relay
Relay 3 Ð Cooling Fan Relay
Relay 4 Ð Air Suspension Pump Relay, Police Power
Relay
* Mini Fuses ** Maxi Fuses
Relays
Relays are located in the power distribution box and should be replaced
by qualified technicians.
CHANGING THE TIRES
If you get a flat tire while driving, do not apply the brake heavily.
Instead, gradually decrease your speed. Hold the steering wheel firmly
and slowly move to a safe place on the side of the road.
Temporary spare tire information
Your vehicle may have a temporary or full-size spare tire. The temporary
spare tire for your vehicle is labeled as such. It is smaller than a regular
tire and is designed for emergency use only. Replace this tire with a
full-size tire as soon as possible.
If you use the temporary spare tire continuously or do not follow
these precautions, the tire could fail, causing you to lose control
of the vehicle, possibly injuring yourself or others.
Roadside emergencies
138
Page 140 of 208
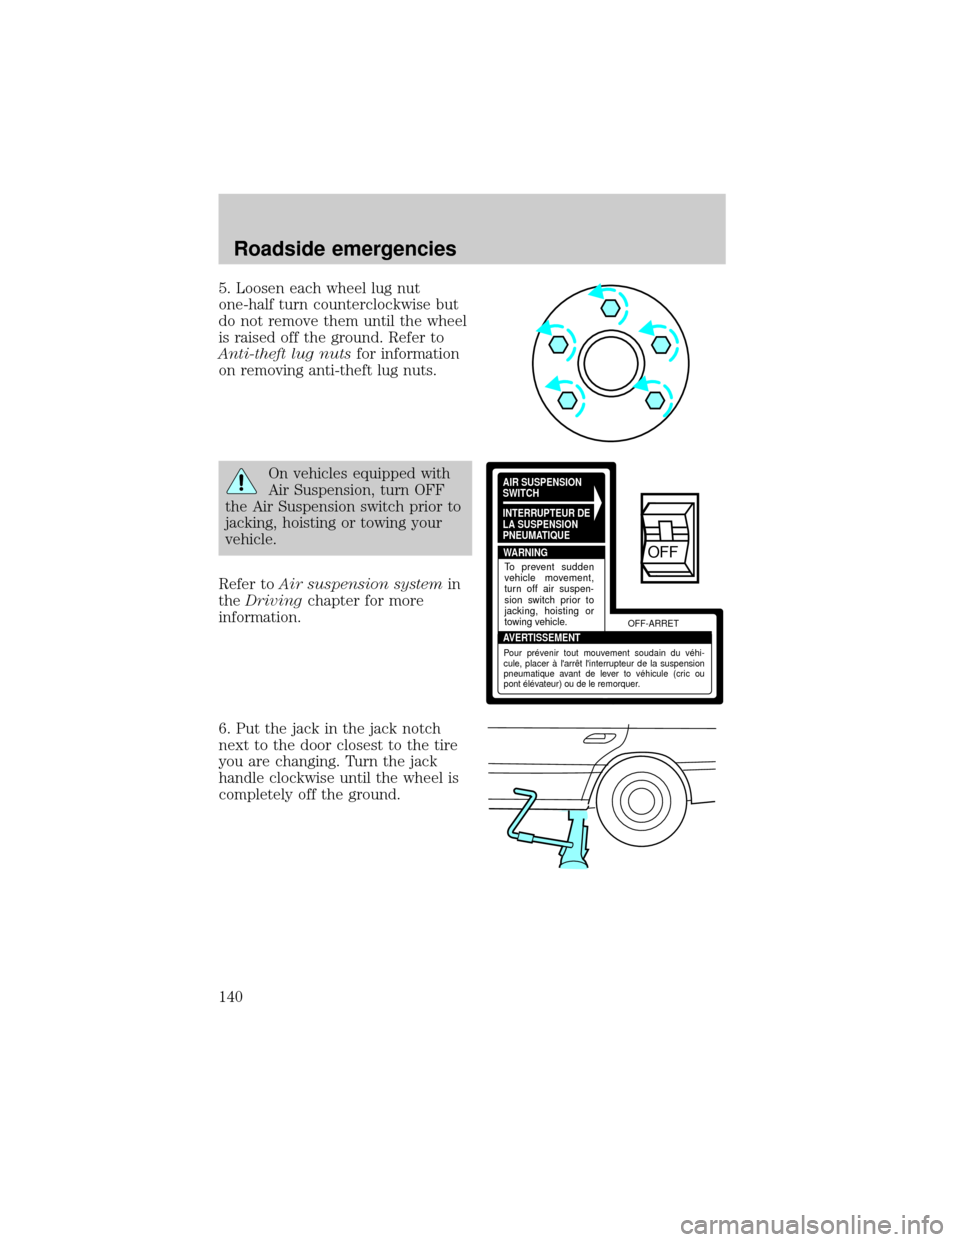
5. Loosen each wheel lug nut
one-half turn counterclockwise but
do not remove them until the wheel
is raised off the ground. Refer to
Anti-theft lug nutsfor information
on removing anti-theft lug nuts.
On vehicles equipped with
Air Suspension, turn OFF
the Air Suspension switch prior to
jacking, hoisting or towing your
vehicle.
Refer toAir suspension systemin
theDrivingchapter for more
information.
6. Put the jack in the jack notch
next to the door closest to the tire
you are changing. Turn the jack
handle clockwise until the wheel is
completely off the ground.AIR SUSPENSION
SWITCH
INTERRUPTEUR DE
LA SUSPENSION
PNEUMATIQUE
WARNING
AVERTISSEMENTOFF-ARRET
To prevent sudden
vehicle movement,
turn off air suspen-
sion switch prior to
jacking, hoisting or
towing vehicle.
Pour prévenir tout mouvement soudain du véhi-
cule, placer à l'arrêt l'interrupteur de la suspension
pneumatique avant de lever to véhicule (cric ou
pont élévateur) ou de le remorquer.
OFF
Roadside emergencies
140
Page 141 of 208
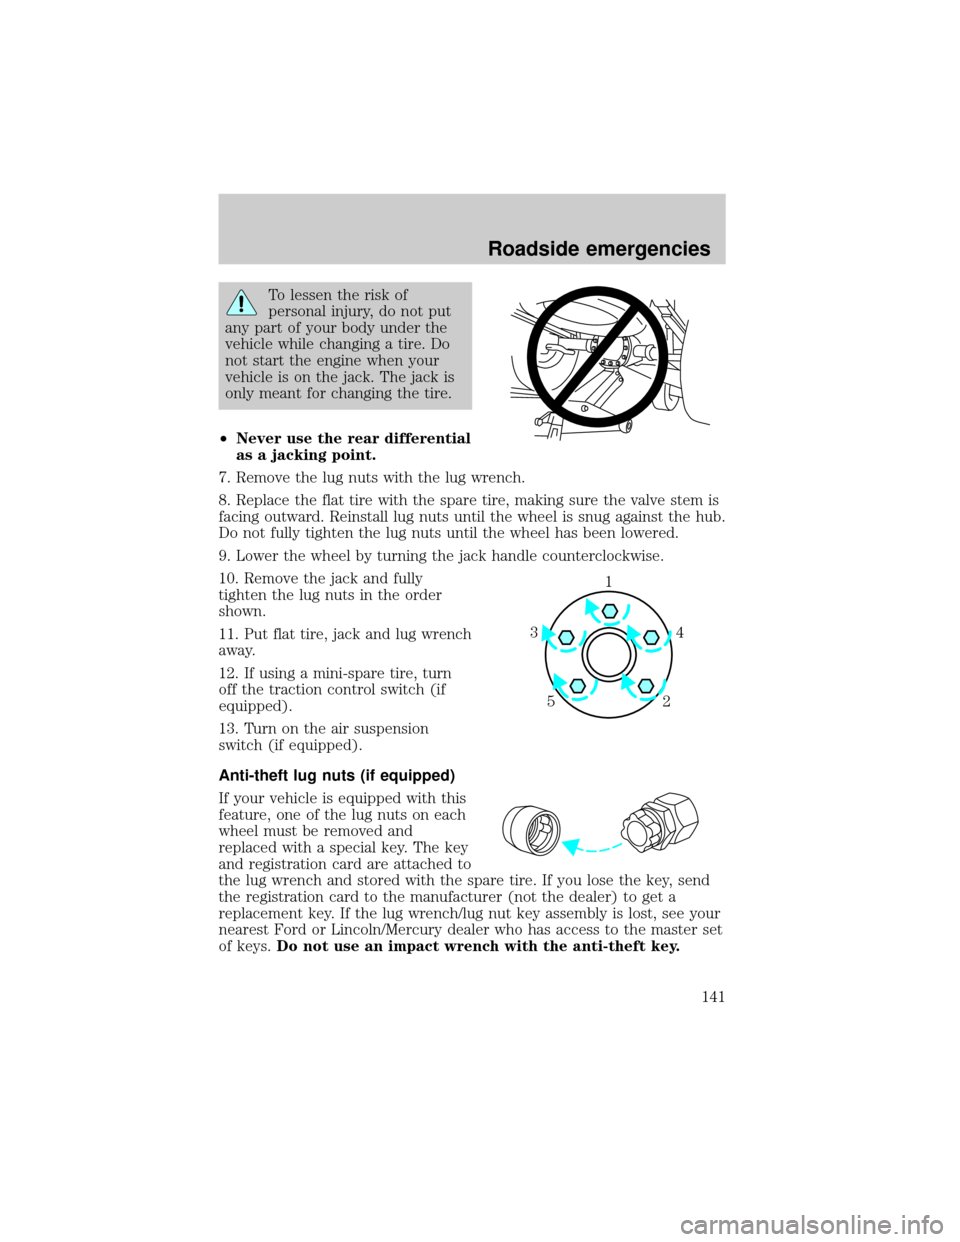
To lessen the risk of
personal injury, do not put
any part of your body under the
vehicle while changing a tire. Do
not start the engine when your
vehicle is on the jack. The jack is
only meant for changing the tire.
²Never use the rear differential
as a jacking point.
7. Remove the lug nuts with the lug wrench.
8. Replace the flat tire with the spare tire, making sure the valve stem is
facing outward. Reinstall lug nuts until the wheel is snug against the hub.
Do not fully tighten the lug nuts until the wheel has been lowered.
9. Lower the wheel by turning the jack handle counterclockwise.
10. Remove the jack and fully
tighten the lug nuts in the order
shown.
11. Put flat tire, jack and lug wrench
away.
12. If using a mini-spare tire, turn
off the traction control switch (if
equipped).
13. Turn on the air suspension
switch (if equipped).
Anti-theft lug nuts (if equipped)
If your vehicle is equipped with this
feature, one of the lug nuts on each
wheel must be removed and
replaced with a special key. The key
and registration card are attached to
the lug wrench and stored with the spare tire. If you lose the key, send
the registration card to the manufacturer (not the dealer) to get a
replacement key. If the lug wrench/lug nut key assembly is lost, see your
nearest Ford or Lincoln/Mercury dealer who has access to the master set
of keys.Do not use an impact wrench with the anti-theft key.
1
4 3
52
Roadside emergencies
141
Page 147 of 208
WRECKER TOWING
If you need to have your vehicle towed, contact a professional towing
service or, if you are a member, your roadside assistance center.
It is recommended that your vehicle be towed with a wheel lift or flatbed
equipment. Do not tow with a slingbelt. Ford Motor Company has not
approved a slingbelt towing procedure.
Before your vehicle can be towed, the air suspension control in the
luggage compartment must be turned to the OFF position (if equipped).
Ford Motor Company provides a towing manual for all authorized tow
truck operators. Have your tow truck operator refer to this manual for
proper hook-up and towing procedures for your vehicle.
Roadside emergencies
147
Page 169 of 208
SNOW TIRES AND CHAINS
Snow tires must be the same size and grade as the tires you
currently have on your vehicle.
The tires on your vehicle have all weather treads to provide traction in
rain and snow. However, in some climates, you may need to use snow
tires and chains. If you need to use chains, it is recommended that steel
wheels (of the same size and specifications) be used as chains may chip
aluminum wheels.
Follow these guidelines when using snow tires and chains:
²Use only SAE Class S chains.
²Install chains securely, verifying that the chains do not touch any
wiring, brake lines or fuel lines.
²Drive cautiously. If you hear the chains rub or bang against your
vehicle, stop and re-tighten the chains. If this does not work, remove
the chains to prevent damage to your vehicle.
²If possible, avoid fully loading your vehicle.
²Remove the tire chains when they are no longer needed. Do not use
tire chains on dry roads.
²The suspension insulation and bumpers will help prevent vehicle
damage. Do not remove these components from your vehicle when
using snow tires and chains.
WHAT YOU SHOULD KNOW ABOUT AUTOMOTIVE FUELS
Important safety precautions
Do not overfill the fuel tank. The pressure in an overfilled tank
may cause leakage and lead to fuel spray and fire.
If you do not use the proper fuel cap, the pressure in the fuel
tank can damage the fuel system or cause it to work improperly
in a collision.
Maintenance and care
169