Page 15 of 440

yellowblue
1-7 Second Row Safety Belt Stowage
If your vehicle has seats in the third row, there is a
sleeve on the second row outside safety belt to store the
safety belt while entering and exiting the third row of
the vehicle.
If your vehicle has a split bench seat in the second row,
follow this procedure:
�Pull the belt out and slide the sleeve along the belt
until it reaches the patch of Velcro
� on the roof.
�Simply press the sleeve against the Velcro patch to
secure it in place.
Do not have the second row outside safety belt stored if
someone is sitting in the second row outside position.
To release the second row outside safety belt, just pull
the sleeve away from the Velcro patch and use the safety
belt as usual. The sleeve should slide freely when not
in use.
There is also a clip on the safety belt used to secure the
belt after it is disconnected from the mini
-buckle. When
removing the split second row bench seat, secure the
loose end of the safety belt in this clip. This will keep
the safety belt from dangling and possibly
striking something.
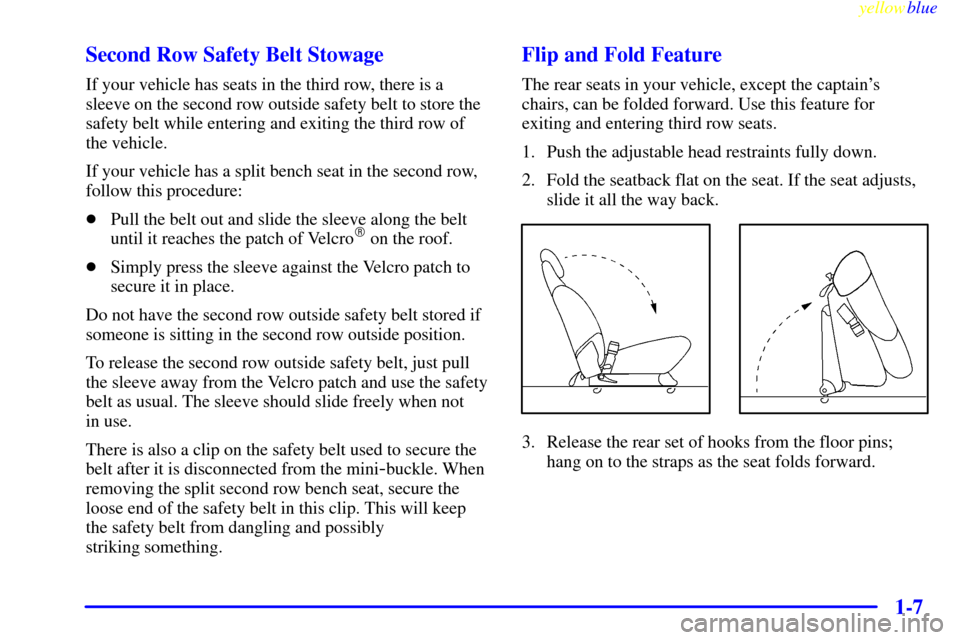
Flip and Fold Feature
The rear seats in your vehicle, except the captain's
chairs, can be folded forward. Use this feature for
exiting and entering third row seats.
1. Push the adjustable head restraints fully down.
2. Fold the seatback flat on the seat. If the seat adjusts,
slide it all the way back.
3. Release the rear set of hooks from the floor pins;
hang on to the straps as the seat folds forward.
Page 19 of 440

yellowblue
1-11
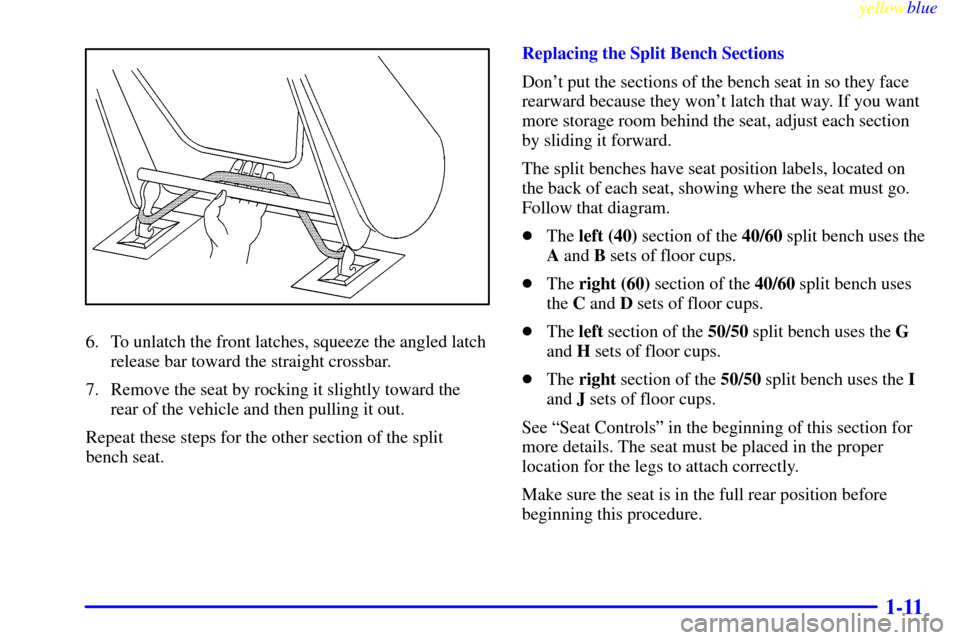
6. To unlatch the front latches, squeeze the angled latch
release bar toward the straight crossbar.
7. Remove the seat by rocking it slightly toward the
rear of the vehicle and then pulling it out.
Repeat these steps for the other section of the split
bench seat.Replacing the Split Bench Sections
Don't put the sections of the bench seat in so they face
rearward because they won't latch that way. If you want
more storage room behind the seat, adjust each section
by sliding it forward.
The split benches have seat position labels, located on
the back of each seat, showing where the seat must go.
Follow that diagram.
�The left (40) section of the 40/60 split bench uses the
A and B sets of floor cups.
�The right (60) section of the 40/60 split bench uses
the C and D sets of floor cups.
�The left section of the 50/50 split bench uses the G
and H sets of floor cups.
�The right section of the 50/50 split bench uses the I
and J sets of floor cups.
See ªSeat Controlsº in the beginning of this section for
more details. The seat must be placed in the proper
location for the legs to attach correctly.
Make sure the seat is in the full rear position before
beginning this procedure.
Page 20 of 440
yellowblue
1-12
1. Squeeze the angled bar toward the solid crossbar
while placing the front hooks of the bench seat onto
the front two floor pins.
To do this, the bench seat
will need to be angled so
that the front hooks clear
the floor pins.
If the front legs are not attached correctly, the rear
legs will not attach to the rear set of floor pins.
Page 25 of 440
yellowblue
1-17
You can also lift the lever on the side of the seat to
release the rear latches from the floor pins.
Do not let go of the straps or lever until the seat is
folded all the way forward.4. To unlatch the front latches, with the seat folded
forward, squeeze the angled latch release bar toward
the straight crossbar.
5. Remove the seat by rocking it slightly toward the
rear of the vehicle and then pulling it out. This
should be done in one motion.
Page 26 of 440

yellowblue
1-18
Replacing the Bucket Seats
Don't put the seats in so they face rearward because they
won't latch that way. If you want more storage room
behind the seat, adjust the seat by sliding it forward.
The bucket seats have seat position labels, located on the
back of the seat, showing where the seat must go.
Follow that diagram. See ªSeat Controlsº in the
beginning of this section for more details. The seat must
be placed in the proper location for the legs to
attach correctly.
RIGHT ONLY seats that don't have the built
-in child
restraint option fit only in the right location of either
row, the E and F or I and J sets of floor cups.
The CENTER OR LEFT seat fits in the center location
or in either left location, the A and B, C and D or G
and H sets of floor cups.
The LEFT ONLY seats that don't have the built
-in child
restraint option fit only in the left location of either row,
the A and B or G and H sets of floor cups.
RIGHT ONLY seats that have the built
-in child restraint
option fit only in the right location of the second row,
the E and F sets of floor cups.LEFT ONLY seats that have the built
-in child restraint
option fit only in the left location of the second row, the
A and B sets of floor cups.
Make sure the seat is in the full rear position before
beginning this procedure.
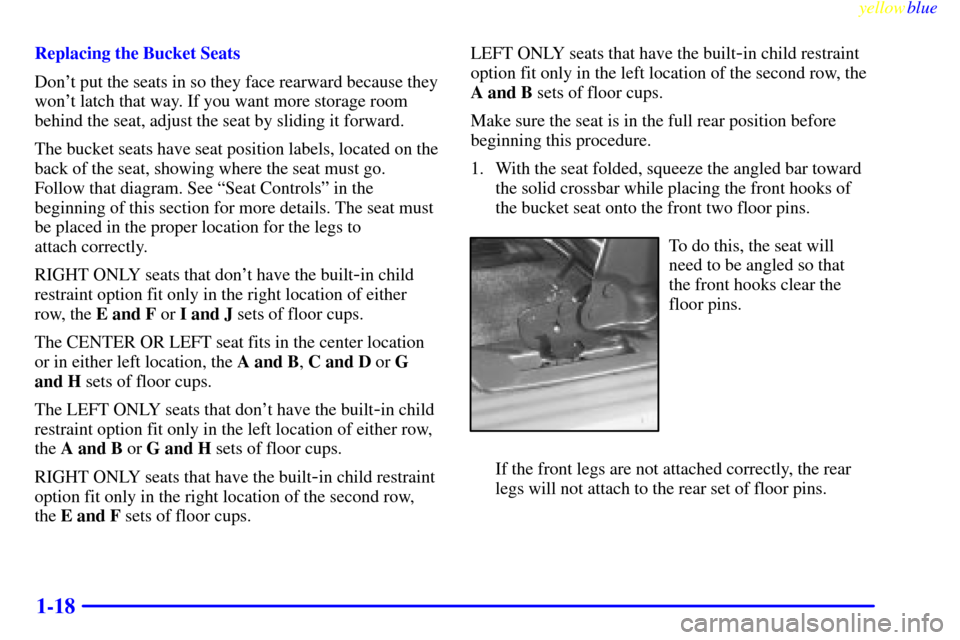
1. With the seat folded, squeeze the angled bar toward
the solid crossbar while placing the front hooks of
the bucket seat onto the front two floor pins.
To do this, the seat will
need to be angled so that
the front hooks clear the
floor pins.
If the front legs are not attached correctly, the rear
legs will not attach to the rear set of floor pins.
Page 51 of 440

yellowblue
1-43
In any particular crash, no one can say whether an air
bag should have inflated simply because of the damage
to a vehicle or because of what the repair costs were. For
frontal air bags, inflation is determined by the angle of
the impact and how quickly the vehicle slows down in
frontal and near
-frontal impacts. For side impact air
bags, inflation is determined by the location of the
impact and how quickly the side of the vehicle deforms.
What makes an air bag inflate?
In an impact of sufficient severity, the air bag sensing
system detects that the vehicle is in a crash. For both
frontal and side impact air bags, the sensing system
triggers a release of gas from the inflator, which inflates
the air bag. The inflator, air bag and related hardware
are all part of the air bag modules inside the steering
wheel, instrument panel and the side of the front
seatbacks closest to the door.How does an air bag restrain?
In moderate to severe frontal or near frontal collisions,
even belted occupants can contact the steering wheel or
the instrument panel. In moderate to severe side
collisions, even belted occupants can contact the inside
of the vehicle. The air bag supplements the protection
provided by safety belts. Air bags distribute the force of
the impact more evenly over the occupant's upper body,
stopping the occupant more gradually. But the frontal air
bags would not help you in many types of collisions,
including rollovers, rear impacts, and side impacts,
primarily because an occupant's motion is not toward
the air bag. Side impact air bags would not help you in
many types of collisions, including frontal or near
frontal collisions, rollovers, and rear impacts, primarily
because an occupant's motion is not toward those air
bags. Air bags should never be regarded as anything
more than a supplement to safety belts, and then only in
moderate to severe frontal or near
-frontal collisions for
the driver's and right front passenger's frontal air bags,
and only in moderate to severe side collisions for the
driver's and right front passenger's side impact air bags.
Page 78 of 440
yellowblue
1-70
Child Restraints
Every time infants and young children ride in vehicles,
they should have protection provided by
appropriate restraints.
Q:What are the different types of add-on
child restraints?
A:Add-on child restraints are available in four basic
types. When selecting a child restraint, take into
consideration not only the child's weight and size,
but also whether or not the restraint will be
compatible with the motor vehicle in which it will
be used.
An infant car bed (A) is a special bed made for use
in a motor vehicle. It's an infant restraint system
designed to restrain or position a child on a
continuous flat surface. With an infant car bed,
make sure that the infant's head rests toward the
center of the vehicle.
Page 96 of 440
yellowblue
1-88
CAUTION:
Never do this.
Here two children are wearing the same belt. The
belt can't properly spread the impact forces. In a
crash, the two children can be crushed together
and seriously injured. A belt must be used by
only one person at a time.
Q:What if a child is wearing a lap-shoulder belt,
but the child is so small that the shoulder belt is
very close to the child's face or neck?
A:Move the child toward the center of the vehicle, but
be sure that the shoulder belt still is on the child's
shoulder, so that in a crash the child's upper body
would have the restraint that belts provide. If the
child is sitting in a rear seat outside position, see
ªRear Safety Belt Comfort Guidesº in the Index.
If the child is so small that the shoulder belt is still
very close to the child's face or neck, you might
want to place the child in a seat that has a lap belt,
if your vehicle has one.