Page 14 of 424

yellowblue
1-8 Rear Seats
CAUTION:
If a head restraint is not installed on the seatback
or stored in the vehicle properly, it could be
thrown about the vehicle in a crash or sudden
maneuver. People in the vehicle could be injured.
Remove the head restraints only when you need
to fold the seat, and be sure that the head
restraints are stored securely in the storage bag
and placed under the rear seat. When the seat is
returned to the passenger position, be sure the
head restraints are installed properly.
Folding the Rear Seat (2-Door Models)
If your vehicle has a rear seat, the seat can be folded flat
for more cargo space. Before folding, make sure that
nothing is under or in front of the seat. When the seat is
folded, it will lay almost flat on the floor.
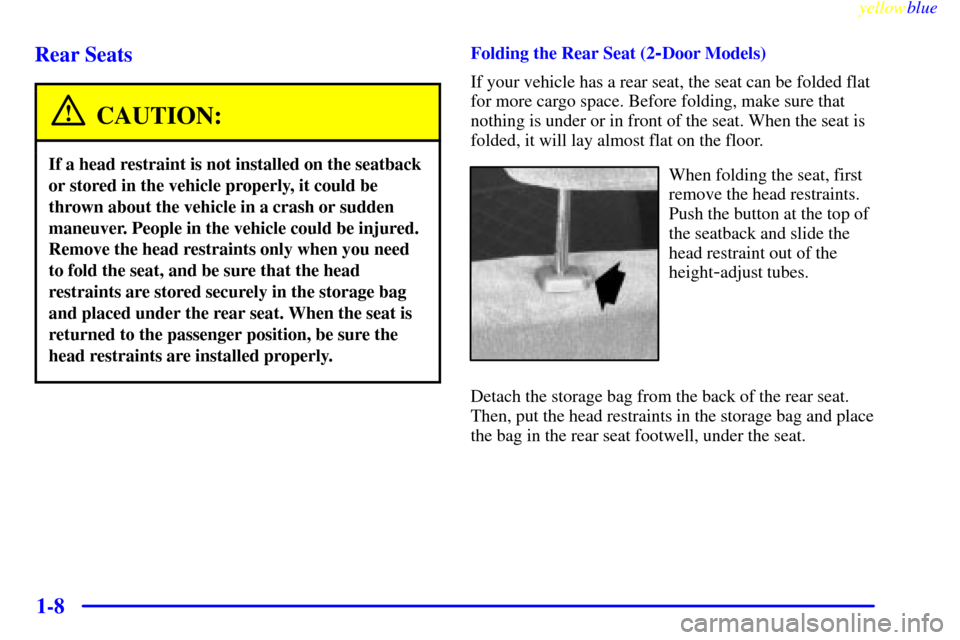
When folding the seat, first
remove the head restraints.
Push the button at the top of
the seatback and slide the
head restraint out of the
height
-adjust tubes.
Detach the storage bag from the back of the rear seat.
Then, put the head restraints in the storage bag and place
the bag in the rear seat footwell, under the seat.
Page 16 of 424

yellowblue
1-10
Folding Rear Seats (4-Door Models)
The rear seat of the 4
-Door Utility or the second seat of
a Suburban may have a 60/40 seat, either side may be
folded down to give you more cargo space.
Before folding, place the latch portion of the center
safety belt in the center armrest. That way, the center
safety belt will be out of the way when the seat is folded
and also will be easily available for passengers to use
when the seat is returned to the passenger position. Also,
make sure that nothing is under or in front of the seat.
When the seat is folded, it will lay flat on the floor.
When folding the seat,
first remove the head
restraints. Push the release
buttons at the bottom of
each head restraint
height
-adjust post and slide
the head restraint out of the
height
-adjust tubes.
Set the head restraints aside for now. You will store
them in their proper position after you are done folding
the seat.
To fold the seat, pull up on
the strap loop at the rear of
the outer edge of the seat
cushion. Then, pull the
seat cushion up and fold
it forward.
After folding the seat cushion fully forward, pull the
seatback forward and fold the seatback down until it
is flat.
Then, store the head
restraints by sliding them
into the rear of the seat
cushion. Make sure the
posts go in all the way.
Page 161 of 424

yellowblue
3-9
Ventilation Tips
�Keep the hood and front air inlet free of ice, snow or
any other obstruction (such as leaves). The heater
and defroster will work far better, reducing the
chance of fogging the inside of your windows.
�When you enter a vehicle in cold weather, turn the
blower fan to high for a few moments before driving.
This helps clear the intake ducts of snow and
moisture, and reduces the chance of fogging the
inside of your windows.
�Keep the air path under the front seats clear of
objects. This helps air to circulate throughout
your vehicle.
�The use of hood air deflectors may adversely
affect the performance of the heating and air
conditioning system.
Defogging and Defrosting
On cool, humid days, use DEFOG to keep the
windshield and side windows clear. Use DEFROST to
remove fog or ice from the windshield in extremely
humid or cold conditions. Use DEFROST with the
temperature knob toward the red area and the fan control
toward HI.
Rear Window Defogger (If Equipped)
If you see lines running across the rear window, you
have a rear window defogger. The lines warm the glass.
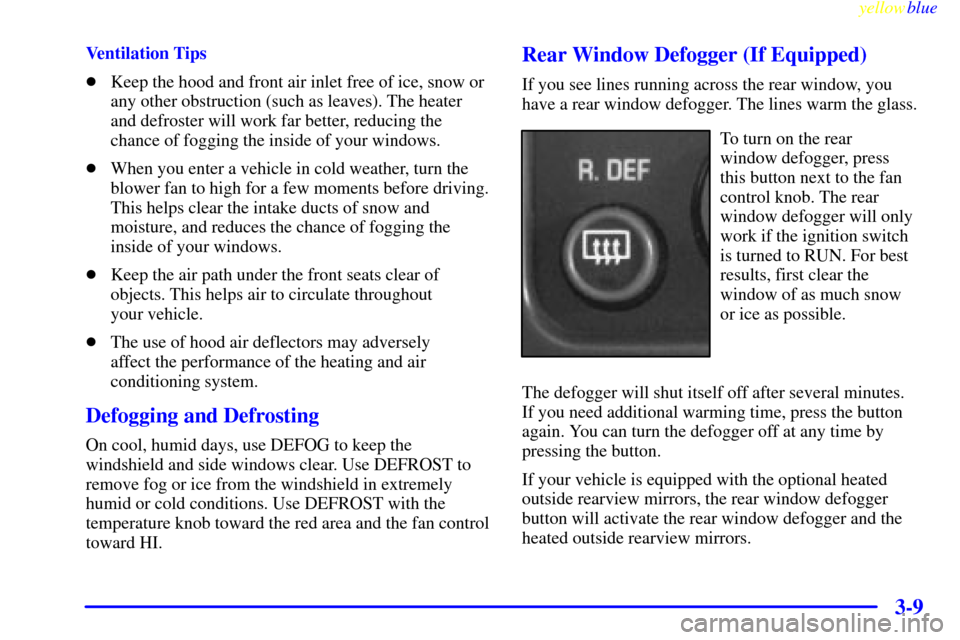
To turn on the rear
window defogger, press
this button next to the fan
control knob. The rear
window defogger will only
work if the ignition switch
is turned to RUN. For best
results, first clear the
window of as much snow
or ice as possible.
The defogger will shut itself off after several minutes.
If you need additional warming time, press the button
again. You can turn the defogger off at any time by
pressing the button.
If your vehicle is equipped with the optional heated
outside rearview mirrors, the rear window defogger
button will activate the rear window defogger and the
heated outside rearview mirrors.
Page 338 of 424

yellowblue
6-58
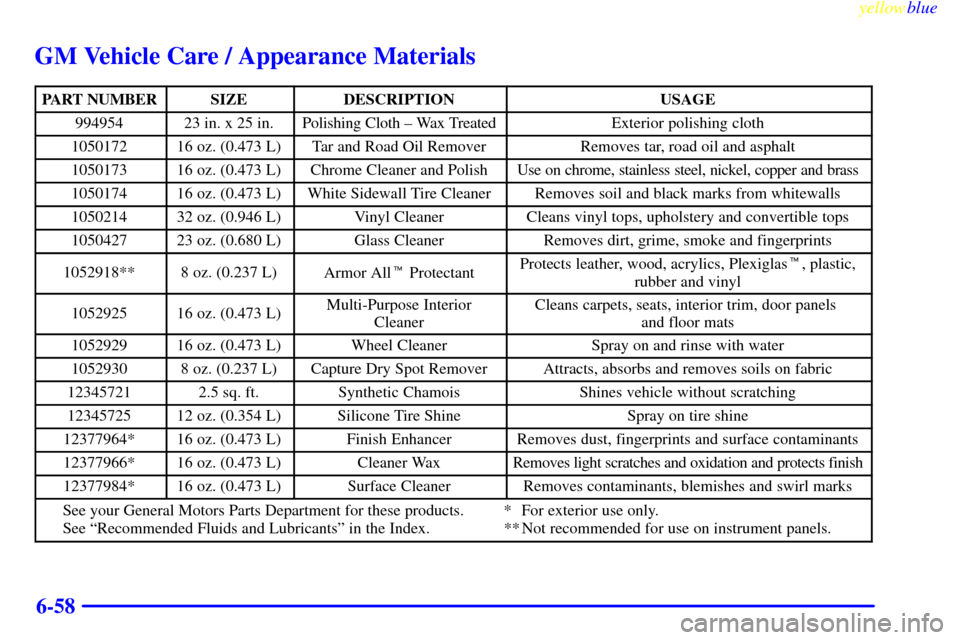
GM Vehicle Care / Appearance Materials
PART NUMBERSIZEDESCRIPTIONUSAGE
99495423 in. x 25 in.Polishing Cloth ± Wax TreatedExterior polishing cloth
105017216 oz. (0.473 L)Tar and Road Oil RemoverRemoves tar, road oil and asphalt
105017316 oz. (0.473 L)Chrome Cleaner and PolishUse on chrome, stainless steel, nickel, copper and brass
105017416 oz. (0.473 L)White Sidewall Tire CleanerRemoves soil and black marks from whitewalls
105021432 oz. (0.946 L)Vinyl CleanerCleans vinyl tops, upholstery and convertible tops
105042723 oz. (0.680 L)Glass CleanerRemoves dirt, grime, smoke and fingerprints
1052918**8 oz. (0.237 L)Armor All� ProtectantProtects leather, wood, acrylics, Plexiglas�, plastic,
rubber and vinyl
105292516 oz. (0.473 L)Multi-Purpose Interior
CleanerCleans carpets, seats, interior trim, door panels
and floor mats
105292916 oz. (0.473 L)Wheel CleanerSpray on and rinse with water
10529308 oz. (0.237 L)Capture Dry Spot RemoverAttracts, absorbs and removes soils on fabric
123457212.5 sq. ft.Synthetic ChamoisShines vehicle without scratching
1234572512 oz. (0.354 L)Silicone Tire ShineSpray on tire shine
12377964*16 oz. (0.473 L)Finish EnhancerRemoves dust, fingerprints and surface contaminants
12377966*16 oz. (0.473 L)Cleaner WaxRemoves light scratches and oxidation and protects finish
12377984*16 oz. (0.473 L)Surface CleanerRemoves contaminants, blemishes and swirl marks
See your General Motors Parts Department for these products. * For exterior use only.
See ªRecommended Fluids and Lubricantsº in the Index. ** Not recommended for use on instrument panels.