Page 262 of 424

yellowblue
5-20
Changing a Flat Tire
If a tire goes flat, avoid further tire and wheel damage
by driving slowly to a level place. Turn on your hazard
warning flashers.
CAUTION:
Changing a tire can cause an injury. The vehicle
can slip off the jack and roll over you or other
people. You and they could be badly injured.
Find a level place to change your tire. To help
prevent the vehicle from moving:
1. Set the parking brake firmly.
2. Put the shift lever in PARK (P).
3. If you have a four
-wheel-drive vehicle,
be sure the transfer case is in a drive
gear
-- not in NEUTRAL (N).
4. Turn off the engine.
To be even more certain the vehicle won't move,
you can put blocks at the front and rear of the
tire farthest away from the one being changed.
That would be the tire on the other side of the
vehicle, at the opposite end.
The following steps will tell you how to use the jack and
change a tire.
Removing the Spare Tire and Tools
The equipment you'll need is located in the rear cargo
area. You'll also find your spare tire there.
On two
-door utility and Suburban models, the spare tire
is located at the rear of the vehicle. To remove the spare
tire, first open the tire cover, if you have one. Turn the
wing nut counterclockwise and take it, and the adapter,
off the bolt. Take the tire out of the vehicle and remove
the tire cover.
Page 273 of 424

yellowblue
5-31
NOTICE:
Improperly tightened wheel nuts can lead to
brake pulsation and rotor damage. To avoid
expensive brake repairs, evenly tighten the wheel
nuts in the proper sequence and to the proper
torque specification.
11. Put the wheel trim back on. For vehicles with
plastic wheel nut caps, tighten the caps until they
are finger tight, then tighten them an additional
one
-half of a turn with the ratchet and
wheel wrench.
Storing a Flat or Spare Tire and Tools
CAUTION:
Storing a jack, a tire or other equipment in the
passenger compartment of the vehicle could
cause injury. In a sudden stop or collision, loose
equipment could strike someone. Store all these
in the proper place.
Store the flat tire where the spare tire is stored.
Put the tools into the storage box and close it tightly. Fit
the storage box on the bracket with the bolt through the
box. Put the jack onto the box. Be sure the jack is stored
as shown in the following illustrations. The jack handle
attachment point is circled in the following illustrations
to show the direction the jack should face when it is
stored properly. Secure the emergency gloves, if your
vehicle has them, to the jack using the provided strap.
Slide the retainer over the bolt onto the jack and put the
wing nut on it. Turn the nut clockwise until it is tight
against the retainer.
Page 281 of 424

6-
yellowblue
6-1
Section 6 Service and Appearance Care
Here you will find information about the care of your vehicle. This section begins with service and fuel information,
and then it shows how to check important fluid and lubricant levels. There is also technical information about your
vehicle, and a part devoted to its appearance care.
6
-2 Service
6
-3 Fuel (Gasoline Engine)
6
-5 Fuels in Foreign Countries (Gasoline Engines)
6
-5 Filling Your Tank (Gasoline Engine)
6
-8 Filling a Portable Fuel Container
6
-8 Checking Things Under the Hood
6
-12 Engine Oil (Gasoline Engine)
6
-16 Engine Air Cleaner/Filter (Gasoline Engines)
6
-19 Automatic Transmission Fluid
6
-22 Rear Axle
6
-22 Four-Wheel Drive
6
-24 Radiator Pressure Cap
6
-25 Thermostat
6
-25 Engine Coolant
6
-28 Power Steering Fluid
6
-29 Windshield Washer Fluid6
-30 Brakes
6
-34 Battery
6
-35 Bulb Replacement
6
-42 Windshield Wiper Blade Replacement
6
-43 Tires
6
-51 Appearance Care
6
-51 Cleaning the Inside of Your Vehicle
6
-54 Care of Safety Belts
6
-55 Cleaning the Outside of Your Vehicle
6
-58 GM Vehicle Care/Appearance Materials
6
-59 Vehicle Identification Number (VIN)
6
-60 Electrical System
6
-65 Replacement Bulbs
6
-67 Capacities and Specifications
6
-68 Air Conditioning Refrigerants
6
-69 Normal Replacement Parts--Gasoline Engines
Page 288 of 424

yellowblue
6-8
Filling a Portable Fuel Container
CAUTION:
Never fill a portable fuel container while it is in
your vehicle. Static electricity discharge from the
container can ignite the gasoline vapor. You can
be badly burned and your vehicle damaged if this
occurs. To help avoid injury to you and others:
�Dispense gasoline only into approved
containers.
�Do not fill a container while it is inside a
vehicle, in a vehicle's trunk, pickup bed or
on any surface other than the ground.
�Bring the fill nozzle in contact with the
inside of the fill opening before operating
the nozzle. Contact should be maintained
until the filling is complete.
�Don't smoke while pumping gasoline.
Checking Things Under the Hood
CAUTION:
If your vehicle has air conditioning, the auxiliary
engine fan under the hood can start up and
injure you even when the engine is not running.
Keep hands, clothing and tools away from any
underhood electric fan.
CAUTION:
Things that burn can get on hot engine parts and
start a fire. These include liquids like gasoline or
diesel fuel, oil, coolant, brake fluid, windshield
washer and other fluids, and plastic or rubber. You
or others could be burned. Be careful not to drop
or spill things that will burn onto a hot engine.
Page 290 of 424
yellowblue
6-10
ªVORTECº 5700 V8 Engine
When you lift up the hood you'll see:
A. Battery
B. Air Cleaner
C. Radiator Cap
D. Coolant Recovery Tank
E. Air Filter Restriction IndicatorF. Engine Oil Dipstick
G. Automatic Transmission
Dipstick
H. Fan
I. Power Steering Fluid ReservoirJ. Engine Oil Fill
K. Brake Fluid Reservoir
L. Windshield Washer
Fluid Reservoir
M. Fuse/Relay Center
Page 291 of 424
yellowblue
6-11
ªVORTECº 7400 V8 Engine
When you lift up the hood you'll see:
A. Battery
B. Coolant Recovery Tank
C. Air Cleaner
D. Radiator Cap
E. Air Filter Restriction IndicatorF. Engine Oil Dipstick
G. Automatic Transmission
Dipstick
H. Engine Oil Fill
I. FanJ. Power Steering Fluid Reservoir
K. Brake Fluid Reservoir
L. Windshield Washer
Fluid Reservoir
M. Fuse/Relay Center
Page 300 of 424

yellowblue
6-20
Get the vehicle warmed up by driving about 15 miles (24 km)
when outside temperatures are above 50�F (10�C). If it's
colder than 50�F (10�C), drive the vehicle in THIRD (3)
until the engine temperature gage moves and then remains
steady for 10 minutes. Then follow the hot check procedures.
Checking Transmission Fluid Cold
A cold check is made after the vehicle has been sitting for
eight hours or more with the engine off and is used only as
a reference. Let the engine run at idle for five minutes if
outside temperatures are 50�F (10�C) or more. If it's
colder than 50�F (10�C), you may have to idle the engine
longer. Should the fluid level be low during a cold check,
you must perform a hot check before adding fluid. This
will give you a more accurate reading of the fluid level.
Checking the Fluid Level
�Park your vehicle on a level place. Keep the
engine running.
�With the parking brake applied, place the shift lever
in PARK (P).
�With your foot on the brake pedal, move the shift lever
through each gear range, pausing for about three seconds
in each range. Then, position the shift lever in PARK (P).
�Let the engine run at idle for three minutes or more.Then, without shutting off the engine, follow these steps:
1. The red transmission dipstick is located at the rear of
the engine compartment, on the passenger's side.
Flip the handle up and then pull out the dipstick and
wipe it with a clean rag or paper towel.
2. Push it back in all the way, wait three seconds and
then pull it back out again.
Page 310 of 424

yellowblue
6-30
NOTICE:
�When using concentrated washer fluid,
follow the manufacturer's instructions for
adding water.
�Don't mix water with ready
-to-use washer
fluid. Water can cause the solution to freeze
and damage your washer fluid tank and
other parts of the washer system. Also,
water doesn't clean as well as washer fluid.
�Fill your washer fluid tank only
three
-quarters full when it's very cold. This
allows for expansion if freezing occurs,
which could damage the tank if it is
completely full.
�Don't use engine coolant (antifreeze) in
your windshield washer. It can damage
your washer system and paint.
Brakes
Brake Fluid
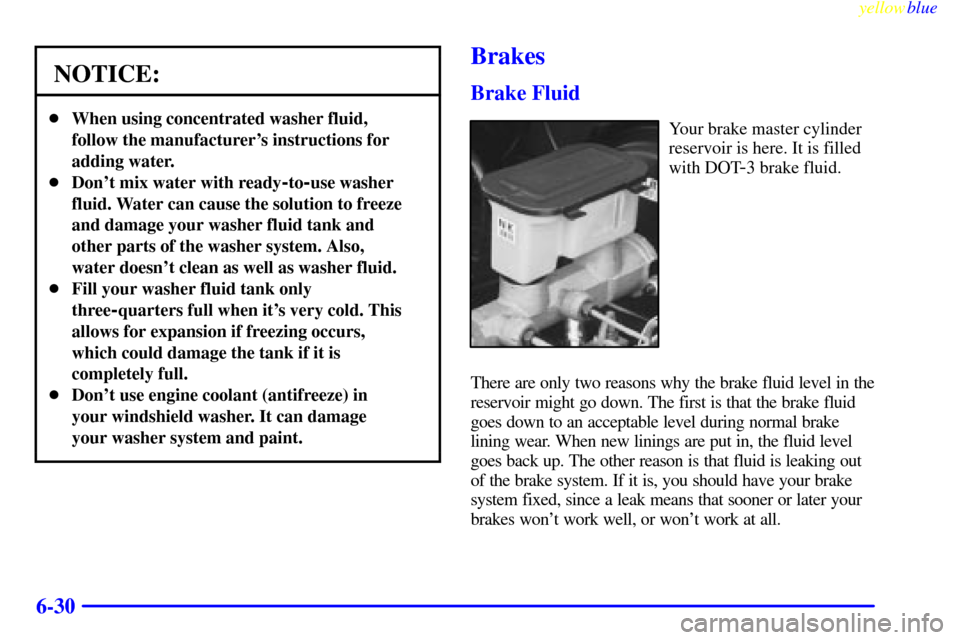
Your brake master cylinder
reservoir is here. It is filled
with DOT
-3 brake fluid.
There are only two reasons why the brake fluid level in the
reservoir might go down. The first is that the brake fluid
goes down to an acceptable level during normal brake
lining wear. When new linings are put in, the fluid level
goes back up. The other reason is that fluid is leaking out
of the brake system. If it is, you should have your brake
system fixed, since a leak means that sooner or later your
brakes won't work well, or won't work at all.