Page 300 of 424

when outside temperatures are above 50�F (10�C). If its
colder than 50�F (10�C), drive the vehicle in THIRD (3)
unti")
yellowblue
6-20
Get the vehicle warmed up by driving about 15 miles (24 km)
when outside temperatures are above 50�F (10�C). If it's
colder than 50�F (10�C), drive the vehicle in THIRD (3)
until the engine temperature gage moves and then remains
steady for 10 minutes. Then follow the hot check procedures.
Checking Transmission Fluid Cold
A cold check is made after the vehicle has been sitting for
eight hours or more with the engine off and is used only as
a reference. Let the engine run at idle for five minutes if
outside temperatures are 50�F (10�C) or more. If it's
colder than 50�F (10�C), you may have to idle the engine
longer. Should the fluid level be low during a cold check,
you must perform a hot check before adding fluid. This
will give you a more accurate reading of the fluid level.
Checking the Fluid Level
�Park your vehicle on a level place. Keep the
engine running.
�With the parking brake applied, place the shift lever
in PARK (P).
�With your foot on the brake pedal, move the shift lever
through each gear range, pausing for about three seconds
in each range. Then, position the shift lever in PARK (P).
�Let the engine run at idle for three minutes or more.Then, without shutting off the engine, follow these steps:
1. The red transmission dipstick is located at the rear of
the engine compartment, on the passenger's side.
Flip the handle up and then pull out the dipstick and
wipe it with a clean rag or paper towel.
2. Push it back in all the way, wait three seconds and
then pull it back out again.
Page 310 of 424

yellowblue
6-30
NOTICE:
�When using concentrated washer fluid,
follow the manufacturer's instructions for
adding water.
�Don't mix water with ready
-to-use washer
fluid. Water can cause the solution to freeze
and damage your washer fluid tank and
other parts of the washer system. Also,
water doesn't clean as well as washer fluid.
�Fill your washer fluid tank only
three
-quarters full when it's very cold. This
allows for expansion if freezing occurs,
which could damage the tank if it is
completely full.
�Don't use engine coolant (antifreeze) in
your windshield washer. It can damage
your washer system and paint.
Brakes
Brake Fluid
Your brake master cylinder
reservoir is here. It is filled
with DOT
-3 brake fluid.
There are only two reasons why the brake fluid level in the
reservoir might go down. The first is that the brake fluid
goes down to an acceptable level during normal brake
lining wear. When new linings are put in, the fluid level
goes back up. The other reason is that fluid is leaking out
of the brake system. If it is, you should have your brake
system fixed, since a leak means that sooner or later your
brakes won't work well, or won't work at all.
Page 311 of 424

yellowblue
6-31
So, it isn't a good idea to ªtop offº your brake fluid.
Adding brake fluid won't correct a leak. If you add fluid
when your linings are worn, then you'll have too much
fluid when you get new brake linings. You should add
(or remove) brake fluid, as necessary, only when work is
done on the brake hydraulic system.
CAUTION:
If you have too much brake fluid, it can spill on
the engine. The fluid will burn if the engine is
hot enough. You or others could be burned,
and your vehicle could be damaged. Add brake
fluid only when work is done on the brake
hydraulic system.
Refer to the Maintenance Schedule to determine when to
check your brake fluid. See ªPeriodic Maintenance
Inspectionsº in the Index.Checking Brake Fluid
You can check the brake fluid without taking off the cap.
Just look at the brake fluid reservoir. The fluid level
should be above MIN. If it isn't, have your brake system
checked to see if there is a leak.
After work is done on the brake hydraulic system,
make sure the level is above the MIN but not over the
MAX mark.
Page 312 of 424

yellowblue
6-32
What to Add
When you do need brake fluid, use only DOT
-3 brake
fluid. Refer to ªRecommended Fluids and Lubricantsº
in the Index. Use new brake fluid from a sealed
container only.
Always clean the brake fluid reservoir cap and the area
around the cap before removing it. This will help keep
dirt from entering the reservoir.
CAUTION:
With the wrong kind of fluid in your brake
system, your brakes may not work well, or they
may not even work at all. This could cause a
crash. Always use the proper brake fluid.
NOTICE:
�Using the wrong fluid can badly damage
brake system parts. For example, just a few
drops of mineral
-based oil, such as engine
oil, in your brake system can damage brake
system parts so badly that they'll have to be
replaced. Don't let someone put in the
wrong kind of fluid.
�If you spill brake fluid on your vehicle's
painted surfaces, the paint finish can be
damaged. Be careful not to spill brake fluid
on your vehicle. If you do, wash it off
immediately. See ªAppearance Careº in
the Index.
Page 314 of 424

yellowblue
6-34 Brake Adjustment
Every time you make a brake stop, your disc brakes
adjust for wear.
If your brake pedal goes down farther than normal, your
rear drum brakes may need adjustment. Adjust them by
backing up and firmly applying the brakes a few times.
Replacing Brake System Parts
The braking system on a modern vehicle is complex. Its
many parts have to be of top quality and work well
together if the vehicle is to have really good braking.
Your vehicle was designed and tested with top
-quality
GM brake parts. When you replace parts of your braking
system
-- for example, when your brake linings wear
down and you have to have new ones put in
-- be sure
you get new approved GM replacement parts. If you
don't, your brakes may no longer work properly. For
example, if someone puts in brake linings that are wrong
for your vehicle, the balance between your front and
rear brakes can change
-- for the worse. The braking
performance you've come to expect can change in many
other ways if someone puts in the wrong replacement
brake parts.
Fluid Leak Check
After the vehicle has been parked for awhile, inspect the
surface under the vehicle for water, oil, fuel or other
fluids. Water dripping from the air conditioning system
after it has been used is normal. If you notice fuel leaks
or fumes, the causes should be found and corrected
at once.
Battery
Your new vehicle comes with an ACDelco Freedom�
battery. When it's time for a new battery, we recommend
an ACDelco Freedom battery. Get one that has the
replacement number shown on the original
battery's label.
Vehicle Storage
If you're not going to drive your vehicle for 25 days or
more, remove the black, negative (
-) cable from the
battery. This will help keep your battery from
running down.
Page 343 of 424
,
Instrument Switches, Radio
Illumination, Chime Module
15 DRL Relay, Fog Lamp Re")
yellowblue
6-63
Fuse/Circuit
BreakerUsage
14 4WD Indicator, Cluster, Front and
Rear Comfort Controls (If Equipped),
Instrument Switches, Radio
Illumination, Chime Module
15 DRL Relay, Fog Lamp Relay
16 Front and Rear Turn Signals,
Back
-Up Lamps, BTSI Solenoid
17 Radio (Ignition)
18 4WAL/VCM, ABS, Cruise Control
19 Radio (Battery)
20 PRNDL, Automatic Transmission,
Speedometer, Check Gages,
Warning Lights
21 Security/Steering
22 Not Used
23 Rear Wiper, Rear Washer Pump
24 Front Axle, 4WD Indicator Lamp,
TP2 Relay (Gasoline Engine)
A Power Door Lock, Six
-Way Power
Seat, Keyless Entry Module
B Power WindowsUnderhood Fuse/Relay Center
The underhood fuse/relay center is located in the rear of
the engine compartment near the brake fluid reservoir.
Move the retainer clips for the cover to access the
fuse block.
You can remove fuses with a fuse extractor. The fuse
extractor is mounted to the interior fuse block. To
remove fuses if you don't have a fuse extractor, hold the
end of the fuse between your thumb and index finger
and pull straight out.
Page 358 of 424
 should be performed after 100,000 miles
(166 000 km)")
Short Trip/City Scheduled Maintenance -- Gasoline Engines
yellowblue
7-8
The services shown in this schedule up to 100,000 miles
(166 000 km) should be performed after 100,000 miles
(166 000 km) at the same intervals. The services shown
at 150,000 miles (240 000 km) should be performed at
the same interval after 150,000 miles (240 000 km).
See ªOwner Checks and Servicesº and ªPeriodic
Maintenance Inspectionsº following.
Footnotes
� The U.S. Environmental Protection Agency or the
California Air Resources Board has determined that the
failure to perform this maintenance item will not nullify
the emission warranty or limit recall liability prior to the
completion of the vehicle's useful life. We, however, urge
that all recommended maintenance services be performed
at the indicated intervals and the maintenance be recorded.
# Lubricate the front suspension, kingpin bushings,
steering linkage, transmission shift linkage, transfer case
shift linkage, parking brake cable guides, front axle
propshaft spline and brake pedal springs. Ball joints andkingpin bushings should not be lubricated unless their
temperature is 10�F (
-12�C) or higher, or they could
be damaged.
+ A good time to check your brakes is during tire
rotation. See ªBrake System Inspectionº under ªPeriodic
Maintenance Inspectionsº in Part C of this schedule.
** Drive axle service (see ªRecommended Fluids and
Lubricantsº in the Index for proper lubricant to use):
�Locking Differential
-- Drain fluid and refill at first
engine oil change. At subsequent oil changes, check
fluid level and add fluid as needed. If driving in
dusty areas or towing a trailer, drain fluid and refill
every 15,000 miles (25 000 km).
�Standard Differential
-- Check fluid level and add
fluid as needed at every oil change. If driving in
dusty areas or towing a trailer, drain fluid and refill
every 15,000 miles (25 000 km).
�More frequent lubrication may be required for
heavy
-duty or off-road use.
Page 361 of 424
Short Trip/City Scheduled Maintenance -- Gasoline Engines
yellowblue
7-11
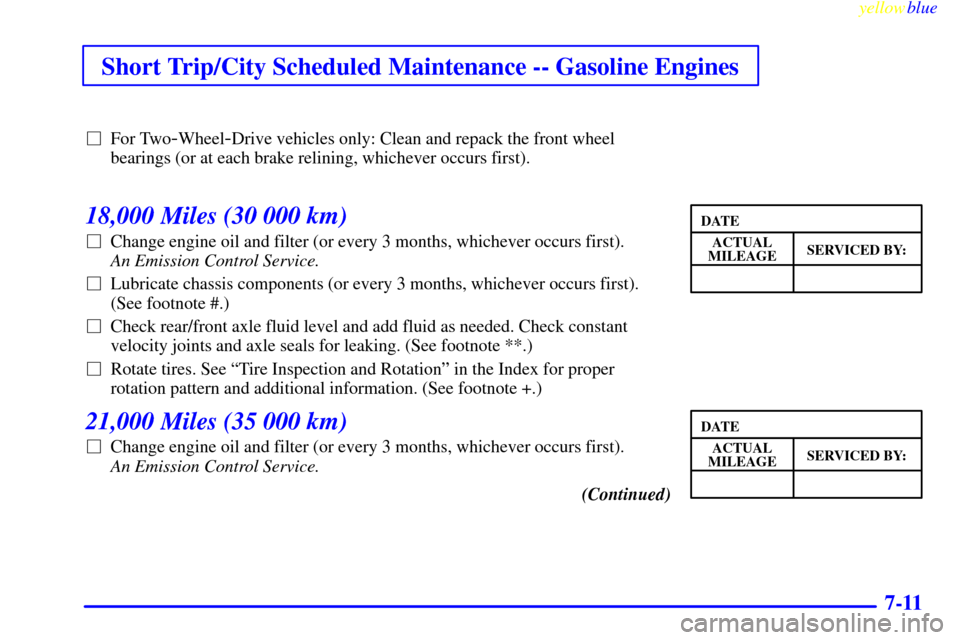
�For Two-Wheel-Drive vehicles only: Clean and repack the front wheel
bearings (or at each brake relining, whichever occurs first).
18,000 Miles (30 000 km)
�Change engine oil and filter (or every 3 months, whichever occurs first).
An Emission Control Service.
�Lubricate chassis components (or every 3 months, whichever occurs first).
(See footnote #.)
�Check rear/front axle fluid level and add fluid as needed. Check constant
velocity joints and axle seals for leaking. (See footnote **.)
�Rotate tires. See ªTire Inspection and Rotationº in the Index for proper
rotation pattern and additional information. (See footnote +.)
21,000 Miles (35 000 km)
�Change engine oil and filter (or every 3 months, whichever occurs first).
An Emission Control Service.
(Continued)
ACTUAL
SERVICED BY:MILEAGE
DATE
ACTUAL
SERVICED BY:MILEAGE
DATE