Page 113 of 432

yellowblue
2-41
Manual Selectable Ride (If Equipped)
The main function of this system is to provide superior
ride comfort while trailering or fully loaded, as well as
for unloaded driving. This system also helps to provide:
�Improved trailering stability
�Improved handling response when trailering or
fully loaded
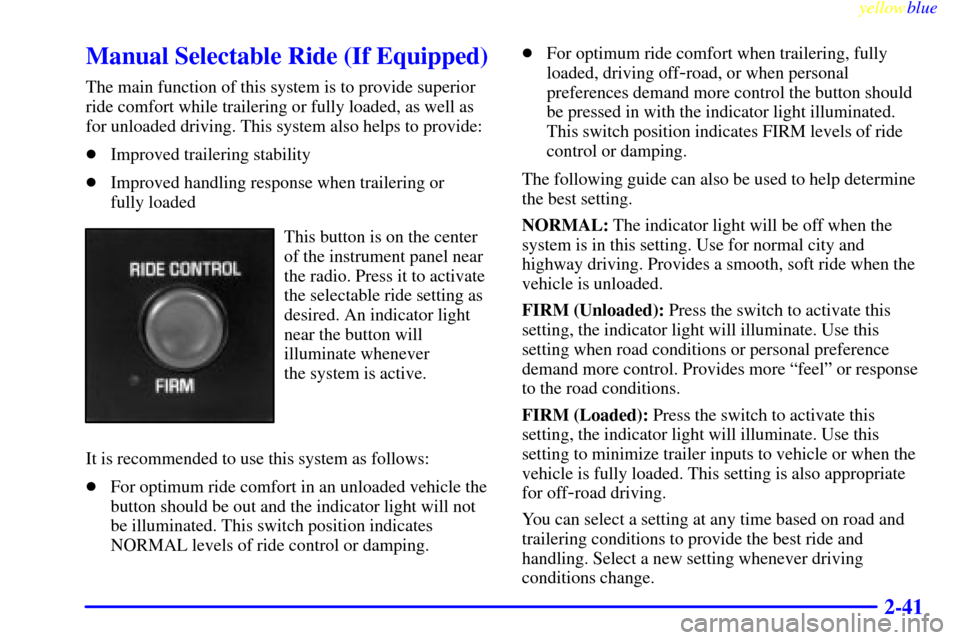
This button is on the center
of the instrument panel near
the radio. Press it to activate
the selectable ride setting as
desired. An indicator light
near the button will
illuminate whenever
the system is active.
It is recommended to use this system as follows:
�For optimum ride comfort in an unloaded vehicle the
button should be out and the indicator light will not
be illuminated. This switch position indicates
NORMAL levels of ride control or damping.�For optimum ride comfort when trailering, fully
loaded, driving off
-road, or when personal
preferences demand more control the button should
be pressed in with the indicator light illuminated.
This switch position indicates FIRM levels of ride
control or damping.
The following guide can also be used to help determine
the best setting.
NORMAL: The indicator light will be off when the
system is in this setting. Use for normal city and
highway driving. Provides a smooth, soft ride when the
vehicle is unloaded.
FIRM (Unloaded): Press the switch to activate this
setting, the indicator light will illuminate. Use this
setting when road conditions or personal preference
demand more control. Provides more ªfeelº or response
to the road conditions.
FIRM (Loaded): Press the switch to activate this
setting, the indicator light will illuminate. Use this
setting to minimize trailer inputs to vehicle or when the
vehicle is fully loaded. This setting is also appropriate
for off
-road driving.
You can select a setting at any time based on road and
trailering conditions to provide the best ride and
handling. Select a new setting whenever driving
conditions change.
Page 175 of 432

yellowblue
3-15
P. SCAN: The preset scan button lets you scan through
your favorite stations stored on your pushbuttons. Select
either the AM, FM1 or FM2 mode and then press
P. SCAN. It will scan through each station stored on
your pushbuttons and stop for a few seconds before
continuing to scan through all of the pushbuttons.
Press P. SCAN again or one of the pushbuttons to stop
scanning to listen to a specific preset station. P. SCAN
will light up on the display while in this mode. If one of
the stations stored on a pushbutton is too weak for the
location you are in, the radio display will show the
channel number (P1
-P6) for several seconds before
advancing to the next preset station.
Setting the Tone
BASS: Press lightly on this knob to release it from its
stored position. Turn the knob clockwise to increase bass
and counterclockwise to decrease bass. When the BASS
control is rotated, the AUTO TONE display will go blank.
TREB: Press lightly on this knob to release it from its
stored position. Turn the knob clockwise to increase
treble and counterclockwise to decrease treble. When
the TREB control is rotated, the AUTO TONE display
will go blank. If a station is weak or noisy, you may
want to decrease the treble.
Push these knobs back into their stored positions when
you're not using them.AUTO TONE: Press this button to select among the six
preset equalization settings and tailor the sound to the
music or voice being heard. Each time you press the
button, the selection will switch to one of the preset
settings of CLASSIC, NEWS, ROCK, POP, C/W
(Country/Western) or JAZZ. To return to the manual
mode, press and release this button until the AUTO
TONE display goes blank. This will return the tone
adjustment to the BASS and TREB controls. If a BASS
or TREB control is rotated, the AUTO TONE display
will go blank. Use PUSHBUTTONS to program
AUTO TONE.
Adjusting the Speakers
BAL: Press lightly on this knob to release it from its
stored position. Turn the control clockwise to adjust
sound to the right speakers and counterclockwise to
adjust sound to the left speakers. The middle position
balances the sound between the speakers.
FADE: Press lightly on this knob to release it from its
stored position. Turn the control clockwise to adjust the
sound to the front speakers and counterclockwise for the
rear speakers. The middle position balances the sound
between the speakers.
Push these knobs back into their stored positions when
you're not using them.
Page 264 of 432

yellowblue
5-4
2. Get the vehicles close enough so the jumper cables
can reach, but be sure the vehicles aren't touching
each other. If they are, it could cause a ground
connection you don't want. You wouldn't be able to
start your vehicle, and the bad grounding could
damage the electrical systems.
To avoid the possibility of the vehicles rolling, set
the parking brake firmly on both vehicles involved in
the jump start procedure. Put an automatic
transmission in PARK (P) or a manual transmission
in NEUTRAL (N). If you have a four
-wheel-drive
vehicle, be sure the transfer case is not in
NEUTRAL (N).
3. Turn off the ignition on both vehicles. Unplug
unnecessary accessories plugged into the cigarette
lighter or accessory power outlets. Turn off all lamps
that aren't needed as well as radios. This will avoid
sparks and help save both batteries. In addition, it
could save your radio!
NOTICE:
If you leave your radio on, it could be badly
damaged. The repairs wouldn't be covered by
your warranty.
4. Open the hoods and locate the positive (+) and
negative (
-) terminal locations on the other vehicle.
Your vehicle has a remote positive (+) jump starting
terminal and a remote negative (
-) jump starting
terminal. The remote positive (+) terminal is located
behind a red plastic cover near the engine accessory
drive bracket. To uncover the remote positive (+)
terminal, open the red plastic cover.
On all V8 gasoline and diesel engines, the remote
negative (
-) terminal is located on the engine
accessory drive bracket. This is marked ªGNDºon
V8 gasoline engines. On V6 engines, the remote
negative (
-) terminal is located on a tab attached to
the engine accessory drive bracket where it is
marked ªGNDº.
You should always use the remote positive (+) and the
remote negative (
-) terminals instead of the positive (+)
and negative (
-) terminals on your battery.