Page 82 of 328

yellowblue
2-24
Horn
Your can sound the horn by pressing one of the horn
symbols on your steering wheel.
Turn Signal/Multifunction Lever
The lever on the left side of the steering column
includes your:
�Turn Signal and Lane Change Indicator
�Headlamp High/Low Beam Changer
�Flash
-to-Pass
Turn Signal and Lane Change Indicator
The turn signal has two upward (for right) and two
downward (for left) positions. These positions allow you
to signal a turn or a lane change.
To signal a turn, move the lever all the way up or
down. When the turn is finished, the lever will
return automatically.
An arrow on the instrument
panel will flash in the
direction of the turn or
lane change.
To signal a lane change, just raise or lower the lever
until the arrow starts to flash. Hold it there until you
complete your lane change. The lever will return by
itself when you release it.
As you signal a turn or a lane change, if the arrows don't
flash but just stay on, a signal bulb may be burned out
and other drivers won't see your turn signal.
If a bulb is burned out, replace it to help avoid an
accident. If the arrows don't go on at all when you
signal a turn, check for burned
-out bulbs and check the
fuse (see ªFuses and Circuit Breakersº in the Index).
Page 103 of 328
yellowblue
2-45
The oil light could also come on in three other situations:
�When the ignition is on but the engine is not running,
the light will come on as a test to show you it is
working. If it doesn't come on with the ignition on,
you may have a problem with the fuse or bulb. Have
it fixed right away.
�Sometimes when the engine is idling at a stop, the
light may blink on and off. This is normal.
�If you make a hard stop, the light may come on for a
moment. This is normal.
CAUTION:
Don't keep driving if the oil pressure is low. If
you do, your engine can become so hot that it
catches fire. You or others could be burned.
Check your oil as soon as possible and have your
vehicle serviced.
NOTICE:
Damage to your engine from neglected oil
problems can be costly and is not covered
by your warranty.
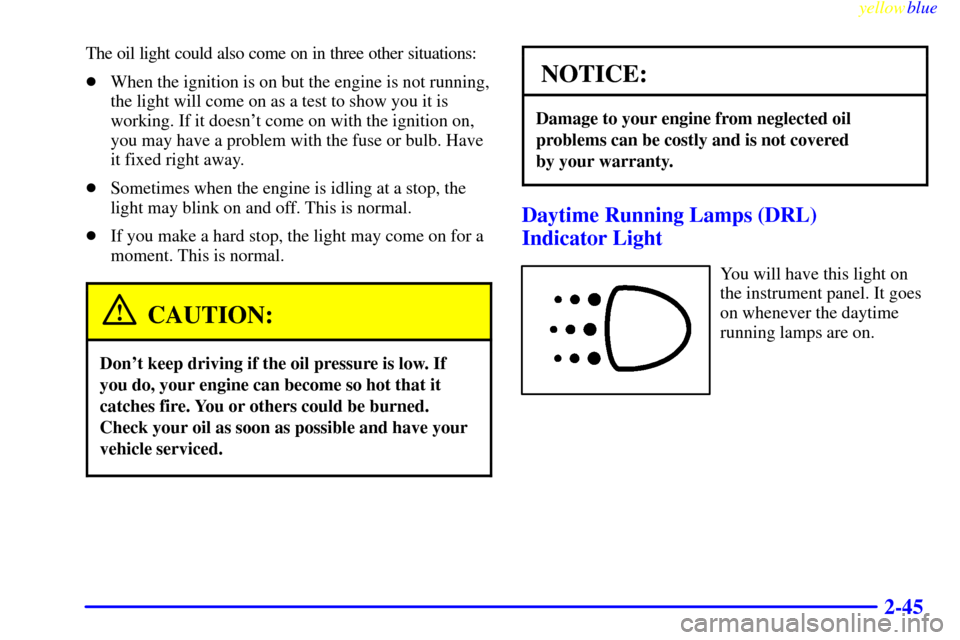
Daytime Running Lamps (DRL)
Indicator Light
You will have this light on
the instrument panel. It goes
on whenever the daytime
running lamps are on.
Page 193 of 328

6-
yellowblue
6-1
Section 6 Service and Appearance Care
Here you will find information about the care of your vehicle. This section begins with service and fuel information,
and then it shows how to check important fluid and lubricant levels. There is also technical information about your
vehicle, and a part devoted to its appearance care.
6
-2 Service
6
-3 Fuel
6
-5 Fuels in Foreign Countries
6
-5 Filling Your Tank
6
-8 Filling a Portable Fuel Container
6
-8 Checking Things Under the Hood
6
-13 Engine Oil
6
-17 Engine Air Cleaner/Filter
6
-20 Automatic Transaxle Fluid
6
-23 Manual Transaxle Fluid
6
-24 Clutch Adjustment
6
-24 Radiator Pressure Cap
6
-25 Thermostat
6
-25 Engine Coolant
6
-27 Power Steering Fluid
6
-28 Windshield Washer Fluid6
-29 Brakes
6
-33 Low Maintenance Battery
6
-34 Bulb Replacement
6
-35 Headlamp Aiming
6
-40 Tires
6
-48 Appearance Care
6
-48 Cleaning the Inside of Your Vehicle
6
-50 Care of the Safety Belts
6
-52 Cleaning the Outside of Your Vehicle
6
-54 Underbody Maintenance
6
-56 Vehicle Identification Number (VIN)
6
-57 Electrical System
6
-60 Replacement Bulbs
6
-60 Capacities and Specifications
6
-61 Air Conditioning Refrigerants
6
-61 Normal Maintenance Replacement Parts
Page 226 of 328
yellowblue
6-34
Bulb Replacement
The following procedures tell you how to replace the
bulbs for your vehicle. See ªReplacement Bulbsº in the
Index to check the size and type of bulb you need to use.
For any bulb changing procedure not listed in this section,
contact your Chevrolet dealer's service department.
Halogen Bulbs
CAUTION:
Halogen bulbs have pressurized gas inside and
can burst if you drop or scratch the bulb. You or
others could be injured. Be sure to read and
follow the instructions on the bulb package.
Headlamps
Halogen Capsule Lamps
1. Open the hood.
2. Using a Phillips-head screwdriver, remove the
headlamp assembly mounting screws.
Page 227 of 328

yellowblue
6-35
3. Pull the headlamp assembly straight out from
the vehicle.
4. Turn the plastic lock ring about one
-quarter of a turn
counterclockwise to remove it. Save the lock ring to
use with the new bulb assembly.
5. Pull up on the plastic clip. Gently pull the bulb out
for replacement.
6. Reverse the steps to replace the new bulb assembly.
Make sure the locator tab is properly aligned when
installing the headlamp assembly to the vehicle.
Headlamp Aiming
Your vehicle may have the halogen capsule headlamp
system. These headlamps have horizontal and vertical
adjustments. These have been pre
-set at the factory and
should need no further adjustment.If your vehicle is damaged in an accident and the
headlamp aim seems affected, see your dealer.
Headlamps on damaged vehicles may require:
�vehicle body repair for correct installation of the
headlamp housings or
�replacement with new headlamp housing(s).
NOTICE:
To make sure your headlamps are aimed
properly, read all the instructions before
beginning. Failure to follow these instructions
could cause damage to headlamp parts.
Page 230 of 328
yellowblue
6-38
4. Turn the turn signal bulb or sidemarker socket
counterclockwise and pull it out.
5. Pull the old bulb straight up to remove it.
6. Reverse the steps with the new bulb.
Rear Combination Lamps
To remove the rear combination bulbs:
1. Remove the two screws from the combination lamps
on the outside of the vehicle.
2. Pull back the cover on the inside of the trunk and use
a 10 mm wrench to remove the nut.
3. Pull the assembly out far enough to reach the
bulb socket.
4. Turn the socket counterclockwise and pull it out.
5. Disconnect the bulb from its socket by twisting and
then pulling the bulb out.
6. Reverse the steps to install a new bulb.
Page 231 of 328

1. Remove the two mounting screws and then the lamp
assembly from the hatchback door.
2. Remove the bulb from the socket.
3. Replace t")
yellowblue
6-39 Center High-Mounted Stoplamp
(2-Door Model)
1. Remove the two mounting screws and then the lamp
assembly from the hatchback door.
2. Remove the bulb from the socket.
3. Replace the bulb with a new one and then use the
two mounting screws to secure the lamp assembly
into place.
Center High-Mounted Stoplamp
(4-Door Model)
1. Open the rear compartment lid.
2. Remove the bulb socket from the underside of the
rear seat
-to-rear window panel.
3. Twist the bulb to the right and pull it straight out.
4. Replace the bulb with a new one and then snap and
turn the bulb socket into the lamp housing.
Rear Parking/Sidemarker Lamps
(2-Door Model)
1. Remove the rear combination lamp assembly as
described under ªRear Combination Lampsº earlier
in this section.2. Turn the socket to the left and gently pull the socket
out of the assembly.
3. Pull the old bulb straight up to remove it.
4. Reverse the steps to install a new bulb.
Dome Lamp
1. Gently pry the dome lamp lens from the dome lamp
assembly with a flat
-head screwdriver.
2. Pull the old bulb out.
3. Replace the bulb and snap the cover back into place.
Page 252 of 328

yellowblue
6-60
Replacement Bulbs
Lamps Bulb Number. . . . . . . . . . . . . . . . . . . . . . . . .
Back
-Up 921. . . . . . . . . . . . . . . . . . . . . . . . . . . . . . . .
GM Part No. 96059983 or equivalent
Center High
-Mounted Stoplamp 921. . . . . . . . . . . . .
GM Part No. 96059983 or equivalent
Dome GM Part No. 94153335. . . . . . . . . . . . . . . . . . .
Front Parking and Sidemarker 168. . . . . . . . . . . . . . .
GM Part No. 96053293 or equivalent
Headlamp (Halogen) GM Part No. 9441731 . . . . . . .
or GM Part No. 91171148 or equivalent
License Plate 168. . . . . . . . . . . . . . . . . . . . . . . . . . . .
Rear Sidemarker 194. . . . . . . . . . . . . . . . . . . . . . . . .
Rear Stop/Tail 1157. . . . . . . . . . . . . . . . . . . . . . . . . .
Turn Signal and Hazard (Front and Rear) 1156. . . . .
Capacities and Specifications
The following approximate capacities are given in U.S.
and metric conversions. Please refer to ªRecommended
Fluids and Lubricantsº in the Index for more information.
Automatic Transaxle
Drain and Refill 1.6 quarts (1.5 L)**. . . . . . . . . . . . .
Manual Transaxle2.5 quarts (2.4 L)** . . . . . . . . . .
Cooling System
Automatic Transaxle
VIN Engine Code 2 5.0 quarts (4.7 L). . . . . . . . . . . .
Manual Transaxle
VIN Engine Code 6 4.1 quarts (3.9 L). . . . . . . . . . . .
VIN Engine Code 2 4.9 quarts (4.6 L). . . . . . . . . . . .
Crankcase
(With Filter Change)3.5 quarts (3.3 L)* . . . . . . .
Fuel Tank10.6 gallons (40.0 L) . . . . . . . . . . . . . . . . .
Wheel Nut Torque45 lb
-ft (60 N´m) . . . . . . . . . . . .
Air Conditioning�
See the refrigerant information label under the hood.
� See ªAir Conditioning Refrigerantsº later in
this section.