Page 1 of 344

yellowblue
i
The 1999 Chevrolet Malibu Owner's Manual
1-1 Seats and Restraint SystemsThis section tells you how to use your seats and safety belts properly. It also explains the ªSRSº system.
2-1 Features and ControlsThis section explains how to start and operate your vehicle.
3-1 Comfort Controls and Audio SystemsThis section tells you how to adjust the ventilation and comfort controls and how to operate your audio system.
4-1 Your Driving and the RoadHere you'll find helpful information and tips about the road and how to drive under different conditions.
5-1 Problems on the RoadThis section tells you what to do if you have a problem while driving, such as a flat tire or overheated engine, etc.
6-1 Service and Appearance CareHere the manual tells you how to keep your vehicle running properly and looking good.
7-1 Maintenance ScheduleThis section tells you when to perform vehicle maintenance and what fluids and lubricants to use.
8-1 Customer Assistance InformationThis section tells you how to contact Chevrolet for assistance and how to get service and owner publications.
It also gives you information on ªReporting Safety Defectsº on page 8-10.
9-1 IndexHere's an alphabetical listing of almost every subject in this manual. You can use it to quickly find
something you want to read.
Page 55 of 344
yellowblue
1-47
CAUTION:
A child in a rear-facing child restraint can be
seriously injured or killed if the right front
passenger's air bag inflates, even though your
vehicle has Next Generation frontal air bags. This
is because the back of the rear
-facing child
restraint would be very close to the inflating air
bag. Always secure a rear
-facing child restraint
in the rear seat.
Although a rear seat is a safer place, you can secure a
forward
-facing child restraint in the right front seat.
You'll be using the lap
-shoulder belt. See the earlier part
about the top strap if the child restraint has one. Be sure
to follow the instructions that came with the child
restraint. Secure the child in the child restraint when and
as the instructions say.
1. Because your vehicle has a right front passenger air
bag, always move the seat as far back as it will go
before securing a forward
-facing child restraint.
(See ªSeatsº in the Index.)
2. Put the restraint on the seat.
3. Pick up the latch plate, and run the lap and shoulder
portions of the vehicle's safety belt through or
around the restraint. The child restraint instructions
will show you how.
Page 71 of 344
yellowblue
2-9
To replace the battery in the keyless entry system:
1. Use a small coin or flathead screwdriver to separate
the bottom half from the top half of the transmitter.
2. Remove the battery and replace it with the new one.
Make sure the positive (+) side of the battery faces
down. Use one three
-volt, CR2032, or
equivalent, type battery.
3. Put the two halves back together. Make sure the
cover is on tightly, so water won't get in.
4. Check the operation of the transmitter with your
vehicle. If the transmitter does not work, try
resynchronizing the transmitter with the receiver.
Resynchronization
Your keyless entry system is equipped with a security
system that prevents anyone from recording and playing
back your signal. The transmitter does not send the same
signal twice to the receiver. The receiver will not
respond to a signal that has been sent to it more
than once.To synchronize your transmitter and receiver, follow
these directions:
1. Stand close to your vehicle.
2. Press and hold the LOCK and UNLOCK buttons on
the transmitter at the same time.
3. Hold the buttons for five seconds. In this time, the
doors should lock and unlock once. This confirms
the resynchronization. If the doors do not lock and
unlock, see your dealer for service.
Trunk
To unlock the trunk from the outside, insert the key and
turn the trunk lock cylinder.
Page 105 of 344
yellowblue
2-43 Center Console Cupholder
The console provides space for holding a cup or soft
drink container. The cupholder is located at the rear of
the shifter.
Rear Seat Cupholder
Pull down the door on the rear of the center console to
use the rear seat cupholder.
Convenience Net (If Equipped)
Your vehicle may have a convenience net. You'll see it
just inside the back wall of the trunk.
Put small loads, like grocery bags, behind the net. It can
help keep them from falling over during sharp turns or
quick starts and stops.
The net isn't for larger, heavier loads. Store them in the
trunk as far forward as you can.
You can unhook the net so that it will lie flat when
you're not using it.
Ashtray and Lighter
The ashtray is located at the lower part of the center of
the instrument panel. To remove the ashtray for
cleaning, pull up on the metal tab and pull the bin out.
NOTICE:
Don't put papers and other things that burn into
your ashtrays. If you do, cigarettes or other
smoking materials could set them on fire,
causing damage.
The lighter is located above the ashtray. To use it, just
push it in all the way and let go. When it's ready, it will
pop back by itself.
Page 181 of 344
yellowblue
4-31
Loading Your Vehicle
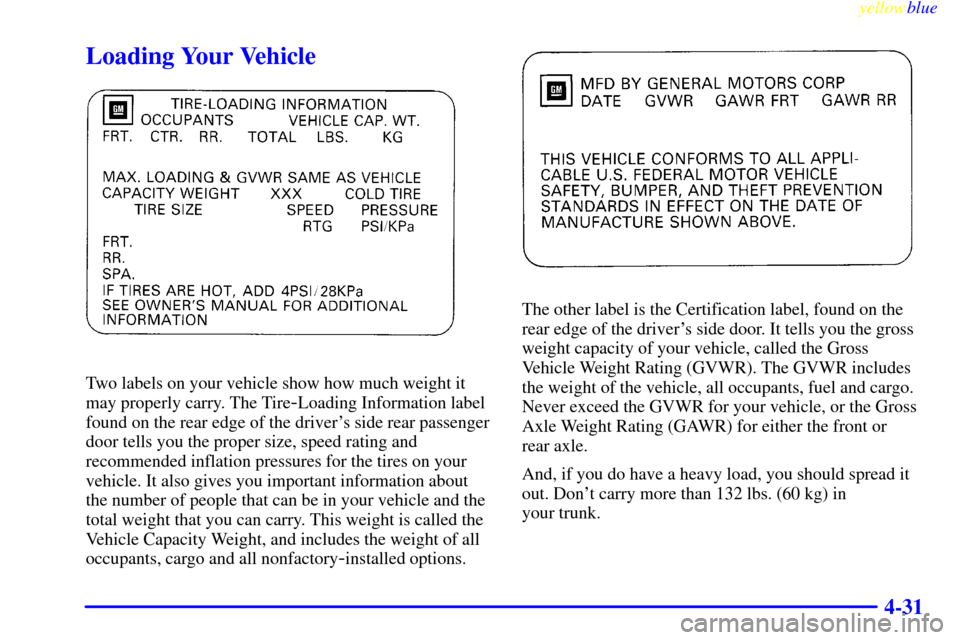
Two labels on your vehicle show how much weight it
may properly carry. The Tire
-Loading Information label
found on the rear edge of the driver's side rear passenger
door tells you the proper size, speed rating and
recommended inflation pressures for the tires on your
vehicle. It also gives you important information about
the number of people that can be in your vehicle and the
total weight that you can carry. This weight is called the
Vehicle Capacity Weight, and includes the weight of all
occupants, cargo and all nonfactory
-installed options.
The other label is the Certification label, found on the
rear edge of the driver's side door. It tells you the gross
weight capacity of your vehicle, called the Gross
Vehicle Weight Rating (GVWR). The GVWR includes
the weight of the vehicle, all occupants, fuel and cargo.
Never exceed the GVWR for your vehicle, or the Gross
Axle Weight Rating (GAWR) for either the front or
rear axle.
And, if you do have a heavy load, you should spread it
out. Don't carry more than 132 lbs. (60 kg) in
your trunk.
Page 216 of 344
yellowblue
5-26
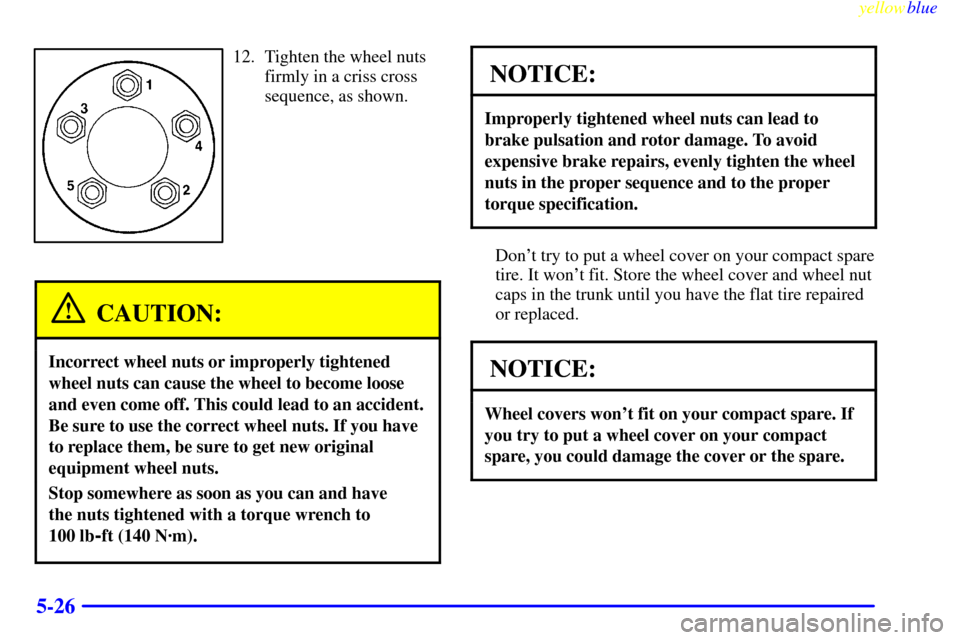
12. Tighten the wheel nuts
firmly in a criss cross
sequence, as shown.
CAUTION:
Incorrect wheel nuts or improperly tightened
wheel nuts can cause the wheel to become loose
and even come off. This could lead to an accident.
Be sure to use the correct wheel nuts. If you have
to replace them, be sure to get new original
equipment wheel nuts.
Stop somewhere as soon as you can and have
the nuts tightened with a torque wrench to
100 lb
-ft (140 N´m).
NOTICE:
Improperly tightened wheel nuts can lead to
brake pulsation and rotor damage. To avoid
expensive brake repairs, evenly tighten the wheel
nuts in the proper sequence and to the proper
torque specification.
Don't try to put a wheel cover on your compact spare
tire. It won't fit. Store the wheel cover and wheel nut
caps in the trunk until you have the flat tire repaired
or replaced.
NOTICE:
Wheel covers won't fit on your compact spare. If
you try to put a wheel cover on your compact
spare, you could damage the cover or the spare.
Page 218 of 344
yellowblue
5-28 Storing the Spare Tire and Tools
CAUTION:
Storing a jack, a tire or other equipment in the
passenger compartment of the vehicle could
cause injury. In a sudden stop or collision, loose
equipment could strike someone. Store all these
in the proper place.
The compact spare is for temporary use only. Replace
the compact spare tire with a full
-size tire as soon as you
can. See ªCompact Spare Tireº later in this section.
See the storage instructions label to replace your
compact spare into your trunk properly.
A. Nut
B. Wing Nut
C. Extension (If Equipped)
D. Adapter
E. Wrench
F. Jack
G. Tool Tray
H. Flat Road Tire
Page 257 of 344
yellowblue
6-37
5. Carefully remove the backplate by gently pulling up
on the two upper and two lower tabs.6. Gently wiggle the bulbs to remove them from the
socket. Replace the bulb.
7. Reverse the steps to reassemble the backplate and
attach the taillamp assembly to the vehicle.
Make sure that all four tabs of the backplate are
securely fastened to the taillamp assembly before
installing it on the vehicle.
8. When securing the lamp assembly back into place,
align the assembly so that the trunk lid doesn't
contact it.
Dome Lamp
To change your dome lamp bulb, grasp the center front
and center rear portion of the housing and squeeze
firmly but gently. The housing should come off.
If this doesn't work, you may need to use a small
flathead screwdriver under the side of the housing to
help pry it off.