Page 4 of 368
yellowblue
iv
In 1932 Chevrolet
introduced the
Synchro
-Mesh
transmission and
offered a host of
accessories -- including
such niceties as a clock!The legacy of America's favorite sportscar
began in 1953, when 319 hand
-assembled
white Corvettes
launched the
first use of a
fiberglass body in
a production car.
The Chevrolet blend of
value and performance has
become an American
tradition -- whether bred for
the racetrack like the legendary
Corvette and Camaro, or created for the pleasure of the
open road.
Every decade, Chevrolet
has reinforced its heritage
of affordable performance
with quality and value crafted into each vehicle. It's not
surprising that for 80 years
ªGenuine Chevroletº has been
America's automobile.
We're proud to continue that
heritage in your Chevrolet,
Page 11 of 368
yellowblue
1-3
If your vehicle is not equipped with easy entry seats,
your passenger seat adjuster looks like this. Slide the
lever under the passenger's seat to the right to unlock it.
Slide the seat to where you want it. Then release the
lever and try to move the seat with your body, to make
sure the seat is locked into place.If your vehicle is equipped with easy entry seats, this is
your front passenger seat adjuster. Pull up on the lever at
the front of the passenger's seat up to unlock it. Slide the
seat to a comfortable position. Then release the lever
and try to move the seat with your body, to make sure
the seat is locked into place.
Manual Lumbar Support (If Equipped)
The manual lumbar support control is located at the
front of the driver's seat, toward the right. Turn the knob
clockwise or counterclockwise to increase or decrease
the amount of support to your lower back.
Page 110 of 368

yellowblue
2-46
Mirrors
Inside Day/Night Rearview Mirror
To reduce glare from lamps behind you, move the lever
toward you to the night position.
Manual Remote Control Mirror
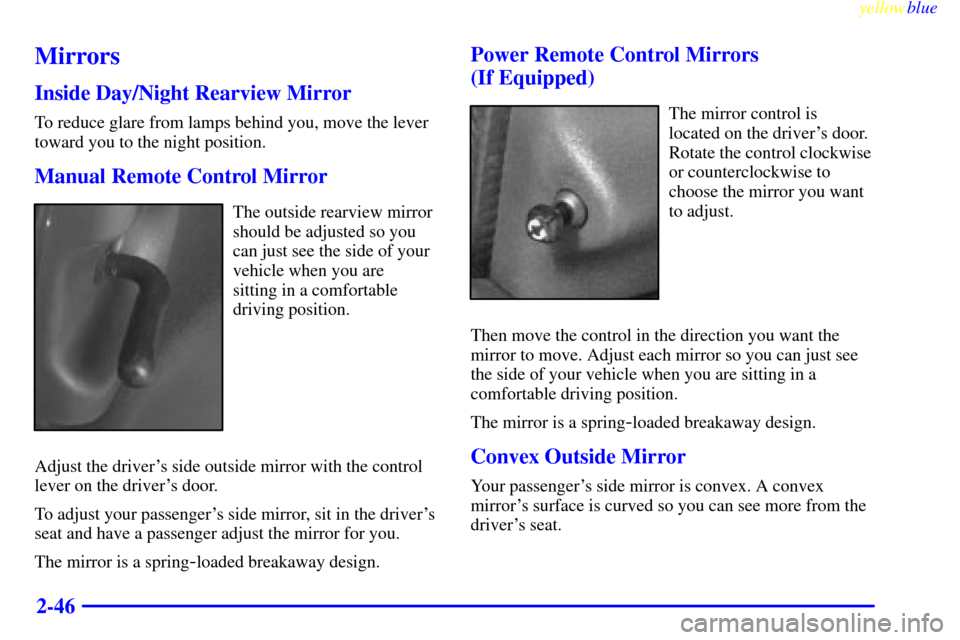
The outside rearview mirror
should be adjusted so you
can just see the side of your
vehicle when you are
sitting in a comfortable
driving position.
Adjust the driver's side outside mirror with the control
lever on the driver's door.
To adjust your passenger's side mirror, sit in the driver's
seat and have a passenger adjust the mirror for you.
The mirror is a spring
-loaded breakaway design.
Power Remote Control Mirrors
(If Equipped)
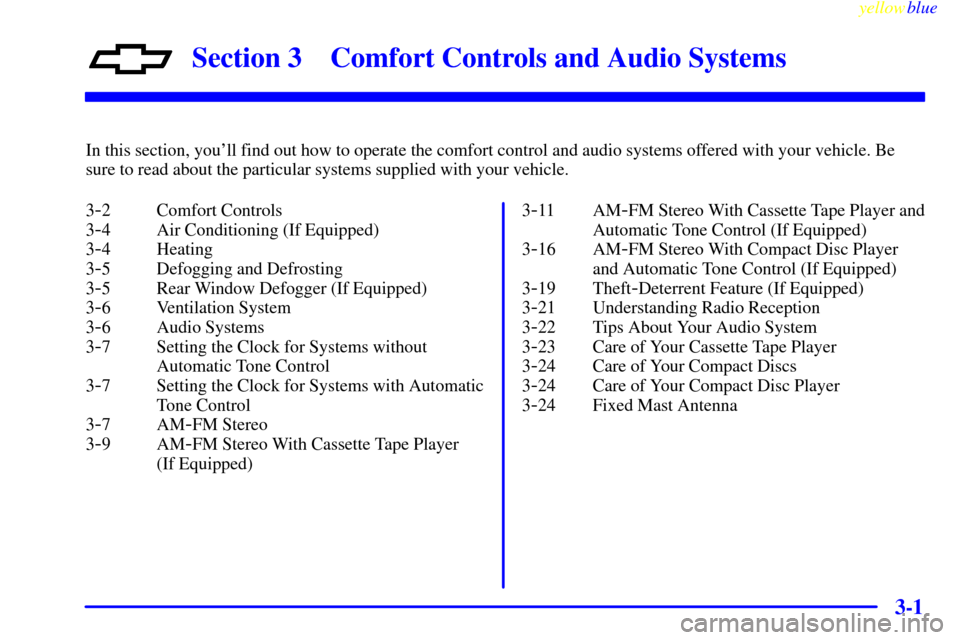
The mirror control is
located on the driver's door.
Rotate the control clockwise
or counterclockwise to
choose the mirror you want
to adjust.
Then move the control in the direction you want the
mirror to move. Adjust each mirror so you can just see
the side of your vehicle when you are sitting in a
comfortable driving position.
The mirror is a spring
-loaded breakaway design.
Convex Outside Mirror
Your passenger's side mirror is convex. A convex
mirror's surface is curved so you can see more from the
driver's seat.
Page 141 of 368

3-
yellowblue
3-1
Section 3 Comfort Controls and Audio Systems
In this section, you'll find out how to operate the comfort control and audio systems offered with your vehicle. Be
sure to read about the particular systems supplied with your vehicle.
3
-2 Comfort Controls
3
-4 Air Conditioning (If Equipped)
3
-4 Heating
3
-5 Defogging and Defrosting
3
-5 Rear Window Defogger (If Equipped)
3
-6 Ventilation System
3
-6 Audio Systems
3
-7 Setting the Clock for Systems without
Automatic Tone Control
3
-7 Setting the Clock for Systems with Automatic
Tone Control
3
-7AM-FM Stereo
3
-9AM-FM Stereo With Cassette Tape Player
(If Equipped)3
-11 AM-FM Stereo With Cassette Tape Player and
Automatic Tone Control (If Equipped)
3
-16 AM-FM Stereo With Compact Disc Player
and Automatic Tone Control (If Equipped)
3
-19 Theft-Deterrent Feature (If Equipped)
3
-21 Understanding Radio Reception
3
-22 Tips About Your Audio System
3
-23 Care of Your Cassette Tape Player
3
-24 Care of Your Compact Discs
3
-24 Care of Your Compact Disc Player
3
-24 Fixed Mast Antenna
Page 142 of 368

yellowblue
3-2
Comfort Controls
This section tells you how to make your air system work
for you. The optional climate control system with air
conditioning uses ozone
-friendly R-134a refrigerant.
With these systems, you can control the ventilation
and heating in your vehicle. Your vehicle also has
the flow
-through ventilation system described later
in this section.
Standard Climate Control System
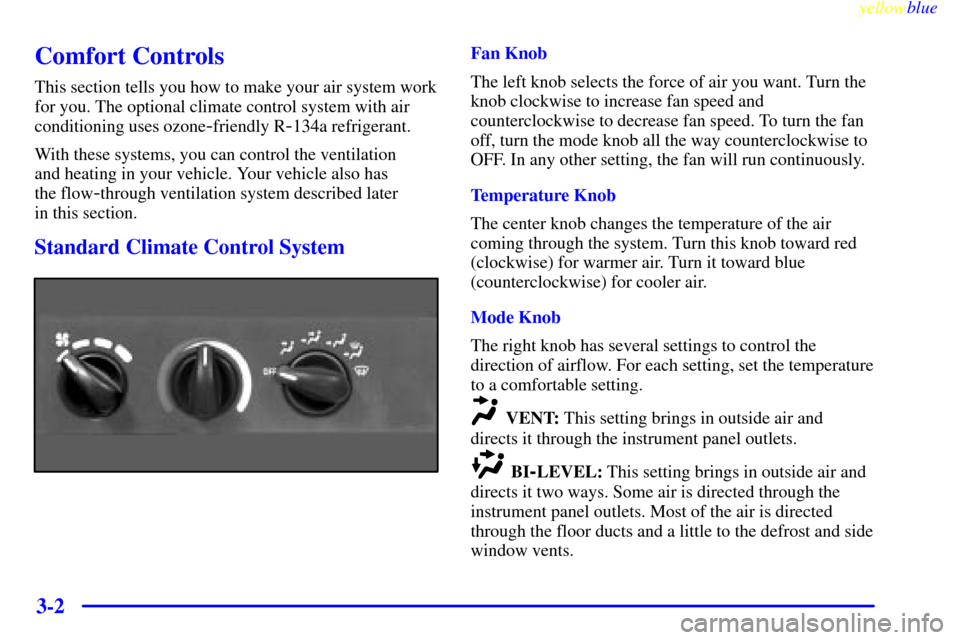
Fan Knob
The left knob selects the force of air you want. Turn the
knob clockwise to increase fan speed and
counterclockwise to decrease fan speed. To turn the fan
off, turn the mode knob all the way counterclockwise to
OFF. In any other setting, the fan will run continuously.
Temperature Knob
The center knob changes the temperature of the air
coming through the system. Turn this knob toward red
(clockwise) for warmer air. Turn it toward blue
(counterclockwise) for cooler air.
Mode Knob
The right knob has several settings to control the
direction of airflow. For each setting, set the temperature
to a comfortable setting.
VENT: This setting brings in outside air and
directs it through the instrument panel outlets.
BI-LEVEL: This setting brings in outside air and
directs it two ways. Some air is directed through the
instrument panel outlets. Most of the air is directed
through the floor ducts and a little to the defrost and side
window vents.
Page 143 of 368

yellowblue
3-3
FLOOR: This setting sends most of the air
through the ducts near the floor. The rest comes out of
the defroster and side window vents.
DEFOG: This setting allows half of the air to go
to the floor ducts and half to the defroster and side
window vents.
DEFROST: This setting directs most of the air
through the defroster and side window vents. Some of
the air goes to the floor ducts.
Climate Control System with Air
Conditioning (If Equipped)
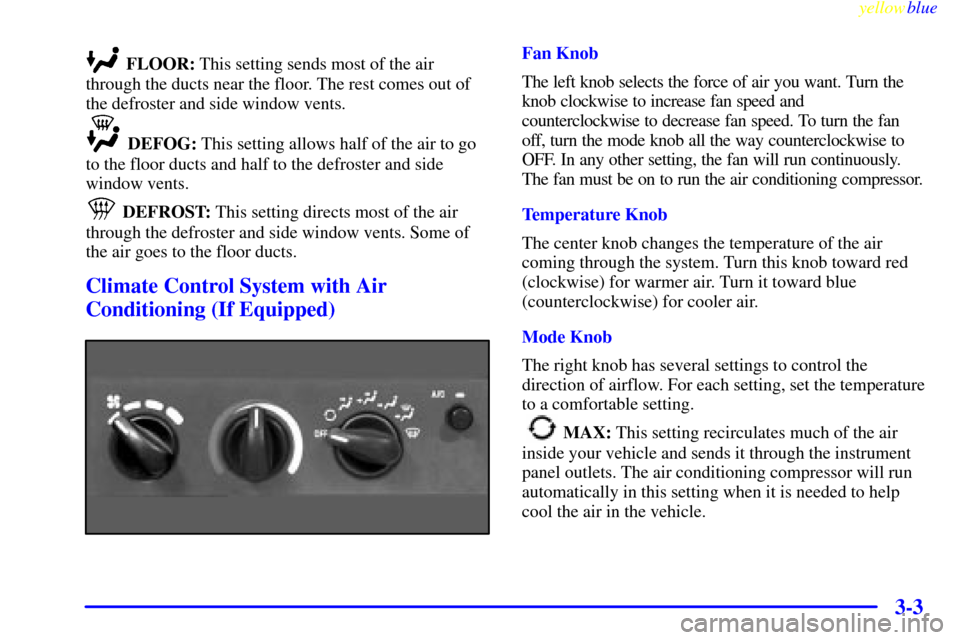
Fan Knob
The left knob selects the force of air you want. Turn the
knob clockwise to increase fan speed and
counterclockwise to decrease fan speed. To turn the fan
off, turn the mode knob all the way counterclockwise to
OFF. In any other setting, the fan will run continuously.
The fan must be on to run the air conditioning compressor.
Temperature Knob
The center knob changes the temperature of the air
coming through the system. Turn this knob toward red
(clockwise) for warmer air. Turn it toward blue
(counterclockwise) for cooler air.
Mode Knob
The right knob has several settings to control the
direction of airflow. For each setting, set the temperature
to a comfortable setting.
MAX: This setting recirculates much of the air
inside your vehicle and sends it through the instrument
panel outlets. The air conditioning compressor will run
automatically in this setting when it is needed to help
cool the air in the vehicle.
Page 147 of 368

yellowblue
3-7
Audio Systems
Your Delco Electronics audio system has been designed
to operate easily and give years of listening pleasure.
You will get the most enjoyment out of it if you acquaint
yourself with it first. Find out what your Delco
Electronics system can do and how to operate all its
controls, to be sure you're getting the most out of the
advanced engineering that went into it.
Setting the Clock for Systems without
Automatic Tone Control
Press SET. SET will appear on the display for five
seconds. Within five seconds, press and hold the right
arrow on the SEEK button until the correct minute
appears. Press and hold the left arrow on the SEEK
button until the correct hour appears.
Setting the Clock for Systems with
Automatic Tone Control
Press and hold HR until the correct hour appears. Press
and hold MN until the correct minute appears.
AM-FM Stereo
Playing the Radio
VOLUME: This knob turns the system on and off and
controls the volume. To increase volume and turn the radio
on, turn the knob clockwise. Turn it counterclockwise to
decrease volume and turn the radio off.
RECALL: Display the time with the ignition off by
pressing the RECALL knob. When the radio is playing,
press this button to recall the station frequency.
Page 149 of 368

yellowblue
3-9 AM-FM Stereo with Cassette Tape Player
(If Equipped)
Playing the Radio
VOLUME: This knob turns the system on and off and
controls the volume. To increase volume and turn the radio
on, turn the knob clockwise. Turn it counterclockwise to
decrease volume and turn the radio off.
RECALL: Display the time with the ignition off by
pressing the RECALL knob. When the radio is playing,
press this button to recall the station frequency.Finding a Station
AM
-FM: Press the lower knob to switch between AM,
FM1 and FM2. The display shows your selection.
TUNE: Turn the lower knob to choose radio stations.
SEEK: Press the right or left arrow to go to the next
higher or lower station and stay there.
PUSHBUTTONS: The four numbered pushbuttons
let you return to your favorite stations. You can set up
to 21 stations (seven AM, seven FM1, and seven FM2 ).
Just:
1. Turn the radio on.
2. Press AM
-FM to select the band.
3. Tune in the desired station.
4. Press SET. (SET will appear on the display.)
5. Press one of the four numbered buttons, within five
seconds. Whenever you press that numbered button,
the station you set will return.
6. Repeat the steps for each pushbutton.