Page 75 of 368

If the ignition is off and
any door is open, the
SECURITY light will flash,
reminding you to activate
the system.
The light will also flash i")
yellowblue
2-15
Theft-Deterrent System (If Equipped)
If the ignition is off and
any door is open, the
SECURITY light will flash,
reminding you to activate
the system.
The light will also flash if the battery has been
disconnected and reconnected. To arm the system, do
the following:
1. Open the door.
2. Lock the door using the power door lock or the
remote keyless entry transmitter. The SECURITY
light should come on and stay on.
3. Close all the doors. The SECURITY light should go
off within about 30 seconds.
The horn will sound and the lamps will flash for about
30 seconds when the door or trunk is opened without the
key or the remote keyless entry transmitter. The horn
also sounds if the locks are damaged.Remember, the theft
-deterrent system won't activate if
you lock the doors with a key or use the manual door
lock. It activates only if you use a power door lock
button or the remote keyless entry transmitter.
To avoid activating the alarm by accident:
�Always unlock a door with a key or use the remote
keyless entry transmitter. (Pressing the unlock button
on the remote keyless entry transmitter disables the
theft
-deterrent system.) Unlocking a door any other
way will activate the alarm. Cycling the ignition
without disarming the theft
-deterrent system will
also activate the alarm.
�The vehicle should be locked with the door key after
the doors are closed if you don't want to activate the
theft
-deterrent system.
If you activate the alarm by accident, unlock any door
with your key. You can also turn off the alarm by using
the unlock button of the remote keyless entry
transmitter. The alarm won't stop if you try to unlock a
door any other way.
Page 76 of 368

yellowblue
2-16 Testing the Alarm
1. From inside the vehicle, roll down the window, then
get out of the vehicle, keeping the door open.
2. From outside of the vehicle, with the door open, lock
the vehicle using the power door lock or the remote
keyless entry transmitter and close the door. Wait
30 seconds until the SECURITY light goes off.
3. Reach in and unlock the door using the manual lock
and open the door. The horn will sound and the
headlamps will flash.
If the alarm does not sound when it should, check to see
if the horn works. The horn fuse may be blown. To
replace the fuse, see ªFuses and Circuit Breakersº in the
Index. If the fuse does not need to be replaced, you may
need to have your vehicle serviced.
To reduce the possibility of theft, always activate the
theft
-deterrent system when leaving your vehicle.
Valet Lockout Button
Pressing the VALET
lockout button located
inside the glove box to ON
will disable the use of the
power trunk, fuel door and
garage door openers.
Pressing this button again
will make these features
reusable. Locking the
glove box with the door
key will also help to secure
your vehicle.
Note: The remote keyless entry transmitter can't be used
to open the trunk or fuel door if the VALET lockout
button is in the ON position.
Page 108 of 368

yellowblue
2-48 Map Lamps
These lamps are located in the front overhead panel.
Press the button to turn them on. Press it again to turn
them off.
Inadvertent Power Battery Saver
This feature is designed to protect your vehicle's
battery against drainage from the interior lamps,
trunk lamp, glove box lamp, cigarette lighters or the
garage door opener. When the ignition is turned off, the
power to these features will automatically turn off after
10 minutes (three minutes if a new car has 15 miles
(24 km) or less). Power will be restored for an additional
10 minutes if any door is opened, the trunk is opened or
the courtesy lamp switch is turned on.
Storage Mode Personalization
This feature is for long-term use and must be
programmed through the Driver Information Center
(DIC) while the ignition is in RUN. Storage mode
personalization protects the battery by placing your
vehicle in a storage mode so that the radio, amplifiers,
instrument cluster and remote keyless entry will not
drain the battery over a long period of time. For
programming information, see ªMemory and
Personalization Featuresº in the Index.
Page 114 of 368

Your vehicle may be equipped with a rear seat armrest
which includes an open storage compartment and a dual
cupholder that unfolds for use. To o")
yellowblue
2-54 Rear Storage Armrest (If Equipped)
Your vehicle may be equipped with a rear seat armrest
which includes an open storage compartment and a dual
cupholder that unfolds for use. To open, lift the front
edge. (This feature is available on vehicles with leather
interiors only.)
Convenience Net
The convenience net is located inside the back wall of
the trunk. Put small loads, like grocery bags, behind the
net. It can help keep them from falling over during sharp
turns or quick starts and stops.
The net is not for larger, heavier loads. Store them in the
trunk as far forward as you can. When not using the net,
hook the net to the tabs securing it to the sill plate.
Ashtrays and Cigarette Lighter
NOTICE:
Don't put papers or other flammable items
into your ashtrays. Hot cigarettes or other
smoking materials could ignite them, causing a
damaging fire.
Front Ashtray
With the full center console (available on DeVille
Concours only), the ashtray is located below the climate
control system. To open, press on the lower edge of the
cover. To clean the ashtray, lift it out by gripping the
sides. For vehicles without the center console, pull the
tray out to reveal the ashtray. The tray is located beneath
the radio. To clean this ashtray, lift it out by pulling on
the snuffer.
Page 149 of 368

yellowblue
2-89
TRACTION ENGAGED - 91 : When your traction
control system is limiting wheel spin, the TRACTION
ENGAGED message will be displayed. Slippery road
conditions may exist if this message is displayed, so
adjust your driving accordingly. This message will stay
on for a few seconds after the traction control system
stops limiting wheel spin.
TRACTION OFF
- 89: This message will be displayed
after the traction control has been turned off.
TRACTION READY
- 90: This message informs the
driver that the traction control system is available. This
occurs when the traction on/off button in the glove box
has been returned to an on position (pressing the button
once turns the traction control system off: pressing the
button again turns the system back on). This message
also self
-cancels after five seconds.
TRACTION SUSPENDED
- 56: This message
displays when the traction control system has been
temporarily shut off because your vehicle's brakes have
overheated. This message does not indicate a problem
with your vehicle's traction control system. After a
few minutes, the traction control system will be
available again and the TRACTION READY
message will appear.TRANS FLUID RESET
- 48: With the engine not
running and the ignition on, press and hold the OFF
and rear defog buttons until the TRANS FLUID
RESET message appears on the DIC (between five
and 20 seconds).
TRANS HOT IDLE ENG
- 112: This messages
indicates that the transaxle fluid in your vehicle is too
hot. Stop and allow your vehicle to idle until it cools
down or until this message is removed.
TRUNK OPEN
- 24: This message indicates that the
trunk is open when your vehicle's ignition is in RUN.
TURN SIGNAL ON
- 20: This message is a reminder,
after driving about 1 mile (1.6 km/h), that you have the
turn signal on. A multiple chime will also sound when
this message is displayed.
VEHICLE OVERSPEED
- 52: A failure in the
suspension control system has occurred when this
message appears. The PCM determines the speed your
vehicle is limited to. Have your vehicle serviced if this
message appears.
VEHICLE SPEED LIMITED TO XXX MPH
(KM/H)
- 113: A failure in the suspension control system
has occurred when this message appears. The PCM
determines the speed your vehicle is limited to. Have your
vehicle serviced if this message appears. The XXX will
indicate the speed your vehicle will be limited to.
Page 157 of 368

3-
yellowblue
3-1
Section 3 Comfort Controls and Audio Systems
In this section, you'll find out how to operate the comfort control and audio systems offered with your vehicle. Be
sure to read about the particular systems supplied with your vehicle.
3
-2 Comfort Controls
3
-2 Digital Cluster Climate Control Panel
(DeVille and DeVille d'Elegance Only)
3
-6 Analog Cluster Climate Control Panel
(DeVille Concours Only)
3
-9 Electronic Solar Sensor
3
-10 Air Conditioning
3
-10 Heating
3
-10 Defogging and Defrosting
3
-11 Rear Window Defogger
3
-12 Ventilation System
3
-13 HVAC Steering Wheel Controls
3
-13 Climate Control Personalization (If Equipped)
3
-14 Audio Systems
3
-14 Setting the Clock
3
-14 AM-FM Stereo with Cassette Tape Player
3
-18 AM-FM Stereo with Cassette Tape and
Compact Disc Player (If Equipped)3
-22 AM-FM Stereo with Cassette Tape and
Compact Disc Player with Radio Data
Systems (RDS) and Digital Signal Processing
(DPS) (If Equipped)
3
-31 Radio Data Systems (RDS) Program Type
(PTY) Selections
3
-32 CD Adapter Kits
3
-32 Trunk-Mounted CD Changer (If Equipped)
3
-36 Radio Personalization with Home and Away
Feature (If Equipped)
3
-37 Theft-Deterrent Feature
3
-37 Audio Steering Wheel Controls
3
-38 Understanding Radio Reception
3
-38 Tips About Your Audio System
3
-39 Care of Your Cassette Tape Player
3
-40 Care of Your Compact Discs
3
-41 Care of Your Compact Disc Player
3
-41 Power Antenna Mast Care
Page 188 of 368

yellowblue
3-32 CD Adapter Kits
It is possible to use a CD adapter kit with your cassette
tape player after activating the bypass feature on your
tape player.
To activate the bypass feature, use the following steps:
1. Turn the ignition to RUN or ACCESSORY.
2. Turn the radio off.
3. Press and hold the SOURCE button for two seconds.
The tape symbol on the display will flash three
times, indicating the feature is active.
4. Insert the adapter.
This override routine will remain active until the eject
button is pressed.
Trunk-Mounted CD Changer (If Equipped)
With the compact disc changer, you can play up to
12 discs continuously. Normal size discs may be
played using the trays supplied in the magazine. The
smaller discs (8 cm) can be played only with specially
designed trays.
NOTICE:
Objects in the trunk which may shift or slide
during driving could damage your CD changer.
Protect your CD changer by using the
convenience net whenever possible. Place large
objects in the trunk appropriately so that they
will not come into contact with the CD changer.
Page 223 of 368
yellowblue
4-25
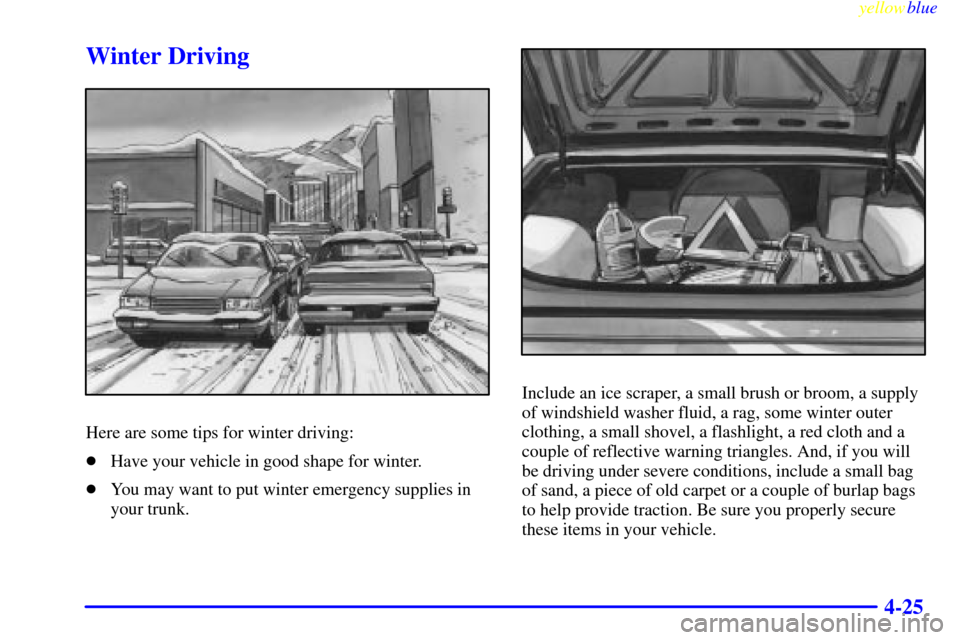
Winter Driving
Here are some tips for winter driving:
�Have your vehicle in good shape for winter.
�You may want to put winter emergency supplies in
your trunk.
Include an ice scraper, a small brush or broom, a supply
of windshield washer fluid, a rag, some winter outer
clothing, a small shovel, a flashlight, a red cloth and a
couple of reflective warning triangles. And, if you will
be driving under severe conditions, include a small bag
of sand, a piece of old carpet or a couple of burlap bags
to help provide traction. Be sure you properly secure
these items in your vehicle.