1998 TOYOTA TACOMA manual radio set
[x] Cancel search: manual radio setPage 105 of 246
'98 Tacoma (U)105
YOUR RADIO ANTENNA
To lower a manual antenna, carefully push
it down.
To lower a power antenna, turn off the
audio system by pushing ºPWR´VOLº or
ºVOL/PWRº, or turn the ignition key to
ºLOCKº.
On some models, the power antenna auto-
matically retracts when the radio mode is
switched off to turn on the cassette tape
player.
YOUR CASSETTE PLAYER
When you insert a cassette, the exposed
tape should be to the right.
NOTICE
Do not oil any part of the player and
do not insert anything other than cas-sette tapes into the slot, or the tape
player may be damaged.
YOUR COMPACT DISC PLAYER
When you insert a disc, gently push it in
with the label side up. (The player will
automatically eject a disc if the label side
is down.) The compact disc player will
play from track 1 through the end of the
disc. Then it will play from track 1 again.
NOTICE
Never try to disassemble or oil any
part of the compact disc player. Donot insert anything except a compact disc into the slot.
8 cm (3 in.) compact disc singles
Your compact disc player does not need
an adaptor to play compact disc singles.
Compact disc singles are about 8 cm (3
in.) in diameter- smaller than standard
discs.
After you eject a compact disc single, do
not insert a standard 12 cm (5 in.) disc
until ºDISCº disappears from the display.
NOTICE
Do not use an adaptor for compact
disc singles
'it could cause tracking
errors or interfere with the ejection of
compact discs.
Page 112 of 246
'98 Tacoma (U)
11 2
1 2 3 4 5 6 (Preset buttons)
These buttons are used to preset and
tune in radio stations.
To preset a station to a button: Tune in
the desired station (see ºTUNEº button).
Push and hold down the button until you
hear a beep
'this will set the station to
the button. The button number will appear
on the display.
To tune in to a preset station: Push the
button for the station you want. The but-
ton number and station frequency will ap-
pear on the display.
These systems can store one AM and two
FM stations for each button (The display
will show ºAMº, ºFM1º or ºFM2º when you
push ºAMº or ºFMº).
(Eject button)
Push this button to eject a cassette.
After you turn the ignition to ºLOCKº, you
will be able to eject a cassette but you
will not be able to reinsert it.
(Reverse/Fast forward buttons)
Cassette Player
Push the fast forward button to fast for-
ward a cassette tape. ºFFº will appear on
the display. Push the reverse button to
rewind a tape. ºREWº will appear on the
display.
To stop the tape while it is fast forward-
ing, push the fast forward button or
ºTAPEº; to stop the tape while it is re-
winding, push the reverse button or
ºTAPEº.
If a tape side rewinds completely, the cas-
sette player will stop and then play that
same side. If a tape fast forwards com-
pletely, the cassette player will play the
other side of the tape, using the auto- re-
verse feature.
Compact Disc Player
If you want to fast forward or reverse
through a compact disc track, push and
hold in the fast forward or reverse button.
When you release the button, the compact
disc player will resume playing. AM
Push ºAMº to switch the AM band. ºAMº
will appear on the display.
If the audio system is off, you can turn
on the radio by pushing ºAMº. Also, push
ºAMº to switch from cassette or compact
disc operation to radio operation.
AUDIO CONTROL / MODE
Manual tone adjustment functionÐ
This knob is used to adjust the tone
manually.
For low- pitch tone adjustment, push
ºAUDIO CONTROL / MODEº repeatedly
until ºBASº appears on the display. Then
turn the knob to suit your preference.
The display will show the range from
ºBAS -5º to ºBAS 5º.
For high- pitch tone adjustment, push
ºAUDIO CONTROL / MODEº repeatedly
until ºTREº appears on the display. Then
turn the knob to suit your preference.
The display will show the range from
ºTRE -5º to ºTRE 5º.
Page 118 of 246

'98 Tacoma (U)
11 8
1 2 3 4 5 6 (Preset buttons)
These buttons are used to preset and
tune in radio stations.
To preset a station to a button: Tune in
the desired station (see ºTUNEº button).
Push and hold down the button until you
hear a beep
'this will set the station to
the button. The button number will appear
on the display.
To tune in to a preset station: Push the
button for the station you want. The but-
ton number and station frequency will ap-
pear on the display.
These systems can store one AM and two
FM stations for each button (The display
will show ºAMº, ºFM1º or ºFM2º when you
push ºAM´FMº).
(Eject button)
Push this button to eject a compact disc.
After you turn the ignition to ºLOCKº, you
will be able to eject a disc but you will
not be able to reinsert it.
(Reverse/Fast forward buttons)
If you want to fast forward or reverse
through a compact disc track, push and
hold in the fast forward or reverse button.
When you release the button, the compact
disc player will resume playing. AM
FM
Push ºAM
F Mº to switch between the AM
and FM bands. ºAMº, ºFM1º or ºFM2º will
appear on the display. These systems al-
low you to set twelve FM stations, two for
each button.
If the audio system is off, you can turn
on the radio by pushing ºAM
FMº. Also,
push ºAM
F Mº to switch from compact
disc operation to radio operation.
AUDIO CONTROL / MODE
Manual tone adjustment functionÐ
This knob is used to adjust the tone
manually.
For low- pitch tone adjustment, push
ºAUDIO CONTROL / MODEº repeatedly
until ºBASº appears on the display. Then
turn the knob to suit your preference.
The display will show the range from
ºBAS -5º to ºBAS 5º. For high- pitch tone adjustment, push
ºAUDIO CONTROL / MODEº repeatedly
until ºTREº appears on the display. Then
turn the knob to suit your preference.
The display will show the range from
ºTRE -5º to ºTRE 5º.
Sound balance adjustment functionÐ
This knob is also to adjust the sound
balance between the front and rear, and
the right and left speakers.
For front/rear adjustment, push ºAUDIO
CONTROL / MODEº repeatedly until ºFAdº
appears on the display. Then turn the
knob to adjust the front/rear balance.
The display will show the range from ºFAd
F7º to ºFAd R7º.
For left/right adjustment, push ºAUDIO
CONTROL / MODEº repeatedly until ºBALº
appears on the display. Then turn the
knob to adjust the left/right balance.
The display will show the range from ºBAL
L7º to ºBAL R7º.
Page 219 of 246
'98 Tacoma (U)219
If the headlights or other electrical
components do not work, check the
fuses. If any of the fuses are blown,
they must be replaced.
See ºFuse locationsº in Chapter 7- 1 for
locations of the fuses.
Turn the ignition switch and inoperative
component off. Pull a suspected fuse
straight out and check it.
Determine which fuse may be causing the
problem. The lid of the fuse box shows
the name of the circuit for each fuse. See
Part 8 of this manual for the functions
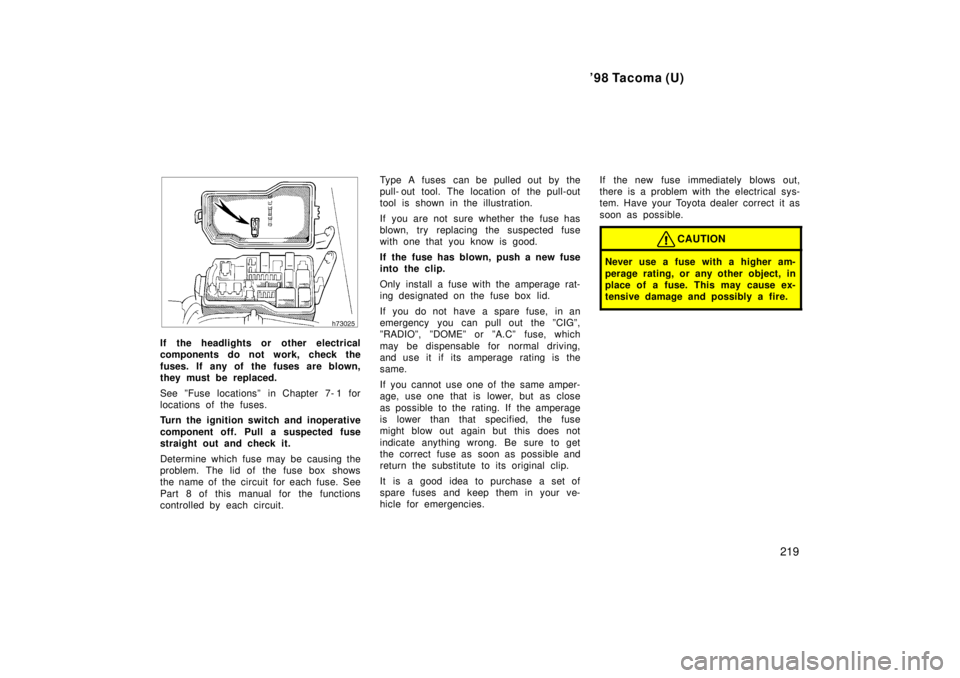
controlled by each circuit. Type A fuses can be pulled out by the
pull- out tool. The location of the pull-out
tool is shown in the illustration.
If you are not sure whether the fuse has
blown, try replacing the suspected fuse
with one that you know is good.
If the fuse has blown, push a new fuse
into the clip.
Only install a fuse with the amperage rat-
ing designated on the fuse box lid.
If you do not have a spare fuse, in an
emergency you can pull out the ºCIGº,
ºRADIOº, ºDOMEº or ºA.Cº fuse, which
may be dispensable for normal driving,
and use it if its amperage rating is the
same.
If you cannot use one of the same amper-
age, use one that is lower, but as close
as possible to the rating. If the amperage
is lower than that specified, the fuse
might blow out again but this does not
indicate anything wrong. Be sure to get
the correct fuse as soon as possible and
return the substitute to its original clip.
It is a good idea to purchase a set of
spare fuses and keep them in your ve-
hicle for emergencies.
If the new fuse immediately blows out,
there is a problem with the electrical sys-
tem. Have your Toyota dealer correct it as
soon as possible.
CAUTION
Never use a fuse with a higher am-
perage rating, or any other object, in
place of a fuse. This may cause ex-
tensive damage and possibly a fire.