1998 PONTIAC GRAND PRIX clock
[x] Cancel search: clockPage 11 of 402

2-Way Manual Lumbar (If Equipped)
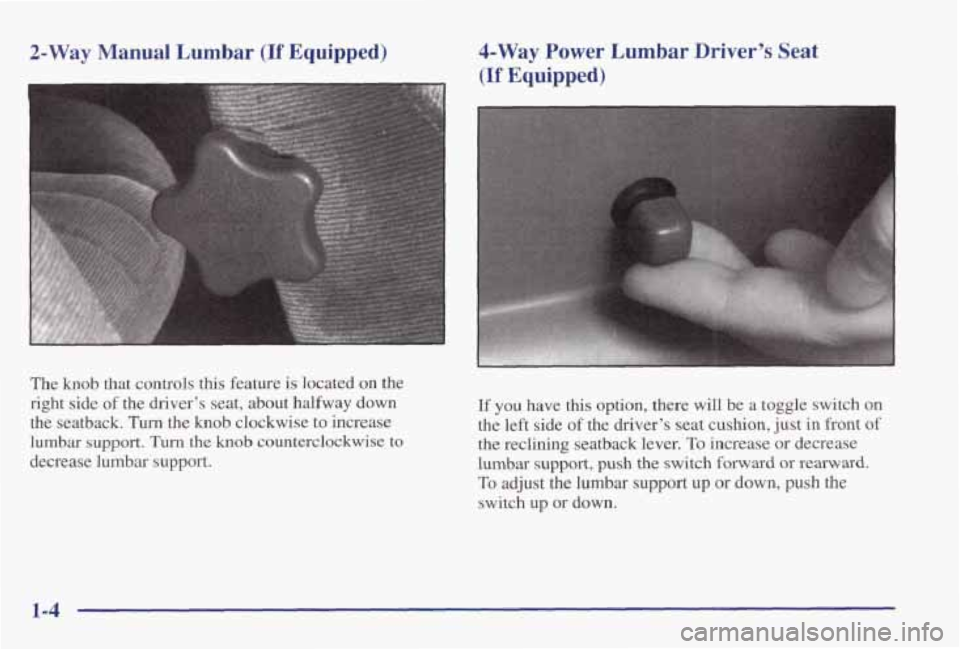
The knob that controls this feature is located on the
right side
of the driver's seat, about halfway down
the seatback.
Turn the knob clockwise to increase
lumbar
support. Turn the knob counterclockwise to
decrease lumbar support.
4-Way Power Lumbar Driver's Seat
(If Equipped)
I
If you have this option, there will be a toggle switch on
the left side
of the driver's seat cushion, just in front of
the reclining seatback lever.
To increase or decrease
lumbar support,
push the switch forward or rearward.
To adjust the lumbar support up or down, push the
switch up or down.
1-4
Page 82 of 402

Rear Door Security Locks (4-Door Models)
Your vehicle is equipped with rear door security locks that
help prevent passengers from opening the rear doors
of
your vehicle from the inside. To use one of these locks:
1.
2.
Open one of the
rear doors.
On the inside
of the rear
door will be a lock.
Insert your master key
into this lock and
turn
it counterclockwise.
This will engage the
safety lock.
3. Close the door.
4. Do the same thing to the other rear door lock.
The rear doors
of your vehicle cannot be opened from
the inside when this feature is
in use. If you want to
open the rear door when the security lock is on, unlock
the door from the inside and then open the door from
the outside.
Leaving Your Vehicle
If you are leaving the vehicle, take your keys, open your
door and set the locks from inside. Then get out and
close the door.
Remote Keyless Entry System
(If Equipped)
If your vehicle has this option, you can lock and unlock
your doors or unlock your
trunk from about 3 feet (1 m)
up to 30 feet (9 m) away using the remote keyless entry
transmitter supplied with your vehicle.
Your remote keyless
entry system operates on a radio
frequency subject to Federal Communications Commission (FCC) Rules and
with Industry Canada.
This device complies
with Part 15 of the FCC Rules.
Operation is subject to the following two conditions:
(1) this device may not cause harmful interference, and
(2) this device must accept any interference received,
including interference that may cause
undesired operation.
Page 160 of 402

P
Section 3 Comfort Controls and Audio Systems
In this section, you’ll find out how to operate the comfort control \
and audio systems offered with your vehicle. Be
sure to read about the particular systems supplied with your v\
ehicle.
3-2
3-2
3-4
3-8
3-9
3-10
3-10
3- 10
3-1 1
3-12
3-16
Comfort Controls
Air Conditioning with Electronic Controls
Air Conditioning with Automatic and
Auxiliary Temperature Control
(If Equipped)
Ventilation System
Rear Window Defogger Audio System Setting the Clock for
AM-FM Stereo
Setting
the Clock for All Systems Except
AM-FM Stereo
AM-FM Stereo
AM-FM Stereo with Cassette Tape Player
(If Equipped)
AM-FM Stereo with Cassette Tape Player and
Equalizer (If Equipped) 3-19
3-22
3-24
3-27
3-29
3-30
3-30
3-3 1
3-32
3-32
3-32 3-32
AM-FM Stereo with Compact Disc Player
(If Equipped)
AM-FM Stereo with Compact Disc Player and
Equalizer
(If Equipped)
Trunk Mounted CD Changer (If Equipped)
Theft-Deterrent Feature
Audio Steering Wheel Controls
(If Equipped)
Understanding Radio Reception
Tips About Your Audio System
Care of
Your Cassette Tape Player
Care
of Your Compact Discs
Care
of Your Compact Disc Player
Fixed Mast Antenna
Backglass Antenna
(If Equipped)
Page 169 of 402

The rear window defogger uses a warming grid to
remove fog from the rear window. Press the button to
turn the rear defogger on. It will turn itself off after
about ten minutes.
If you turn it on again, the rear defogger will only run
for about five minutes before
turning off. You can also
turn it off by pressing the button again.
Do not attach anything like a temporary vehicle license
or decal across the defogger grid.
NOTICE:
Don’t use a razor blade or anything else sharp on
the inside
of the rear window. If you do, you
could cut or damage the warming grid,
and the
repairs wouldn’t be covered by your warranty.
Audio Systems
Your Delco Electronics audio system has been designed
to operate easily and give years of listening pleasure,
You will get the most enjoyment out
of it if you acquaint
yourself with it
first. Find out what your Delco
Electronics system can do and how
to operate all its
controls, to be sure you’re getting the most
out of the
advanced engineering that went into it.
Setting the Clock for AM-FM Stereo
Press SET. Within five seconds, press and hold the
SEEK down arrow until the correct hour appears on the
display. Press
and hold the SEEK up arrow until the
correct minute appears on the display.
Setting the Clock for All Systems Except
AM-FM Stereo
Press and hold HR until the correct hour appears. Press
and hold MIN until the correct minute appears. There
will be a two-second delay before the clock goes into
time-set mode,
and the colon on the display will blink
while in this mode.
3-10
Page 170 of 402

AM-FM Stereo Finding a Station
AM-FM: Press this button to switch between AM and
FM. The display shows your selection.
TUNE: Turn the lower knob to choose radio stations.
SEEK: Press the up or down arrow to go to the next
higher or lower station and stay there.
PUSHBUTTONS: The four numbered pushbuttons let
you return to your favorite stations. You can set up to
14 stations (seven AM and seven FM). Just:
1. Turn the radio on.
Playing the Radio
PWR-VOLUME:
This knob turns the system on and
off and controls the volume. To turn the radio on and to
increase volume,
turn the knob to the right. Turn it to the
left to decrease volume and to turn the radio
off.
RCL: Press this knob to recall the station being played
or to display the clock.
2. Press AM-FM to select the band.
3. Tune in the desired station.
4. Press SET. (SET will appear
on the display.)
5. Press one of the four numbered pushbuttons within five seconds. Whenever you press that numbered
pushbutton, the station you set will return.
6. Repeat the steps for each pushbutton.
3-11
Page 181 of 402

AM-FM Stereo with Compact Disc Player
and Equalizer
(If Equipped)
Playing the Radio
POWER-VOL: Press this knob to turn the system on
and
off. To increase volume, turn the knob to the right.
Turn it
to the left to decrease volume.
RECALL: Press this button briefly to recall the station
being played or to display the clock. If
you press the
knob when the ignition is
off, the clock will show for a
few seconds.
Finding a Station
AM-FM: Press this button to switch between AM, FM1
and FM2. The display shows your selection.
TUNE: Press this knob lightly so it extends. Turn it to
choose radio stations. Push the knob back into its stored
position when you’re not using it.
SEEK: Press the up or down arrow to go to the next
higher or lower station and stay there.
PUSHBUTTONS: The six numbered pushbuttons let
you return to
your favorite stations. You can set up to
18 stations (six AM, six FM1 and six FMZ). Just:
1. Turn the radio on.
2. Press AM-FM to select the band.
3. Tune in the desired station.
4. Press and hold one of the six numbered buttons until
SET appears on the display. Whenever you press that
numbered button, the station
you set will return.
5. Repeat the steps for each pushbutton.
Setting the Tone
EQUALIZER: A seven band equalizer is part of your
audio system. Slide the levers
up to boost or down to
reduce frequency range.
3-22
Page 207 of 402

An emergency like this requires close attention and a
quick decision.
If you are holding the steering wheel at
the recommended
9 and 3 o’clock positions, you can
turn it a full 180 degrees very quickly without removing
either hand. But you have to act fast, steer
quickly, and
just as quickly straighten the wheel once you have
avoided the object.
The fact that such emergency situations are always
possible is a good reason to practice defensive driving at
all times and
wear safety belts properly.
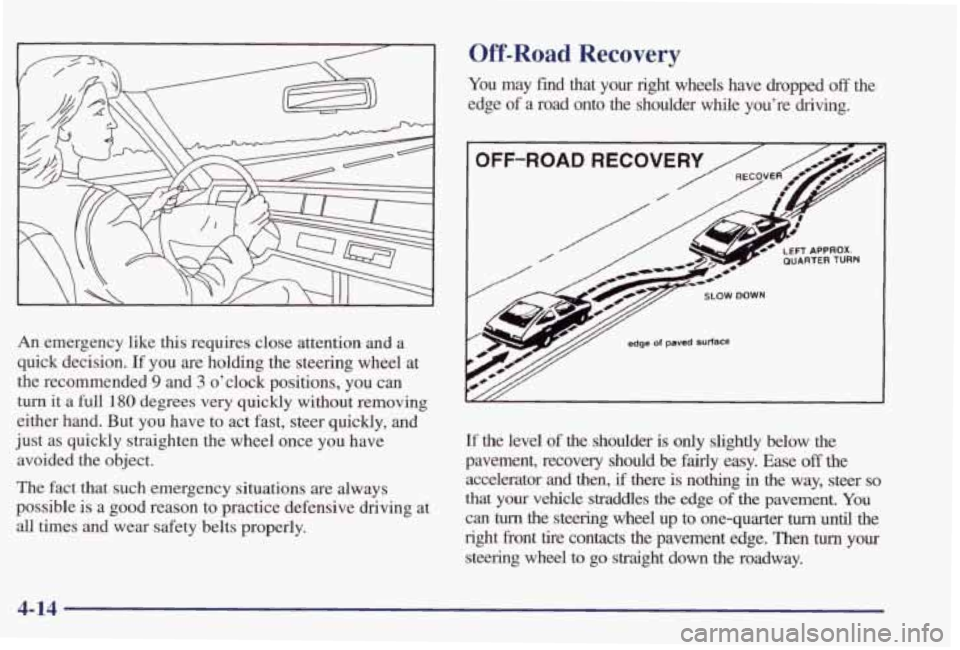
Off-Road Recovery
You may find that your right wheels have dropped off the
edge
of a road onto the shoulder while you’re driving.
LEFT APPROX. WARTER TURN
edge of pamd wrfsco
If the level of the shoulder is only slightly below the
pavement, recovery should
be fairly easy. Ease off the
accelerator and then, if there is nothing in the way, steer so
that your vehicle straddles the edge of the pavement. You
can turn the steering wheel up to one-quarter turn until the
right front tire contacts the pavement edge. Then turn your
steering wheel to go straight down the roadway.
4-14
Page 258 of 402

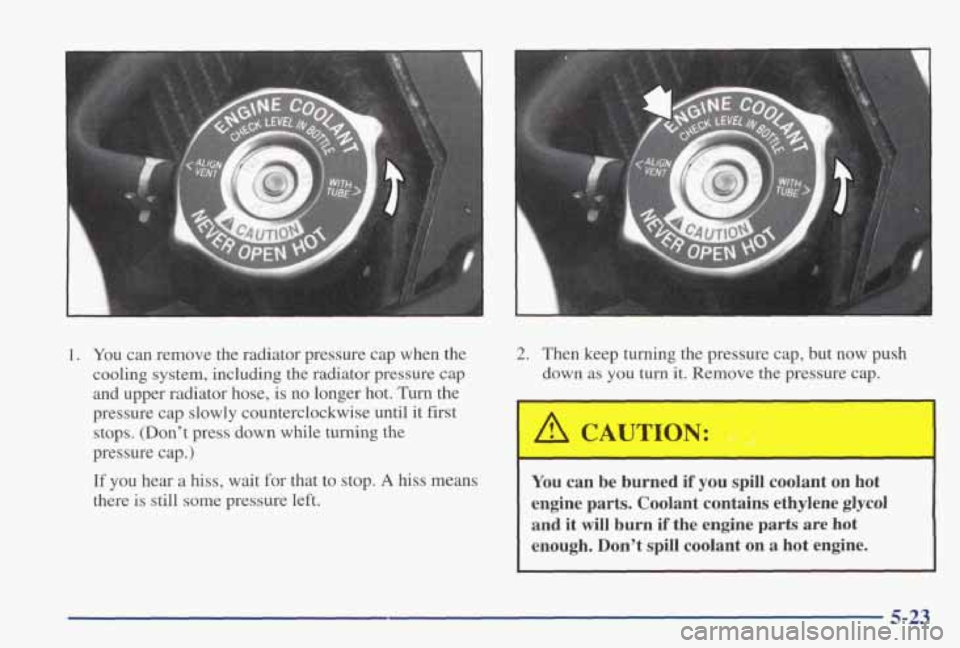
1. You can remove the radiator pressure cap when the
cooling system, including the radiator pressure cap
and upper radiator hose,
is no longer hot. Turn the
pressure cap slowly counterclockwise until
it fist
stops. (Don't press
down while turning the
pressure cap.)
If you hear a hiss, wait for that to stop. A hiss means
there
is still some pressure left.
2. Then keep turning the pressure cap, but now push
down
as you turn it. Remove the pressure cap.
You can be burned if you spill coolant on hot
engine parts. Coolant contains ethylene glycol
and it will burn if the engine parts are hot
enough. Don't spill coolant on
a hot engine.
5-23