Page 88 of 402

Parking Lots Theft
Vehicle theft is big business, especially in some cities.
Although your vehicle has
a number of theft-deterrent
features, we know that nothing we put on it can make
it impossible to steal. However, there are ways you
can help.
Key in the Ignition
If you leave your vehicle with the keys inside, it’s an
easy target for joy riders or professional thieves -- so
don’t do it.
When you park your vehicle and open the driver’s door,
you’ll hear a chime reminding you to remove your key
from
the ignition and take it with you. Always do this.
Your steering wheel will be locked, and so will your
ignition and transaxle. And remember to lock the doors.
Parking at Night
Park in a lighted spot, close all windows and lock your
vehicle. Remember
to keep your valuables out of sight.
Put them in a storage area, or take them with you. If you park in
a lot where someone
will be watching
your vehicle, it’s best to
lock it up and take your keys.
But what if you have to leave your ignition key?
0
0
0
0
0
0
If possible, park in a busy, well lit area.
Put your valuables in a storage area, like your
trunk
or glove box. Be sure to close and lock the
storage area.
Close
all windows.
Lock
the glove box.
Lock all doors except
the driver’s.
Give the valet key to the valet. Then take the tnaster
key with you.
Page 92 of 402

LOCK (B): Before you put the key into the ignition
switch, the switch is in LOCK. It’s
also the only position
from which you can remove your key.
This position
locks your ignition, steering wheel and transaxle. It’s a
theft-deterrent feature.
OFF (C): This position lets you turn off the engine but
still turn the steering wheel. It doesn’t lock the steering
wheel like
LOCK. Use OFF if you must have your
vehicle pushed or towed.
RUN (D): This position is where the key returns
after you start your vehicle. With the engine
off, you
can use RUN to display some of your warning and
indicator lights.
START (E): This position starts your engine.
A warning chime will sound if you open the driver’s
door when the ignition is in
OFF, LOCK or
ACCESSORY and the key is in the ignition.
NOTICE:
If your key seem stuck in LOCK and you can’t
turn it, be sure you are using the correct key;
if
so, is it all the way in? If it is, then turn the
steering wheel left and right while
you turn the
key hard. But turn the key only with your hand.
Using a tool to force it could break the key
or the
ignition switch.
If none of this works, then your
vehicle needs service.
Retained Accessory Power
With retained accessory power, your power windows, audio system and sunroof will continue to work up to
10 minutes after the ignition key is turned to OFF and
none of the doors are opened.
Starting Your Engine
Move your shift lever to PARK (P) or NEUTRAL (N).
Your engine won’t start in any other position -- that’s a
safety feature.
To restart when you’re already moving,
use
NEUTRAL (N) only.
2-17
~~
Page 106 of 402
Parking Over Things '
.. . . .
& -"
---- e-" I
Things that can burn could touch hot exhaust
parts under your vehicle and ignite. Don't park
over papers, leaves, dry grass or other things that
can burn.
Engine Exhaust
Engine exhaust can kill. It contains the gas
carbon monoxide (CO), which you can't see or
smell. It can cause unconsciousness and death.
You might have exhaust coming in if:
0 Your exhaust system sounds strange
0 Your vehicle gets rusty underneath.
0 Your vehicle was damaged in a collision.
Your vehicle was damaged when driving
over high points on the road or over
road debris. or different.
Repairs weren't done correctly.
0 Your vehicle or exhaust system had been
If you ever suspect exhaust is coming into
your vehicle:
0 Drive it only with all the windows down to
0 Have your vehicle fixed immediately.
modified
improperly.
blow out any
CO; and
2-31
~~
Page 108 of 402

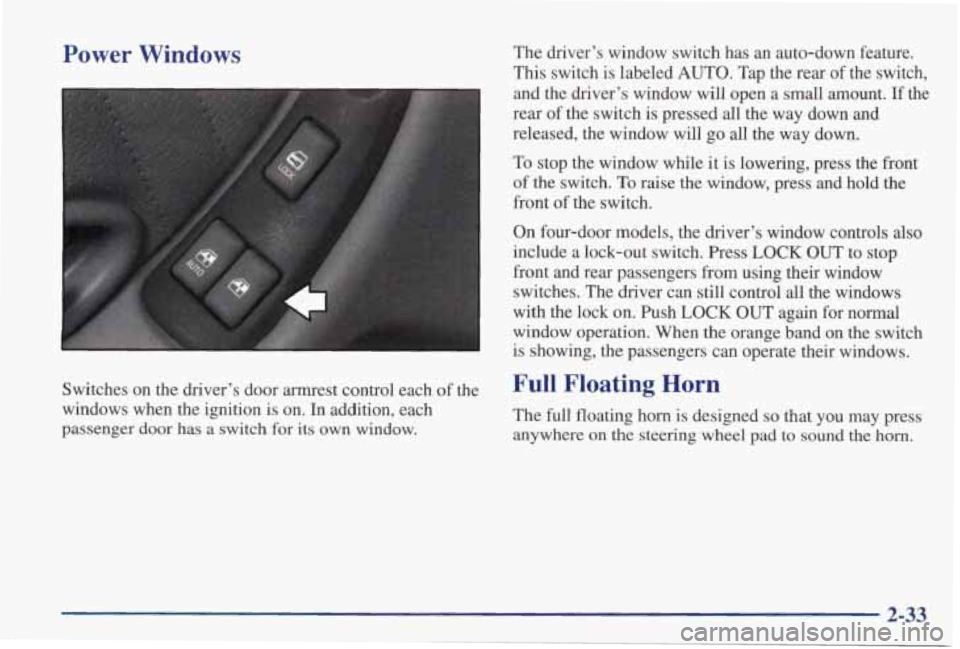
Power Windows
Switches on the driver’s door armrest control each of the
windows when the ignition
is on. In addition, each
passenger door has a switch
for its own window. The
driver’s window switch has an auto-down feature.
This switch is labeled AUTO. Tap the rear of the switch,
and the driver’s window will open a small amount.
If the
rear of the switch is pressed
all the way down and
released, the window will go
all the way down.
To stop the window while it is lowering, press the front
of the switch.
To raise the window, press and hold the
front of the switch.
On four-door models, the driver’s window controls also
include a lock-out switch. Press LOCK OUT to stop
front and rear passengers from using their window
switches. The driver can still control
all the windows
with the lock on. Push
LOCK OUT again for normal
window operation. When the orange band
on the switch
is showing, the passengers can operate their windows.
Full Floating Horn
The full floating horn is designed so that you may press
anywhere
on the steering wheel pad to sound the horn.
2-33
Page 128 of 402

One photocell on the front of the mirror senses when it
is becoming dark outside. Another photocell, facing
rearward, senses headlamps behind you.
To turn the
electrochromic feature
off, press the button on the
bottom of the mirror again.
To keep the photocells operating well, occasionally
clean them with a cotton swab and glass cleaner.
Power Outside Mirrors
The electric mirror control
is near the driver’s window,
on the armrest.
Turn the
control
to the left to adjust
the left mirror or to the right
to adjust the right mirror.
Then move the control in
the direction you want to
Convex Outside Mirror
Your passenger’s side mirror is convex. A convex
mirror’s surface is curved so you can see more from the
driver’s seat.
A CAUTION:
-
A convex mirror can make things (like other
vehicles) look farther away than they really are.
If you cut too sharply into the right lane, you
could hit a vehicle on your right. Check your
inside mirror or glance over your shoulder before changing lanes.
2-53
Page 136 of 402
The main components of your instrument panel are:
A. Side Window Defogger Vents
B. Fog Lamp Switch
C. Instrument Panel Vents
D. Interior Lamp Control
E. Exterior Lamp Control
E Instrument Panel Cluster
G. Comfort Controls
H. Audio System
I. Ashtray
J. Glove Box
IS. Trip Computer/Driver Information Center
2-61
Page 160 of 402

P
Section 3 Comfort Controls and Audio Systems
In this section, you’ll find out how to operate the comfort control \
and audio systems offered with your vehicle. Be
sure to read about the particular systems supplied with your v\
ehicle.
3-2
3-2
3-4
3-8
3-9
3-10
3-10
3- 10
3-1 1
3-12
3-16
Comfort Controls
Air Conditioning with Electronic Controls
Air Conditioning with Automatic and
Auxiliary Temperature Control
(If Equipped)
Ventilation System
Rear Window Defogger Audio System Setting the Clock for
AM-FM Stereo
Setting
the Clock for All Systems Except
AM-FM Stereo
AM-FM Stereo
AM-FM Stereo with Cassette Tape Player
(If Equipped)
AM-FM Stereo with Cassette Tape Player and
Equalizer (If Equipped) 3-19
3-22
3-24
3-27
3-29
3-30
3-30
3-3 1
3-32
3-32
3-32 3-32
AM-FM Stereo with Compact Disc Player
(If Equipped)
AM-FM Stereo with Compact Disc Player and
Equalizer
(If Equipped)
Trunk Mounted CD Changer (If Equipped)
Theft-Deterrent Feature
Audio Steering Wheel Controls
(If Equipped)
Understanding Radio Reception
Tips About Your Audio System
Care of
Your Cassette Tape Player
Care
of Your Compact Discs
Care
of Your Compact Disc Player
Fixed Mast Antenna
Backglass Antenna
(If Equipped)
Page 161 of 402

Comfort Controls
Air Conditioning with Electronic Controls
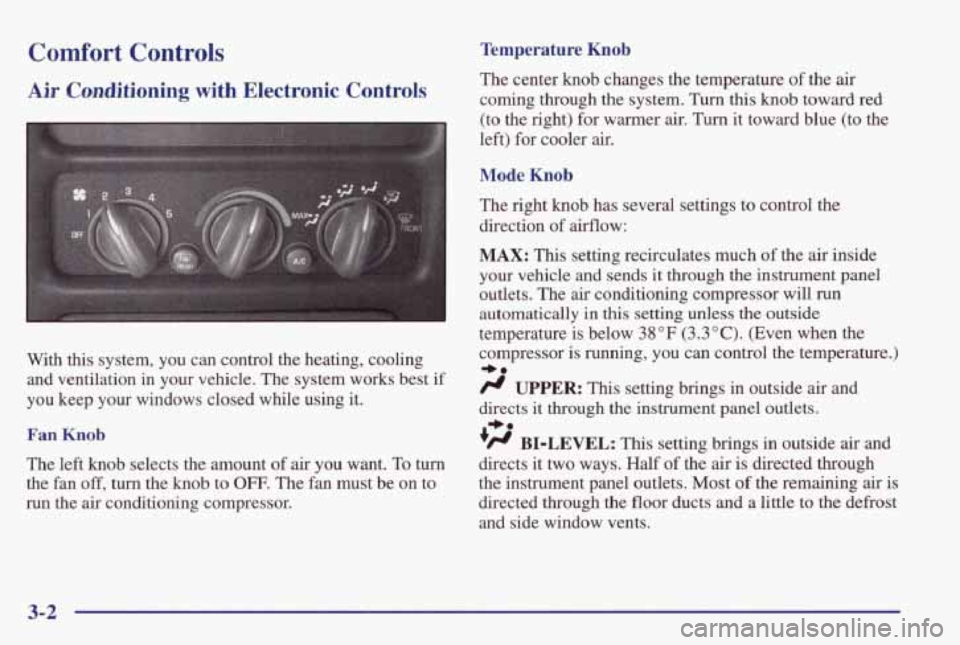
With this system, you can control the heating, cooling
and ventilation in your vehicle. The system works best if
you keep your windows closed while using it.
Fan Knob
The left knob selects the amount of air you want. To turn
the fan off, turn the knob to OFF. The fan must be on to
run the
air conditioning compressor.
Temperature Knob
The center knob changes the temperature of the air
coming through the system.
Turn this knob toward red
(to the right) for warmer
air. Turn it toward blue (to the
left) for cooler air.
Mode Knob
The right knob has several settings to control the
direction of airflow:
MAX: This setting recirculates much of the air inside
your vehicle and sends it through the instrument panel
outlets. The air conditioning compressor will
run
automatically in this setting unless the outside
temperature is below
38°F (3.3"C). (Even when the
compressor is running, you can control the temperature.)
/r UPPER: This setting brings in outside air and
directs
it through the instrument panel outlets.
'H BI-LEVEL: This setting brings in outside air and
directs it two ways. Half of the
air is directed through
the instrument panel outlets. Most
of the remaining air is
directed through the floor
ducts and a little to the defrost
and side window vents.
+e
+e
3-2