Page 7 of 444

The 1998 Oldsrnobile Silhouette Owner’s Manual
1-1
2-1
3-1
4-1
5-1
6- 1
7-1
8-1
9- 1
Seats and Restraint Systems
This section tells you how to use your seats and safety belts properly. It also explains the “SRS” system.
Features and Controls
This section explains how to start and operate your vehicle.
Comfort Controls and Audio Systems
This section tells you how to adjust the ventilation and comfort controls and how to operate your audio system.
Your Driving and the Road
Here you’ll find helpful information and tips about the road and how to drive under different conditions.
Problems on the Road
This section tells what to do if you have a problem while driving, such as a flat tire or overheated engine, etc.
Service and Appearance Care
Here the manual tells you how to keep your vehicle running properly and loolung good.
Maintenance Schedule
This section tells you when to perform vehicle maintenance and what fluids and lubricants to use.
Customer Assistance Information
This section tells you how to contact Oldsmobile for assistance and how to get service and owner publications.
It also gives
you information on “Reporting Safety Defects” on page 8-8.
Index
Here’s an alphabetical listing of almost every subject in this manual. You can use it to quickly find
something you want to read.
i
ProCarManuals.com
Page 11 of 444
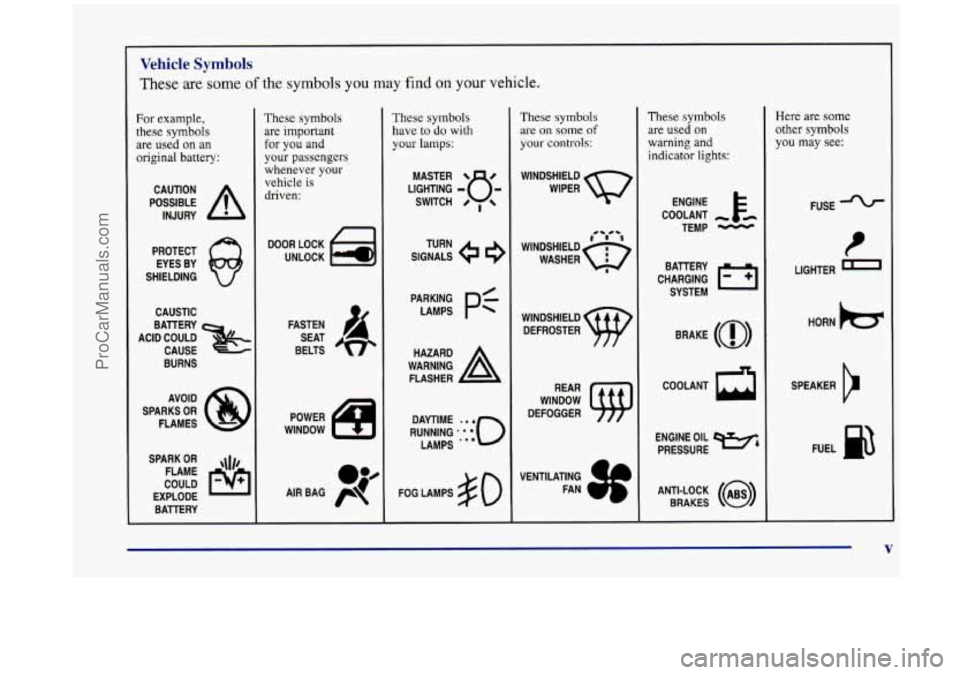
Vehicle Symbols
These are some of the symbols you may find on your vehicle.
For example,
these symbols are used on an
original battery:
POSSIBLE A
CAUTION
INJURY
PROTECT EYES BY
SHIELDING
CAUSTIC
ACID COULD BAllERY
CAUSE
BURNS
AVOID
SPARKS
OR
FLAMES
SPARK
OR ,\I/,
COULD FLAME
EXPLODE BAllERY
These symbols
are important
for you and
your passengers
whenever
your
vehicle is
driven:
DOOR LOCK
UNLOCK
FASTEN SEAT
BELTS
These symbols
have to do with
your lamps:
SIGNALS e
TURN
WARNING
A
HAZARD
FLASHER
FOG LAMPS
$0
These symbols
are on some of
your controls:
WINDSHIELD
WIPER
WINDSHIELD DEFROSTER
WINDOW
DEFOGGER
These symbols
are used on
warning and indicator lights:
ENGINE E*
COOLANT
TEMP
-
CHARGING I-1
BATTERY
SYSTEM
BRAKE
(a)
COOLANT a
ENGINE OIL e,
PRESSURE
ANTI-LOCK
(@)
BRAKES
Here are some other symbols you may see:
FUSE
LIGHTER
m
HORN )cr
SPEAKER
b
FUEL e3
ProCarManuals.com
Page 13 of 444
Section 1 Seats and Restraint Systems
Here you’ll find information about the seats in your Oldsmobile and how to use your safety belts properly. You can
also learn about
some things you should not do with air bags and safety belts.
1-2
1-6
1-24
1-28
1-29 1-29
1-37
1-38
1-38
1-46 Seats and Seat Controls
Rear Seats
Safety Belts: They’re for Everyone
Here Are Questions Many People Ask About
Safety Belts
-- and the Answers
How to Wear Safety Belts Properly
Driver Position
Safety Belt Use During Pregnancy
Right Front Passenger Position
Supplemental Restraint Systems (SRS)
Rear Seat Passengers
1-50
1-52
1-54 1-56
1-59
1-70 1-86
1-89
1-89
1-90 Rear Safety Belt Comfort Guides for Children
and Small Adults
Center Passenger Position (Bench Seat)
Center Passenger Position (Bucket Seat)
Children Built-in Child Restraint (Option)
Child Restraints
Larger Children
Safety Belt Extender
Checking Your Restraint Systems
Replacing Restraint System Parts After a Crash
1-1
ProCarManuals.com
Page 14 of 444
Seats and Seat Controls
This section tells you about the seats -- how to adjust
them, take them out, put them back in and fold and
unfold them.
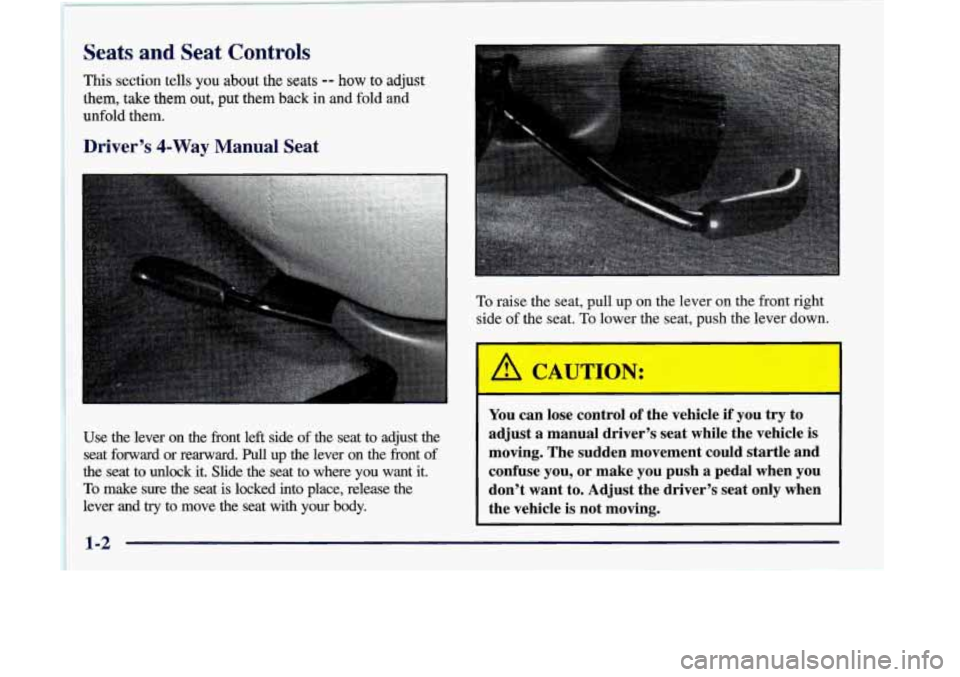
Driver’s 4-Way Manual Seat
To raise the seat, pull up on the lever on the front right
side
of the seat. To lower the seat, push the lever down.
Use the lever on the front left side
of the seat to adjust the
seat forward or reatward.
Pull up the lever on the front of
the seat to unlock it. Slide the seat to where you want it. \
To make sure the seat is locked into place, release the
lever and
try to move the seat with your body.
- -- ii
You can lose control of the vehicle if you try to
adjust a manual driver’s seat while the vehicle is
moving. The sudden movement could startle and confuse you,
or make you push a pedal when you
don’t want to. Adjust the driver’s seat only when the vehicle
is not moving.
1-2
ProCarManuals.com
Page 15 of 444
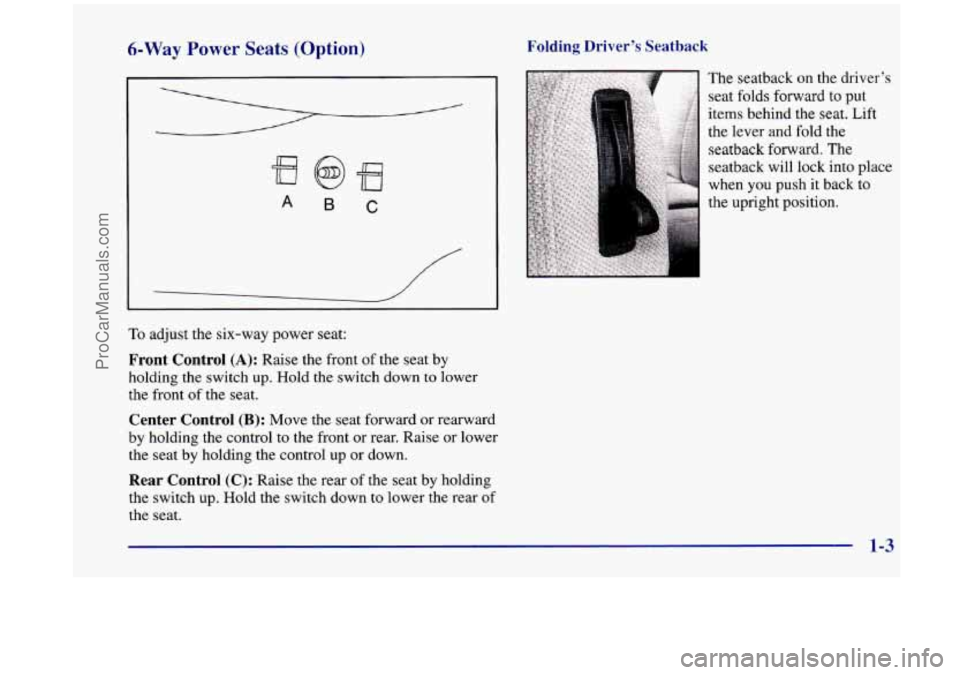
6-Way Power Seats (Option) Folding Driver’s Seatback
A B C
To adjust the six-way power seat:
Front Control (A): Raise the front of the seat by
holding the switch up. Hold the switch down to lower
the front of
the seat.
Center Control (B): Move the seat forward or rearward
by holding the control to the front or rear. Raise or lower
the seat by holding the control up or down.
Rear Control (C): Raise the rear of the seat by holding
the switch up. Hold the switch down to lower the rear of
the seat. The
seatback on the driver’s
seat
folds forward to put
items behind the seat. Lift
the lever
and fold the
seatback forward. The
seatback will lock into place
when
you push it back to
the upright position.
1-3
ProCarManuals.com
Page 16 of 444
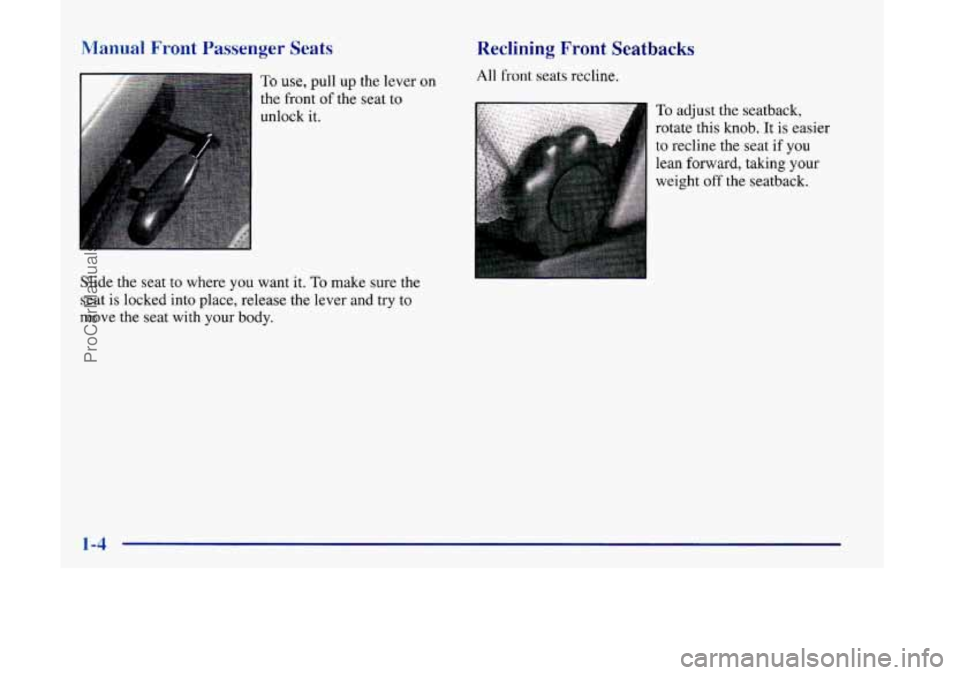
Manual Front Passenger Seats
To use, pull up the lever on
the front of the seat to
unlock it.
Slide the seat to where you want it.
To make sure the
seat is locked into place, release the lever and try to
move the seat with your body.
Reclining Front Seatbacks
All front seats recline.
To adjust the seatback,
rotate this knob. It
is easier
to recline the seat if you
lean forward, taking your
weight off the seatback.
1-4
ProCarManuals.com
Page 17 of 444
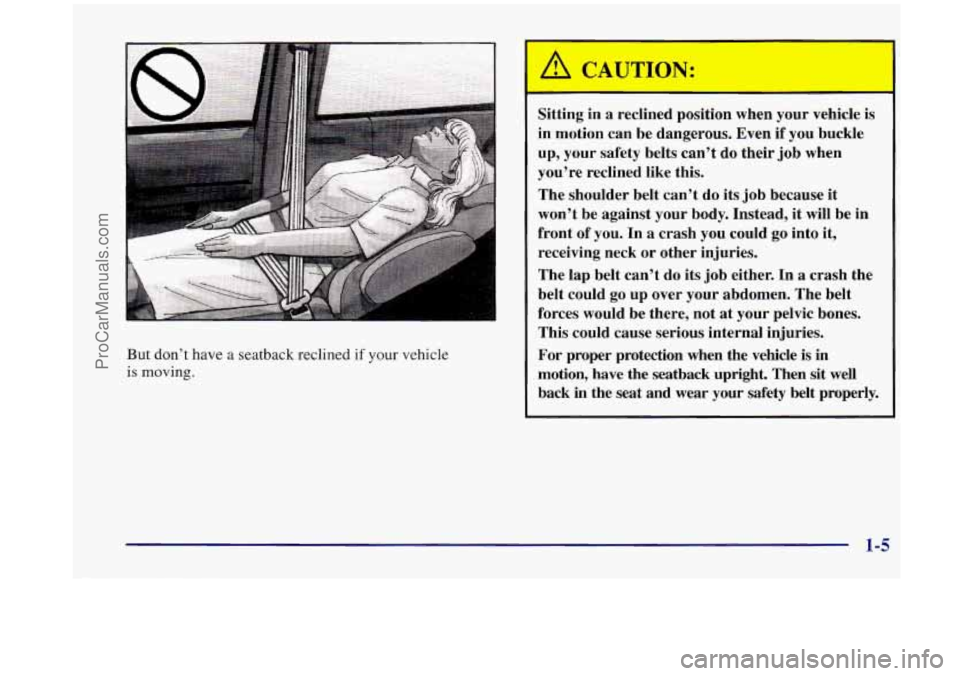
But don’t have a seatback reclined if your vehicle
is moving.
Sitting in a reclined position when your vehicle is
in motion can be dangerous. Even if you buckle
up, your safety belts can’t do their job when
you’re reclined like this.
The shoulder belt can’t do its job because it
won’t be against your body. Instead, it will be in
front of you. In a crash you could
go into it,
receiving neck or other injuries.
The lap belt can’t do its job either. In
a crash the
belt could
go up over your abdomen. The belt
forces would be there, not at your pelvic bones.
This could cause serious internal injuries.
For proper protection when the vehicle is
in
motion, have the seatback upright. Then sit well
back in the seat and wear your safety belt properly.
1-5
ProCarManuals.com
Page 18 of 444
Manual Lumbar Control
Turn the knob on the
inboard
side of the
seat to adjust the lower
back support.
Head Restraints
Slide the head restraint up or down so that the top of the
restraint is closest to the top
of your ears. This position
reduces the chance
of a neck injury in a crash.
Rear Seats
Seat Controls
The rear seats in your vehicle have levers and straps
used to adjust, remove and replace the seats. By using
the levers and straps, in the correct order, you can easily
remove the seats from your vehicle. When
you replace the seats in the vehicle, be sure to
follow
the label on the back of the seat for proper location.
Follow this diagram when the text in this manual tells you
what sets of floor cups to use for each seat.
0
i
El
G
3
i
0
C
41
D
B
0
0
H
F
0
H I
1
J
Floor Seat Pin Diagram
1-6
ProCarManuals.com