1998 OLDSMOBILE SILHOUETTE parking brake
[x] Cancel search: parking brakePage 190 of 444

Charging System Indicator Light
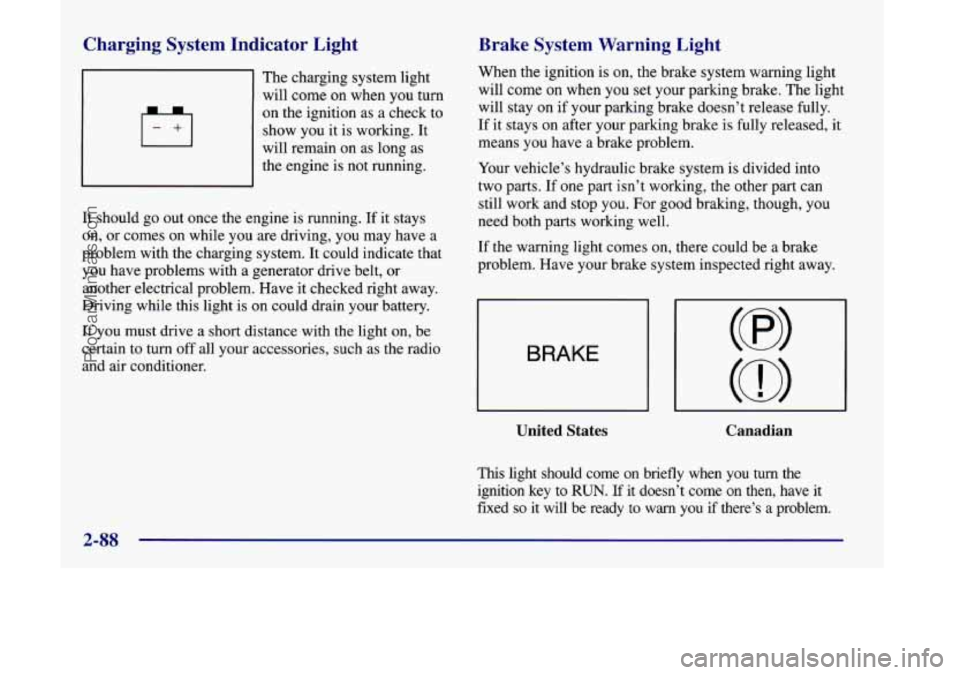
The charging system light
will come on when you turn
on the ignition as a check to
show you it is working. It
will remain on as long as
the engine is not running.
It should go out once the engine is running.
If it stays
on, or comes on while you
are driving, you may have a
problem with the charging system. It could indicate that
you have problems with a generator drive belt, or
another electrical problem. Have it checked right away.
Driving while this light is on could drain your battery.
If you must drive a short distance
with the light on, be
certain to turn off all your accessories, such as the radio
and air conditioner.
Brake System Warning Light
When the ignition is on, the brake system warning light
will come on when you set your parking brake.
The light
will stay on if your parking brake doesn’t release fully.
If
it stays on after your parking brake is fully released, it
means you have
a brake problem.
Your vehicle’s hydraulic brake system is divided into
two parts. If one part isn’t working, the other part can
still work and stop you. For good braking, though, you
need both
parts working well.
If the warning light comes on, there could be a brake
problem. Have your brake system inspected right away.
BRAKE
United States Canadian
This light should come on briefly when you turn the
ignition key to
RUN. If it doesn’t come on then, have it
fixed
so it will be ready to warn you if there’s a problem.
2-88
ProCarManuals.com
Page 272 of 444

Parking on Hills
You really should not park your vehicle, with a trailer
attached, on a hill.
If something goes wrong, your rig
could start to move. People can be injured, and both
your vehicle and the trailer can be damaged.
But
if you ever have to park your rig on a hill, here’s
how
to do it:
1. Apply your regular brakes, but don’t shift into
PARK
(P) yet.
2. Have someone place chocks under the trailer wheels.
3. When the wheel chocks are in place, release the
regular brakes until the chocks absorb the load.
4. Reapply the regular brakes. Then apply your parking
brake, and then shift to PARK (P).
5. Release the regular brakes.
When You Are Ready to Leave After
Parking on a Hill
1. Apply your regular brakes and hold the pedal down
while you:
Start your engine;
Shift into a gear; and
Release the parking brake.
2. Let up on the brake pedal.
3. Drive slowly until the trailer is clear of the chocl ss .
4. Stop and have someone pick up and store the chocks.
Maintenance When Trailer Towing
Your vehicle will need service more often when you’re
pulling a trailer. See the Maintenance Schedule for more
on this. Things that are especially important in trailer
operation are automatic transaxle fluid (don’t overfill),
engine oil, belts, cooling system and brake adjustment.
Each of these is covered in this manual, and the Index
will help you find them quickly. If you’re trailering, it’s
a good idea to review these sections before you start
your trip.
Check periodically to see that all hitch nuts and bolts
are tight.
4-40
ProCarManuals.com
Page 278 of 444

NOTICE:
To avoid the possibility of the vehicles rolling, set
the parking brake firmly on both vehicles
involved in the jump start procedure. Put an
automatic transaxle in
PARK (P).
3. Turn off the ignition on both vehicles. Unplug
unnecessary accessories plugged into the cigarette
lighter or accessory power outlet. Turn
off all lamps
that aren’t needed as well as radios. This will avoid
sparks and help save both batteries.
In addition, it
could save your radio!
I NOTICE:
If you leave your radio on, it could be badly
damaged. The repairs wouldn’t be covered by
your warranty.
JTION:
--
An electric fan can start up even when the engine
is not running and can injure you. Keep hands,
clothing and tools away from any underhood
electric fan.
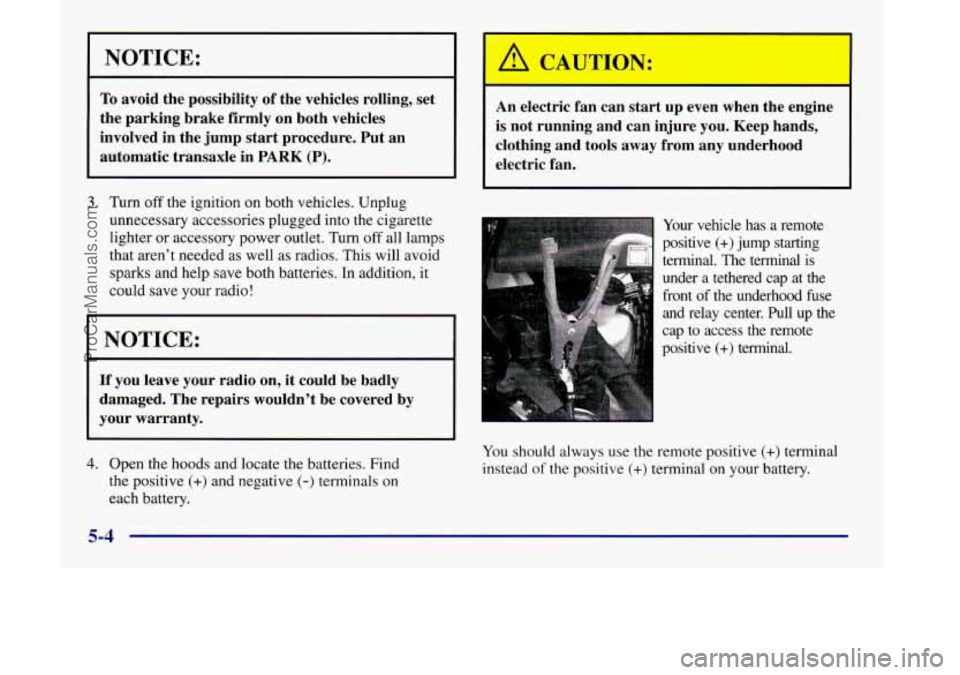
Your vehicle has a remote
positive
(+) jump starting
terminal. The terminal is
under a tethered cap at the
front of the underhood fuse
and relay center. Pull up the
cap to access the remote
positive
(+) terminal.
4. Open the hoods and locate the batteries. Find
the positive
(+) and negative (-) terminals on
each battery. You
should always use
the remote positive (+) terminal
instead
of the positive (+) terminal on your battery.
5-4
ProCarManuals.com
Page 283 of 444

NOTICE:
If you are using car-carrier equipment, you must
pull the Electronic Level Control (ELC) fuse, in
the instrument panel fuse block, before securing
the vehicle.
Damage to the shocks or leveling system
may occur if the Electronic Level Control (ELC)
fuse
is not disabled.
in OFF. The steering wheel should be clamped in a
straight-ahead position, with a clamping device
designed for towing service.
Do not use the vehicle’s
steering column lock for this. For front towing, the
transaxle should be in
PARK (P) and the parking brake
released.
For rear towing, the transaxle should be in
NEUTRAL (N) and the parking brake engaged.
NOTICE:
Your vehicle has front-wheel drive; do not have it
towed with the front wheels in contact with the
ground or vehicle damage may occur.
A dolly
must be used under the front wheels when towing
from the rear or the vehicle must be transported
on a flat bed carrier.
5-9
ProCarManuals.com
Page 298 of 444

If a Tire Goes Flat Changing a Flat Tire
It’s unusual for a tire to “blow out” while you’re driving,
especially
if you maintain your tires properly. If air goes
out of a tire, it’s much more likely to leak out slowly.
But if you should ever have a “blowout,” here are a few
tips about what to expect and what to do:
If a front tire fails, the flat tire will create a drag that
pulls the vehicle toward that side. Take your foot
off the
accelerator pedal and grip the steering wheel
firmly.
Steer to maintain lane position, and then gently brake to
a stop well out of the traffic lane.
A rear blowout, particularly on a curve, acts much like a
skid and may require the same correction you’d use in a
skid. In any rear blowout, remove your foot from the
accelerator pedal. Get the vehicle under control by
steering the way you want the vehicle
to go. It may be
very bumpy and noisy, but you can still steer. Gently
brake to a stop
-- well off the road if possible.
If a tire goes flat, the next part shows how to use your
jacking equipment to change a flat tire safely.
Air Inflator (Option)
Your vehicle may have an air inflator used to bring tires
up to the proper pressure. See “Accessory Inflator
System” in the Index for more details. If
a tire goes
flat, avoid further tire and wheel damage
by driving slowly to a level place.
Turn on your hazard
warning flashers.
/:1 CAUTION-
Changing a tire can cause an injury. The vehicle
can slip off the jack and roll over you
or other
people. You and they could be badly injured.
Find
a level place to change your tire. To help
prevent the vehicle from moving:
1. Set the parking brake firmly.
2. Put the shift lever in PARK (P).
3. lhrn off the engine.
To be even more certain the vehicle won’t move,
you can put blocks at the front and rear of the
tire farthest away from the one being changed.
That would be the tire on the other side of the
vehicle,
at the opposite end.
ProCarManuals.com
Page 329 of 444

Wait at least 30 minutes before checking the transaxle
fluid level if
you have been driving:
When outside temperatures are above 90°F (32°C).
At high speed for quite a while.
In heavy traffic -- especially in hot weather.
While pulling a trailer.
To get the right reading, the fluid should be at normal
operating temperature, which is
180°F to 200°F
(82°C to 93°C).
Get the vehicle warmed up by driving about 15 miles
(24 km) when outside temperatures are above
50°F (10°C). If it's colder than 50°F (lO°C), you
may have to drive longer.
Checking the Fluid Level
Park your vehicle on a level place. Keep the
engine running.
With the parking brake applied, place the shift lever
in PARK (P).
With your foot on the brake pedal, move the shift
lever through each gear range, pausing for about
three seconds in each range. Then, position the shift
lever in
PARK (P).
Let the engine run at idle for three to five minutes.
Then, without shutting off the engine, follow
these steps:
1. The dipstick is located toward the back
of the engine
compartment, next to the brake master cylinder. The
dipstick handle has
a bright red loop design for easy
identification. Pull
out the dipstick and wipe it with a
clean rag or paper towel.
2. Push it back in all the way, wait three seconds and
then pull
it back out again.
6-19
ProCarManuals.com
Page 383 of 444

Short TripKity Maintenance Schedule
The services shown in this schedule up to 100,000 miles
( 166 000 km) should be performed after 100,000 miles
(166 000 km) at the same intervals. The services shown
at
150,000 miles (240 000 km) should be performed at
the same interval after
150,000 miles (240 000 km).
See “Owner Checks and Services” and “Periodic
Maintenance Inspections” following.
# Lubricate the suspension, steering linkage, transaxle
shift linkage, parking brake cable guides and the
underbody contact points and linkage.
+ A good time to check your brakes is during tire
rotation. See “Brake System Inspection” under “Periodic
Maintenance Inspections” in Part C of this schedule.
Footnotes
The US. Environmental Protection Agency or the
California Air Resources Board has determined that the
failure to perform this maintenance item will not nullify
the emission warranty or limit recall liability prior to the
completion of the vehicle’s useful life. We, however,
urge that all recommended maintenance services be
performed at
the indicated intervals and the maintenance
be recorded.
7-7
ProCarManuals.com
Page 397 of 444

The services shown in this schedule up to 100,000 miles # Lubricate the suspension, steering linkage, transaxle
( 166 000 km) should be performed after 100,000 miles shift linkage, parking brake cable guides and the
(166
000 km) at the same intervals. The services shown underbody contact points and linkage.
at
150,000 miles (240 000 km) should be performed at
the same interval after 150,000 miles
(240 000 km).
See “Owner Checks and Services” and “Periodic
Maintenance Inspections” following. + A good time to check your brakes is during tire
rotation.
See “Brake System Inspection” under “Periodic
Maintenance Inspections” in Part C of this schedule.
Footnotes
-i- The U.S. Environmental Protection Agency or the
California Air Resources Board has determined that the
failure
to perform this maintenance item will not nullify
the emission warranty or limit recall liability prior to the
completion
of the vehicle’s useful life. We, however,
urge that
all recommended maintenance services be
performed at the indicated intervals and the maintenance
be recorded.
7-21
ProCarManuals.com