Page 168 of 216

HEADLIGHTS
The headlight is a semi-sealed beam type
which uses a replaceable headlight (halo-
gen) bulb. A bulb can be replaced from
inside the engine compartment without re-
moving the headlight assembly.
CAUTION
cHigh pressure halogen gas is sealed
inside the halogen bulb. The bulb
may break if the glass envelope is
scratched or the bulb is dropped.
cWhen handling the bulb, do not
touch the glass envelope.
Removing the headlight bulb
1. Open the engine hood.
2. Disconnect the negative (-) battery cable.
3.
If removing the right-hand (passenger
side) headlight bulb, it is necessary to first
reposition the engine coolant reservoir.
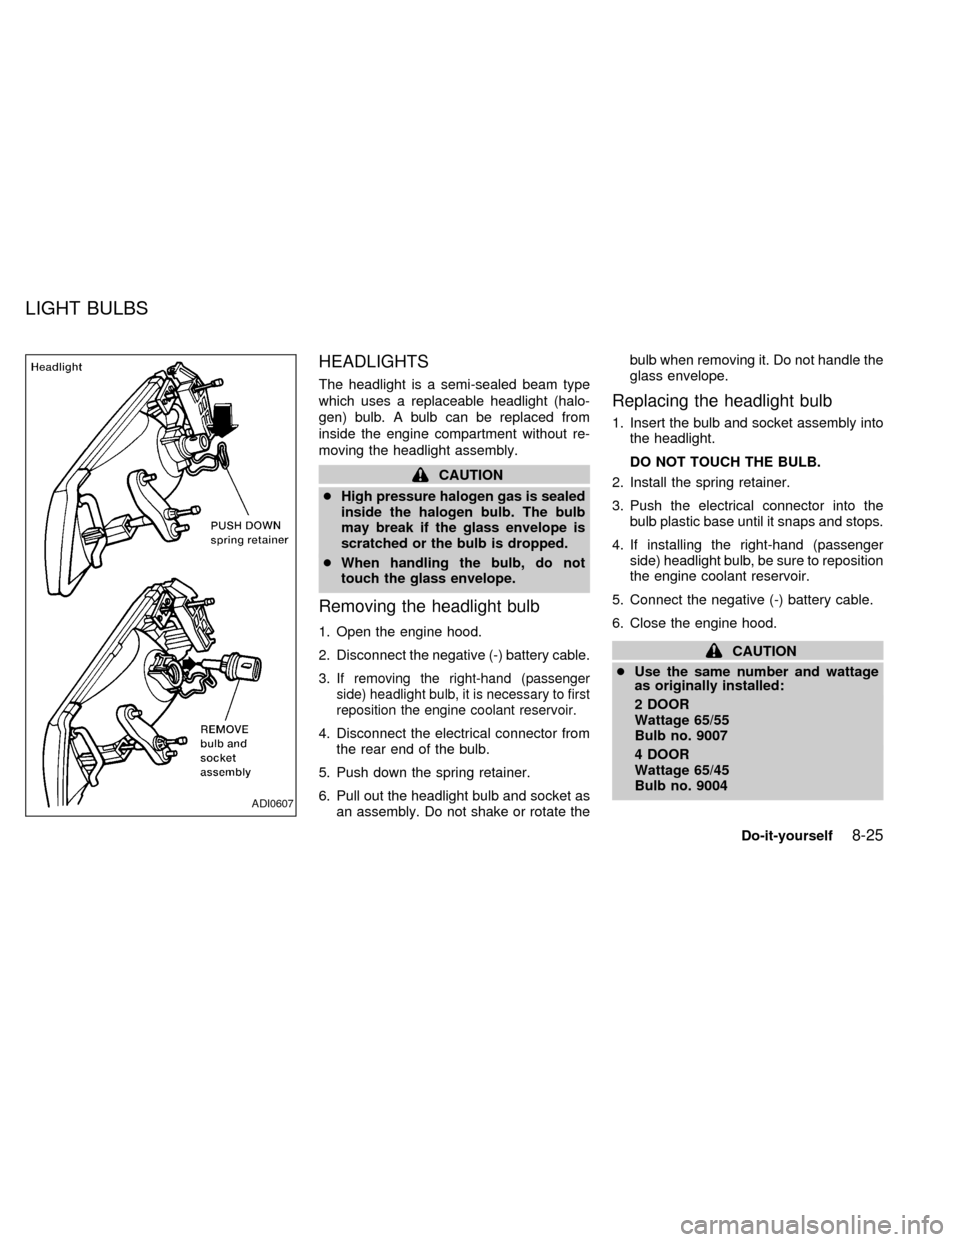
4. Disconnect the electrical connector from
the rear end of the bulb.
5. Push down the spring retainer.
6. Pull out the headlight bulb and socket as
an assembly. Do not shake or rotate thebulb when removing it. Do not handle the
glass envelope.
Replacing the headlight bulb
1. Insert the bulb and socket assembly into
the headlight.
DO NOT TOUCH THE BULB.
2. Install the spring retainer.
3. Push the electrical connector into the
bulb plastic base until it snaps and stops.
4. If installing the right-hand (passenger
side) headlight bulb, be sure to reposition
the engine coolant reservoir.
5. Connect the negative (-) battery cable.
6. Close the engine hood.
CAUTION
cUse the same number and wattage
as originally installed:
2 DOOR
Wattage 65/55
Bulb no. 9007
4 DOOR
Wattage 65/45
Bulb no. 9004
ADI0607
LIGHT BULBS
Do-it-yourself8-25
ZX
Page 169 of 216

cAiming is not necessary after replac-
ing the bulb.
cDo not leave the bulb out of the
headlight reflector for a long period
of time as dust, moisture, and smoke
may enter the headlight body and
affect the performance of the head-
light.
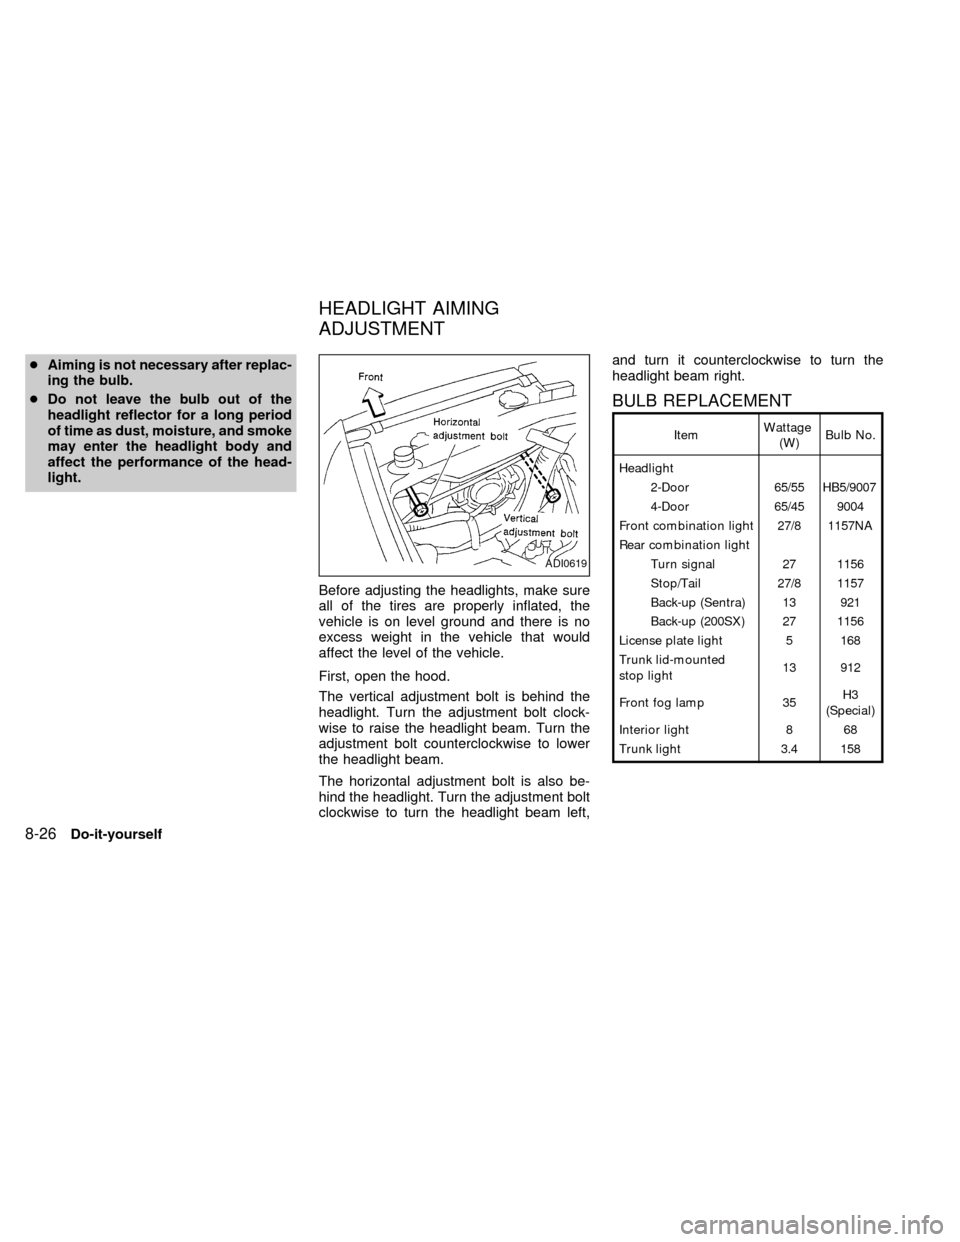
Before adjusting the headlights, make sure
all of the tires are properly inflated, the
vehicle is on level ground and there is no
excess weight in the vehicle that would
affect the level of the vehicle.
First, open the hood.
The vertical adjustment bolt is behind the
headlight. Turn the adjustment bolt clock-
wise to raise the headlight beam. Turn the
adjustment bolt counterclockwise to lower
the headlight beam.
The horizontal adjustment bolt is also be-
hind the headlight. Turn the adjustment bolt
clockwise to turn the headlight beam left,and turn it counterclockwise to turn the
headlight beam right.
BULB REPLACEMENT
ItemWattage
(W)Bulb No.
Headlight
2-Door 65/55 HB5/9007
4-Door 65/45 9004
Front combination light 27/8 1157NA
Rear combination light
Turn signal 27 1156
Stop/Tail 27/8 1157
Back-up (Sentra) 13 921
Back-up (200SX) 27 1156
License plate light 5 168
Trunk lid-mounted
stop light13 912
Front fog lamp 35H3
(Special)
Interior light 8 68
Trunk light 3.4 158
ADI0619
HEADLIGHT AIMING
ADJUSTMENT
8-26Do-it-yourself
ZX
Page 170 of 216
ADI1047
Do-it-yourself8-27
ZX
Page 171 of 216
Replacement procedures
All other lights are either type A, B, C or D.
When replacing a bulb, first remove the lens
and/or cover.
MDI0006
8-28Do-it-yourself
ZX
Page 172 of 216
ADI0624
Do-it-yourself8-29
ZX
Page 173 of 216
ADI1048
8-30Do-it-yourself
ZX
Page 174 of 216
FRONT FOG LIGHT BULB
REPLACEMENT (if so equipped)
1. Use a Phillip's head screwdriver to re-
move the trim plate and the anchoring
bolts on the fog lamp assembly.
2. Move the fog lamp assembly towards the
center of the vehicle and pull out to
expose the rear of the assembly.
3. Remove the retaining ring from the fog
lamp assembly.
4. Remove the bulb cover.
5. Lift the spring retainer.
6. Remove the fog lamp bulb.
ADI0651
Do-it-yourself8-31
ZX
Page 175 of 216

If you have a flat tire, see the ``In case of
emergency'' section of this manual.
Maximum inflation pressure
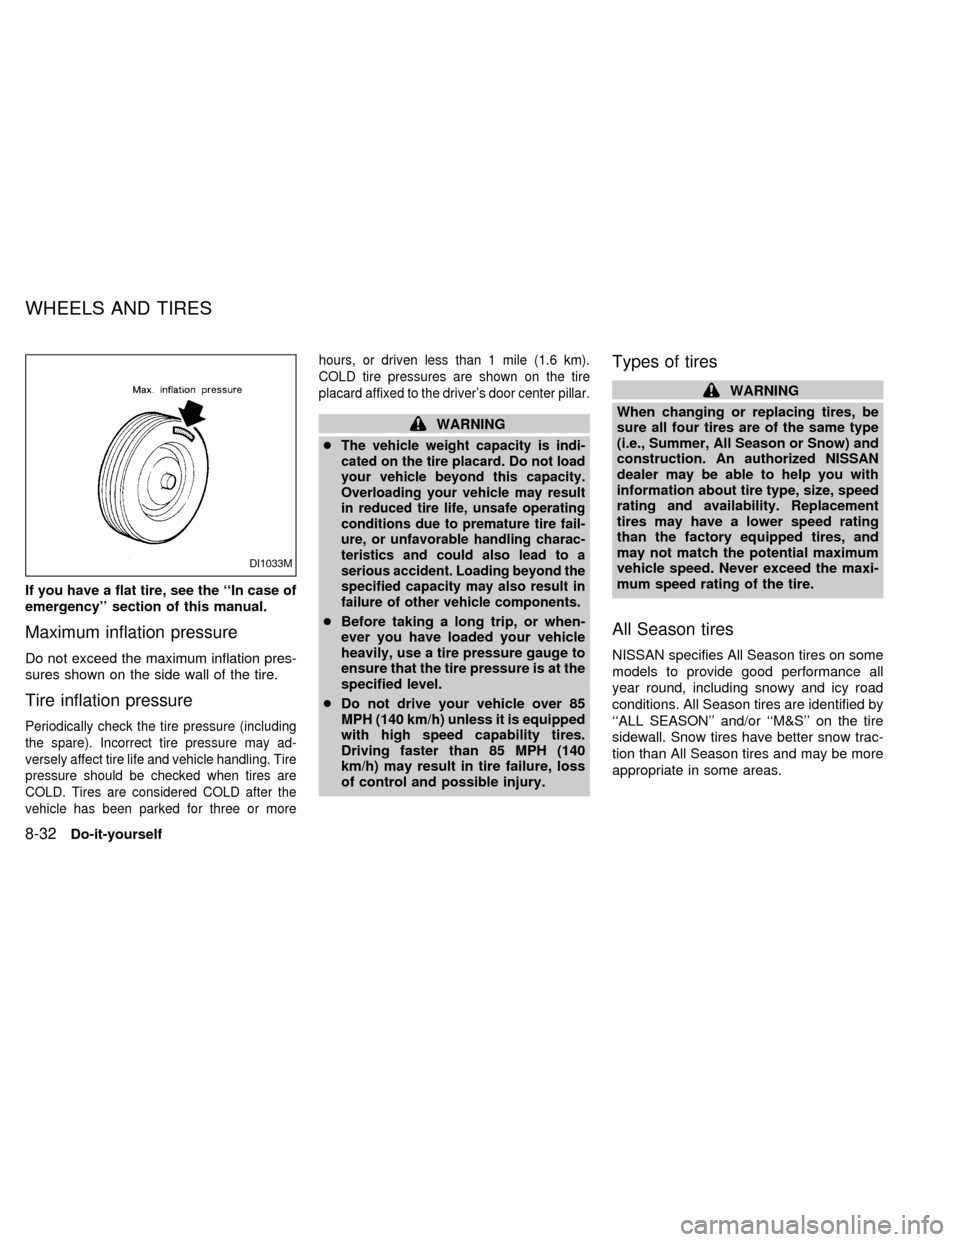
Do not exceed the maximum inflation pres-
sures shown on the side wall of the tire.
Tire inflation pressure
Periodically check the tire pressure (including
the spare). Incorrect tire pressure may ad-
versely affect tire life and vehicle handling. Tire
pressure should be checked when tires are
COLD. Tires are considered COLD after the
vehicle has been parked for three or morehours, or driven less than 1 mile (1.6 km).
COLD tire pressures are shown on the tire
placard affixed to the driver's door center pillar.
WARNING
c
The vehicle weight capacity is indi-
cated on the tire placard. Do not load
your vehicle beyond this capacity.
Overloading your vehicle may result
in reduced tire life, unsafe operating
conditions due to premature tire fail-
ure, or unfavorable handling charac-
teristics and could also lead to a
serious accident. Loading beyond the
specified capacity may also result in
failure of other vehicle components.
cBefore taking a long trip, or when-
ever you have loaded your vehicle
heavily, use a tire pressure gauge to
ensure that the tire pressure is at the
specified level.
cDo not drive your vehicle over 85
MPH (140 km/h) unless it is equipped
with high speed capability tires.
Driving faster than 85 MPH (140
km/h) may result in tire failure, loss
of control and possible injury.
Types of tires
WARNING
When changing or replacing tires, be
sure all four tires are of the same type
(i.e., Summer, All Season or Snow) and
construction. An authorized NISSAN
dealer may be able to help you with
information about tire type, size, speed
rating and availability. Replacement
tires may have a lower speed rating
than the factory equipped tires, and
may not match the potential maximum
vehicle speed. Never exceed the maxi-
mum speed rating of the tire.
All Season tires
NISSAN specifies All Season tires on some
models to provide good performance all
year round, including snowy and icy road
conditions. All Season tires are identified by
``ALL SEASON'' and/or ``M&S'' on the tire
sidewall. Snow tires have better snow trac-
tion than All Season tires and may be more
appropriate in some areas.
DI1033M
WHEELS AND TIRES
8-32Do-it-yourself
ZX