1998 NISSAN QUEST child lock
[x] Cancel search: child lockPage 69 of 260
child safety seat, allow the right shoul-
der harness to retract over the right
shoulder and securely restrain the child.
A clicking sound is heard as the har-
ness retracts, indicating that the retrac-
tor is in the automatic locking mode. Be
sure the left shoulder harness is also
properly positioned over the child's left
shoulder.
11. Check that the shoulder harness is in
the automatic locking mode by trying to
pull the shoulder harness out of the
retractor. If you cannot pull any of the
shoulder harness webbing out of the
retractor, the shoulder harness is in the
automatic locking mode. If the shoulder
harness is not locked, repeat step 10. If,
after repeated attempts, the integrated
child safety seat shoulder harness can-
not be placed in the automatic locking
mode, do not use the integrated child
safety seat and have it inspected by an
authorized NISSAN dealer.
To cancel the automatic locking mode, un-
buckle the chest clip and both shoulder
harness tongues. Allow the shoulder har-
nesses to retract completely. The automatic
locking mode is now canceled and theshoulder harness retractor is in the emer-
gency locking mode.
WARNING
The automatic locking mode (child re-
straint mode) must be reactivated each
time you place a child in the integrated
child safety seats.
In addition to the automatic locking retrac-
tors, the integrated child safety seat shoul-
der harnesses are equipped with emer-
gency locking retractors. The automatic
locking mode is best to use, especially for
children who need help staying properly
positioned in the seat and its harnesses (for
example, children who are younger and
smaller), because the belts are always
locked. In the emergency locking mode, the
shoulder belts only lock in a sudden stop or
accident, allowing a child more freedom of
movement. Use the emergency locking
mode only if you judge your child able to
remain properly positioned in the integrated
child safety seat.
Removing the child
1. Release the chest clip.
2. Release the left and right shoulder har-ness tongues from the belt buckle by
pressing the red belt buckle button.
3. Move the left and right shoulder har-
nesses aside and assist the child from
the integrated child safety seat.
Storing the Integrated Child Safety
Seat
1. Be sure the shoulder harnesses are fully
retracted and resting inside the inte-
grated child safety seat recess. It is not
necessary to reconnect the shoulder har-
nesses and belt buckle prior to storing
the integrated child safety seat.
2. While holding onto, but not pulling, the
cushion release strap, rotate the cushion
upward until it fits flush with the second
row seat back cushion and locks into
position.
3. Be sure the integrated child safety seat is
locked in the stowed position by grasping
the safety seat cushion and attempting to
lower it without pulling the cushion re-
lease strap. If the integrated child safety
seat is not locked in the stowed position,
repeat steps one through three.
1-62Seats, restraints and supplemental air bag systems
ZX
Page 101 of 260
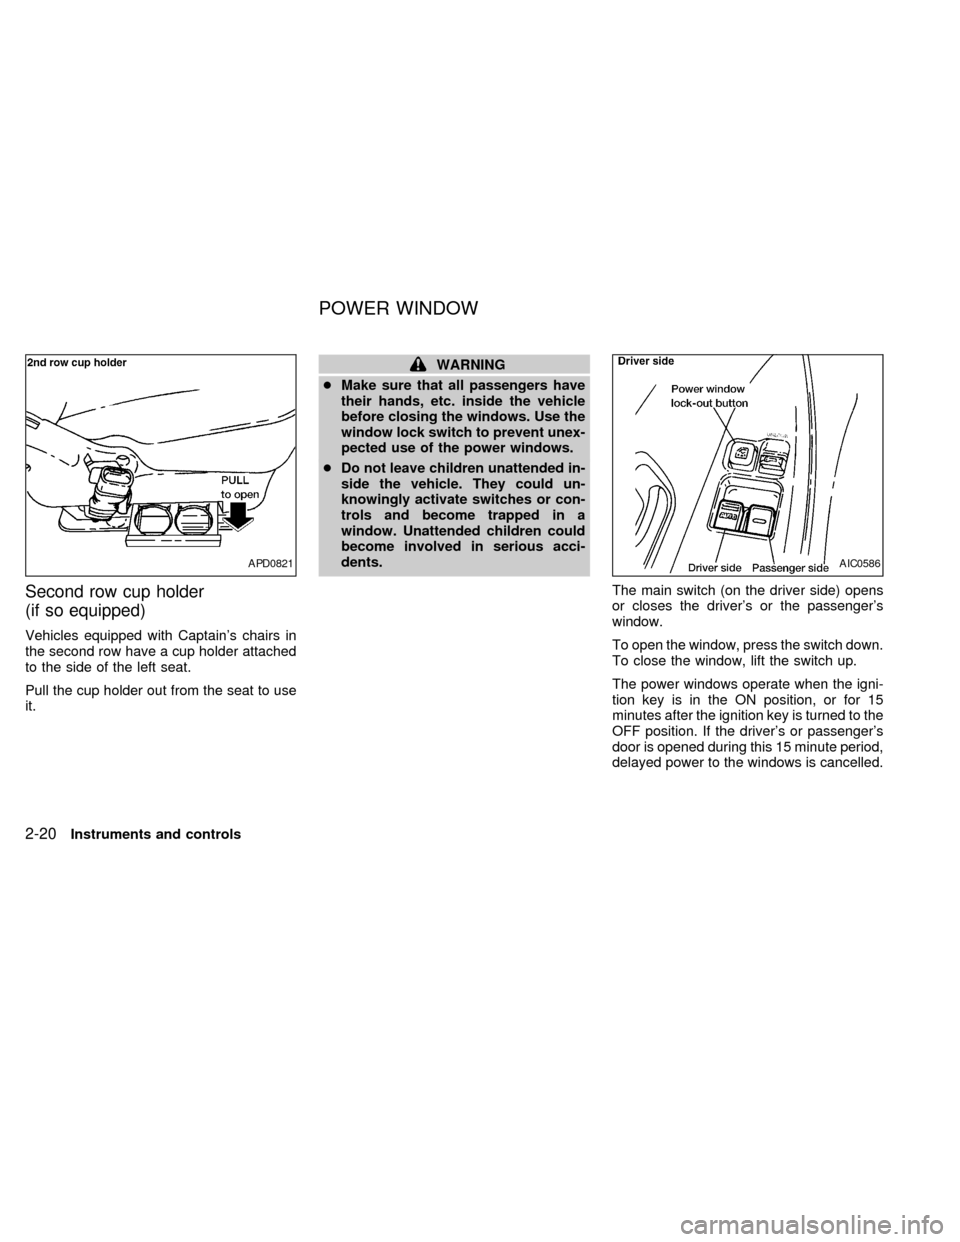
Second row cup holder
(if so equipped)
Vehicles equipped with Captain's chairs in
the second row have a cup holder attached
to the side of the left seat.
Pull the cup holder out from the seat to use
it.
WARNING
cMake sure that all passengers have
their hands, etc. inside the vehicle
before closing the windows. Use the
window lock switch to prevent unex-
pected use of the power windows.
cDo not leave children unattended in-
side the vehicle. They could un-
knowingly activate switches or con-
trols and become trapped in a
window. Unattended children could
become involved in serious acci-
dents.
The main switch (on the driver side) opens
or closes the driver's or the passenger's
window.
To open the window, press the switch down.
To close the window, lift the switch up.
The power windows operate when the igni-
tion key is in the ON position, or for 15
minutes after the ignition key is turned to the
OFF position. If the driver's or passenger's
door is opened during this 15 minute period,
delayed power to the windows is cancelled.
APD0821AIC0586
POWER WINDOW
2-20Instruments and controls
ZX
Page 103 of 260
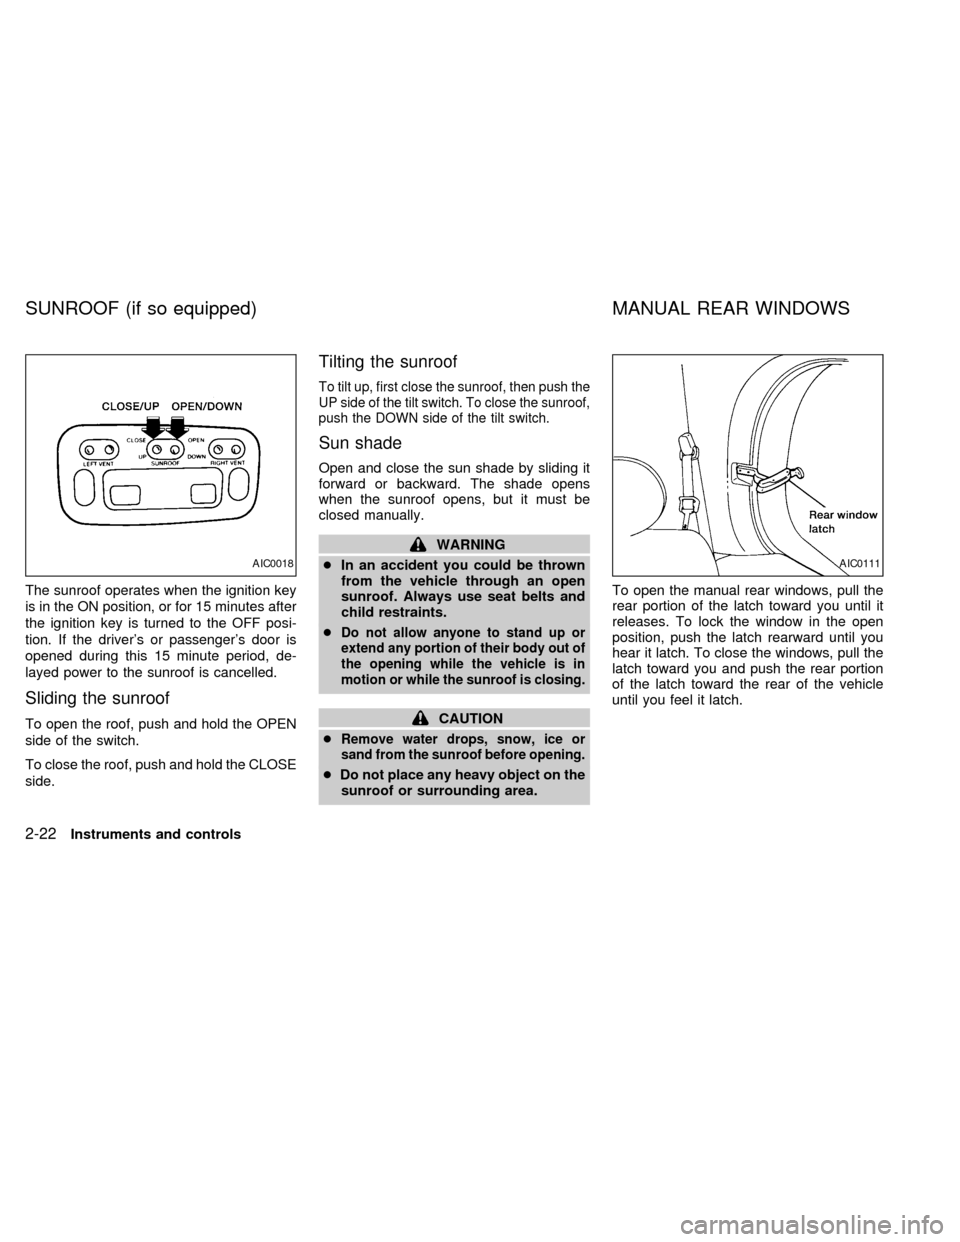
The sunroof operates when the ignition key
is in the ON position, or for 15 minutes after
the ignition key is turned to the OFF posi-
tion. If the driver's or passenger's door is
opened during this 15 minute period, de-
layed power to the sunroof is cancelled.
Sliding the sunroof
To open the roof, push and hold the OPEN
side of the switch.
To close the roof, push and hold the CLOSE
side.
Tilting the sunroof
To tilt up, first close the sunroof, then push the
UP side of the tilt switch. To close the sunroof,
push the DOWN side of the tilt switch.
Sun shade
Open and close the sun shade by sliding it
forward or backward. The shade opens
when the sunroof opens, but it must be
closed manually.
WARNING
cIn an accident you could be thrown
from the vehicle through an open
sunroof. Always use seat belts and
child restraints.
c
Do not allow anyone to stand up or
extend any portion of their body out of
the opening while the vehicle is in
motion or while the sunroof is closing.
CAUTION
c
Remove water drops, snow, ice or
sand from the sunroof before opening.
cDo not place any heavy object on the
sunroof or surrounding area.To open the manual rear windows, pull the
rear portion of the latch toward you until it
releases. To lock the window in the open
position, push the latch rearward until you
hear it latch. To close the windows, pull the
latch toward you and push the rear portion
of the latch toward the rear of the vehicle
until you feel it latch.
AIC0018AIC0111
SUNROOF (if so equipped) MANUAL REAR WINDOWS
2-22Instruments and controls
ZX
Page 108 of 260

3 Pre-driving checks and adjustments
Key .........................................................................3-2
Door locks ..............................................................3-2
Manual door lock ....................................................3-3
Child safety sliding door lock .................................3-5
Power door lock (if so equipped) ...........................3-6
Multi-remote control system (if so equipped).........3-8
Battery replacement ...............................................3-9
Illuminated entry system ......................................3-10
Hood release ........................................................3-11Rear door lock ......................................................3-12
Cargo net (if so equipped) ...................................3-14
Luggage rack (if so equipped) .............................3-15
Fuel filler lid and cap ............................................3-16
Tilting steering wheel ...........................................3-17
Outside mirror control...........................................3-17
Outside mirrors .....................................................3-18
Inside mirror .........................................................3-18
Vanity mirror .........................................................3-19
ZX
Page 109 of 260
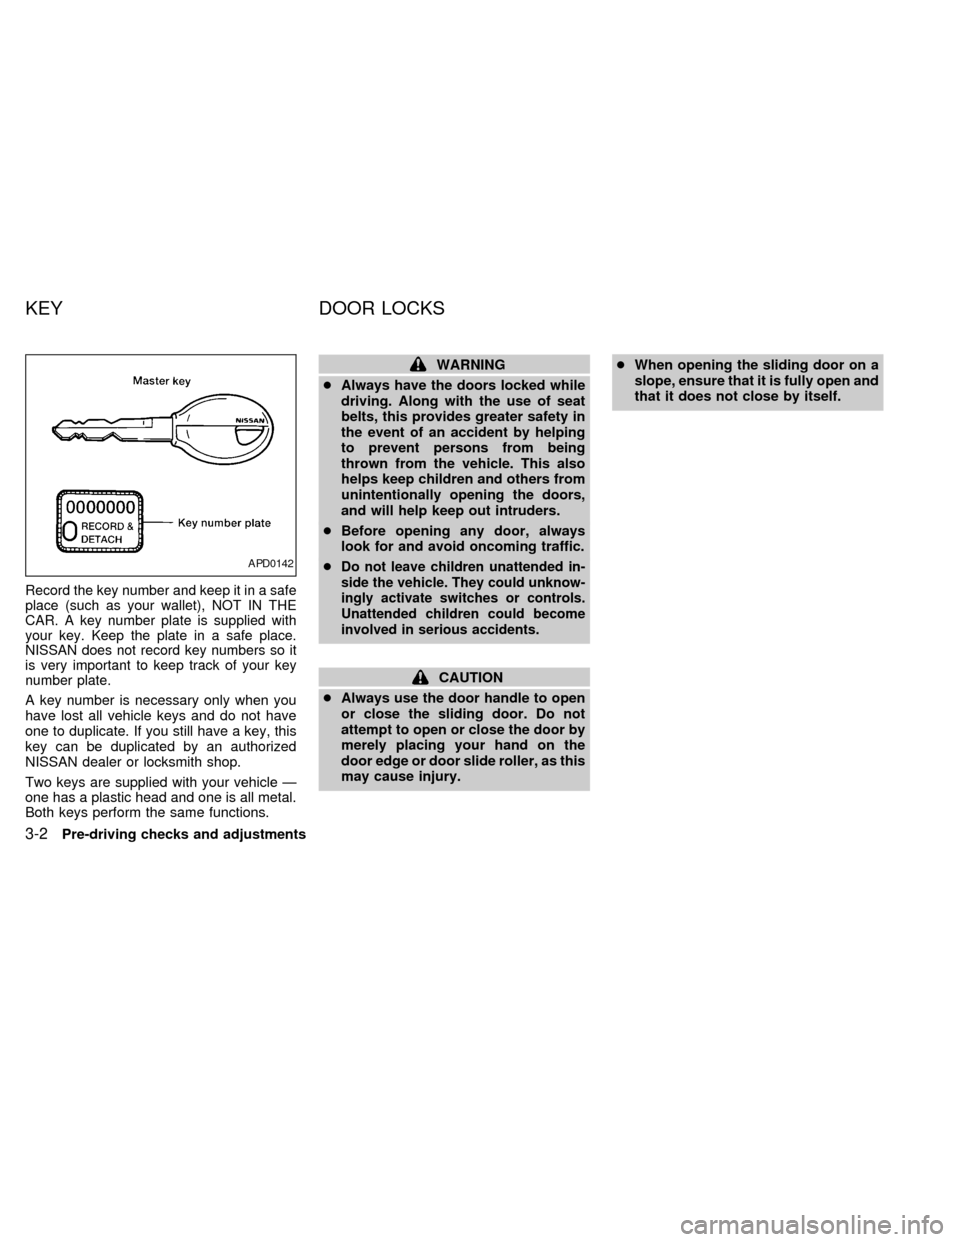
Record the key number and keep it in a safe
place (such as your wallet), NOT IN THE
CAR. A key number plate is supplied with
your key. Keep the plate in a safe place.
NISSAN does not record key numbers so it
is very important to keep track of your key
number plate.
A key number is necessary only when you
have lost all vehicle keys and do not have
one to duplicate. If you still have a key, this
key can be duplicated by an authorized
NISSAN dealer or locksmith shop.
Two keys are supplied with your vehicle Ð
one has a plastic head and one is all metal.
Both keys perform the same functions.
WARNING
cAlways have the doors locked while
driving. Along with the use of seat
belts, this provides greater safety in
the event of an accident by helping
to prevent persons from being
thrown from the vehicle. This also
helps keep children and others from
unintentionally opening the doors,
and will help keep out intruders.
cBefore opening any door, always
look for and avoid oncoming traffic.
c
Do not leave children unattended in-
side the vehicle. They could unknow-
ingly activate switches or controls.
Unattended children could become
involved in serious accidents.
CAUTION
cAlways use the door handle to open
or close the sliding door. Do not
attempt to open or close the door by
merely placing your hand on the
door edge or door slide roller, as this
may cause injury.cWhen opening the sliding door on a
slope, ensure that it is fully open and
that it does not close by itself.
APD0142
KEY DOOR LOCKS
3-2Pre-driving checks and adjustments
ZX
Page 112 of 260

CHILD SAFETY SLIDING DOOR
LOCK
Child safety locking helps prevent doors
from being opened accidentally, especially
when small children are in the vehicle.
When the lever is in the LOCK position,
the sliding door can be opened only from
the outside.
APD0005
Pre-driving checks and adjustments3-5
ZX
Page 166 of 260
WARNING
Do not park the vehicle over flammable
materials such as dry grass, waste pa-
per or rags. They may ignite and cause
a fire.
1. Firmly apply the parking brake.
2. Move the gearshift lever to the P (Park)
position.WARNING
Safe parking procedures require that
both the parking brake be set and the
transmission placed into P (Park)
position. Failure to do so could cause
the vehicle to move unexpectedly or roll
away and result in an accident. Make
sure the shift lever has been pushed up
as far as it can go and cannot be moved
without pulling it towards you.
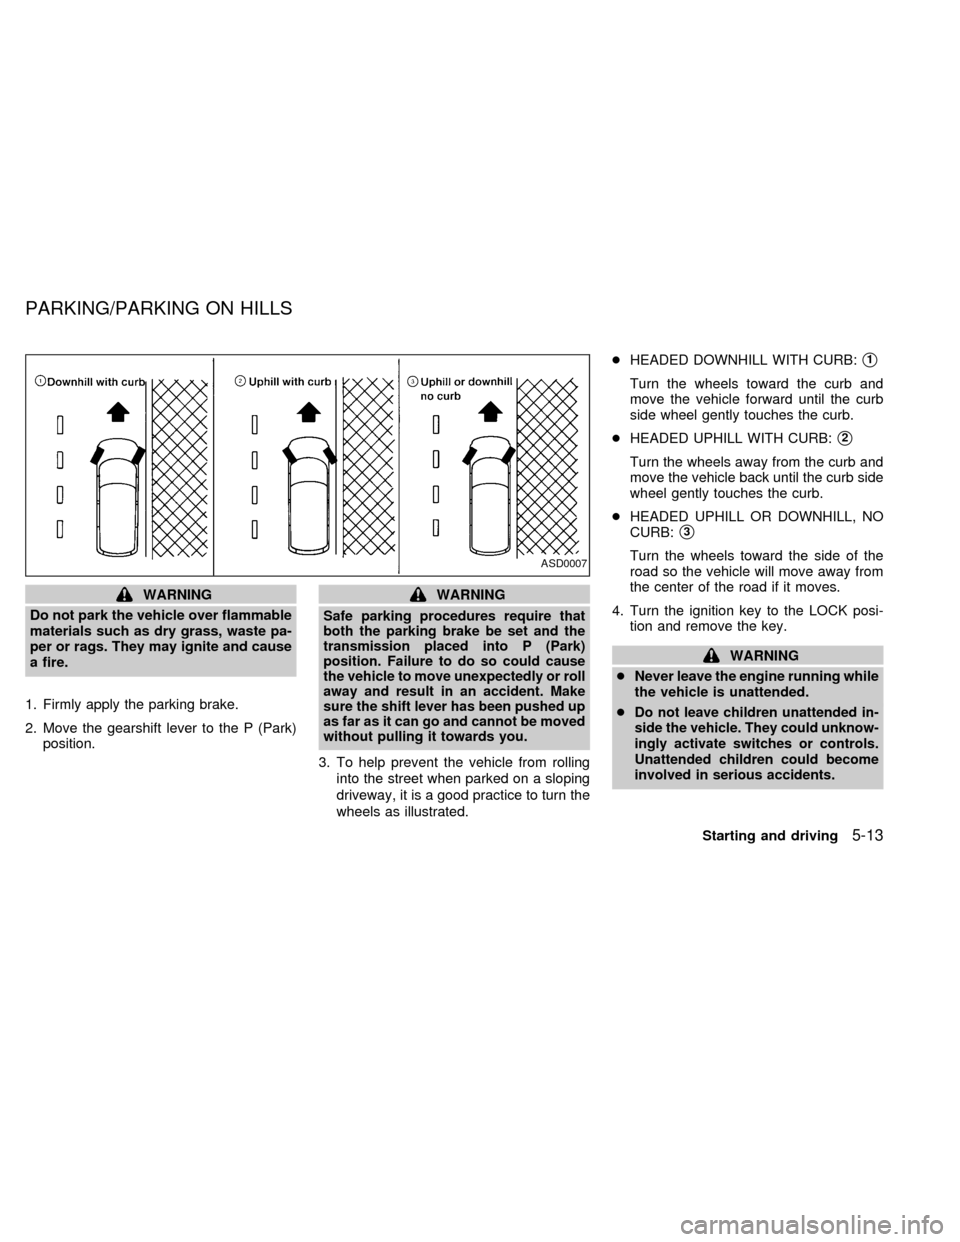
3. To help prevent the vehicle from rolling
into the street when parked on a sloping
driveway, it is a good practice to turn the
wheels as illustrated.cHEADED DOWNHILL WITH CURB:
s1
Turn the wheels toward the curb and
move the vehicle forward until the curb
side wheel gently touches the curb.
cHEADED UPHILL WITH CURB:
s2
Turn the wheels away from the curb and
move the vehicle back until the curb side
wheel gently touches the curb.
cHEADED UPHILL OR DOWNHILL, NO
CURB:
s3
Turn the wheels toward the side of the
road so the vehicle will move away from
the center of the road if it moves.
4. Turn the ignition key to the LOCK posi-
tion and remove the key.
WARNING
cNever leave the engine running while
the vehicle is unattended.
c
Do not leave children unattended in-
side the vehicle. They could unknow-
ingly activate switches or controls.
Unattended children could become
involved in serious accidents.
ASD0007
PARKING/PARKING ON HILLS
Starting and driving5-13
ZX
Page 254 of 260
11 Index
A
After an accident........................................ 6-11
Air bag (See supplemental restraint
system) ...................................................... 1-18
Air bag warning light .................................. 1-23
Air cleaner housing filter ............................ 8-13
Air conditioner
Air conditioner operation ............... 4-20, 4-5
Air conditioner service .......................... 4-14
Air conditioner specification label ....... 10-11
Air conditioner system refrigerant and
lubrication recommendations ................ 10-6
Heater and air conditioner (automatic)
(if so equipped)..................................... 4-10
Heater and air conditioner (manual)....... 4-3
Rear seat heater and air conditioner ... 4-13
Air flow charts .............................................. 4-7
Alarm system (See theft warning) ............. 2-10
Anchor point locations ............................... 1-53
Antenna
Manual .................................................. 4-20
Power.................................................... 4-20
Anti-lock brake system (ABS).................... 5-15
Anti-lock brake warning light ....................... 2-8
Armrests....................................................... 1-6
Ashtray (See cigarette lighter and
ashtray) ...................................................... 2-16Audio system
AM-FM radio with cassette player ........ 4-14
Compact disc (CD) player .................... 4-21
Autolamp switch......................................... 2-14
Automatic
Automatic power window switch .......... 2-21
Automatic transmission fluid (ATF) ........ 8-8
Driving with automatic transmission ....... 5-5
B
Battery........................................................ 8-11
Before starting the engine ........................... 5-5
Brake
Anti-lock brake system (ABS) .............. 5-15
Brake booster ....................................... 8-18
Brake fluid ................................... 10-2, 8-10
Brake light (See stop light) ................... 8-22
Brake pedal .......................................... 8-17
Brake system ........................................ 5-14
Brake warning light ................................. 2-7
Brake wear indicators ............................. 2-9
Parking brake check ............................. 8-16
Parking brake operation ......................... 5-9
Self-adjusting brakes ............................ 8-17
Break-in schedule ...................................... 5-11
Bulb check/instrument panel ....................... 2-6
Bulb replacement ....................................... 8-22C
Capacities and recommended fuel/
lubricants.................................................... 10-2
Cargo net ................................................... 3-14
Cargo (See vehicle loading
information) .............................................. 10-12
Cassette player (See audio system) ......... 4-14
CB radio or car phone ............................... 4-25
Check engine indicator light
(See malfunction indicator light) .................. 2-9
Child restraint with top tether strap ........... 1-49
Child restraints ........................................... 1-39
Child safety sliding door lock....................... 3-5
Cigarette lighter (accessory)
and ashtray ................................................ 2-16
Cleaning exterior and interior ...................... 7-2
Clock .......................................................... 2-23
Coin tray .................................................... 2-18
Cold weather driving .................................. 5-16
Compact disc (CD) player ......................... 4-21
Controls
Audio controls ....................................... 4-14
Audio controls (rear) ............................. 4-24
Audio controls (steering wheel) ............ 4-23
Heater and air conditioner controls
(automatic) ............................................ 4-10
Heater and air conditioner controls
(manual).................................................. 4-3
ZX