Page 20 of 47

4. Connect red clip of deployment tool to battery positive terminal
and black clip to negative terminal.
5. The lamp on the right side of the tool, marked ``deployment tool
power'', should glow green, not red.
6. Press the button on the deployment tool. The left side lamp on
the tool, marked ``air bag connector voltage'', will illuminate and
the air bag module will deploy.
CAUTION:
When deploying the air bag module, stand at least 5 m (16 ft)
away from the air bag module.
Deployment of passenger air bag module (outside of
vehicle)
1. Make an 8.5 mm (0.335 in) diameter hole in air bag module
bracket (SST: KV99105300) at the position shown in ®gure at
left.
2. Firmly secure air bag module bracket (SST: KV99105300) in a
vise.
3. Match the two holes in air bag module bracket (held in vise) and
passenger air bag module and ®x them with two bolts [M8 x 25
- 30 mm (0.98 - 1.18 in)].
CAUTION:
If a gap exists between passenger air bag module and air bag
module bracket, use a piece of wood inserted in the gap to
stabilize the air bag module.
4. Connect deployment tool adapter (SST: KV99108300) to
deployment tool (SST: KV99106400) connector and connector
on either side of air bag module.
5. Connect red clip of deployment tool to battery positive terminal
and black clip to negative terminal.
6. The lamp on the right side of the tool, marked ``deployment tool
power'', should glow green, not red.
7. Press the button on the deployment tool. The left side lamp on
the tool, marked ``air bag connector voltage'', will illuminate and
the air bag module will deploy.
SRS235-B
SRS236-B
SRS310
SRS311
SRS313-A
SUPPLEMENTAL RESTRAINT SYSTEM (SRS)
Disposal of Air Bag Module and Seat Belt Pre-
tensioner (Cont'd)
RS-19
Page 23 of 47

Trouble Diagnoses Introduction
CAUTION:
+Do not use a circuit tester to check SRS harness connectors unless instructed to in this Service
Manual. SRS wiring harnesses except for ``SEAT BELT PRE-TENSIONER'' can be identi®ed with
yellow harness protector or yellow insulation tape before the harness connectors.
+Do not attempt to repair, splice or modify the SRS wiring harness. If the harness is damaged,
replace it with a new one.
+Keep ground portion clean.
DIAGNOSIS FUNCTION
The SRS self-diagnosis results can be read by using ``AIR BAG'' warning lamp and/or CONSULT.
System Using CONSULT Using warning lamp
Seat belt pre-tensioner X Ð
Air bag Driver air bag X X
Front passenger air bag X X
The reading of these results is accomplished using one of two modes Ð ``User mode'' and ``Diagnosis mode''.
The User mode is exclusively prepared for the customer (driver). This mode warns the driver of a system
malfunction through the operation of the ``AIR BAG'' warning lamp.
The Diagnosis mode allows the technician to locate and inspect the malfunctioning part.
The mode applications for the ``AIR BAG'' warning lamp and CONSULT are as follows:
User mode Diagnosis mode Display type
``AIR BAG'' warning lamp X X ON-OFF operation
CONSULT Ð X Monitoring
DIAGNOSIS MODE FOR CONSULT
+``SELF-DIAG [CURRENT]''
A current Self-diagnosis result (also indicated by the warning lamp ¯ashes in the Diagnosis mode) is dis-
played on the CONSULT screen in real time. This refers to a malfunctioning part requiring repairs.
+``SELF-DIAG [PAST]''
Diagnosis results previously stored in the memory are displayed on the CONSULT screen. The stored
results are not erased until memory erasing is executed.
+``TROUBLE DIAG RECORD''
With ``TROUBLE DIAG RECORD'', diagnosis results previously erased by a reset operation can be dis-
played on the CONSULT screen.
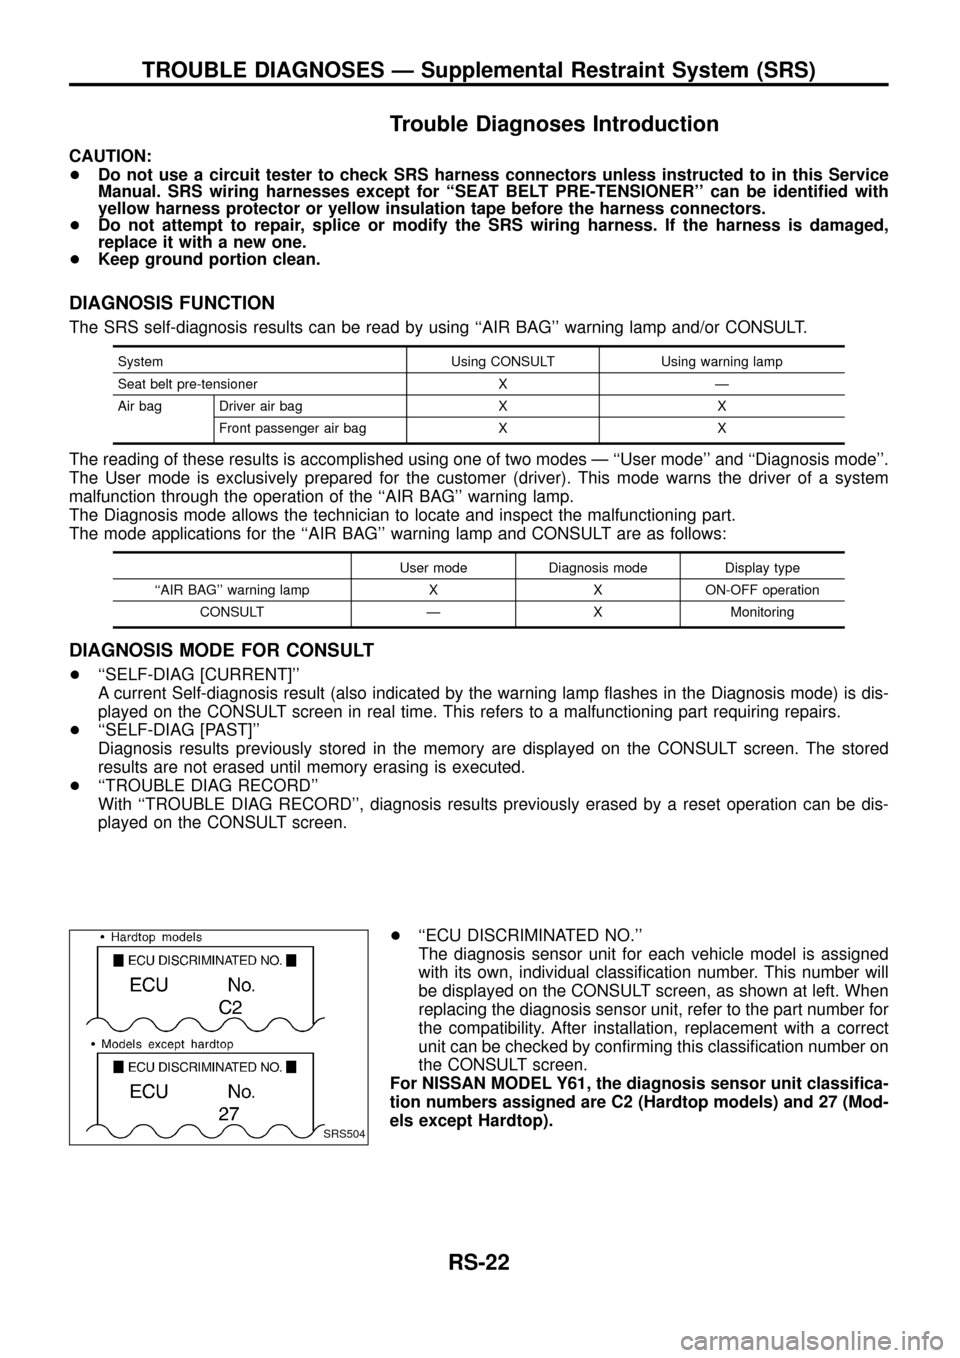
+``ECU DISCRIMINATED NO.''
The diagnosis sensor unit for each vehicle model is assigned
with its own, individual classi®cation number. This number will
be displayed on the CONSULT screen, as shown at left. When
replacing the diagnosis sensor unit, refer to the part number for
the compatibility. After installation, replacement with a correct
unit can be checked by con®rming this classi®cation number on
the CONSULT screen.
For NISSAN MODEL Y61, the diagnosis sensor unit classi®ca-
tion numbers assigned are C2 (Hardtop models) and 27 (Mod-
els except Hardtop).
SRS504
TROUBLE DIAGNOSES Ð Supplemental Restraint System (SRS)
RS-22
Page 47 of 47
Part SRS (except the
side air bag) is acti-
vatedSRS is NOT activated
Instrument panel 1. When passenger air bag in¯ates, check the following points for bending, deformities or cracks.
+Opening portion for passenger air bag
SRS472
+Passenger air bag module brackets
SRS473
+The portions securing the instrument panel
SRS474
2. If no damage is found, reinstall the instrument panel.
3. If damagedÐREPLACE the instrument panel with bolts.
COLLISION DIAGNOSIS
RS-46