Page 152 of 217
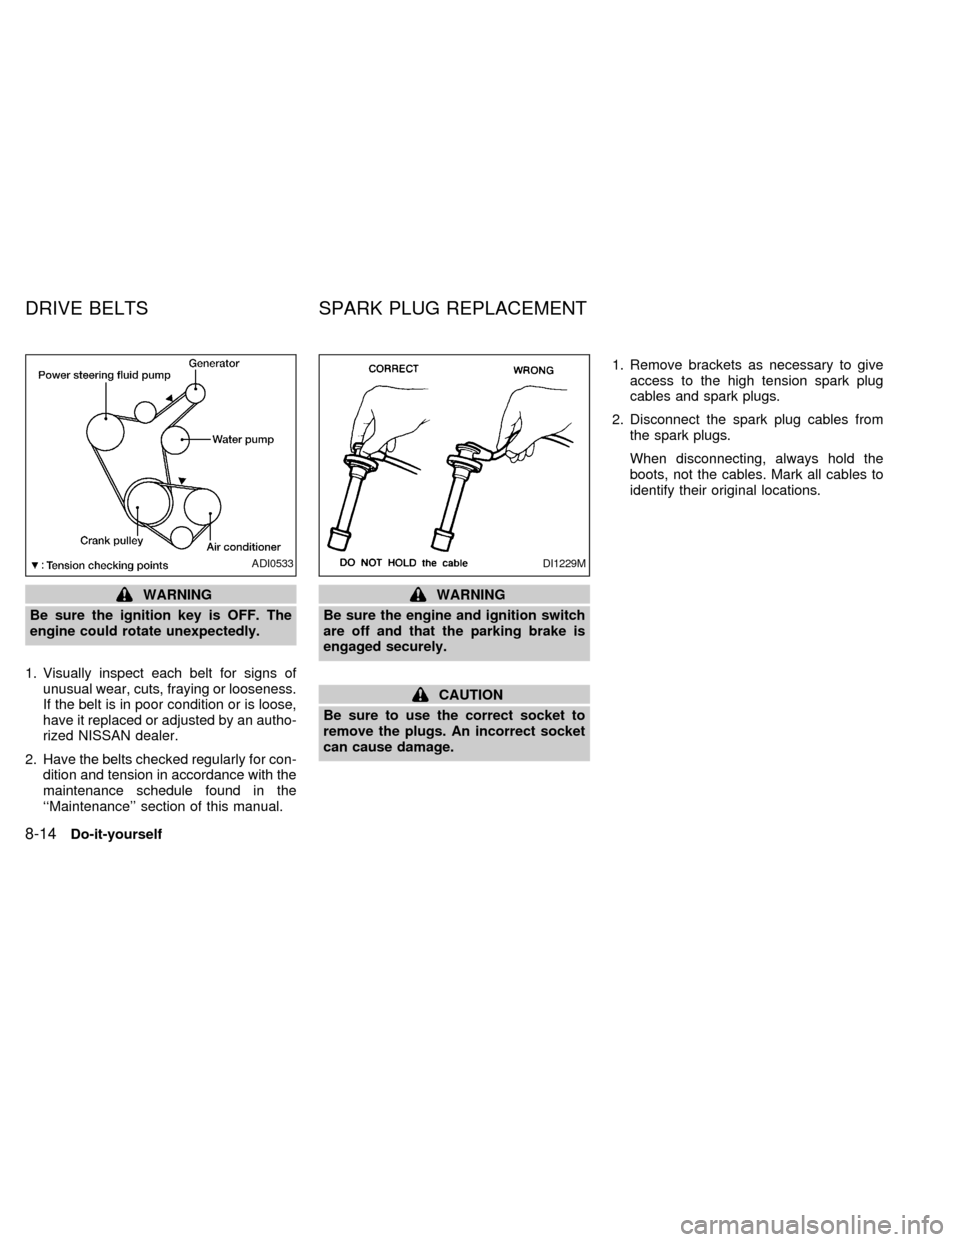
CHECKING ENGINE OIL LEVEL
1. Park the vehicle on a level surface and
apply the parking brake.
2. Start the engine and let it idle until it
reaches operating temperature.
3. Turn off the engine.Wait a few minutes
for the oil to drain back into the oil
pan.
4. Remove the dipstick and wipe it clean.
Reinsert it all the way.5. Remove the dipstick again and check the
oil level. It should be between the H
(High) and L (Low) marks. If the oil level
is below the L (Low) mark, remove the oil
filler cap and pour recommended oil
through the opening.Do not overfill.
6. Recheck the oil level with the dipstick.
It is normal to add some oil between oil
maintenance intervals or during the
break-in period, depending on the sever-
ity of operating conditions.
CAUTION
Oil level should be checked regularly.
Operating with insufficient amount of
oil can damage the engine, and such
damage is not covered by warranty.
DI1300DI1301
ENGINE OIL
Do-it-yourself8-7
ZX
Page 153 of 217
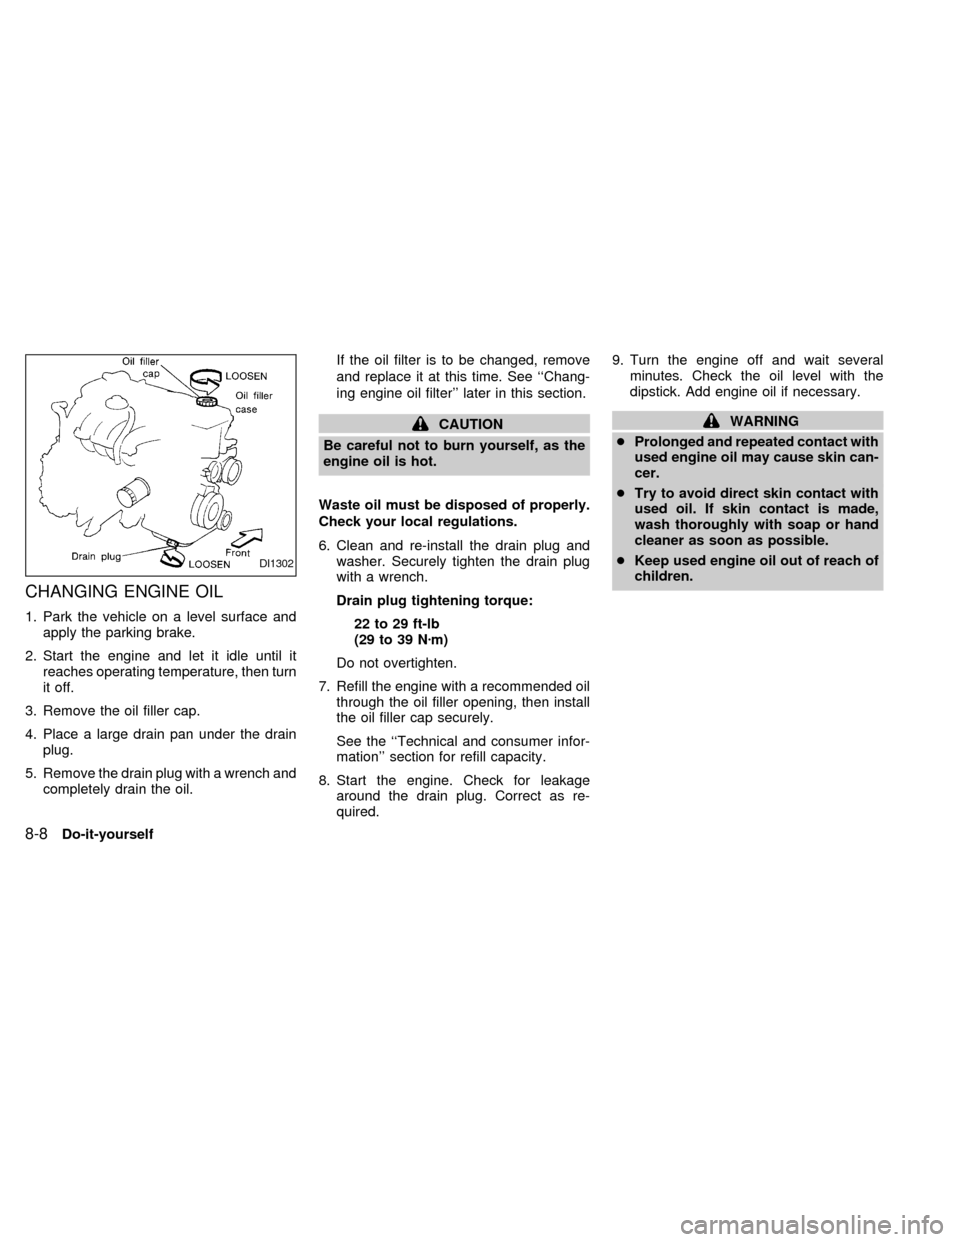
CHANGING ENGINE OIL
1. Park the vehicle on a level surface and
apply the parking brake.
2. Start the engine and let it idle until it
reaches operating temperature, then turn
it off.
3. Remove the oil filler cap.
4. Place a large drain pan under the drain
plug.
5. Remove the drain plug with a wrench and
completely drain the oil.If the oil filter is to be changed, remove
and replace it at this time. See ``Chang-
ing engine oil filter'' later in this section.
CAUTION
Be careful not to burn yourself, as the
engine oil is hot.
Waste oil must be disposed of properly.
Check your local regulations.
6. Clean and re-install the drain plug and
washer. Securely tighten the drain plug
with a wrench.
Drain plug tightening torque:
22 to 29 ft-lb
(29 to 39 Nzm)
Do not overtighten.
7. Refill the engine with a recommended oil
through the oil filler opening, then install
the oil filler cap securely.
See the ``Technical and consumer infor-
mation'' section for refill capacity.
8. Start the engine. Check for leakage
around the drain plug. Correct as re-
quired.9. Turn the engine off and wait several
minutes. Check the oil level with the
dipstick. Add engine oil if necessary.WARNING
cProlonged and repeated contact with
used engine oil may cause skin can-
cer.
cTry to avoid direct skin contact with
used oil. If skin contact is made,
wash thoroughly with soap or hand
cleaner as soon as possible.
cKeep used engine oil out of reach of
children.
DI1302
8-8Do-it-yourself
ZX
Page 154 of 217
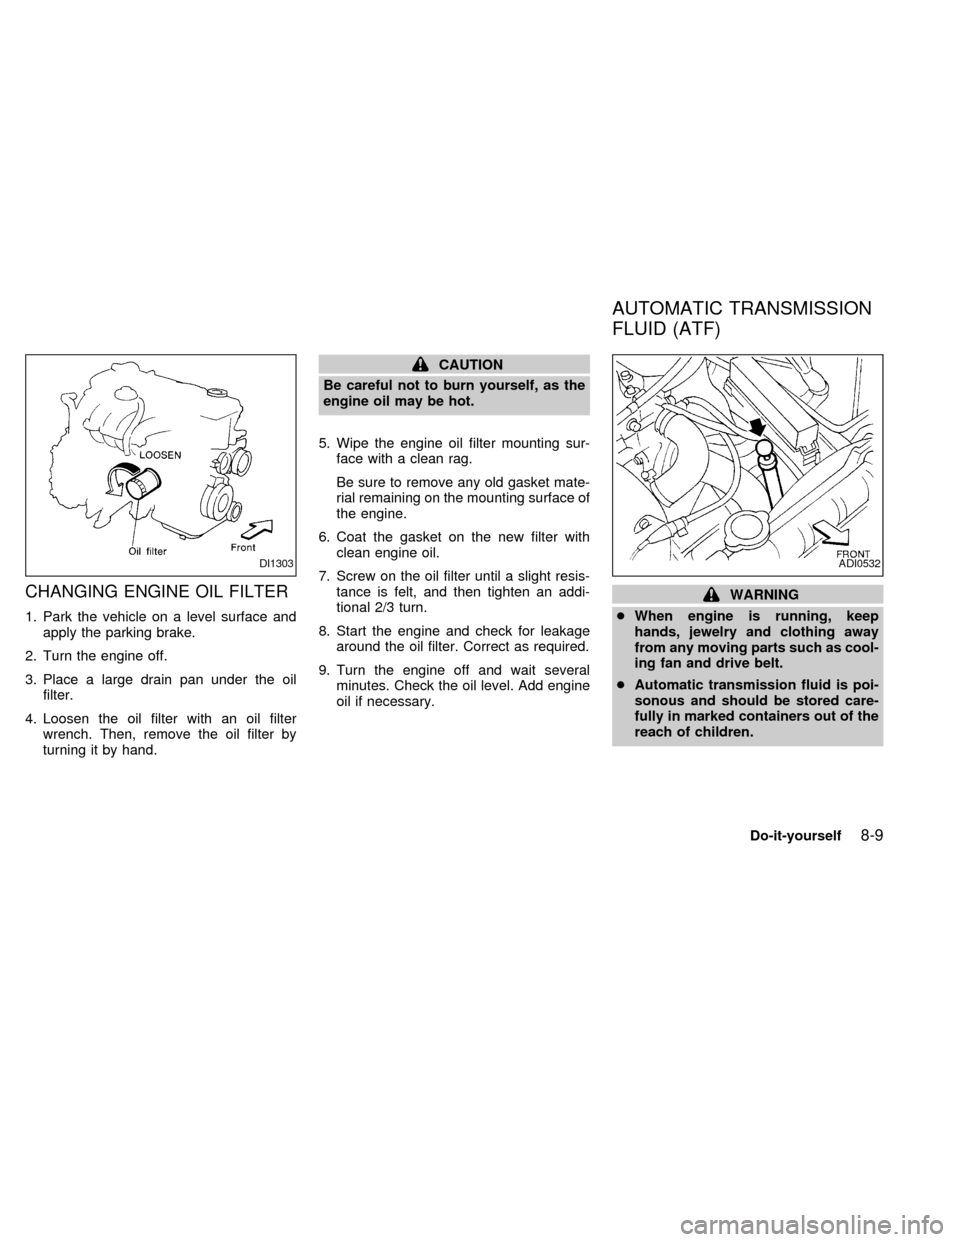
CHANGING ENGINE OIL FILTER
1. Park the vehicle on a level surface and
apply the parking brake.
2. Turn the engine off.
3. Place a large drain pan under the oil
filter.
4. Loosen the oil filter with an oil filter
wrench. Then, remove the oil filter by
turning it by hand.
CAUTION
Be careful not to burn yourself, as the
engine oil may be hot.
5. Wipe the engine oil filter mounting sur-
face with a clean rag.
Be sure to remove any old gasket mate-
rial remaining on the mounting surface of
the engine.
6. Coat the gasket on the new filter with
clean engine oil.
7. Screw on the oil filter until a slight resis-
tance is felt, and then tighten an addi-
tional 2/3 turn.
8. Start the engine and check for leakage
around the oil filter. Correct as required.
9. Turn the engine off and wait several
minutes. Check the oil level. Add engine
oil if necessary.
WARNING
cWhen engine is running, keep
hands, jewelry and clothing away
from any moving parts such as cool-
ing fan and drive belt.
cAutomatic transmission fluid is poi-
sonous and should be stored care-
fully in marked containers out of the
reach of children.
DI1303ADI0532
AUTOMATIC TRANSMISSION
FLUID (ATF)
Do-it-yourself8-9
ZX
Page 155 of 217
TEMPERATURE CONDITIONS
FOR CHECKING ATF
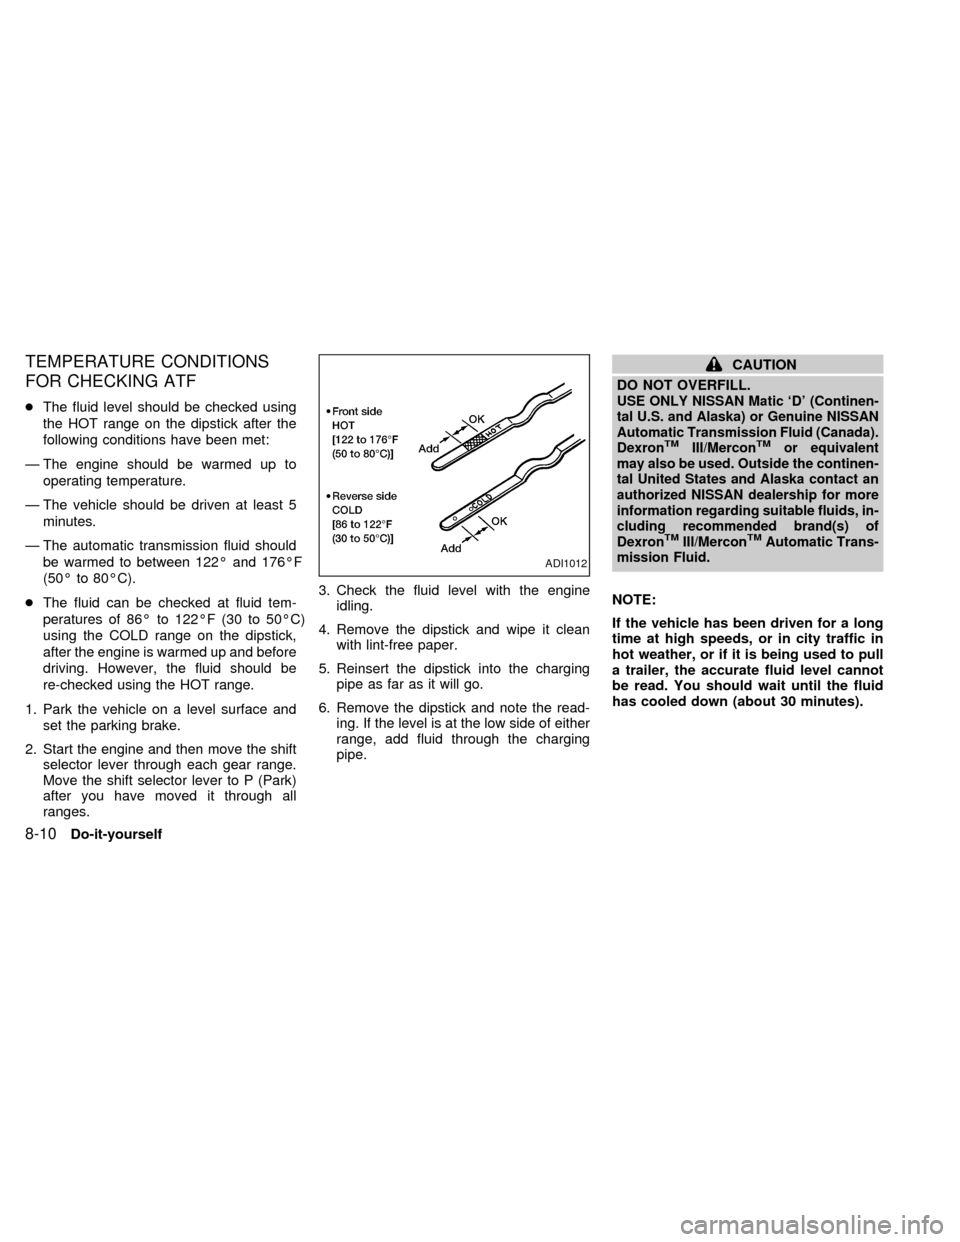
cThe fluid level should be checked using
the HOT range on the dipstick after the
following conditions have been met:
Ð The engine should be warmed up to
operating temperature.
Ð The vehicle should be driven at least 5
minutes.
Ð The automatic transmission fluid should
be warmed to between 122É and 176ÉF
(50É to 80ÉC).
cThe fluid can be checked at fluid tem-
peratures of 86É to 122ÉF (30 to 50ÉC)
using the COLD range on the dipstick,
after the engine is warmed up and before
driving. However, the fluid should be
re-checked using the HOT range.
1. Park the vehicle on a level surface and
set the parking brake.
2. Start the engine and then move the shift
selector lever through each gear range.
Move the shift selector lever to P (Park)
after you have moved it through all
ranges.3. Check the fluid level with the engine
idling.
4. Remove the dipstick and wipe it clean
with lint-free paper.
5. Reinsert the dipstick into the charging
pipe as far as it will go.
6. Remove the dipstick and note the read-
ing. If the level is at the low side of either
range, add fluid through the charging
pipe.
CAUTION
DO NOT OVERFILL.
USE ONLY NISSAN Matic `D' (Continen-
tal U.S. and Alaska) or Genuine NISSAN
Automatic Transmission Fluid (Canada).
Dexron
TMIII/MerconTMor equivalent
may also be used. Outside the continen-
tal United States and Alaska contact an
authorized NISSAN dealership for more
information regarding suitable fluids, in-
cluding recommended brand(s) of
Dexron
TMIII/MerconTMAutomatic Trans-
mission Fluid.
NOTE:
If the vehicle has been driven for a long
time at high speeds, or in city traffic in
hot weather, or if it is being used to pull
a trailer, the accurate fluid level cannot
be read. You should wait until the fluid
has cooled down (about 30 minutes).
ADI1012
8-10Do-it-yourself
ZX
Page 156 of 217
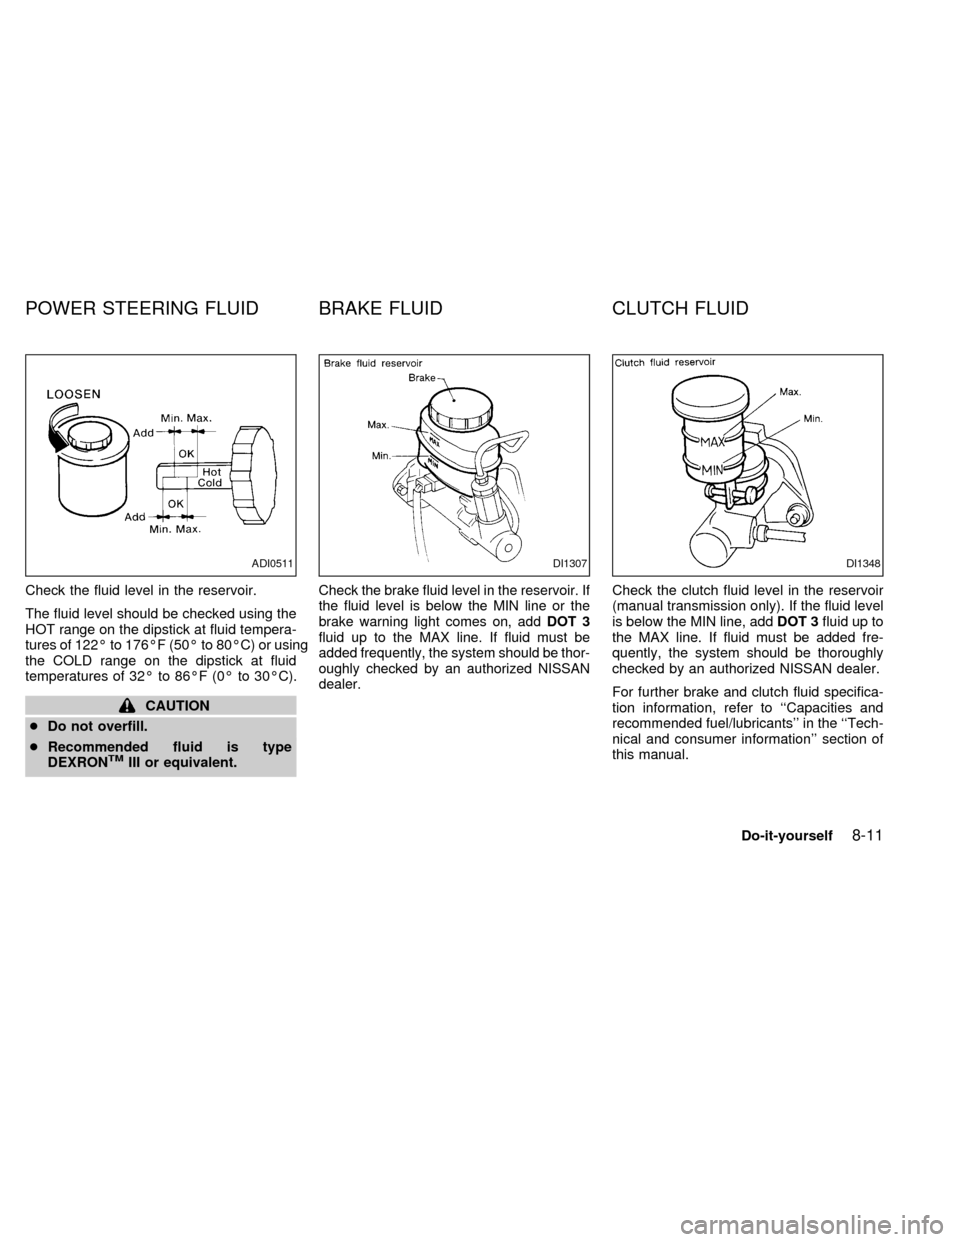
Check the fluid level in the reservoir.
The fluid level should be checked using the
HOT range on the dipstick at fluid tempera-
tures of 122É to 176ÉF (50É to 80ÉC) or using
the COLD range on the dipstick at fluid
temperatures of 32É to 86ÉF (0É to 30ÉC).
CAUTION
cDo not overfill.
cRecommended fluid is type
DEXRON
TMIII or equivalent.
Check the brake fluid level in the reservoir. If
the fluid level is below the MIN line or the
brake warning light comes on, addDOT 3
fluid up to the MAX line. If fluid must be
added frequently, the system should be thor-
oughly checked by an authorized NISSAN
dealer.Check the clutch fluid level in the reservoir
(manual transmission only). If the fluid level
is below the MIN line, addDOT 3fluid up to
the MAX line. If fluid must be added fre-
quently, the system should be thoroughly
checked by an authorized NISSAN dealer.
For further brake and clutch fluid specifica-
tion information, refer to ``Capacities and
recommended fuel/lubricants'' in the ``Tech-
nical and consumer information'' section of
this manual.
ADI0511DI1307DI1348
POWER STEERING FLUID BRAKE FLUID CLUTCH FLUID
Do-it-yourself8-11
ZX
Page 157 of 217
WARNING
Use only new fluid. old, inferior, or
contaminated fluid may damage the
brake and clutch systems. The use of
improper fluids can damage the brake
system and affect the vehicle's stop-
ping ability.
CAUTION
Do not spill the fluid on painted sur-
faces. This will damage the paint. If
fluid is spilled, wash with water.
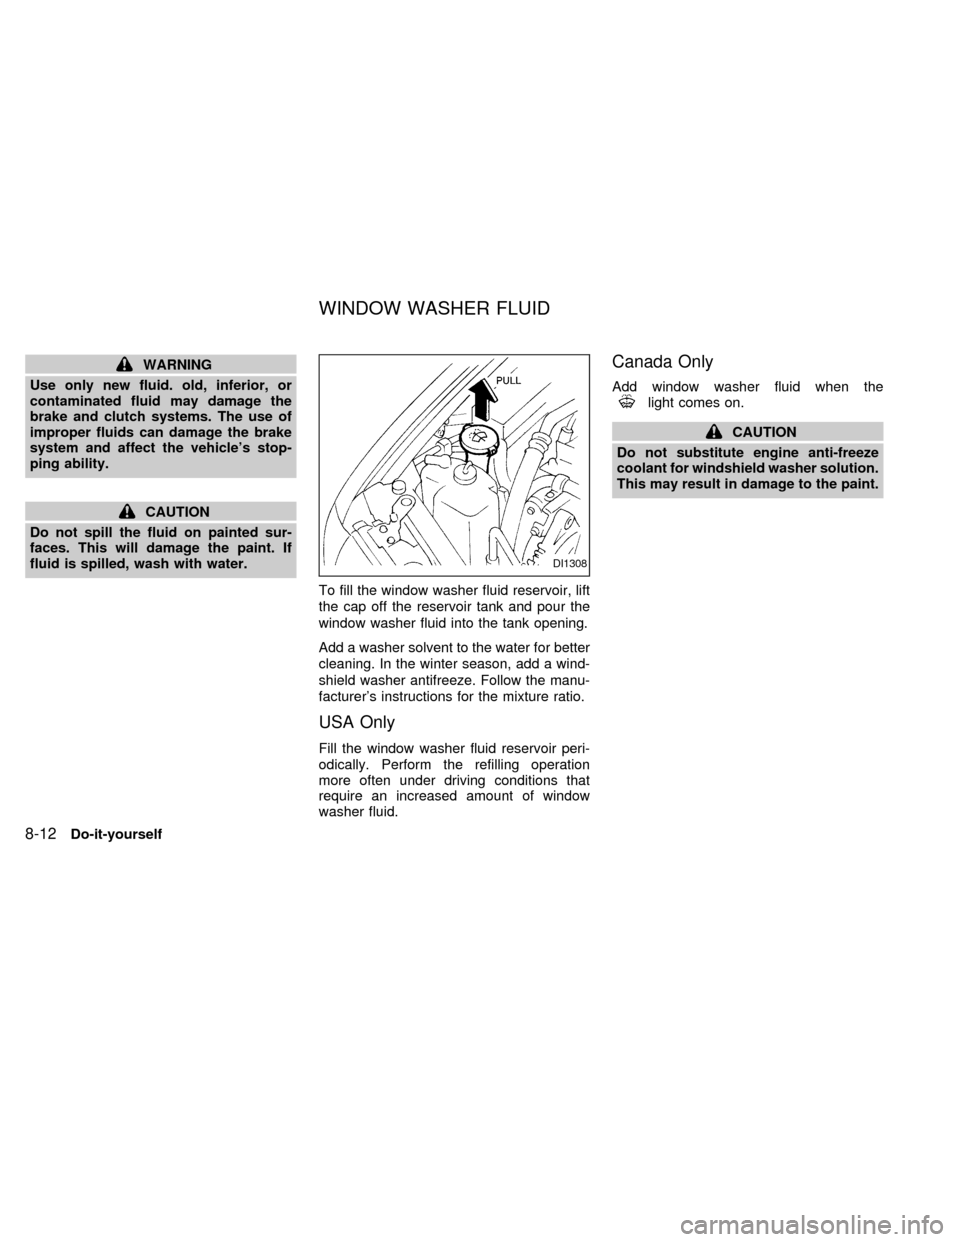
To fill the window washer fluid reservoir, lift
the cap off the reservoir tank and pour the
window washer fluid into the tank opening.
Add a washer solvent to the water for better
cleaning. In the winter season, add a wind-
shield washer antifreeze. Follow the manu-
facturer's instructions for the mixture ratio.
USA Only
Fill the window washer fluid reservoir peri-
odically. Perform the refilling operation
more often under driving conditions that
require an increased amount of window
washer fluid.
Canada Only
Add window washer fluid when thelight comes on.
CAUTION
Do not substitute engine anti-freeze
coolant for windshield washer solution.
This may result in damage to the paint.
DI1308
WINDOW WASHER FLUID
8-12Do-it-yourself
ZX
Page 159 of 217
WARNING
Be sure the ignition key is OFF. The
engine could rotate unexpectedly.
1. Visually inspect each belt for signs of
unusual wear, cuts, fraying or looseness.
If the belt is in poor condition or is loose,
have it replaced or adjusted by an autho-
rized NISSAN dealer.
2. Have the belts checked regularly for con-
dition and tension in accordance with the
maintenance schedule found in the
``Maintenance'' section of this manual.WARNING
Be sure the engine and ignition switch
are off and that the parking brake is
engaged securely.
CAUTION
Be sure to use the correct socket to
remove the plugs. An incorrect socket
can cause damage.1. Remove brackets as necessary to give
access to the high tension spark plug
cables and spark plugs.
2. Disconnect the spark plug cables from
the spark plugs.
When disconnecting, always hold the
boots, not the cables. Mark all cables to
identify their original locations.
ADI0533DI1229M
DRIVE BELTS SPARK PLUG REPLACEMENT
8-14Do-it-yourself
ZX
Page 163 of 217
If you wax the surface of the hood, be
careful not to let wax get into the washer
nozzle. This may cause clogging or im-
proper windshield washer operation. If wax
gets into the nozzle, remove it with a needle
or small pin.From the released position, pull the parking
brake lever up slowly and firmly. If the
number of clicks is out of the range listed
above, see an authorized NISSAN dealer.With the engine running, check the distance
between the upper surface of the pedal and
the metal floor. If it is out of the range shown
above, see an authorized NISSAN dealer.
ADI0613
ADI1003DI1020M
PARKING BRAKE CHECK BRAKE PEDAL
8-18Do-it-yourself
ZX