Page 4 of 176
RESUME
SET ACCEL
COAST
OFF
ON
80
MPH km/h
ABS
P!BRAKE
+ Ð
RPMx1000NORM
T/C
OFF
CHEF
FILL ON RIGHT
SERVICE
ENGINE
SOON AIR
BAG TURN ON
HEAD
LAMPS0 123456
7
0 2060
80
100
1200 204060100
120
140
160
180
200
40
OFFHI
LO
P0FFLIGHTS
AUTO
LAMP
SRS
Headlamp control
(pg. 26)
Turn signal and
wiper/washer control
(pg. 35)Instrument cluster
(pg. 6)
Driver air bag
(pg. 80) Speed control
(pg. 36) Instrument panel
dimmer switch
(pg. 27) Auto lamp
(pg. 27)
Instrumentation
4
Page 12 of 176

ELECTRONIC MESSAGE CENTER
The electronic message center only
works when the ignition is in the
ON position.
The message center tells you about
the condition of your vehicle by two
methods:
²operator selectable features
²continuous warning reporting of
monitored systems
You can select different features for
the message center to display by
using the message center controls
located to the right of the
instrument cluster. You will hear a tone when you press one of these
controls. However, the message center will display the appropriate
warning message if it detects a warning from any of the monitored
systems.
If you have a vehicle with the Driver
Select System, you have a DRIVER
ID control in place of the E/M
control.
²Refer toDRIVER ID
(if equipped)
for DRIVER ID control
information.
²Refer toE/M (if equipped)for
E/M control information.
Operator selectable features
These features are controlled by the message center controls located to
the right of the instrument cluster.
SYSTEM
E/M
MENU
TRIP
RESETSELECT
DISPLAY
DTE ECON VEHICLE HANDLING
SYSTEM
DRIVER ID
MENU
TRIP
RESETSELECT
DISPLAY
DTE ECON VEHICLE HANDLING
Instrumentation
12
Page 78 of 176

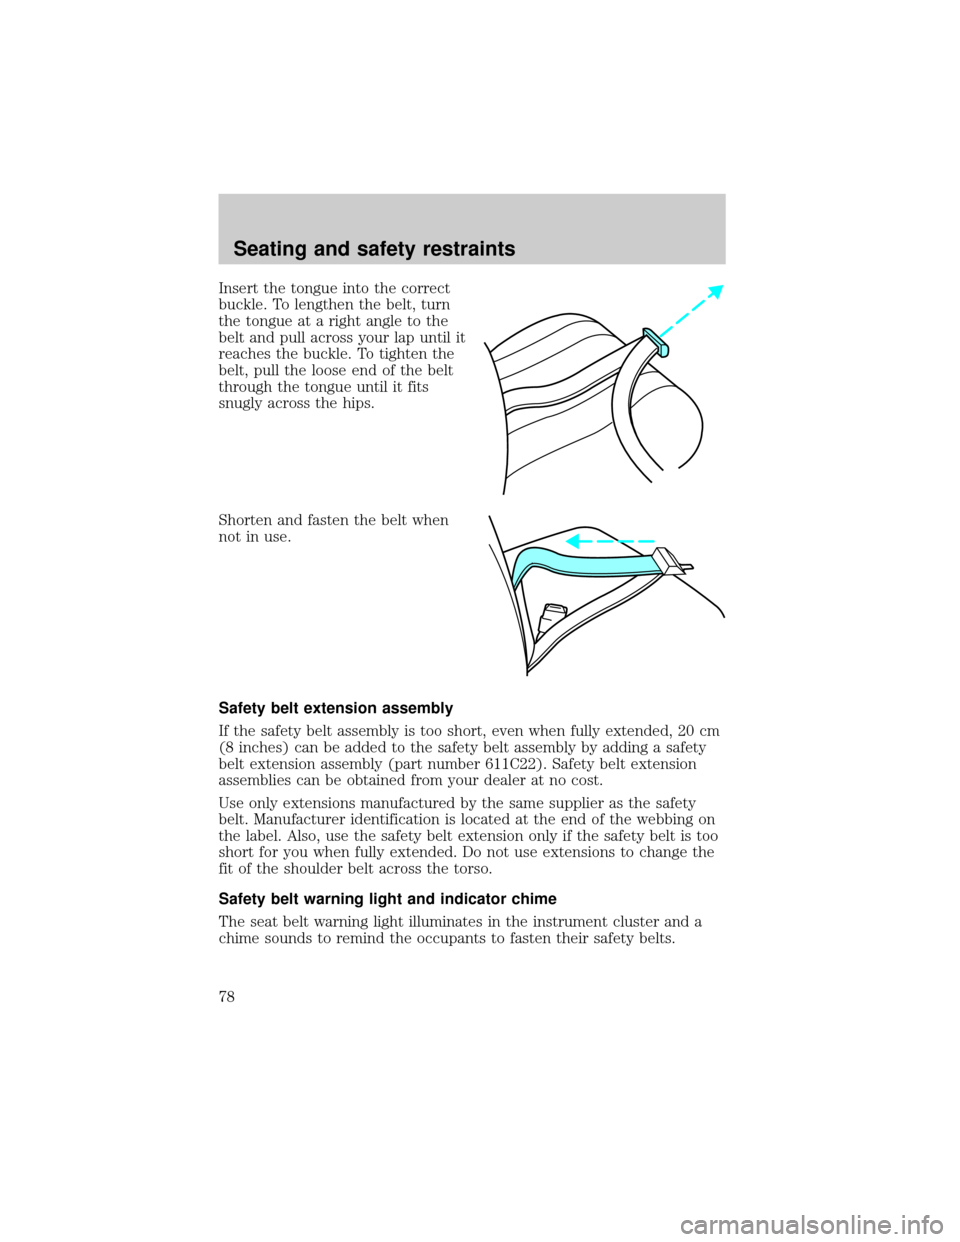
Insert the tongue into the correct
buckle. To lengthen the belt, turn
the tongue at a right angle to the
belt and pull across your lap until it
reaches the buckle. To tighten the
belt, pull the loose end of the belt
through the tongue until it fits
snugly across the hips.
Shorten and fasten the belt when
not in use.
Safety belt extension assembly
If the safety belt assembly is too short, even when fully extended, 20 cm
(8 inches) can be added to the safety belt assembly by adding a safety
belt extension assembly (part number 611C22). Safety belt extension
assemblies can be obtained from your dealer at no cost.
Use only extensions manufactured by the same supplier as the safety
belt. Manufacturer identification is located at the end of the webbing on
the label. Also, use the safety belt extension only if the safety belt is too
short for you when fully extended. Do not use extensions to change the
fit of the shoulder belt across the torso.
Safety belt warning light and indicator chime
The seat belt warning light illuminates in the instrument cluster and a
chime sounds to remind the occupants to fasten their safety belts.
Seating and safety restraints
78
Page 82 of 176

The air bags inflate and deflate
rapidly upon activation.
After air bag deployment, it is
normal to notice a smoke-like,
powdery residue or smell the burnt
propellant. This may consist of
cornstarch, talcum powder
(to lubricate the bag) or sodium
compounds (e.g., baking soda) that
result from the combustion process
that inflates the air bag. Small
amounts of sodium hydroxide may
be present which may irritate the
skin and eyes, but none of the
residue is toxic.
Several air bag system components get hot after inflation. Do not
touch them after inflation.
If the air bag is inflated,the air bag will not function again
and must be replaced immediately. If the air bag is not
replaced, the unrepaired area will increase the risk of injury in a
collision.
The SRS consists of:
²driver and passenger air bag modules (which include the inflators and
air bags),
²one or more impact and safing sensors,
²a readiness light and tone
²and the electrical wiring which connects the components.
The diagnostic module monitors its own internal circuits and the
supplemental air bag electrical system warning (including the impact
sensors), the system wiring, the air bag system readiness light, the air
bag back up power and the air bag ignitors.
Determining if the system is operational
The SRS uses a readiness light in the instrument cluster or a tone to
indicate the condition of the system. Refer to theAir bag readiness
Seating and safety restraints
82
Page 95 of 176

BRAKES
Your brakes are self-adjusting. Refer to the ªService Guideº for scheduled
maintenance.
Occasional brake noise is normal and often does not indicate a
performance concern with the vehicle's brake system. In normal
operation, automotive brake systems may emit occasional or intermittent
squeal or groan noises when the brakes are applied. Such noises are
usually heard during the first few brake applications in the morning;
however, they may be heard at any time while braking and can be
aggravated by environmental conditions such as cold, heat, moisture,
road dust, salt or mud. If a ªmetal-to-metal,º ªcontinuous grindingº or
ªcontinuous squealº sound is present while braking, the brake linings
may be worn-out and should be inspected by a qualified service
technician.
Anti-lock brake system (ABS)
On vehicles equipped with an anti-lock braking system (ABS), a noise
from the hydraulic pump motor and pulsation in the pedal may be
observed during ABS braking events. Pedal pulsation coupled with noise
while braking under panic conditions or on loose gravel, bumps, wet or
snowy roads is normal and indicates proper functioning of the vehicle's
anti-lock brake system. If the vehicle has continuous vibration or shudder
while braking, felt mainly in the steering wheel, the vehicle most likely
needs service.
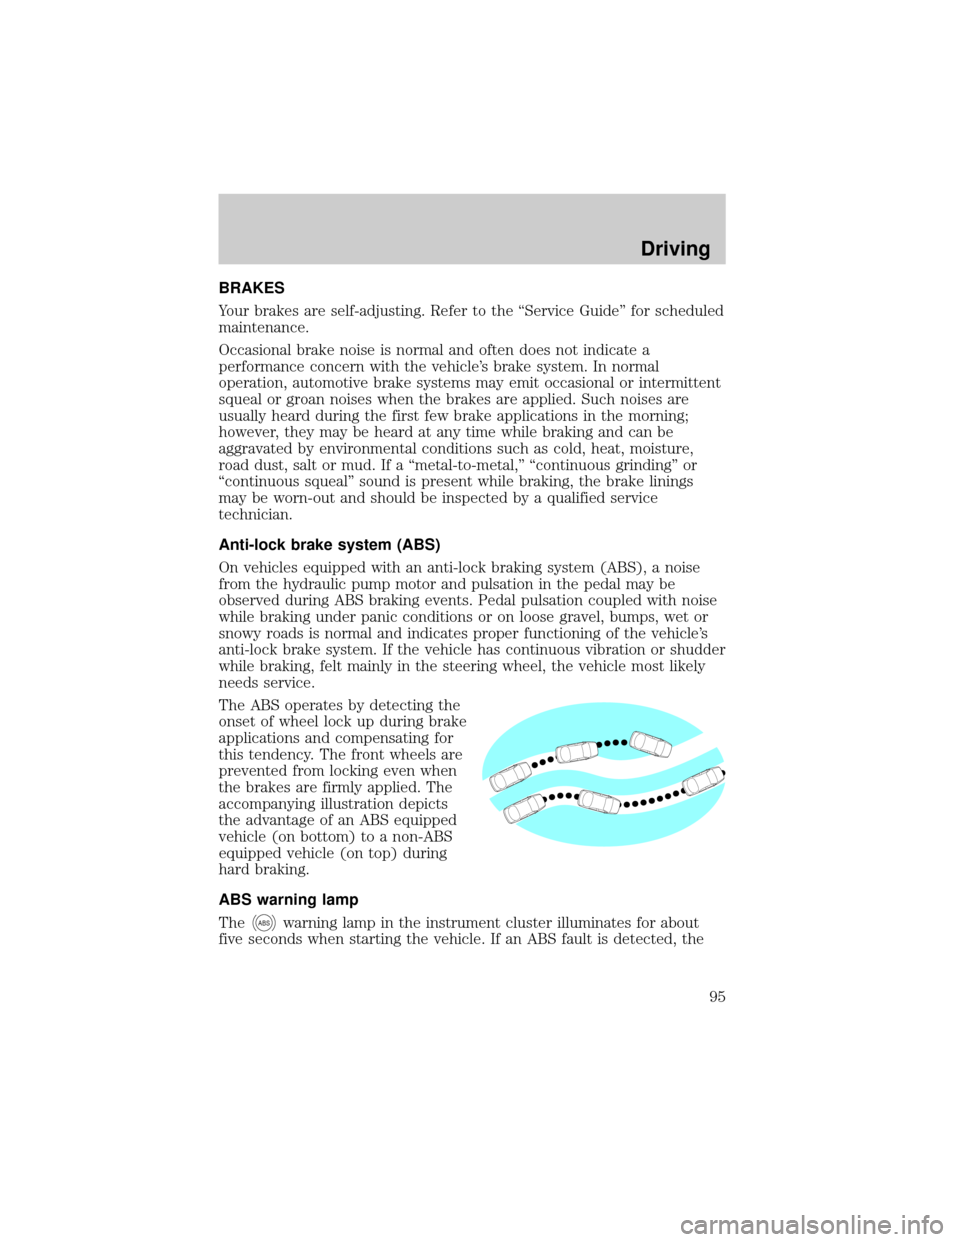
The ABS operates by detecting the
onset of wheel lock up during brake
applications and compensating for
this tendency. The front wheels are
prevented from locking even when
the brakes are firmly applied. The
accompanying illustration depicts
the advantage of an ABS equipped
vehicle (on bottom) to a non-ABS
equipped vehicle (on top) during
hard braking.
ABS warning lamp
The
ABSwarning lamp in the instrument cluster illuminates for about
five seconds when starting the vehicle. If an ABS fault is detected, the
Driving
95
Page 96 of 176

light will remain on and your vehicle should be serviced as soon as
possible.
Normal braking is still effective
unless the BRAKE warning lamp is
also illuminated.
Using ABS
²In an emergency or when maximum efficiency from the ABS is
required, apply continuous full force on the brake. The ABS will be
activated immediately, thus allowing you to retain full steering control
of your vehicle and, providing there is sufficient space, will enable you
to avoid obstacles and bring the vehicle to a controlled stop.
²We recommend that you familiarize yourself with this braking
technique. However, avoid taking any unnecessary risks.
Parking brake with auto-release
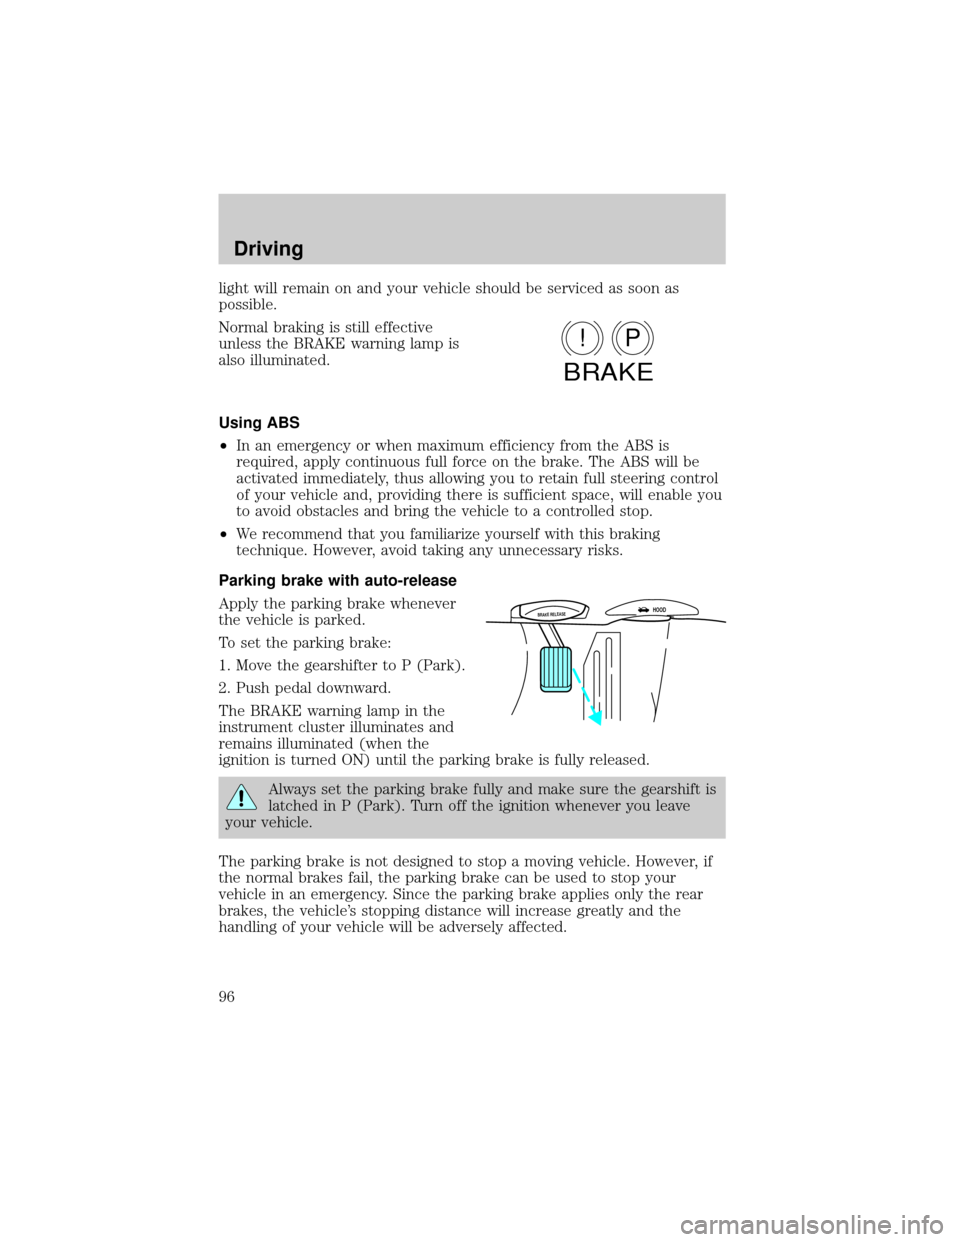
Apply the parking brake whenever
the vehicle is parked.
To set the parking brake:
1. Move the gearshifter to P (Park).
2. Push pedal downward.
The BRAKE warning lamp in the
instrument cluster illuminates and
remains illuminated (when the
ignition is turned ON) until the parking brake is fully released.
Always set the parking brake fully and make sure the gearshift is
latched in P (Park). Turn off the ignition whenever you leave
your vehicle.
The parking brake is not designed to stop a moving vehicle. However, if
the normal brakes fail, the parking brake can be used to stop your
vehicle in an emergency. Since the parking brake applies only the rear
brakes, the vehicle's stopping distance will increase greatly and the
handling of your vehicle will be adversely affected.
P!
BRAKE
BRAKE RELEASEHOOD
Driving
96
Page 113 of 176
Fuse/Relay Location Fuse Amp Rating Description
5 10A Virtual Image
Instrument Cluster,
Lighting Control
Module (LCM
RUN/START Sense),
Autolamp Light Sensor
6 10A Virtual Image
Instrument Cluster, RF
Park/Turn Lamp
7 20A Power Point
8 20A Fuel Filler Door
Release Switch, Trunk
Lid Relay
9 10A Air Bag Diagnostic
Monitor, EATC
Module, Blower Motor
Relay
10 30A Windshield Wiper
Motor, Windshield
Wiper Module
11 10A Ignition Coils, Radio
Interference Capacitor,
PCM Power Relay,
Passive Anti-Theft
System (PATS)
Transceiver
12 10A Lighting Control
Module
Roadside emergencies
113
Page 115 of 176
Fuse/Relay Location Fuse Amp Rating Description
26 10A Virtual Image
Instrument Cluster,
EATC Module
27 - NOT USED
28 10A Shift Lock Actuator,
Vehicle Dynamic
Module, Virtual Image
Instrument Cluster,
Rear Window Defrost,
Heated Seat Switch
Assembly, Low Tire
Pressure Module
29 10A Radio
30 10A Heated Mirrors
31 15A Lighting Control
Module (LCM): FCU,
Electronic Day/Night
Mirror, RH and LH
Courtesy Lamp, Door
Courtesy Lamps, RH
and LH Map Lamps,
RR and LR Reading
Lamps, RH and LH
Visor Lamps, Storage
Bin Lamps, Trunk Lid
Lamp, Glove Box
Lamp, Light Sensor
Amplifier
32 15A Speed Control DEAC.
Switch, Brake On/Off
(BOO) Switch
33 - NOT USED
Roadside emergencies
115