Page 172 of 272

Engine Oil
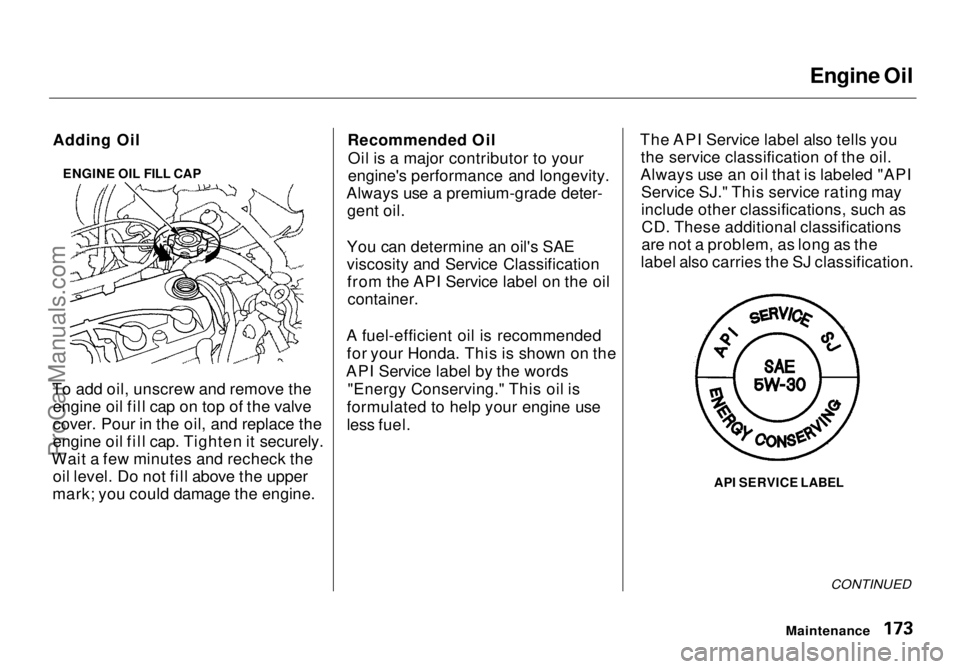
ENGINE OIL FILL CAP
To add oil, unscrew and remove the engine oil fill cap on top of the valve
cover. Pour in the oil, and replace the
engine oil fill cap. Tighten it securely.
Wait a few minutes and recheck the oil level. Do not fill above the upper
mark; you could damage the engine. Recommended Oil
Oil is a major contributor to your
engine's performance and longevity.
Always use a premium-grade deter- gent oil.
You can determine an oil's SAE
viscosity and Service Classification from the API Service label on the oilcontainer.
A fuel-efficient oil is recommended for your Honda. This is shown on the
API Service label by the words "Energy Conserving." This oil is
formulated to help your engine use
less fuel. The API Service label also tells you
the service classification of the oil.
Always use an oil that is labeled "API Service SJ." This service rating may
include other classifications, such asCD. These additional classifications
are not a problem, as long as the
label also carries the SJ classification.
API SERVICE LABEL
CONTINUED
Maintenance
Adding OilProCarManuals.comMain Menu Table of Contents s t
Page 173 of 272
Engine Oil
The oil container may also display the API Certification seal. Make sure
it says "For Gasoline Engines."
API CERTIFICATION MARK The SAE numbers tell you the oil's
viscosity or weight. Select the oil for
your vehicle according to this chart.
An oil with a viscosity of 5W-30 is preferred for improved fuel economyand year-round protection in your
Honda. You may use a 10W-30 oil if
the temperature in your area never
goes below 20°F ( — 7°C). Synthetic Oil
You may use a synthetic motor oil if it meets the same requirements
given for conventional motor oil; energy conserving, a service
classification of SJ, and the proper
weight as shown on the chart. When using synthetic oil, you must follow
the oil and filter change intervals
given in the maintenance schedule.
Maintenance
Ambient TemperatureProCarManuals.comMain Menu Table of Contents s t
Page 174 of 272

Engine Oil
Additives Your Honda does not need any oil
additives. Purchasing additives for
the engine or transmission will not
increase your vehicle's performance
or longevity. It only increases the
cost of operating your vehicle. Changing the Oil and Filter
Always change the oil and filter according to the time and distance (miles/kilometers) recommenda-
tions in the maintenance schedule.
The oil and filter collect contami- nants that can damage your engine if
they are not removed regularly.
Changing the oil and filter requires
special tools and access from
underneath the vehicle. The vehicle should be raised on a service station-
type hydraulic lift for this service. Unless you have the knowledge and
proper equipment, you should have
this maintenance done by a skilled
mechanic.
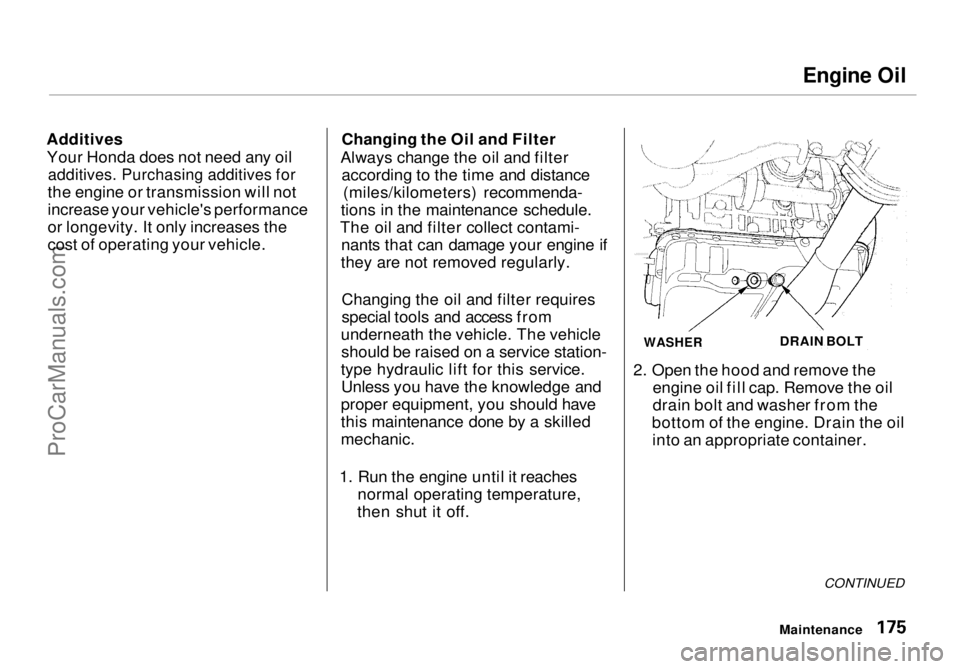
1. Run the engine until it reaches normal operating temperature,
then shut it off. 2. Open the hood and remove the
engine oil fill cap. Remove the oil
drain bolt and washer from the
bottom of the engine. Drain the oil into an appropriate container.
CONTINUED
Maintenance
WASHER
DRAIN BOLTProCarManuals.comMain Menu Table of Contents s t
Page 184 of 272
Air Cleaner Element
The air cleaner element should be cleaned or replaced according to the
time and distance recommendations
in the maintenance schedule. Cleaning (Severe Conditions)
Clean the air cleaner element by
blowing compressed air through it in
the opposite direction to normal air
flow. If you do not have access to compressed air (such as a service
station), ask your Honda dealer to do
this service.
Follow the replacement procedure
for removal and reinstallation. Replacement
The air cleaner element is inside the air cleaner housing on the passenger's
side of the engine compartment.
To replace it:
1. Remove the two pins holding the air intake cover by pulling the
head on each pin. Remove the air
intake cover.
2. Remove the air duct from the air cleaner housing cover.
Maintenance
CONTINUEDProCarManuals.comMain Menu Table of Contents s t
Page 193 of 272

Air Conditioning System
Your vehicle's air conditioning is a sealed system. Any major mainte-
nance, such as recharging, should be done by a qualified mechanic. You
can do a couple of things to make sure the air conditioning works
efficiently.
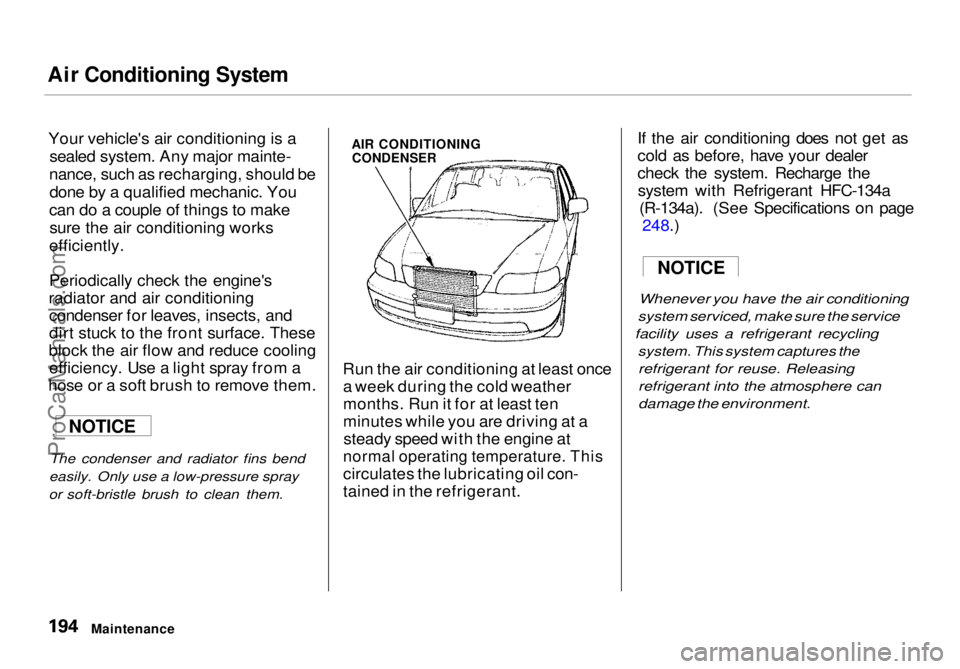
Periodically check the engine's
radiator and air conditioning condenser for leaves, insects, and
dirt stuck to the front surface. These
block the air flow and reduce cooling efficiency. Use a light spray from a
hose or a soft brush to remove them.
The condenser and radiator fins bend
easily. Only use a low-pressure spray
or soft-bristle brush to clean them.
AIR CONDITIONING
CONDENSER
Run the air conditioning at least once a week during the cold weather
months. Run it for at least ten
minutes while you are driving at asteady speed with the engine at
normal operating temperature. This
circulates the lubricating oil con-
tained in the refrigerant. If the air conditioning does not get as
cold as before, have your dealer
check the system. Recharge the
system with Refrigerant HFC-134a (R-134a). (See Specifications on page 248.
)
Whenever you
have the air conditioning
system serviced, make sure the service
facility uses a refrigerant recycling
system. This system captures the
refrigerant for reuse. Releasing
refrigerant into the atmosphere can
damage the environment.
Maintenance
NOTICE
NOTICEProCarManuals.comMain Menu Table of Contents s t
Page 224 of 272
Changing a Flat Tire
15.Lower the vehicle to the ground and remove the jack.
16.Tighten the wheel nuts securely in
the same crisscross pattern. Have
the wheel nut torque checked at
the nearest automotive service
facility.
Tighten the wheel nuts to:80 lbf.ft (108 N.m , 11 kgf.m)
17.Put the flat tire in the suppliedvinyl bag.
E
X model:
Remove the center cap.
Taking Care of the Unexpected
CONTINUEDProCarManuals.comMain Menu Table of Contents s t
Page 232 of 272
Charging System Indicator
This indicator should come on when the ignition switch is ON (II), and goout after the engine starts. If it
comes on brightly when the engine
is running, it indicates that the
charging system has stopped
charging the battery. Immediately turn off all electrical
accessories: radio, heater, A/C, rear
defogger, cruise control, etc. Try not
to use other electrically-operated
controls such as the power windows. Keep the engine running and take
extra care not to stall it. Starting the
engine will discharge the battery
rapidly. By eliminating as much of the
electrical load as possible, you can
drive several miles (kilometers)
before the battery is too discharged
to keep the engine running. Drive to a service station or garage where
you can get technical assistance.
Taking Care of the Unexpected
CHARGING SYSTEM INDICATORProCarManuals.comMain Menu Table of Contents s t
Page 234 of 272

Brake System Indicator
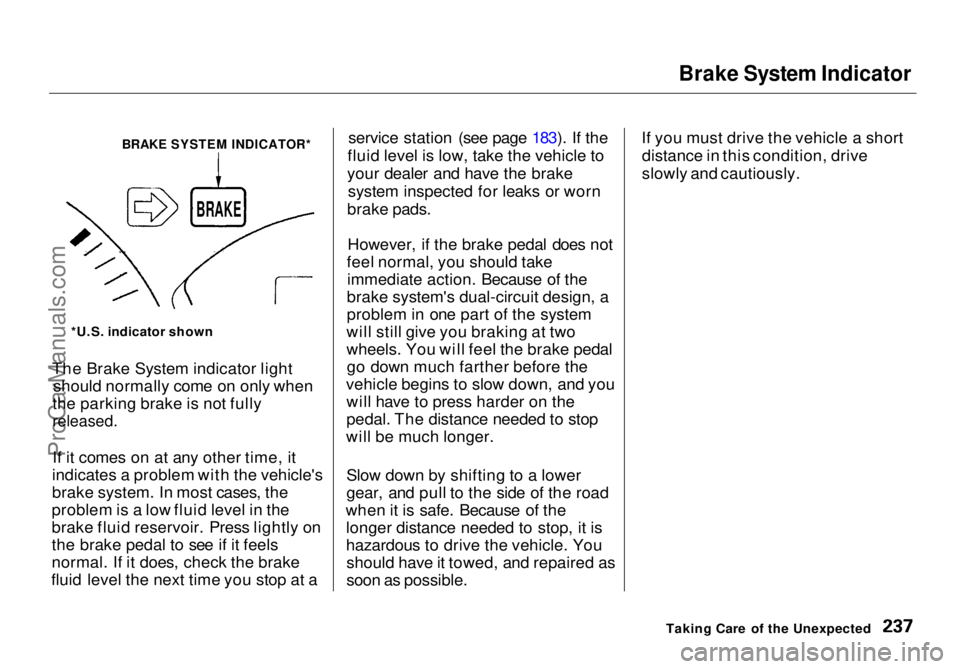
The Brake System indicator light should normally come on only when
the parking brake is not fully
released.
If it comes on at any other time, it
indicates a problem with the vehicle's
brake system. In most cases, the
problem is a low fluid level in the
brake fluid reservoir. Press lightly on
the brake pedal to see if it feels
normal. If it does, check the brake
fluid level the next time you stop at a service station (see page 183). If the
fluid level is low, take the vehicle to
your dealer and have the brake system inspected for leaks or worn
brake pads.
However, if the brake pedal does not
feel normal, you should take immediate action. Because of the
brake system's dual-circuit design, a
problem in one part of the system
will still give you braking at two
wheels. You will feel the brake pedal go down much farther before the
vehicle begins to slow down, and you will have to press harder on the
pedal. The distance needed to stop
will be much longer.
Slow down by shifting to a lower
gear, and pull to the side of the road
when it is safe. Because of the longer distance needed to stop, it is
hazardous to drive the vehicle. Youshould have it towed, and repaired as
soon as possible. If you must drive the vehicle a short
distance in this condition, drive
slowly and cautiously.
Taking Care of the Unexpected
BRAKE SYSTEM INDICATOR*
*U.S. indicator shown
BRAKEProCarManuals.comMain Menu Table of Contents s t