1998 HONDA INTEGRA indicator
[x] Cancel search: indicatorPage 1522 of 1681
![HONDA INTEGRA 1998 4.G Workshop Manual - Canada Only
UNDER-OASHFUSE/RELAYBOX
T@-];----
_ti:___:_c440
;
J
j
r-----
I See Power: Distribution,I page 10-8.
I
IL-----
FUSE 20{FUNNING LIGHTS)
See BrakeSystemIndicalor Light
c439
c41sc416
c416
ar HONDA INTEGRA 1998 4.G Workshop Manual - Canada Only
UNDER-OASHFUSE/RELAYBOX
T@-];----
_ti:___:_c440
;
J
j
r-----
I See Power: Distribution,I page 10-8.
I
IL-----
FUSE 20{FUNNING LIGHTS)
See BrakeSystemIndicalor Light
c439
c41sc416
c416
ar](/manual-img/13/6069/w960_6069-1521.png)
- Canada Only
UNDER-OASHFUSE/RELAYBOX
T@-];----
_ti:___:_c440
;
J
j
r-----
I See Power: Distribution,I page 10-8.
I
IL-----
FUSE 20{FUNNING LIGHTS)
See BrakeSystemIndicalor Light
c439
c41sc416
c416
arr<
DAYTIMERUNNINGLIGHTSCONTROLUNIT
c302
1
WHT/NEO
WHT/FEO
DAYTIMERUNNINGLIGHTSRESISTOR
c307c440
.I UNDER.DASHI FUSE/RELAYI 8OXI Pqofa 53
c504
18
r
I
I
1
A C508
l-l-l PARKINGI ' I BRAKE| .( | swrrcH| ..- t I Closed with4 parking brake- applreo.PHAfO 71
c301
See GroundDistribution,page 14-4.
Y
I
I
a:."-
Lights-on Batteryinpul
Headlight control
lgnitionBrake system indicatorlight control
GroundParking brake input
r-910-1-
1 10-9
Page 1523 of 1681
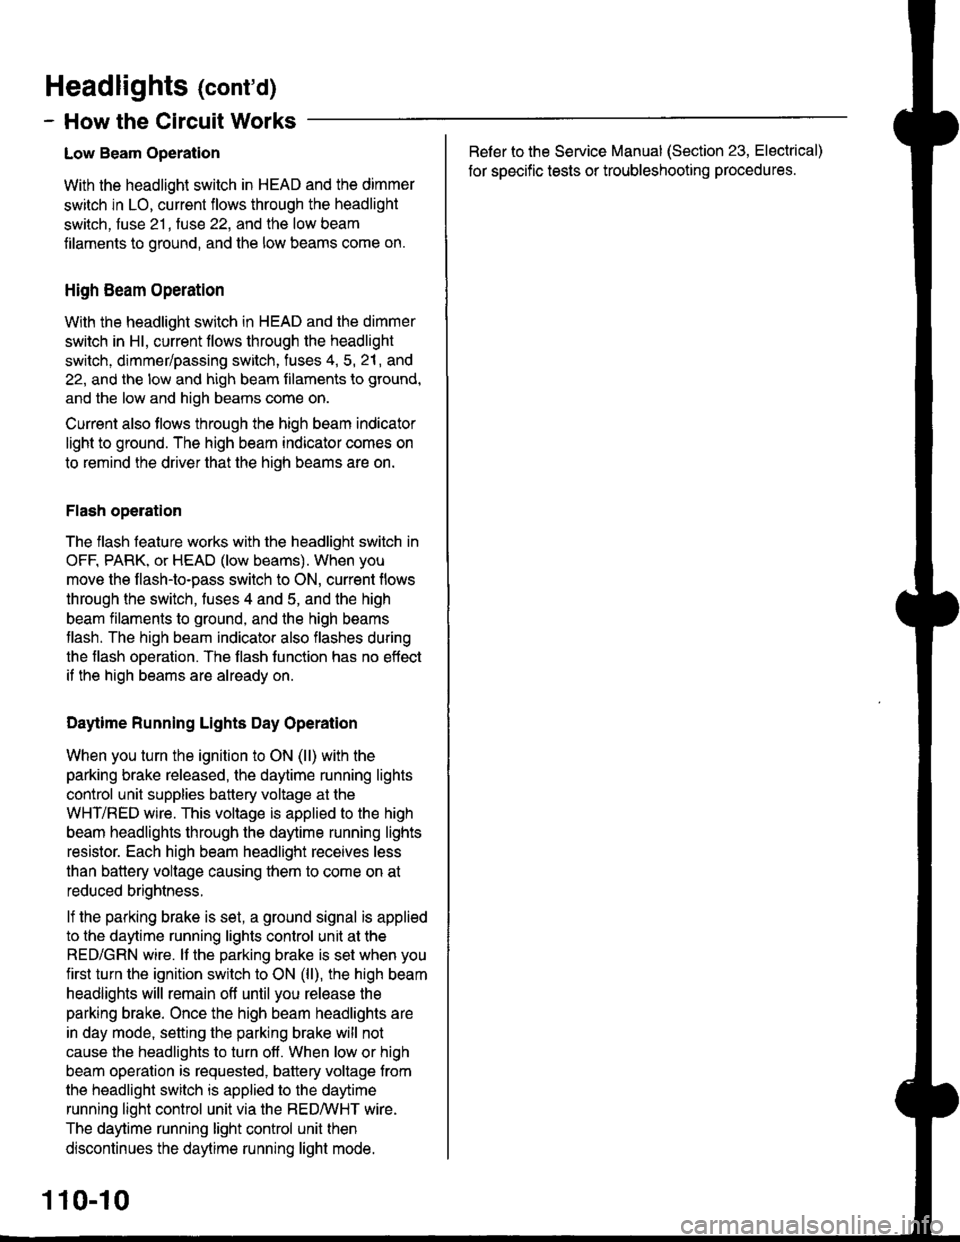
Headlights (cont'd)
- How the Circuit Works
Low Beam OperationRefer to the Service Manual (Section 23, Electrical)
for specific tests or troubleshooting procedures.
With the headlight switch in HEAD and the dimmer
switch in LO, current flows through the headlight
switch, fuse 21 , tuse 22, and the low beam
filaments to ground, and the low beams come on.
tligh Beam Operation
With the headlight switch in HEAD and the dimmer
switch in Hl, current flows through the headlight
switch, dimmer/passing switch, fuses 4, 5, 21, and
22, and the low and high beam filaments to ground,
and the low and high beams come on.
Current also tlows through the high beam indicator
light to ground. The high beam indicator comes on
to remind the driver that the high beams are on.
Flash operation
The flash feature works with the headlight switch in
OFF, PARK, or HEAD (low beams). When you
move the flash-to-pass switch to ON, current flows
through the switch, fuses 4 and 5, and the high
beam filaments to ground, and the high beams
flash. The high beam indicator also flashes during
the flash oDeration. The flash function has no effect
it the high beams are already on.
Daytime Running Lights Day Operation
When you turn the ignition to ON (ll) with the
parking brake released, the daytime running lights
control unit supplies battery voltage at the
WHT/RED wire. This voltage is applied to the high
beam headlights through the daytime running lights
resistor. Each high beam headlight receives less
than battery voltage causing them to come on al
reduced brightness.
lf the parking brake is set, a ground signal is applied
to the daytime running lights control unit at the
RED/GRN wire. It the parking brake is set when you
first turn the ignition switch to ON (ll), the high beam
headlights will remain off until you release the
parking brake. Once the high beam headlights are
in day mode, setting the parking brake will not
cause the headlights to turn off . When low or high
beam operation is requested, baftery voltage trom
the headlight switch is applied to the daytime
running light control unit via the RED/vVHT wire.
The daytime running light control unit then
discontinues the daytime running light mode.
1 10-10
Page 1527 of 1681
Fog Lights
UNDER-HOODFUSE/RELAYBOXi-f;;-| neroucrt
!__L':___
:;i!'r.
6€e HeadlightSwitch,page 10O.
Y
I
-.1.*.
Flash.to-pasE ISwitch /
orrl-t o"t*
oir.r, {-Swltch \",I-J -
lt:
-- -'t coMBtNATtoN1H€8dT I LIGHT
lggltl"" iP#[9]l
*,JI-
See HeadlightSwitch,page |00.
ON
"oN"
INDICATOR
FOGLIGHTIN-LINEFUSEPHOfO 123
FOGLIGHTREI.AYPHATO 122
See HeadliohtSwitch,page 100.
cl6
RIGHTFOG LIGHT
------Tl'c42
elurneo ll
".u,".of, "t"to% u,
A csroBLU/REO ll PHO|O tr
Ut",'ry*
"'fi
',ua'r.,o
"'
110-14
..- c4o -a-----l c3o1: PHoro 122 : : pHaToll
Page 1530 of 1681
Ceiling, Spot, Cargo Area, and Trunk Lights; Door, Hatch,
i
- - - - - - -rffi
;
-
I H,!8",klf;""
I s""Po*"r. ) Ifl* i!,?t,,: Distribution t '-
!-id"i::=a----l'10 Y C55110 Y C5s11l PHOTO aA
-l--
IYEUBLU
I
i qpq Fv"'ll uElnDuron.! page'lo-5.
"Tl",,,
Indicators,ii1;](;;;' I II'OOR OPEN TINDICAIOR LIGHT \
tJEJ
With Moonroof
c425
wHr/BEoJl
::'::l[
LIGHTS '
-:_ __i (ferminats 8.10)
CEILINGLIGHT
,-, o"n "a9 [ rroro ro LT GFN'REDGFN/REO12 a C422if pForo )6
| _9I _c*s __ |PfSE, .'"""
t!-f."----T'! IU.E9F FD I hEiii iiD
if ifr*"o + l8Rllr"o' ti;91".. l1---
i i i:tr#i">-{ i"usfl. lai6iose
lL:---=*J-.^ |
'---=r,f;---J .'""""."i
.-E
.,o"""."f.u,.
I-I-I DRIVER'S I-IF] FBONT .I-IFI LEFT REAR I-IFI RIGHT REAB 'l, IDooRswrrcH l, IPASSENGEBS,I I loo.|orB" l/ ISSP;B, :
ll+lF.":"::r!!r lglp;?"',"i,:;i'''"" il /-r|il{':!,sf l '-11:$"|I,lr
i
13?,c:::""" I
'--------;
I t{r"rn".iil""onn""to., ,
o"n".u| | : | 'oa',n."|[3r,J#,1?,,"",",;
| "uor ,f[ cu', i J[ cszs ,1, c'g,
PHOIO 88 (Sedan) - pHOrO 8t | - PHOrO 92 - PHO|O 92PHoIo 88 (s6dan) ___ Sedan
a-t c-{OFF
OFF A
";flxl
3::; ;;il;;;
::"T{ ;,
2 Y C560
' ? --=:( d-o-n-r.iiiicin ioprroHr, n c426
:_---_i - _ _ _:Plo_'?. A||exceptusARs _
LTGRN,BE'I - c4'r8
114-2
Page 1548 of 1681
- How the Circuit Works
The immobilizer system is designed to prevent the
car f rom being started without the owner's ignition
key. lf an attempt is made to start the car without
the correct key, the immobilizer system will disable
the car's fuel supply.
The immobilizer system consists of the ignition key,
immobilizer receiver unit, immobilizer indicator
light, PGM-FI main relay, fuel pump, and the PCM
or ECM.
With the ignition switch in ON (ll) or START (lll), the
immobilizer receiver unit and the PCM or ECM
receive an "ignition on" signal through fuse 44 and
the PGM-FI main relay. The PCM or ECM then
sends power to the ignition key transponder through
the immobilizer receiver unit. The transponder then
sends a coded signal back to the PCM or ECM
through the receiver unit. lf the signal is correct, the
PCM or ECM will energize the car's fuel supply
system by grounding the PGM-FI main relay. The
immobilizer indicator light flashes a code to indicate
that the correct key has been inserted. lf the
ignition key signal is not correct, the PCM or ECM
will not energize the car's fuel supply system by not
grounding the PGM-Fl main relay. The immobilizer
indicator light then flashes a code to indicate that an
incorrect key has been inserted.
Refer to the Service Manual (Section 23,
Body Electrical) for specific tests and
troubleshooting procedures.
132-1
Page 1549 of 1681
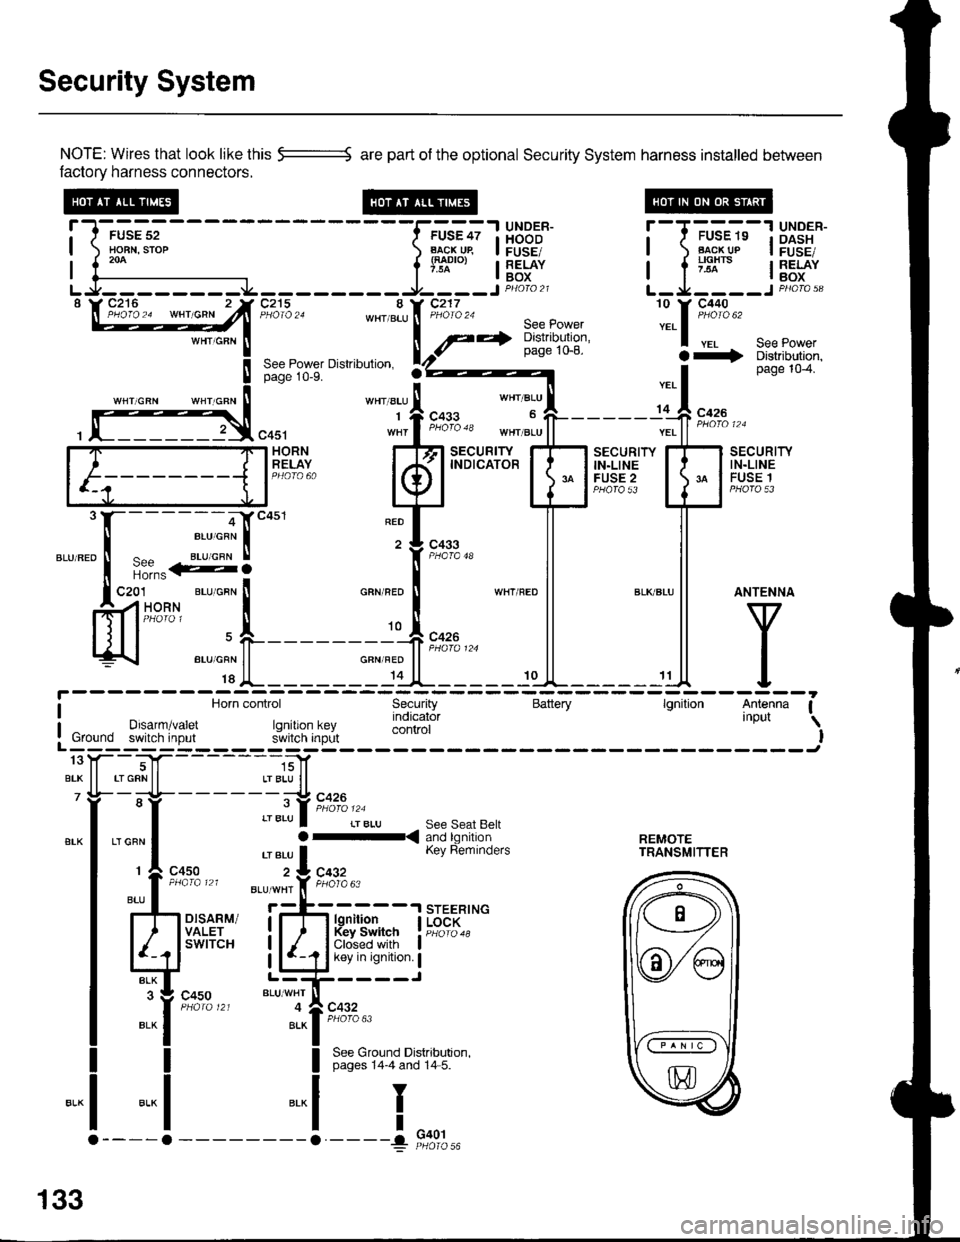
Security System
NOTE: Wires that look like this --::= are part of the optional Security System harness installed betlveen
factory harness connectors.
!-l-'*;;--
-----f.-u'?;l
HBB'J' !--T-'u-"-"-13X3"'*-| ) Ho-BN.srop ) B..l\-cj^qp I FUSE/ | ) Flg!!!p I FusE,| 1."^ | lTl"'", I RELAY I a ;'lx'" I RELAY| {--------------- l'* | Box I l -^ lBox
LJ--------.J4---------9----JP4oto21 L-Ja----JPHoro,3"\W27**^ -"hlT'jZn8:,*[:*ift :.1::t*'
seepowerpage 1o-8. a+ Distributjon,See Power Dislribulion. rZ)z----- I page 104.page 10-9.
''"' "t' 1.*"
*', "r:l-
- - - - - -,C **
, f]3,"0u, "1,f ";"3" *",J"11-------;'ff ;;;"
[F=]F;"#,.. kfl
t"ffBr+T'
EilHr{" E
mli
"."".:X-:-S]""'
"T['*-
ll ll
ffi'-"*FL_____r*F_*l
l^y^
c4s1 wnr I t"o'o 'o tn"r ".u | | ".. | | *n' ' '
i Horn control Security Battery lgnition Antenna Ia Horn control Security Battery lgnilion Antenna I
I Drsarm/varet rq indicator 'nPut \
: Ground switch input r.JllXi'lJ;,L control I! Ground switch input s'ivitcn inprlt IL------; ------Jtoy--T|f- -----,;]1
BrK ll rrGRNll LrBLU ll7 Yi- -;-lt- - - - - - -;-:t c426
"-l ,"":l :::lb.i[ri?n'a'fl:. r..rn?.,n| 'eru I Kev Reminders rRANsMlrrER
r
c4so z:L cqgz
:l-il*
",, I
ttu' . *'*'i'f, F;l'o"
rh d.,til i;-fr H{jfJ. I i{",;::*
Ed'"""" LliCir'l':i
":it*t*'
"t--,i[;""
I See Ground Distributron.I pages 14-4 and 14 5.
-.1
I
I
"..1
133
G401
Page 1551 of 1681
![HONDA INTEGRA 1998 4.G Workshop Manual Security System (contd)
NOTE: Wires that look likethis 5--------5 are part of the ootional
aY cz.tz ||rrrur oPcn rnpur ]wHr RED ll P&?ir rz
I .- - ro 6___z_|f__________Jlf
8,"hT" ll ll see Trunk o"n HONDA INTEGRA 1998 4.G Workshop Manual Security System (contd)
NOTE: Wires that look likethis 5--------5 are part of the ootional
aY cz.tz ||rrrur oPcn rnpur ]wHr RED ll P&?ir rz
I .- - ro 6___z_|f__________Jlf
8,"hT" ll ll see Trunk o"n](/manual-img/13/6069/w960_6069-1550.png)
Security System (contd)
NOTE: Wires that look likethis 5--------5 are part of the ootional
aY cz.tz ||rrrur oPcn rnpur ]wHr RED ll P&?ir rz
I .- - ro 6___z_|f__________Jlf
8,'"'hT" ll ll see Trunk o"n*i l
t"t*
,, V P,'::.^
Lid Open or >-a
r.I-.;.-,:1 UNDER. Security System harness installed between factory harness connectors.
I { i":"",'# | !.o.^o-g sEcuRrrY
I J t$r- i ;Eiii I c"itrns Door I coNrBoL
L^*-^lt-jF,i[,, i lg5 fffJ I','#llitT iv,j:]'",,
t-l,",,*,"""^'"*f,'''o" ll ffi dlffi'r,'*ir*'
[*l
.*"*1*,
1
ll
*""&
L= Jsts.""ll
.L:-.ntt
"l1",.,."""'o.L---- _I,&:1*,"","11
'I:;"12 * H4rqH
""
I
.,"""ffi:;:91., ll ':L--:SI{ ,l"u.u
-='1=rr^,."-"" l"''qi:'':* ll ilSl:il,:f,-,. i |.�l;H,I!il""
li!qr,,n.t !fiJ"''
I ll lFhalchooen ' HPrata'�te
ru;;i.- >1 r i ll :tl-------i "if
"*'
L---ilr-J I ll 1gcs28 |
---:Ij1'-----l ll "-l'nnn'''o--,..^,.^ I "".
."*":['*'-
ll ;;:, *lH'T,'*i'*"
a, o"n ".oI P,olo s6
r----{-- 'NDER-DAsFI
! ,. I "oo. I FUSE;BELAY
L----V-J I lr 1gcs28 I
---:{j1'-----l il "-l
_''.""o,"""0 | _"""o,ounocnNe.u I l-o 'rr{ oisiriourtn. or{ oLtrioutron,
L'�"---J_.i14 lr c44e
----1---
'":;1"_.
""" ".u ll
*o'o'
11"""
," I ",,,
*"{ "." ll ".*l pase u, u.* | pase 14-8'
""^l.:fit*t" gn:+r- ;t'"*."
f+J l#-*ll
V
'cnrneof 99,to;t,u :iio_,_o.0,,
| | cFN BLu ll s"" u cnr neo I-:- -Gc--open - -t-Indicator ll., Lr cFN RED
(ln-line connector;,
"""",u! .,o""".0! ',-
____l::.*"! .,o"n",'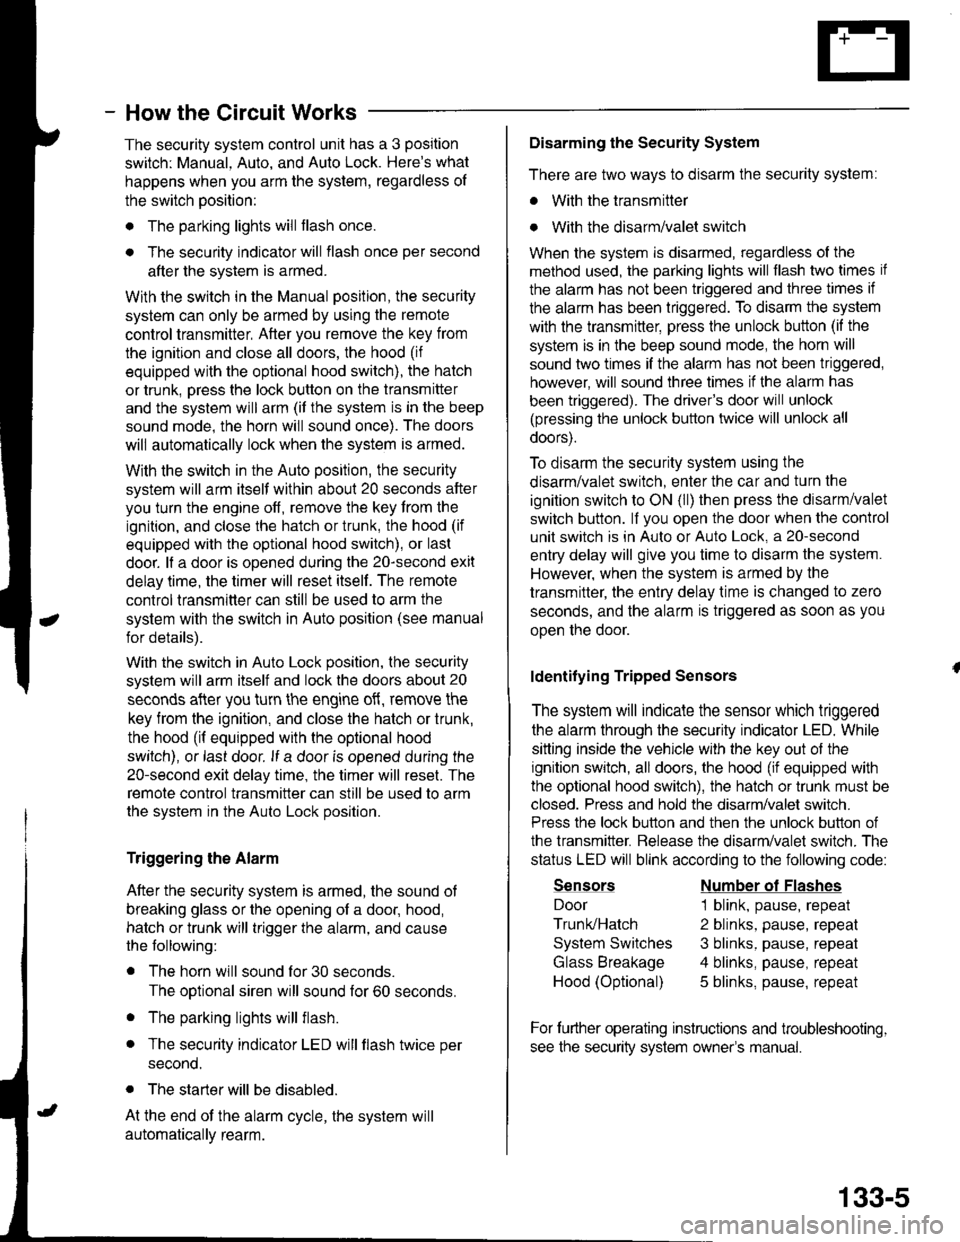
- How the Circuit Works
The security system control unit has a 3 position
switch: Manual. Auto. and Auto Lock. Here's what
happens when you arm the system, regardless ol
the switch position:
o The parking lights will flash once.
. The security indicator will flash once per second
after the system is armed.
With the switch in the Manual position, the security
system can only be armed by using the remote
control transmitter, After you remove the key from
the ignition and close all doors, the hood (if
equipped with the optional hood switch), the hatch
or trunk. Dress the lock button on the transmitter
and the system will arm (if the system is in the beep
sound mode, the horn will sound once). The doors
will automatically lock when the system is armed.
With the switch in the Auto position, the security
system will arm itself within about 20 seconds after
you turn the engine off, remove the key from the
ignition, and close the halch or trunk, the hood (if
equipped with the optional hood switch), or last
door. lf a door is opened during the 2o-second exit
delay time, the timer will reset itself . The remote
control transmitler can still be used to arm the
system with the switch in Auto position (see manual
for details).
With the switch in Auto Lock position, the security
system will arm itself and lock the doors about 20
seconds after you turn the engine of{, remove the
key from the ignition, and close the hatch or trunk,
the hood (if equipped with the optional hood
switch), or last door. lf a door is opened during the
2o-second exit delay time, the timer will reset. The
remote control transmitter can still be used to arm
the system in the Auto Lock position.
Triggering the Alarm
After the security system is armed, the sound ot
breaking glass or the opening of a door, hood,
hatch or trunk will trigger the alarm, and cause
the following:
r The horn will sound for30 seconds.
The optional siren will sound lor 60 seconds.
. The parking lights will flash.
. The security indicator LED will flash twice per
second.
. The starter will be disabled.
At the end of the alarm cycle, the system will
automatically rearm.
Disarming the Security System
There are two ways to disarm the security system:
. With the transmitter
o With the disarm/valet switch
When the system is disarmed, regardless of the
method used, the parking lights will flash two times if
the alarm has not been triggered and three times if
the alarm has been triggered. To disarm the system
with the transmitter, press the unlock button (if the
system is in the beep sound mode, the horn will
sound two times if the alarm has not been triggered,
however, will sound three times if the alarm has
been triggered). The driver's door will unlock
(pressing the unlock button twice will unlock all
doors).
To disarm the security system using the
disarm/valet switch, enter the car and turn the
ignition switch to ON (ll) then press the disarm/valet
switch button. lf you open the door when the control
unit switch is in Auto or Auto Lock, a 2o-second
entry delay will give you time to disarm the system.
However, when the system is armed by the
transmitter, the entry delay time is changed to zero
seconds, and the alarm is triggered as soon as you
oDen the door.
ldentifying Tripped Sensors
The system will indicate the sensor which triggered
the alarm through the security indicator LED. While
sitting inside the vehicle wlth the key out of the
ignition switch, all doors, the hood (if equipped with
the optional hood swilch), the hatch or trunk must be
closed. Press and hold the disarm/valet switch.
Press the lock button and then the unlock button of
the transmitter. Belease the disarm/valet switch. The
status LED will blink according to the following code:
Sensors
Door
Trunk/Hatch
System Switches
Glass Breakage
Hood (Optional)
Number ol Flashes
1 blink, pause, repeat
2 blinks, pause, repeat
3 blinks, pause, repeat
4 blinks, pause, repeat
5 blinks, pause, repeat
For further operating instructions and troubleshooting,
see the security system owner's manual.
133-5